
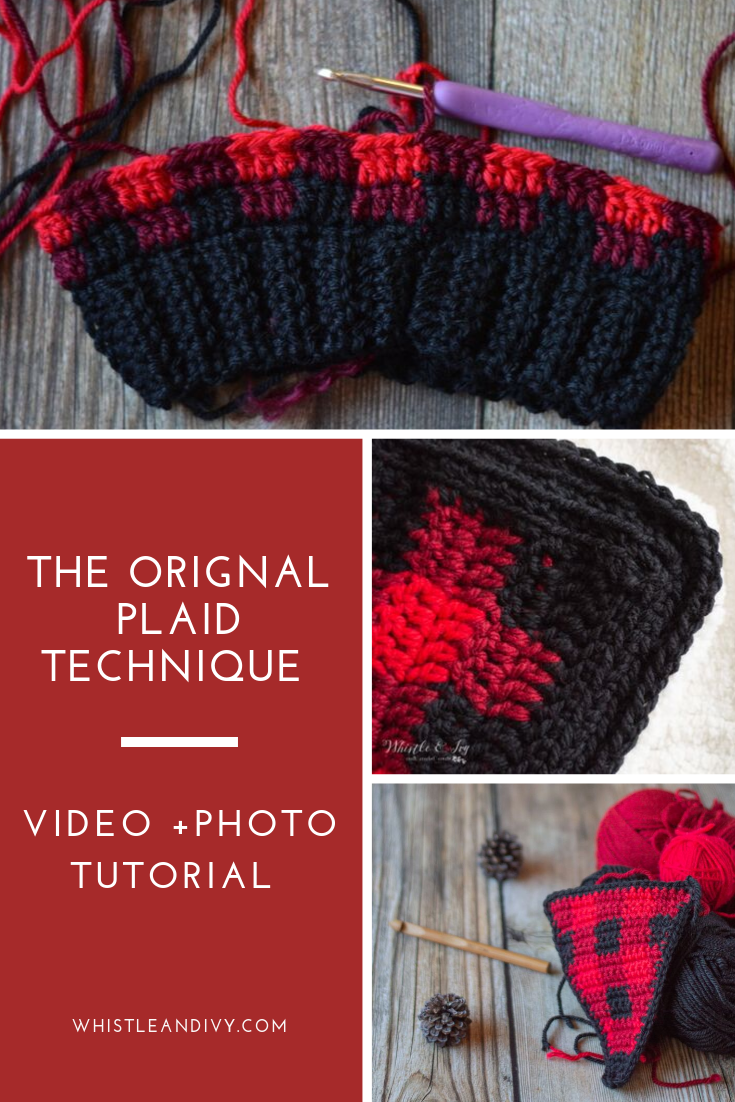
Did you know you can create crochet that looks like buffalo plaid? You can! With simple crochet stitches and strategic color changes, you can create beautiful crochet buffalo plaid. This post will teach you how to crochet buffalo plaid basics, gives you free crochet patterns using the buffalo plaid technique This post includes affiliate links, which means I get a small commissions if you make a purchase using one of my links (with zero cost to you!). Thanks for your support!
I love when the air turns a bit chilly. It’s still comfortable to be outside but you get to break out your long-forgotten hats and scarves. Crunchy leaves and crisp air means fall is around the corner, and fall, to me, mean buffalo plaid! Did you know you can crochet buffalo plaid? Making plaid in crochet is easier than you think, it’s created by simple color changes. Don’t be intimidated by the use of three colors, this is an easy technique and I have also figured out a way to keep the yarns from getting tangled. Despite what you may think, there aren’t tons of ends to weave in, and carrying the yarn is not difficult or scary.
You CAN crochet plaid!

You’re tired of sifting through complicated tutorials and patterns that leave you feeling overwhelmed.
Let me help.
PICTURE THIS:
Instant access to a library of modern, easy-to-follow patterns
Gifting your handcrafted treasures to your loved ones.
Feeling accomplished by your beautiful makes
It’s time to make your crafting experience as joyful as it should be.
HOW TO CROCHET BUFFALO PLAID
What you need:
- 3 – 4 colors of yarn (see below)
- Hook of your choice
Picking colors:
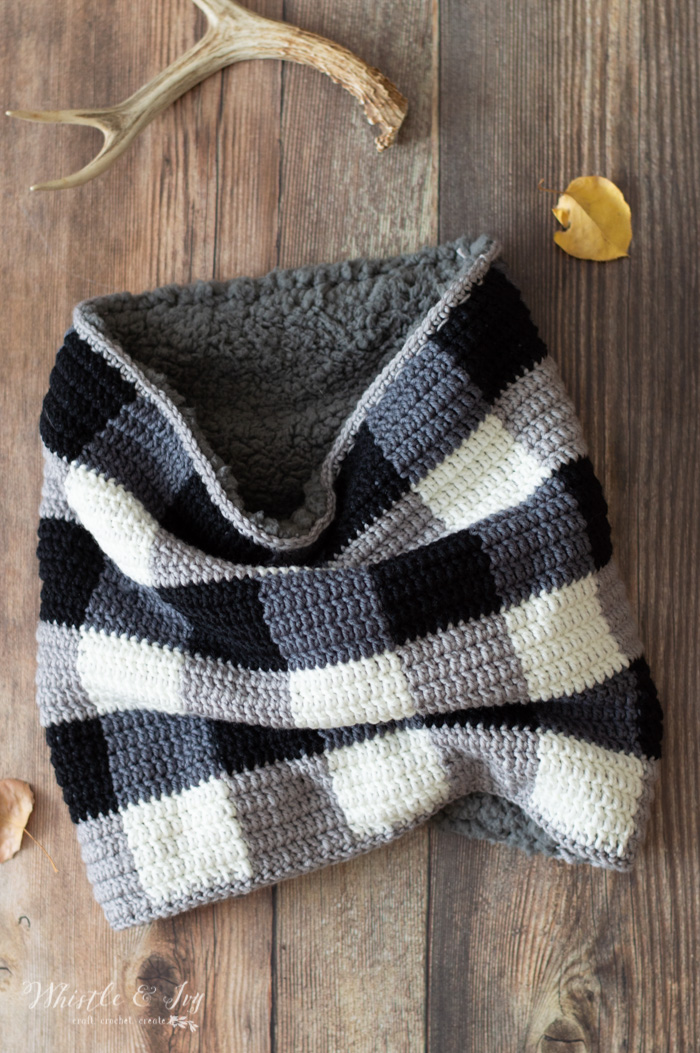
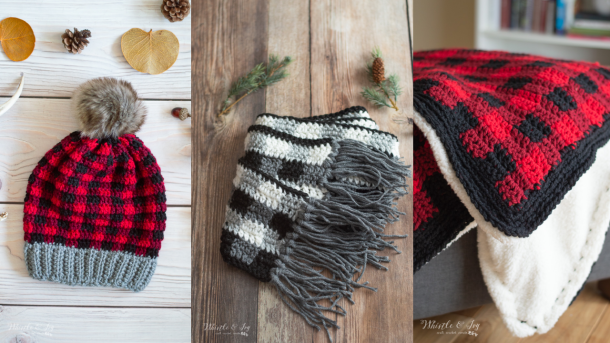
To make the crochet buffalo plaid, or the plaid stitch, you need a minimum of three colors: a dark, a light and a mid. To work a classic buffalo plaid color scheme, you need red(light), black(dark) and maroon(mid) or Black, Gray, and White. This is my suggestion for classic buffalo plaid, but you can make your items in any colors you want!
Some of my favorites:

Premier Anti Pilling Worsted in Really Red, Wine, and Black.

Knit Picks Brava in Wine with Lion Brand Heartland in Redwood and Black Canyon

Lion Brand Basic Stitch in White, Silver Heather Redwood and Black Canyon
Working with 4 colors:
Additionally, you can make crochet plaid with four colors like with this pink plaid hat. You will do the same technique as with three colors, but you will need a light, a dark and two mid colors. It works well with an ombre color scheme. The first row will alternate between the light and mid #1, and the next row will alternate between the dark and mid #2, with the mid colors kitty-corny from each other.


Plaid Stitch Join Update:
After my first yearn of plaid, I came up with a new way to join The Plaid Stitch in the joined rounds. The method for the plaid stitch will be the same, you will work the rounds with one less stitch and join into the beginning chain. Watch how to do this small change here:
Crochet Plaid Photo Tutorial:
The Plaid stitch is worked in multiples of 6 (minus one if you are working in the round). To make the plaid stitch, start with your mid color. Work 2 dc. Begin a 3rd dc, but before you pull the final loop through the last two loops on your hook, drop your mid and pull through with black. Carry the wine through the next 3 stitches. Work 2 dc with black. Finished 3rd dc with wine. You will alternate the first row between black and wine for the first row of the pattern you are working. Join with a sl st using the color you will begin with on the next row.

For the next row, you will be alternating between your mid color and light color. Make sure the light and dark squares are kitty-corner and the mid squares are kitty corner. When you join the rows, make sure to use the color you will be starting the nest row with.

You will continue alternating between the mid/dark row and the mid/light row until your piece is your desired size.
Crochet Plaid in Turning Rows
Making the plaid stitch in turned rows is just as easy and working the plaid stitch in joined rounds. You can either work a ch 2 and dc in the same stitch to start, or your can count the ch 2 as your first st. You also need to remember to carry all the yarn through each row (the yarn you are alternating, and the yarn you aren’t using at all) so it’s on the other side when you need it.
Larger Plaid Blocks:
You can also make the plaid technique using larger blocks. This is especially helpful when working in turning rows, as it can eliminate the need to carry the unused yarn through the row so you have it when it need it. To do this, make sure the size of your squares in an even number (2, 4, 6 rows high).
You can see how the larger blocks look in the Sheepskin Lined Cowl, which uses blocks that are 12 x 5, meaning 12 stitches wide and 5 rows tall. Because you are working in joined rows, you don’t need to work in even rows because you can simply drop the yarn and pick it back up when you need it.
Or the Plush Plaid Blanket:
Crochet Plaid Video Tutorial:
Clear as mud?
It is a bit confusing to read how to crochet plaid, so that is why I made a video! The technique is much easier to understand when you get to see it in real time. In the video I demonstrate both joined rounds and turning rows, and I also explain a neat trick for keeping your yarn from getting tangled. It’s a lifesaver, tangled yarn turns a fun, relaxing project into a frustrating mess! Be sure to take a few minutes and watch it.
Watch below: (if video isn’t loading, please deactivate your ad-blocker software.
xoxo,


I would love to try this in Orange & black. Anyone try it? If so what 2 orange colors did you use? Suggentions?
Sounds awesome! I would maybe do a pastel orange for the light color, black for the dark color and a true orange for the mid color.
is there a written pattern?
Yes, the written instructions are with the photo tutorial.
Hi! I love the plaid, and want to try it…. when I have time, ha. 😅 What I’m wondering is… when you, let’s say, crochet with the wine color, and then go to black, how to you pick up the black, without making it noticable that you changed colors? Like, would you have a bit of yarn crossed over it on the flip side?
You actually can’t see it when you change colors! I recommend watching to video I have included, it will most likely answer all your questions :)
Hi, Beth!
I am in love with your crochet buffalo plaid! Could you tell me what third color you would use for a purple and gold hat? Thanks!
Thank you! Are you referring to the deer hat? I used taupe, brown and cream :) I used Red Heart with Love.
In every row I end up with one box of four stitches ( a ch 2 +3 double crochet stitches). So that column Is wider than all the others which only have three double crochets. Am I doing something wrong?
To fix this you can use the updated join (video is under the pink plaid photos)
Thank you so much Bethany! What a great solution! I’m so happy!! Many thanks!! Take care!
I love, love, LOVE your plaid pieces.
I would love to try it on one of your free patterns first before I commit to buying one just to see how I do. In this post there is a link that says “over 20 free patterns”. When I clicked on it it took me to Volume 2 on Etsy. Can you tell me how to locate a free pattern? (I really love your moose lovey. I may have to order him and cross my fingers. LOL)
Thank you Kim! Search “Plaid” on my website, you can browse through all of them!
Hi! I love your site! I have a question will the plaid stitch work in single crochet? I do a lot of amigurumi and I had an idea today to make a plaid elephant, but I wasn’t sure if I would need to do an a a b b pattern of rows instead of a a b pattern of rows?
Yes you can do sc! I recommend working in BLO so the squares line up.
Thank you! I have one more question. I have only played a little bit with the plaid stitch and I’ve (more or less haha) figured out how to decrease and keep the plaid pattern, but is there a way to increase? I’ve been looking at most of your plaid patterns and I haven’t seen any. Thank you so much! and once again, I love your patterns!
Yes! I do this in my Triangle Cowl:
https://www.whistleandivy.com/crochet-plaid-triangle-cowl/
And if you are wanting an extensive plaid course, I have an online class! You can see the details here:
https://whistleandivy.teachable.com/p/learn-crochet-plaid/
So glad I found you.
Just saw my niece and met her new bebe …. and spouse. Daddy likes plaid.
Can’t wait to try the tutorial and make the deer hat from the second collection, or maybe the bear.
Thank you for sharing.
RQuinlan
I’m so glad you found me too! Enjoy the plaid patterns :)
This is great. How would you go about tweaking this to make a blanket with much bigger “plaid” squares? I’m still kind of learning here. Thank you!
I got you!
https://www.whistleandivy.com/crochet-buffalo-plaid-blanket-free-crochet-pattern/
Love the plaid items, and the instructions are very good. My only complaint is about term: Plaid is a pattern or a design, not a stitch. Double crochet, single crochet, etc are stitches….patterns/dessigns are made from stitches, but are not stitches.
Yes I understand that, but it really kinda rolls off the tongue doesn’t it?
Hi Bethany,
I’m not seeing the link to the video tutorial for the buffalo plaid that is supposed to be under the paragraph below, am I missing something?
Video Tutorial:
Clear as mud?
It is a bit confusing to read how to crochet plaid, so that is why I made a video! The technique is much easier to understand when you get to see it in real time. In the video I demonstrate both joined rounds and turning rows, and I also explain a neat trick for keeping your yarn from getting tangled. It’s a lifesaver, tangled yarn turns a fun, relaxing project into a frustrating mess! Be sure to take a few minutes and watch it.
Watch below:
Thanks!
Penny
Hi penny! if the video isn’t showing, it’s most likely because you use Adblocker and it’s preventing the video from loading. Please disable Adblocker!
I’m looking for a buffalo plaid pattern for a baby crocheted blanket. Do you have one?
Not yet, but because I got so many request, I will be doing one for Plaid Week this fall :)
Hi! Wonderful i liked, you job is amazing, this content help me a lot because i’m in beginning crochet with a business and i love it
Hi Bethany! I love your buffalo plaid patterns. Made the booties a year ago, and now I am making the toddler hat. Is there a secret to keeping the 3 yarn strands from getting twisted while you work? Have to stop every so often to untwist them!
Yes there is :)
https://www.whistleandivy.com/crochet-tip-how-to-keep-your-yarn-from-getting-tangled/
Bethany,
I just started my plaid hat, and I am on the second row. I want to know id I am supposed to carry the third strand of yarn behind the two I am using to do the second row, and so on.
Thanks for the great patterns, and thanks for your help.
Kris Woosley
Hello Kris! When you are working the round, I only work with two strands. You pick it up when you come back around.
Love this plaid. Made the hat already but would love your additional patterns
Thanks! So glad you like it!
I am having a horrible time computing this in my head. Trying to make a throw afghan. Did 270 chain, plus the chain 2 for turning. My first row of DC in dark I did the chain 2 plus the double in that same stitch like your video. I alternated on row 2 with the 3 dark, 3 med, and I get to the end and there’s the turning chain 2 from the previous row 1. I just leave that untouched right? I don’t put any stitches in that one like normal? I’m not used to not counting the turning chain as a stitch and I think that’s where my brain is screaming I’m screwing up, even if I’m not.
You can count the turning chain if that helps you, I just prefer not to, especially when I will need to work a row of stitching around the outside. But yes, if you are working the ch 2 and not counting it as a stitch, you will leave it untouched.
If using three colors them what you makes this triple thick right? Would this be ok to do as a blanket?
You are still using each yarn separately, but the carried yarn does add some thickness. Yes! It would be perfect as a blanket.
I’m looking forward to making this blanket for our bed to replace one my hubby’s puppy ate so it will be considerable in size, large enough to just cover the top, not hang over, of a king sized bed and with buying this much yarn even with no dye lots I’d like to buy it all at once and be done with it. It looks like from the description in the video that of the colors you work with for the 3 color blanket you will always need double the amount of the middle color of the other two so 2 skeins of light and dark and 4 middle color, right? But if I do a 4 color blanket I should only need equal amounts of all colors, correct?
Yes that is correct! If you use 4 colors, they should all equal out.
Love the plaid.
Thank you!
I don’t understand how many chains you start with for the Buffalo plaid.
Oh yes! Very important thing I forgot to mention(although I did mention it in the video). You will need to work in multiples of 6.