
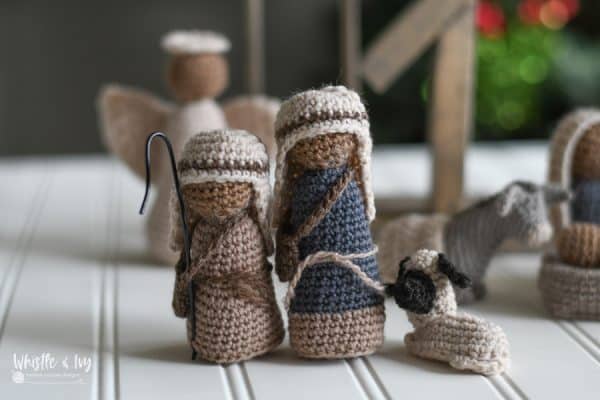
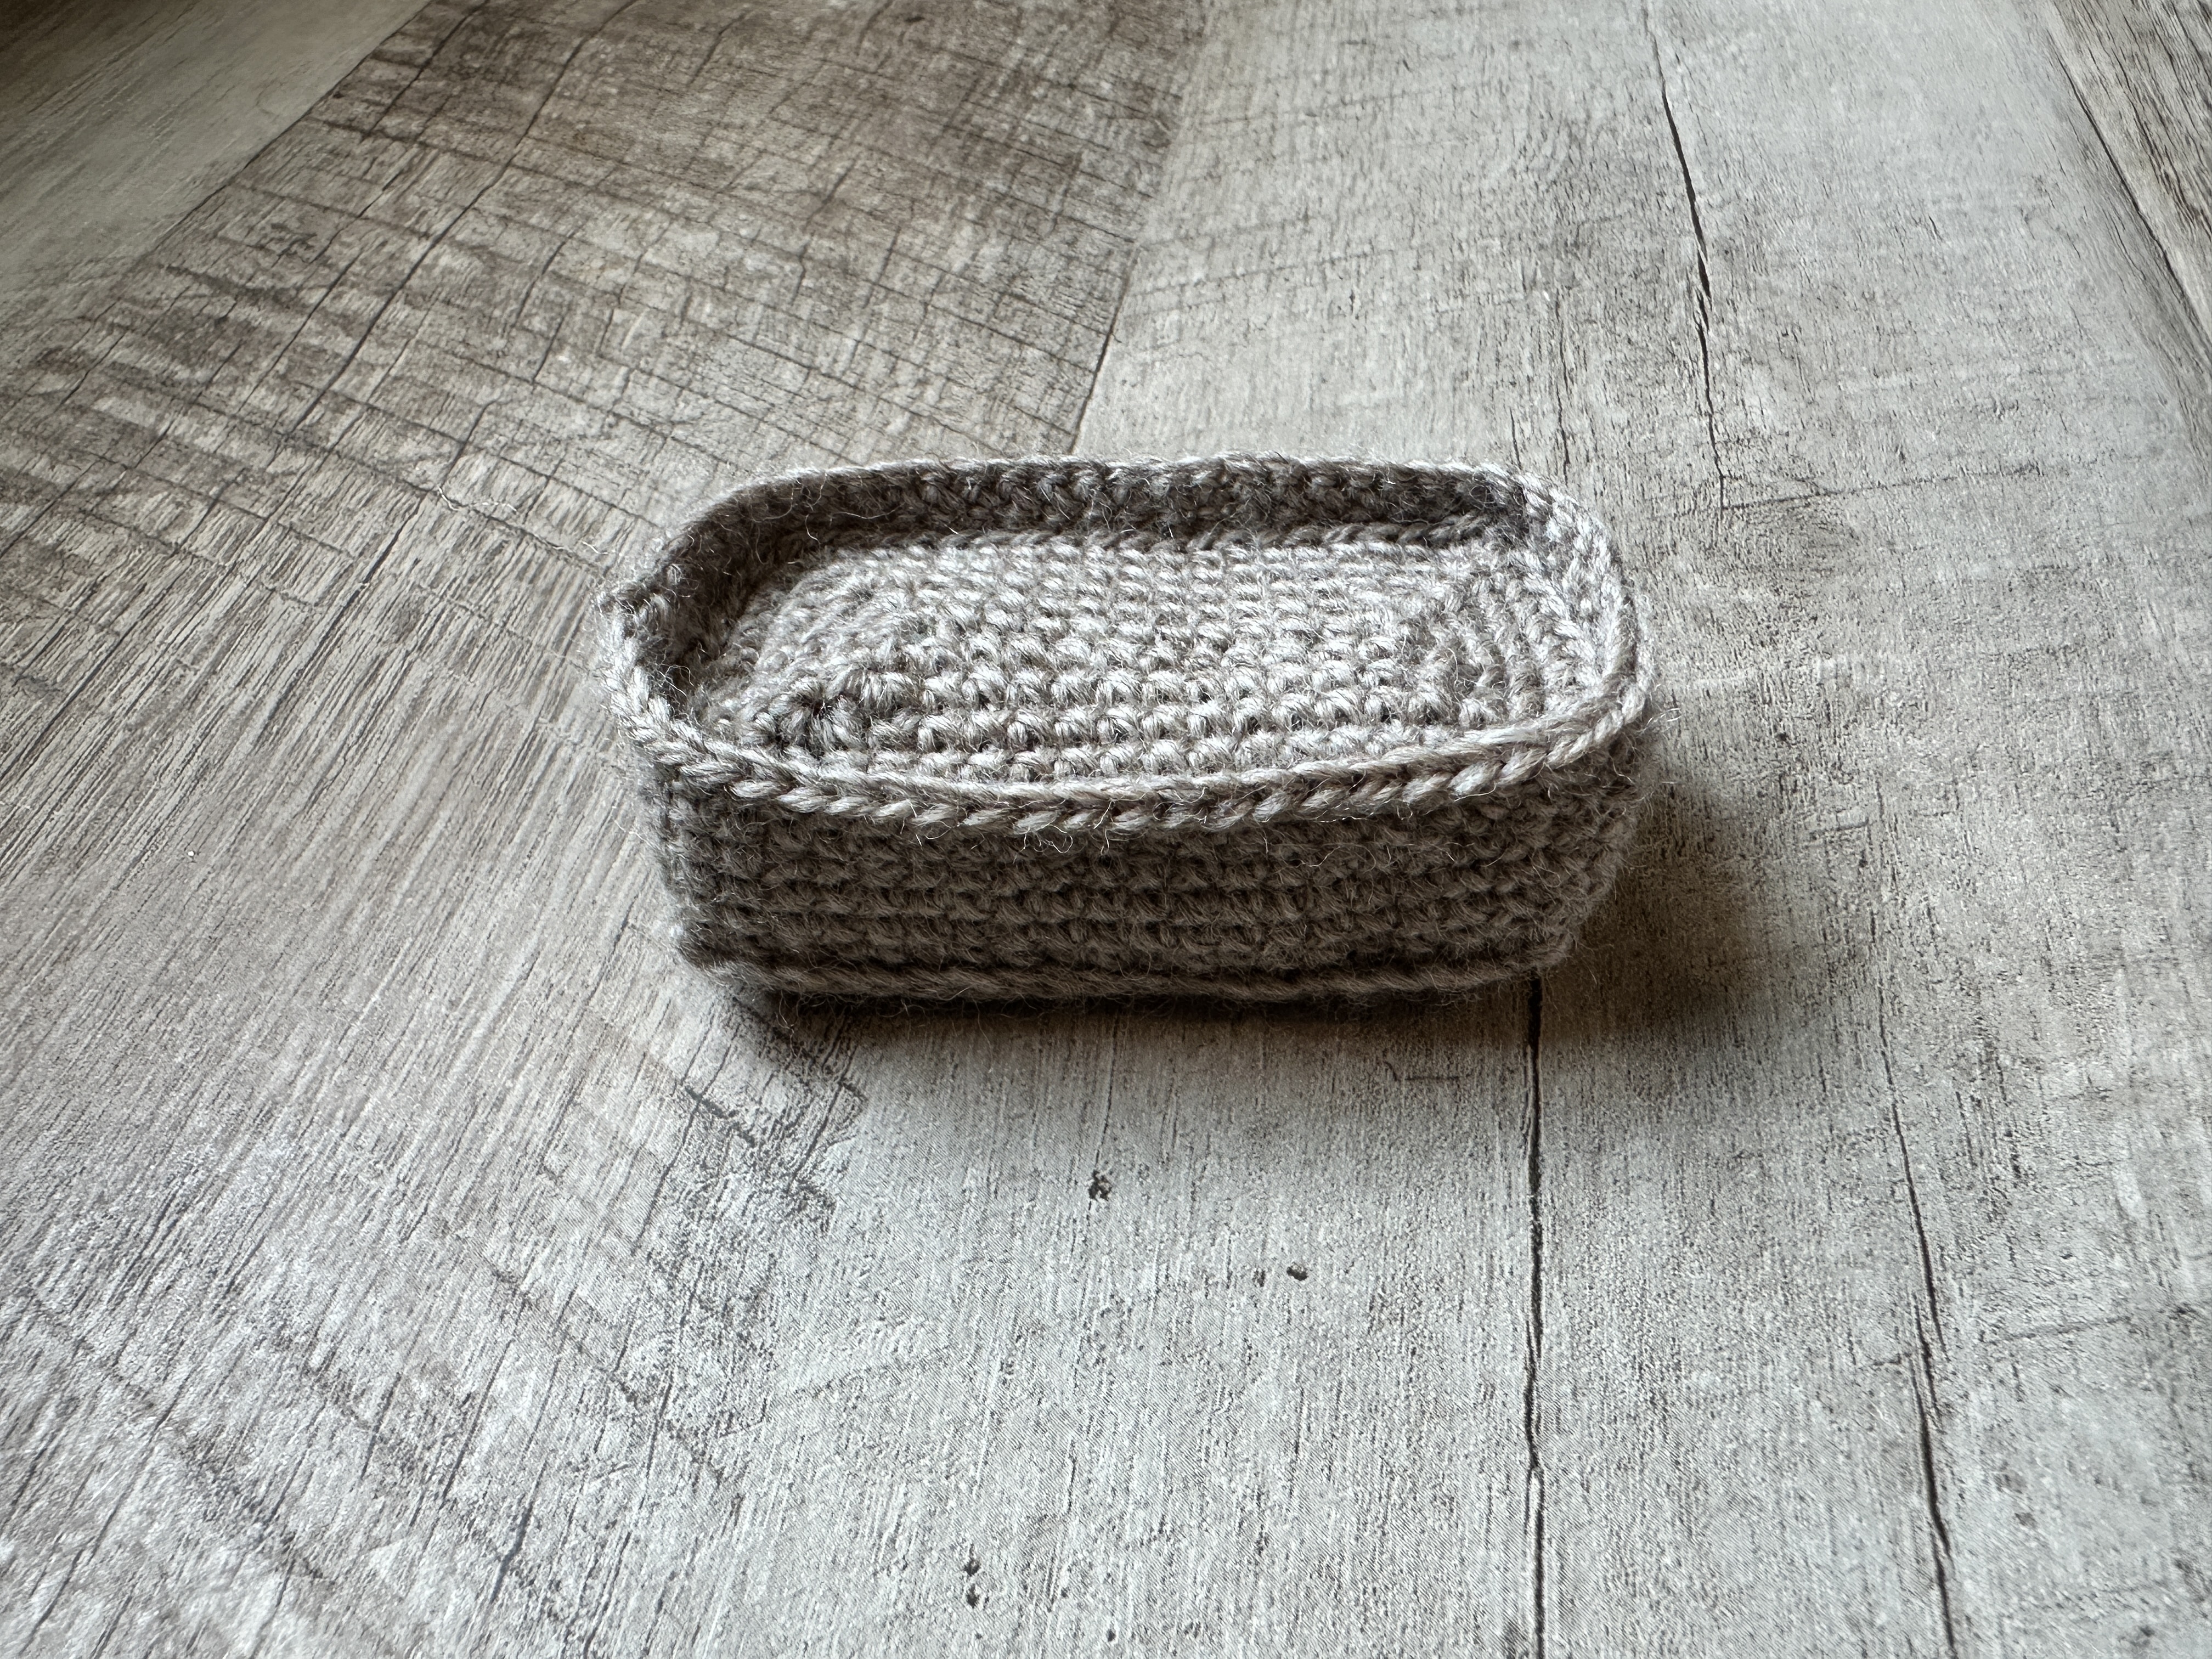
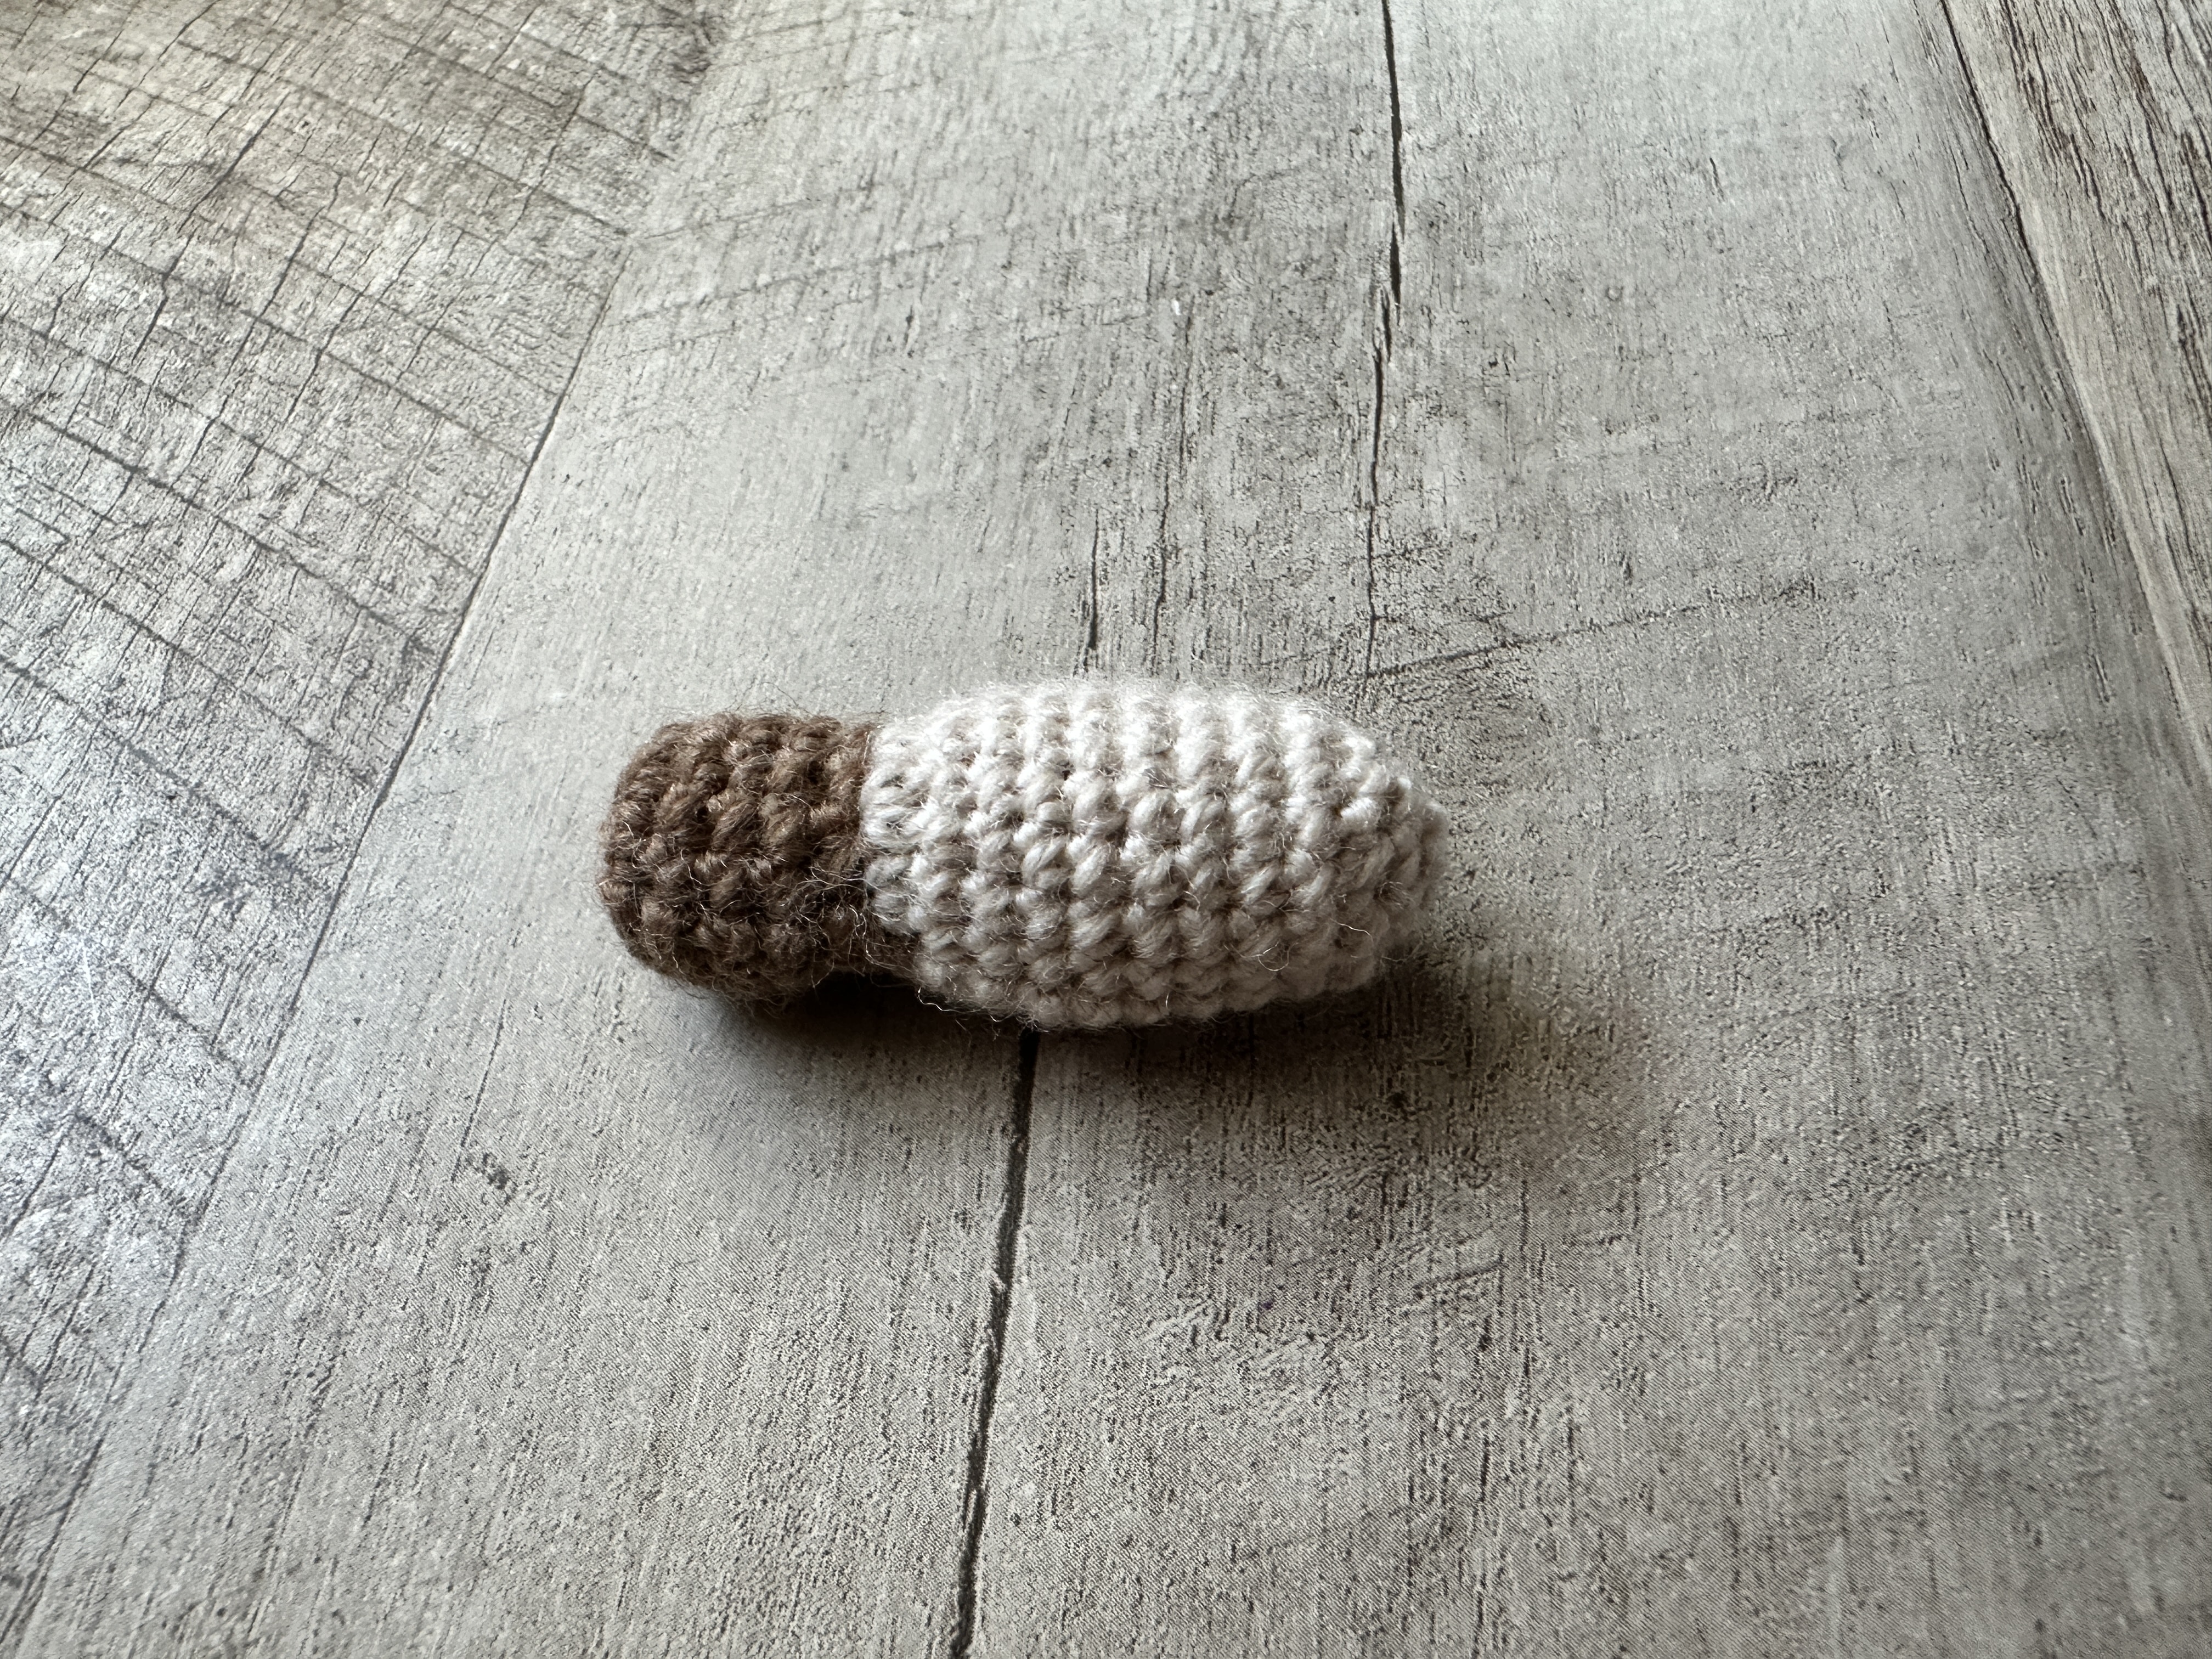
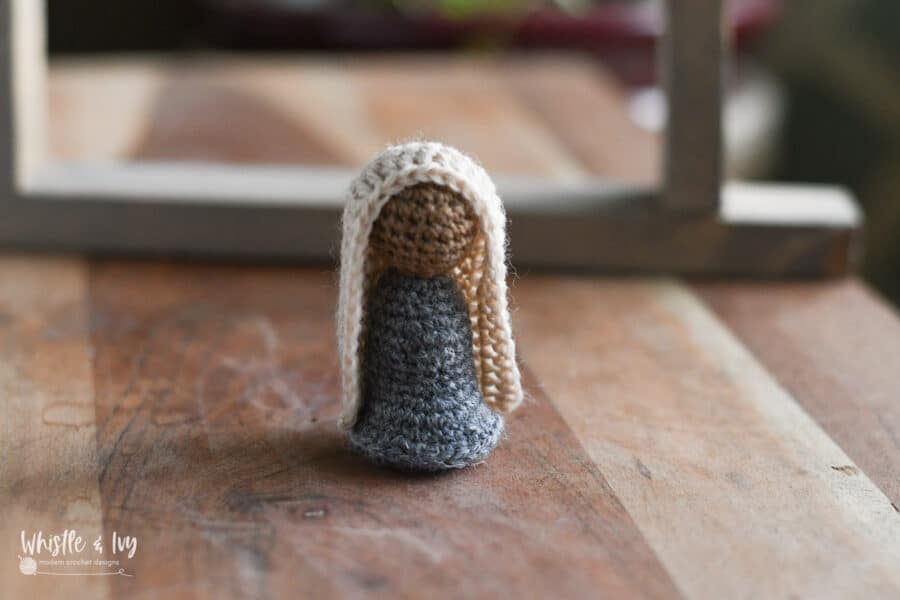
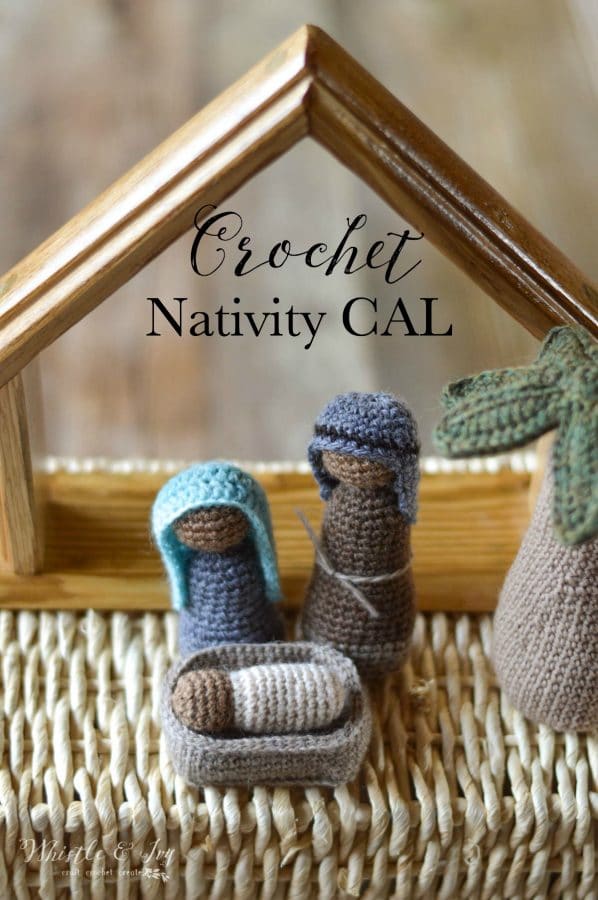
The most important part of the nativity, the Holy Child and His manger.
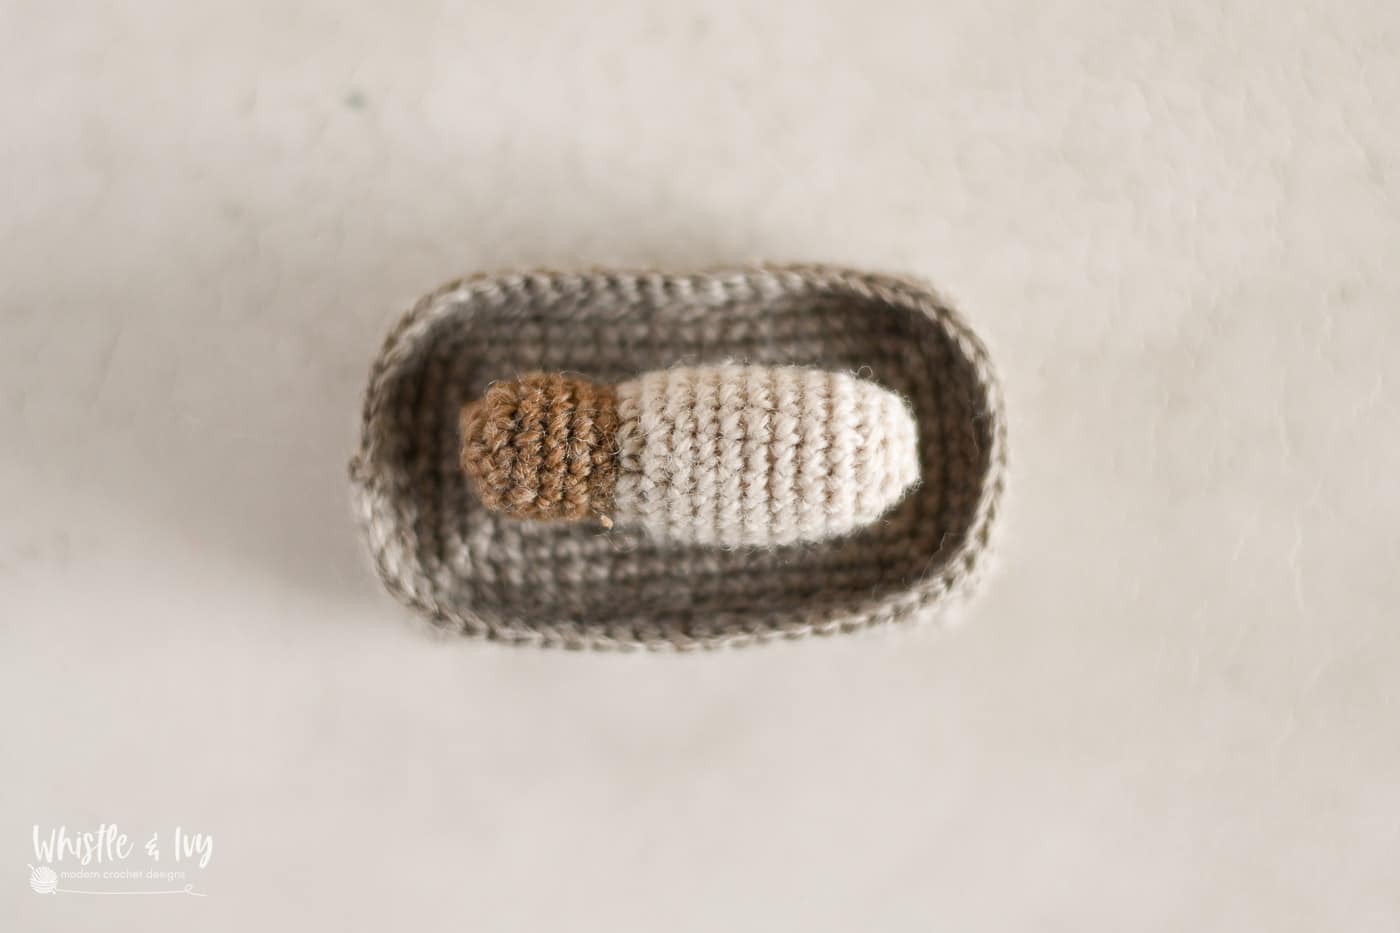
This first figure incorporate the quickest pattern in the set (Baby).
I did a bit of research on what the manger would have looked like, and it turns out the wooden thing with straw poking out is historically inaccurate. A feeding trough from this time period would have possibly been made of stone with a hollowed out space in the top, and most likely rectangular in shape.
This is the depiction I was going after with this design. I hope you enjoy it!

You’re tired of sifting through complicated tutorials and patterns that leave you feeling overwhelmed.
Let me help.
PICTURE THIS:
Instant access to a library of modern, easy-to-follow patterns
Gifting your handcrafted treasures to your loved ones.
Feeling accomplished by your beautiful makes
It’s time to make your crafting experience as joyful as it should be.
MANGER AND BABY
Please remember: You are free to use this pattern to make and sell, but do not republish or distribute this pattern in any way. DO NOT use my photos in your listings. Please do share my blog links! It’s a quick and FREE way of supporting Whistle and Ivy and more free crochet patterns in the future.
PLEASE read my Disclaimer before working my free patterns!
What you need: (affiliate links)
-Fingering Weight Yarn (Palette Yarn)
[Oyster Heather, Wheat Heather, Hare Heather]
– 3.5mm Hook
– Darning Needle
– Glue Gun
Abbreviations: (American terms)
Ch – Chain
Sc – Single Crochet
Sc2tog- SC decrease
St – Stitch
Gauge: 12 sc = 2″
Ready to make the full set? Get yours in my shop!
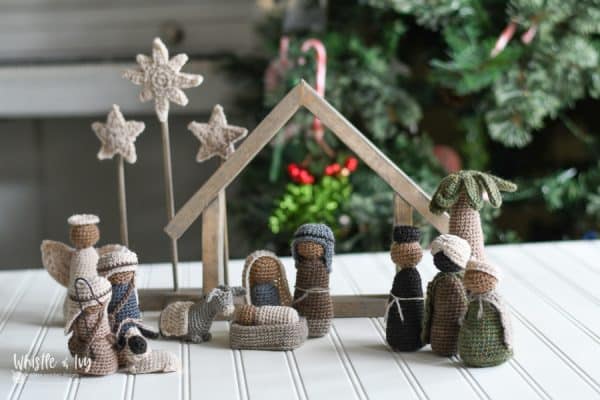

RUSTIC CROCHET NATIVITY – FULL SET CROCHET PATTERN
$8.50
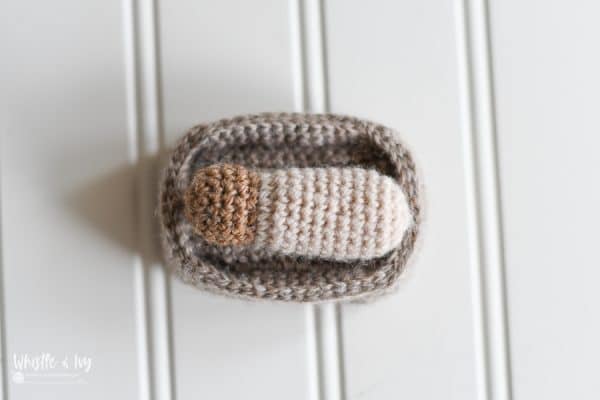
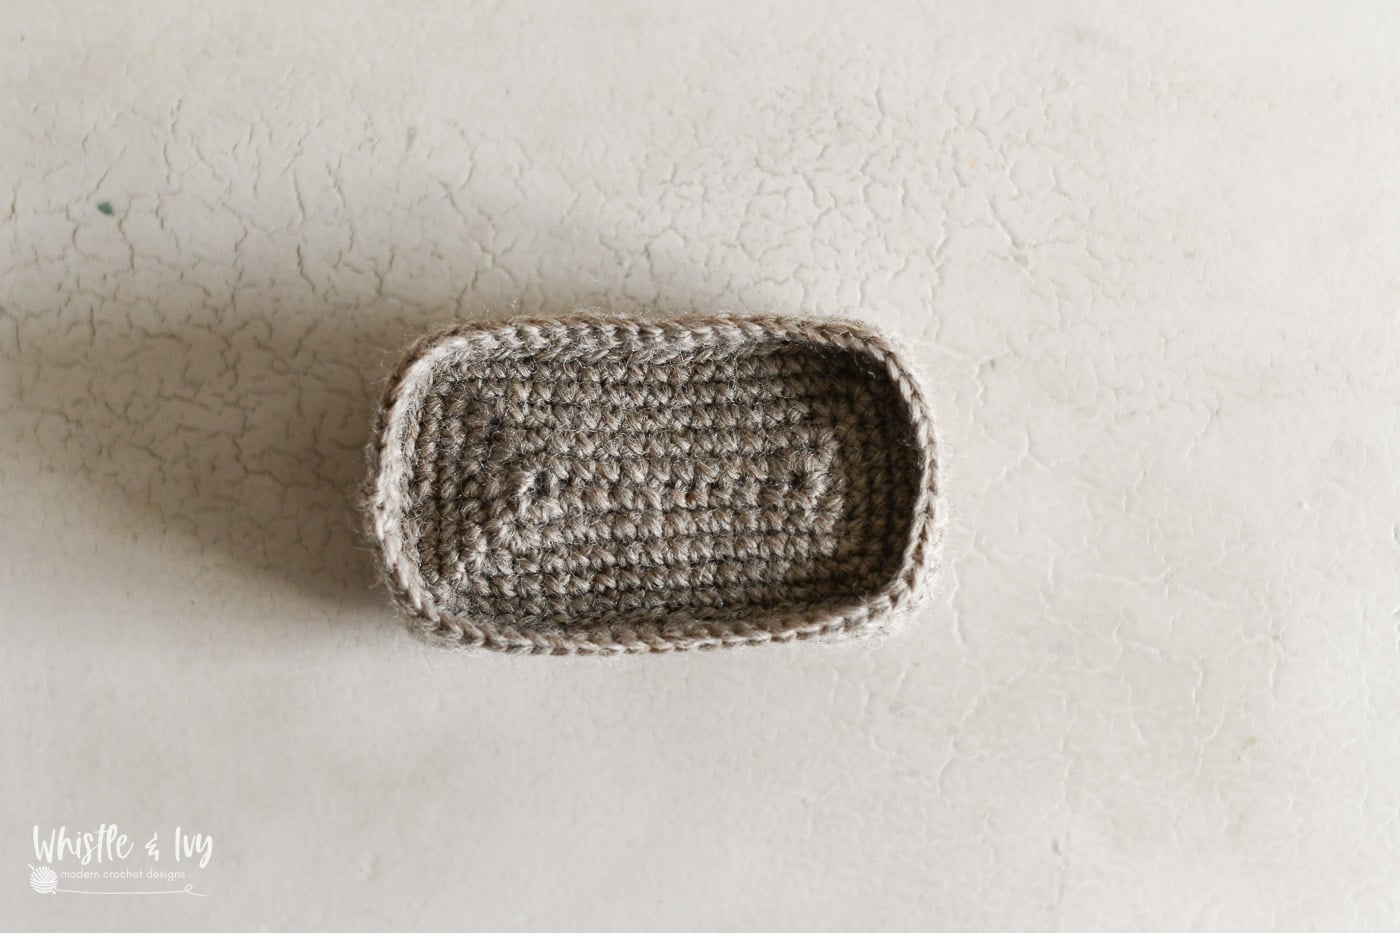
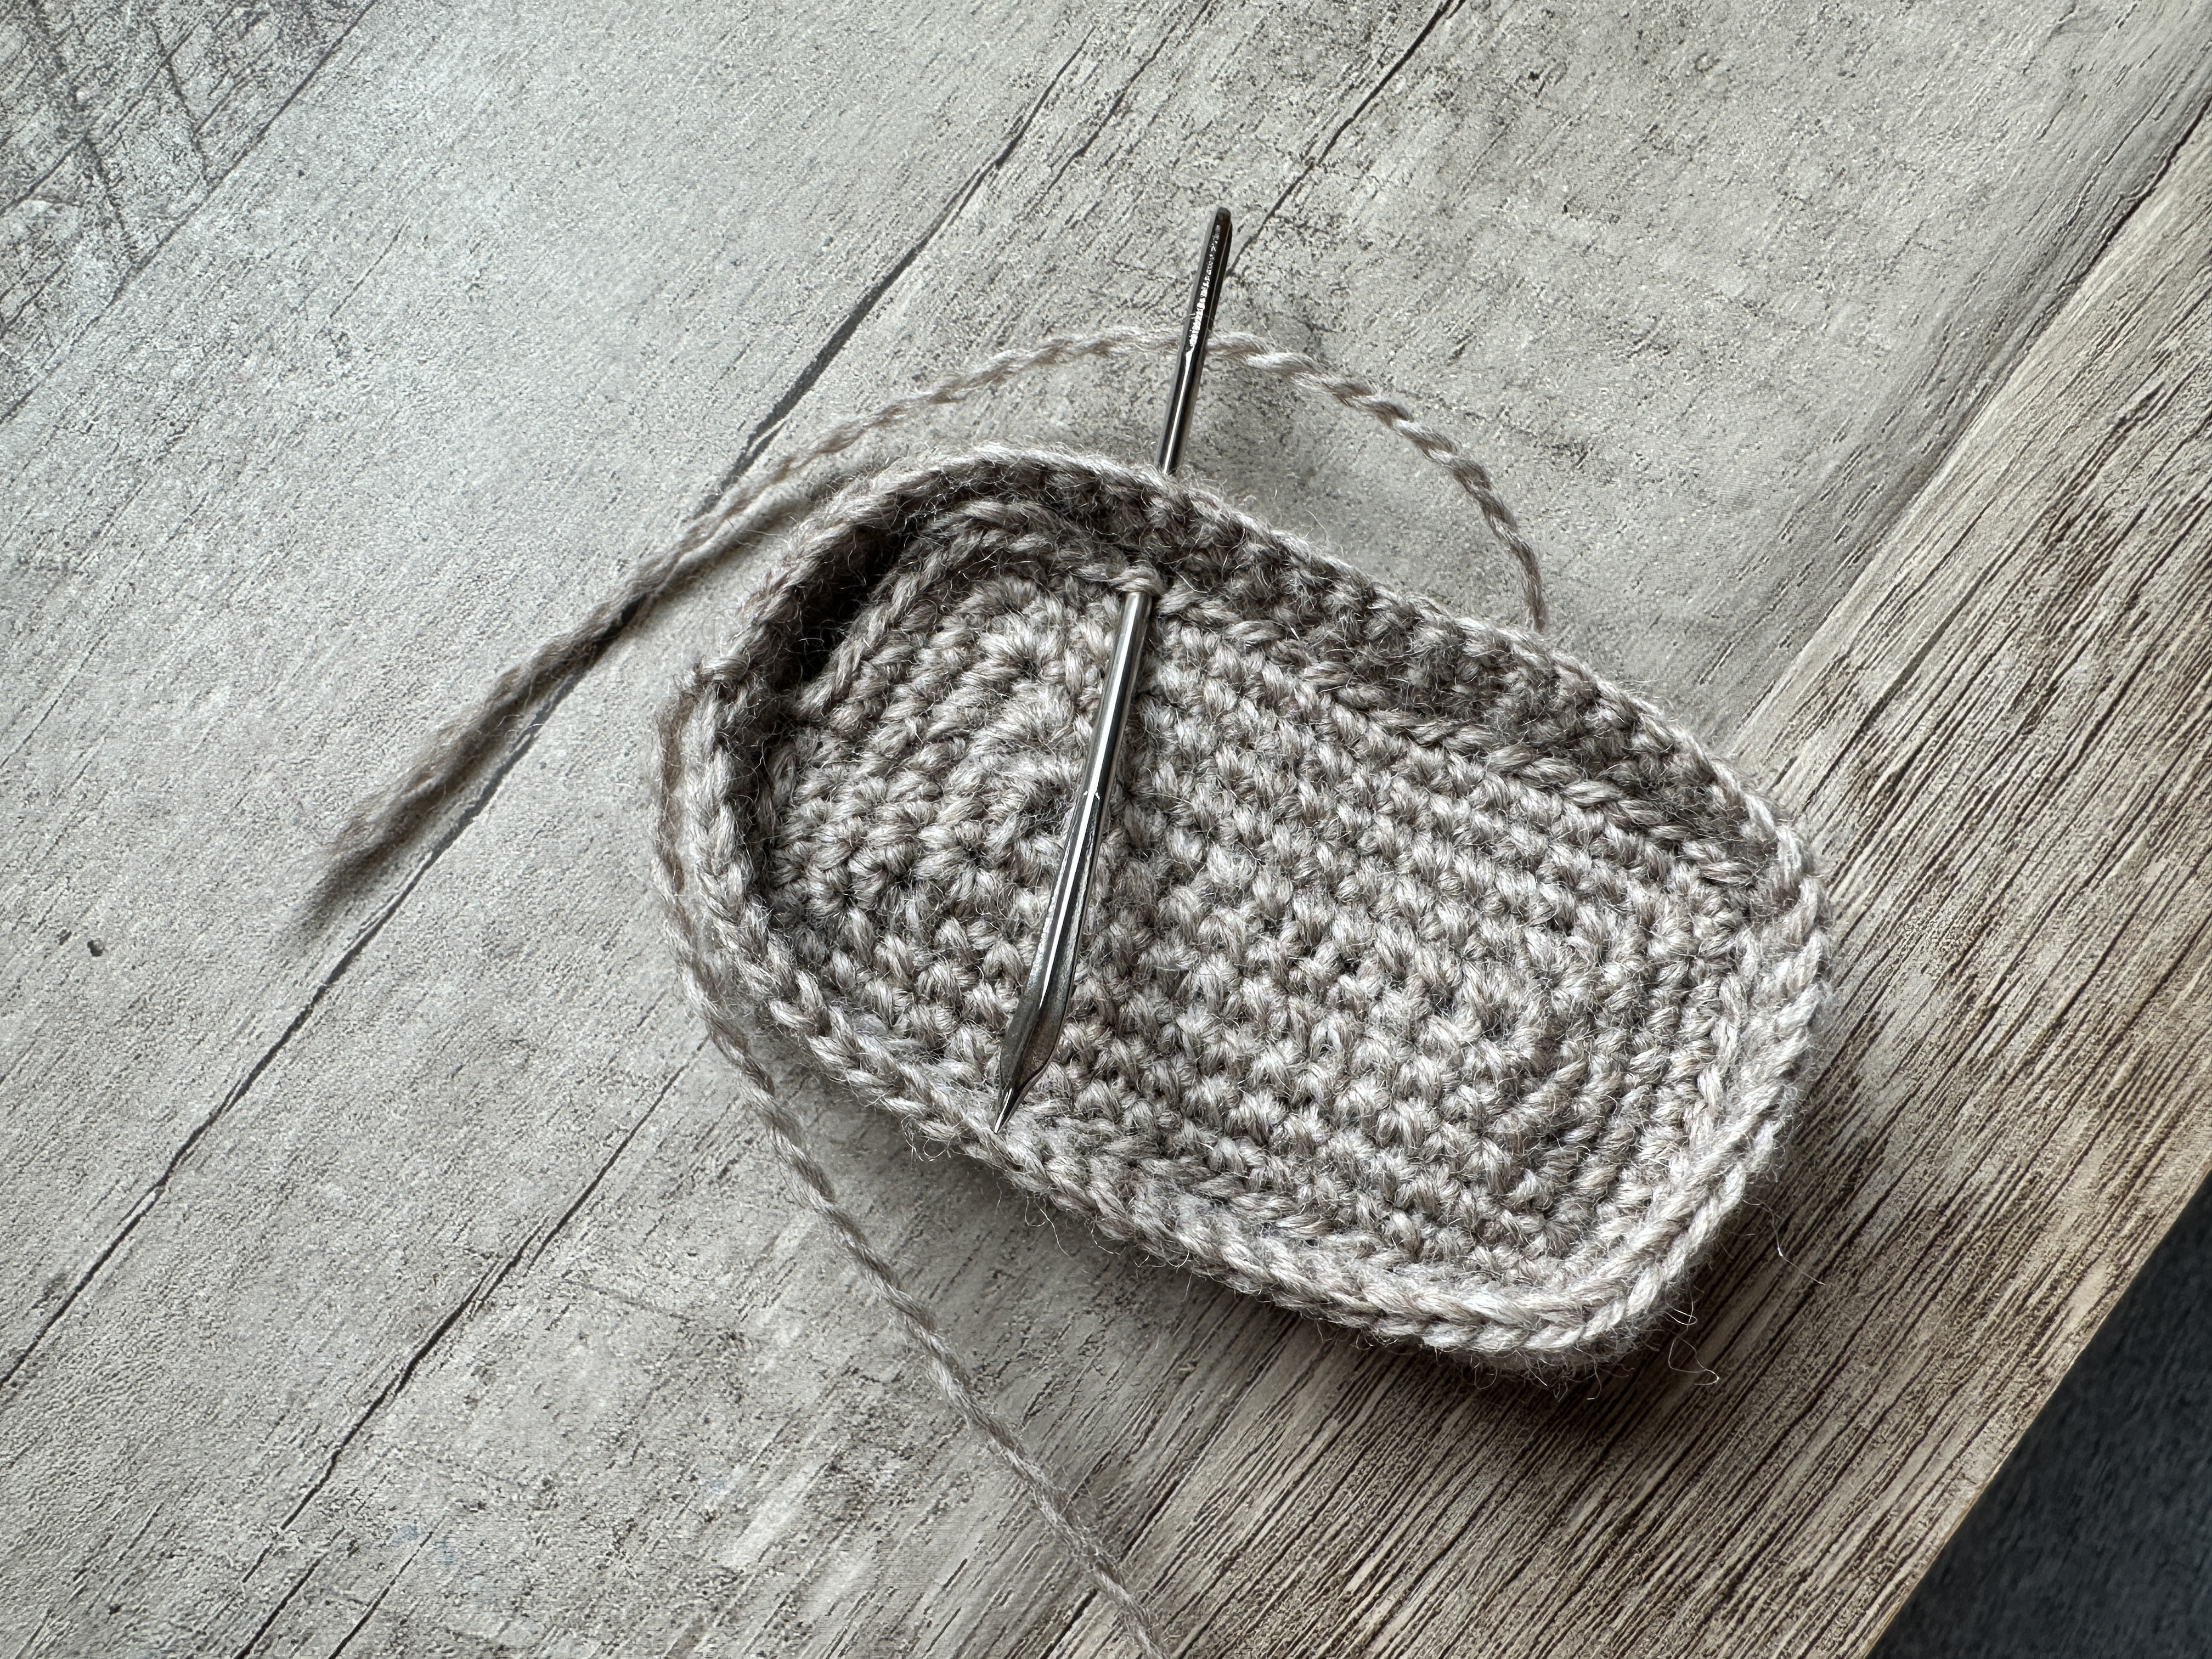
MANGER
TOP PIECE:
Ch 12
Use gosling.
1. Work 3 sc in 2nd ch from hook, sc in next 9 chs. Work 6 sc in last ch.
Working on the other side of the ch, sc in next 9 sts. Work 3 sc in last st (same st as first 3 sc). Join. (30 sts)
2. Ch 1, sc in next st. In the next st: sc, hdc, sc. Sc in next 11 sts. In next st: sc, hdc, sc.
Sc in next 2 sts. In next st: sc, hdc, sc.
Sc in next 11 sts.
In next st: sc, hdc, sc.
Sc in last st. Join. (38 sts)
3. Ch 1, sc in next 2 sts. Work 3 sc in next st. Sc in next 13 sts. Work 3 sc in next st. Sc in next 4 sts. Work 3 sc in next st.
Sc in next 13 sts. Work 3 sc in next st.
Sc in last 2 sts. Join. (46 sts)
4. Ch 1, sc in next 3 sts. Work 3 sc in next st. Sc in next 15 sts. Work 3 sc in next st. Sc in next 6 sts. Work 3 sc in next st.
Sc in next 15 sts. Work 3 sc in next st.
Sc in last 3 sts. Join. (54 sts)
5. Ch 1, sc in next 4 sts. Work 3 sc in next st. Sc in next 17 sts. Work 3 sc in next st. Sc in next 8 sts. Work 3 sc in next st.
Sc in next 17 sts. Work 3 sc in next st.
Sc in last 4 sts. Join. (62 sts)
Tie off.
BOTTOM PIECE:
Repeat first 4 rounds of TOP PIECE.
5. Ch 1, hdc in next 4 sts. Work 3 hdc in next st. Hdc in next 17 sts. Work 3 hdc in next st. Hdc in next 8 sts. Work 3 hdc in next st.
Hdc in next 17 sts. Work 3 hdc in next st.
Hdc in last 4 sts. Join. (62 sts)
6. Ch 1, working through THIRD loop, sc in each st around. Join with a sl st. Join. (62 sts)
7 – 11. Ch 1, sc in each st. Join. (62 sts)
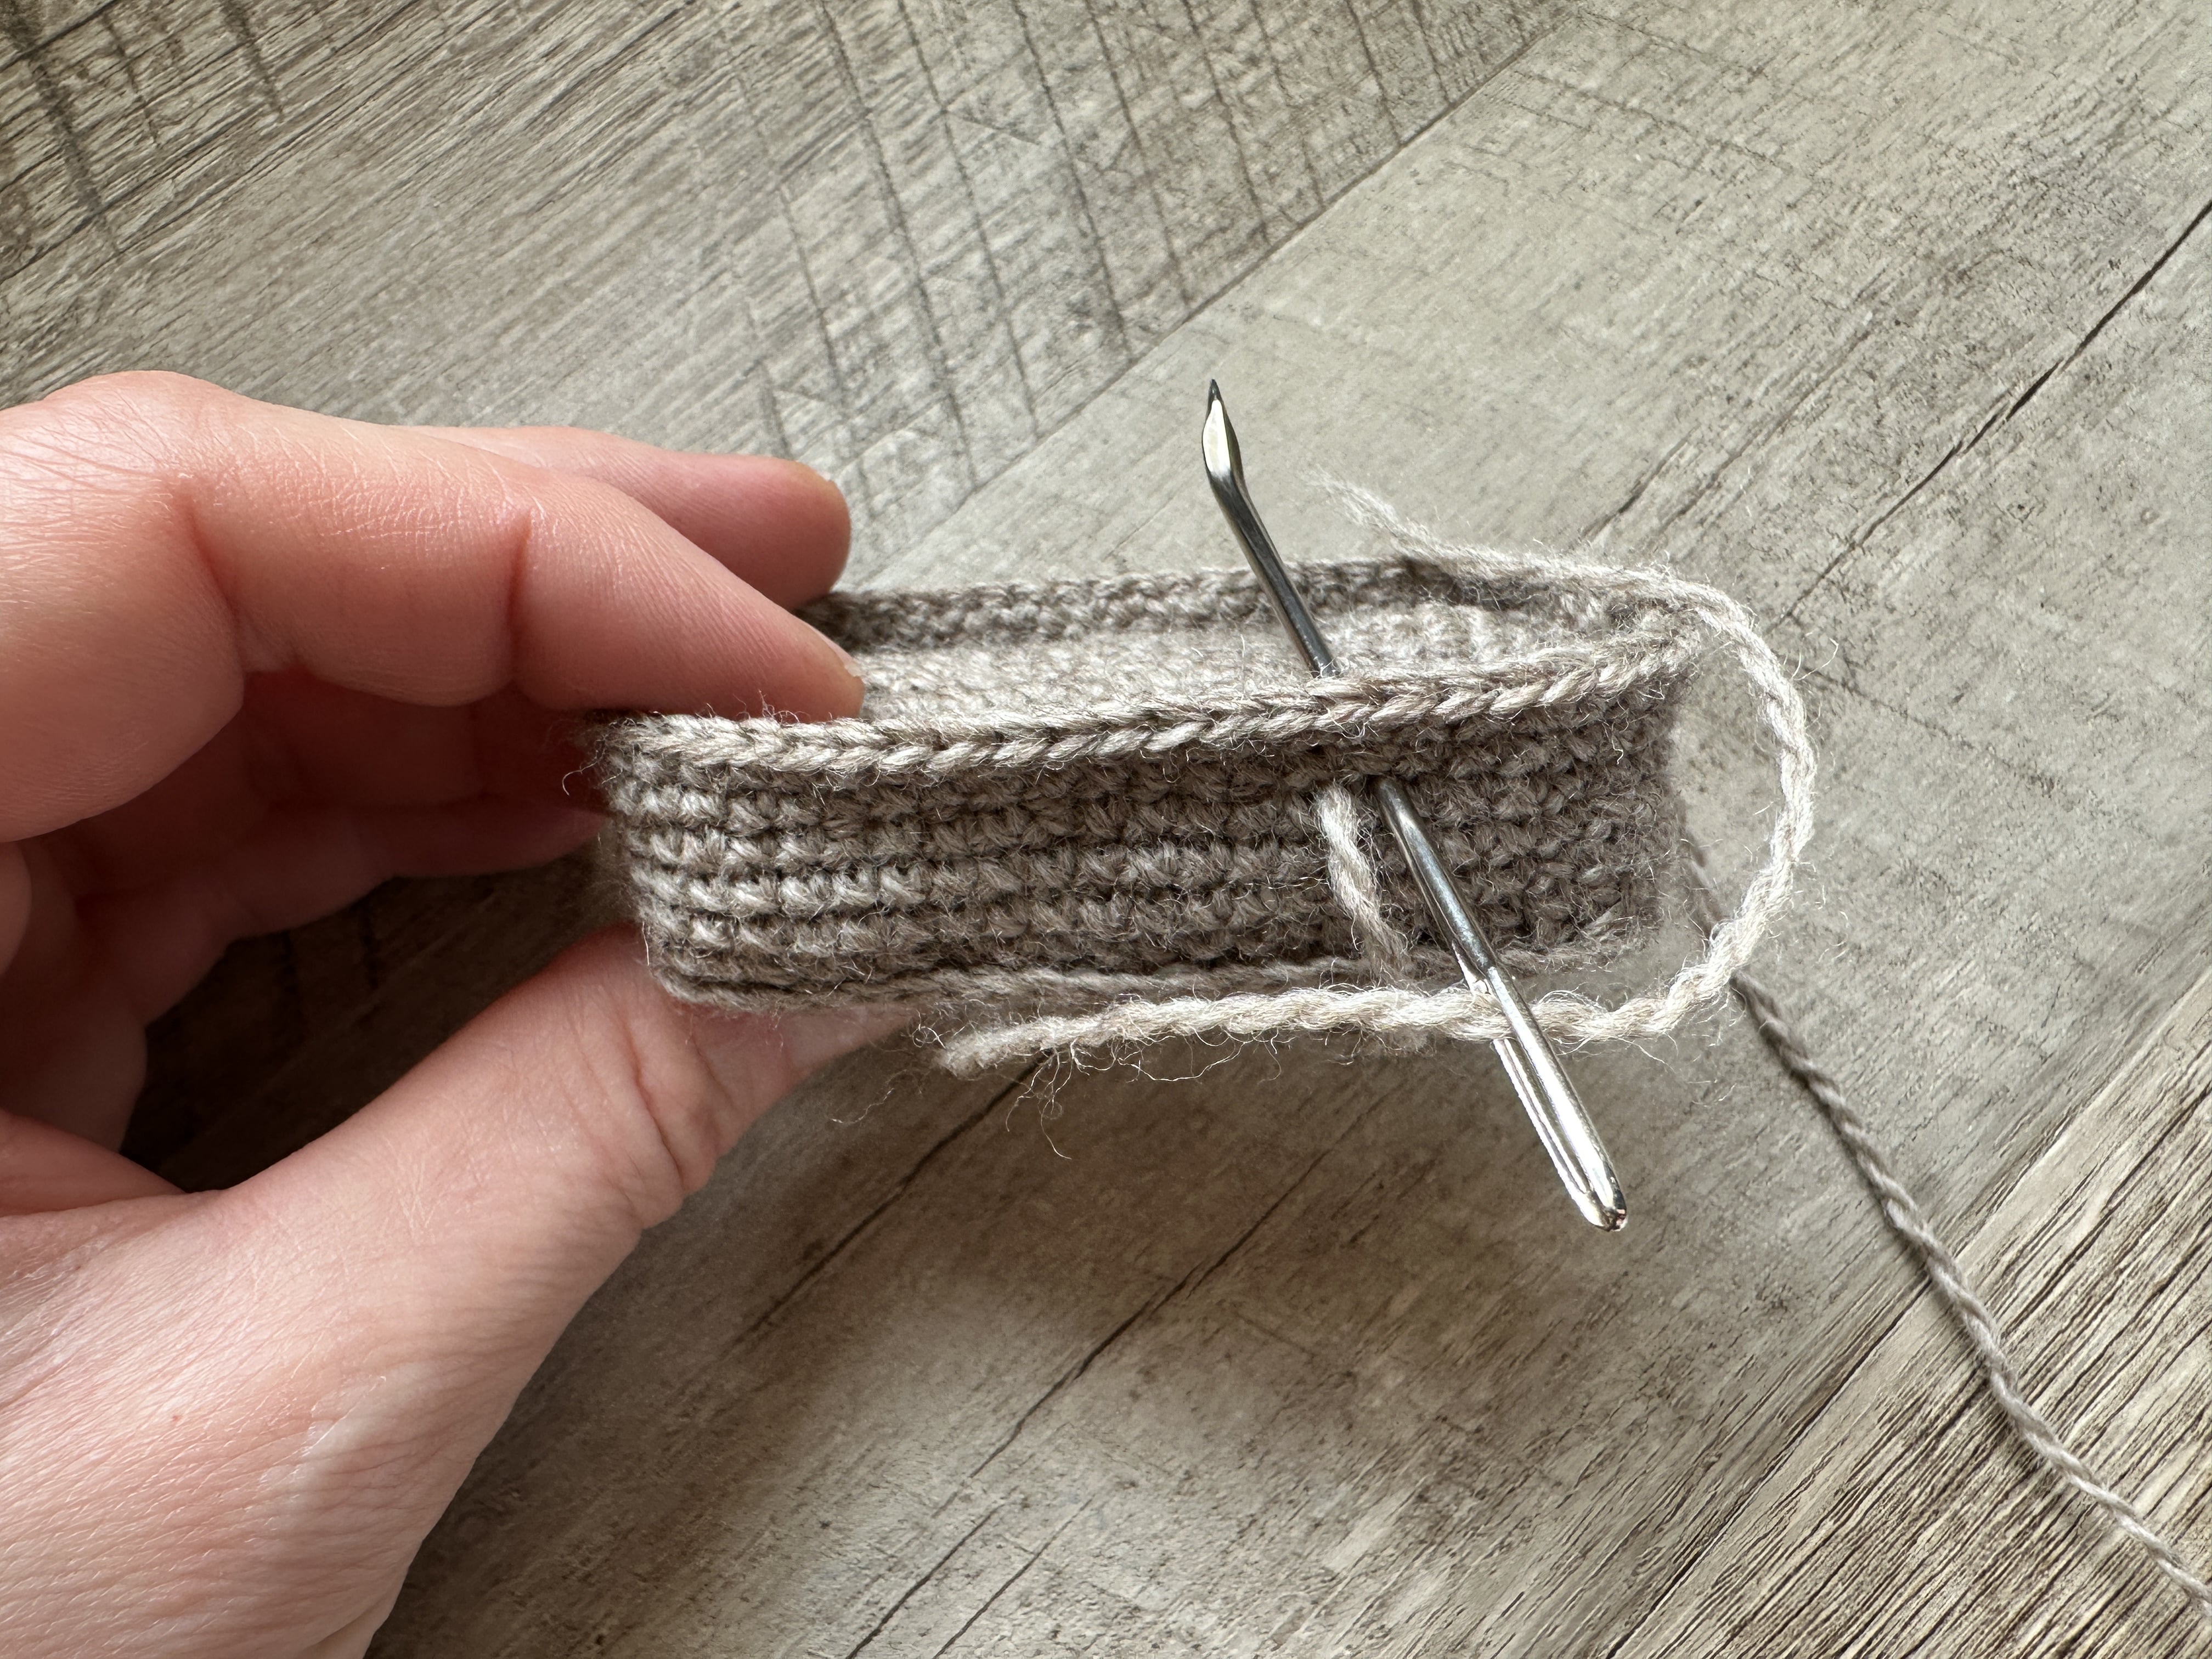
CONSTRUCTION:
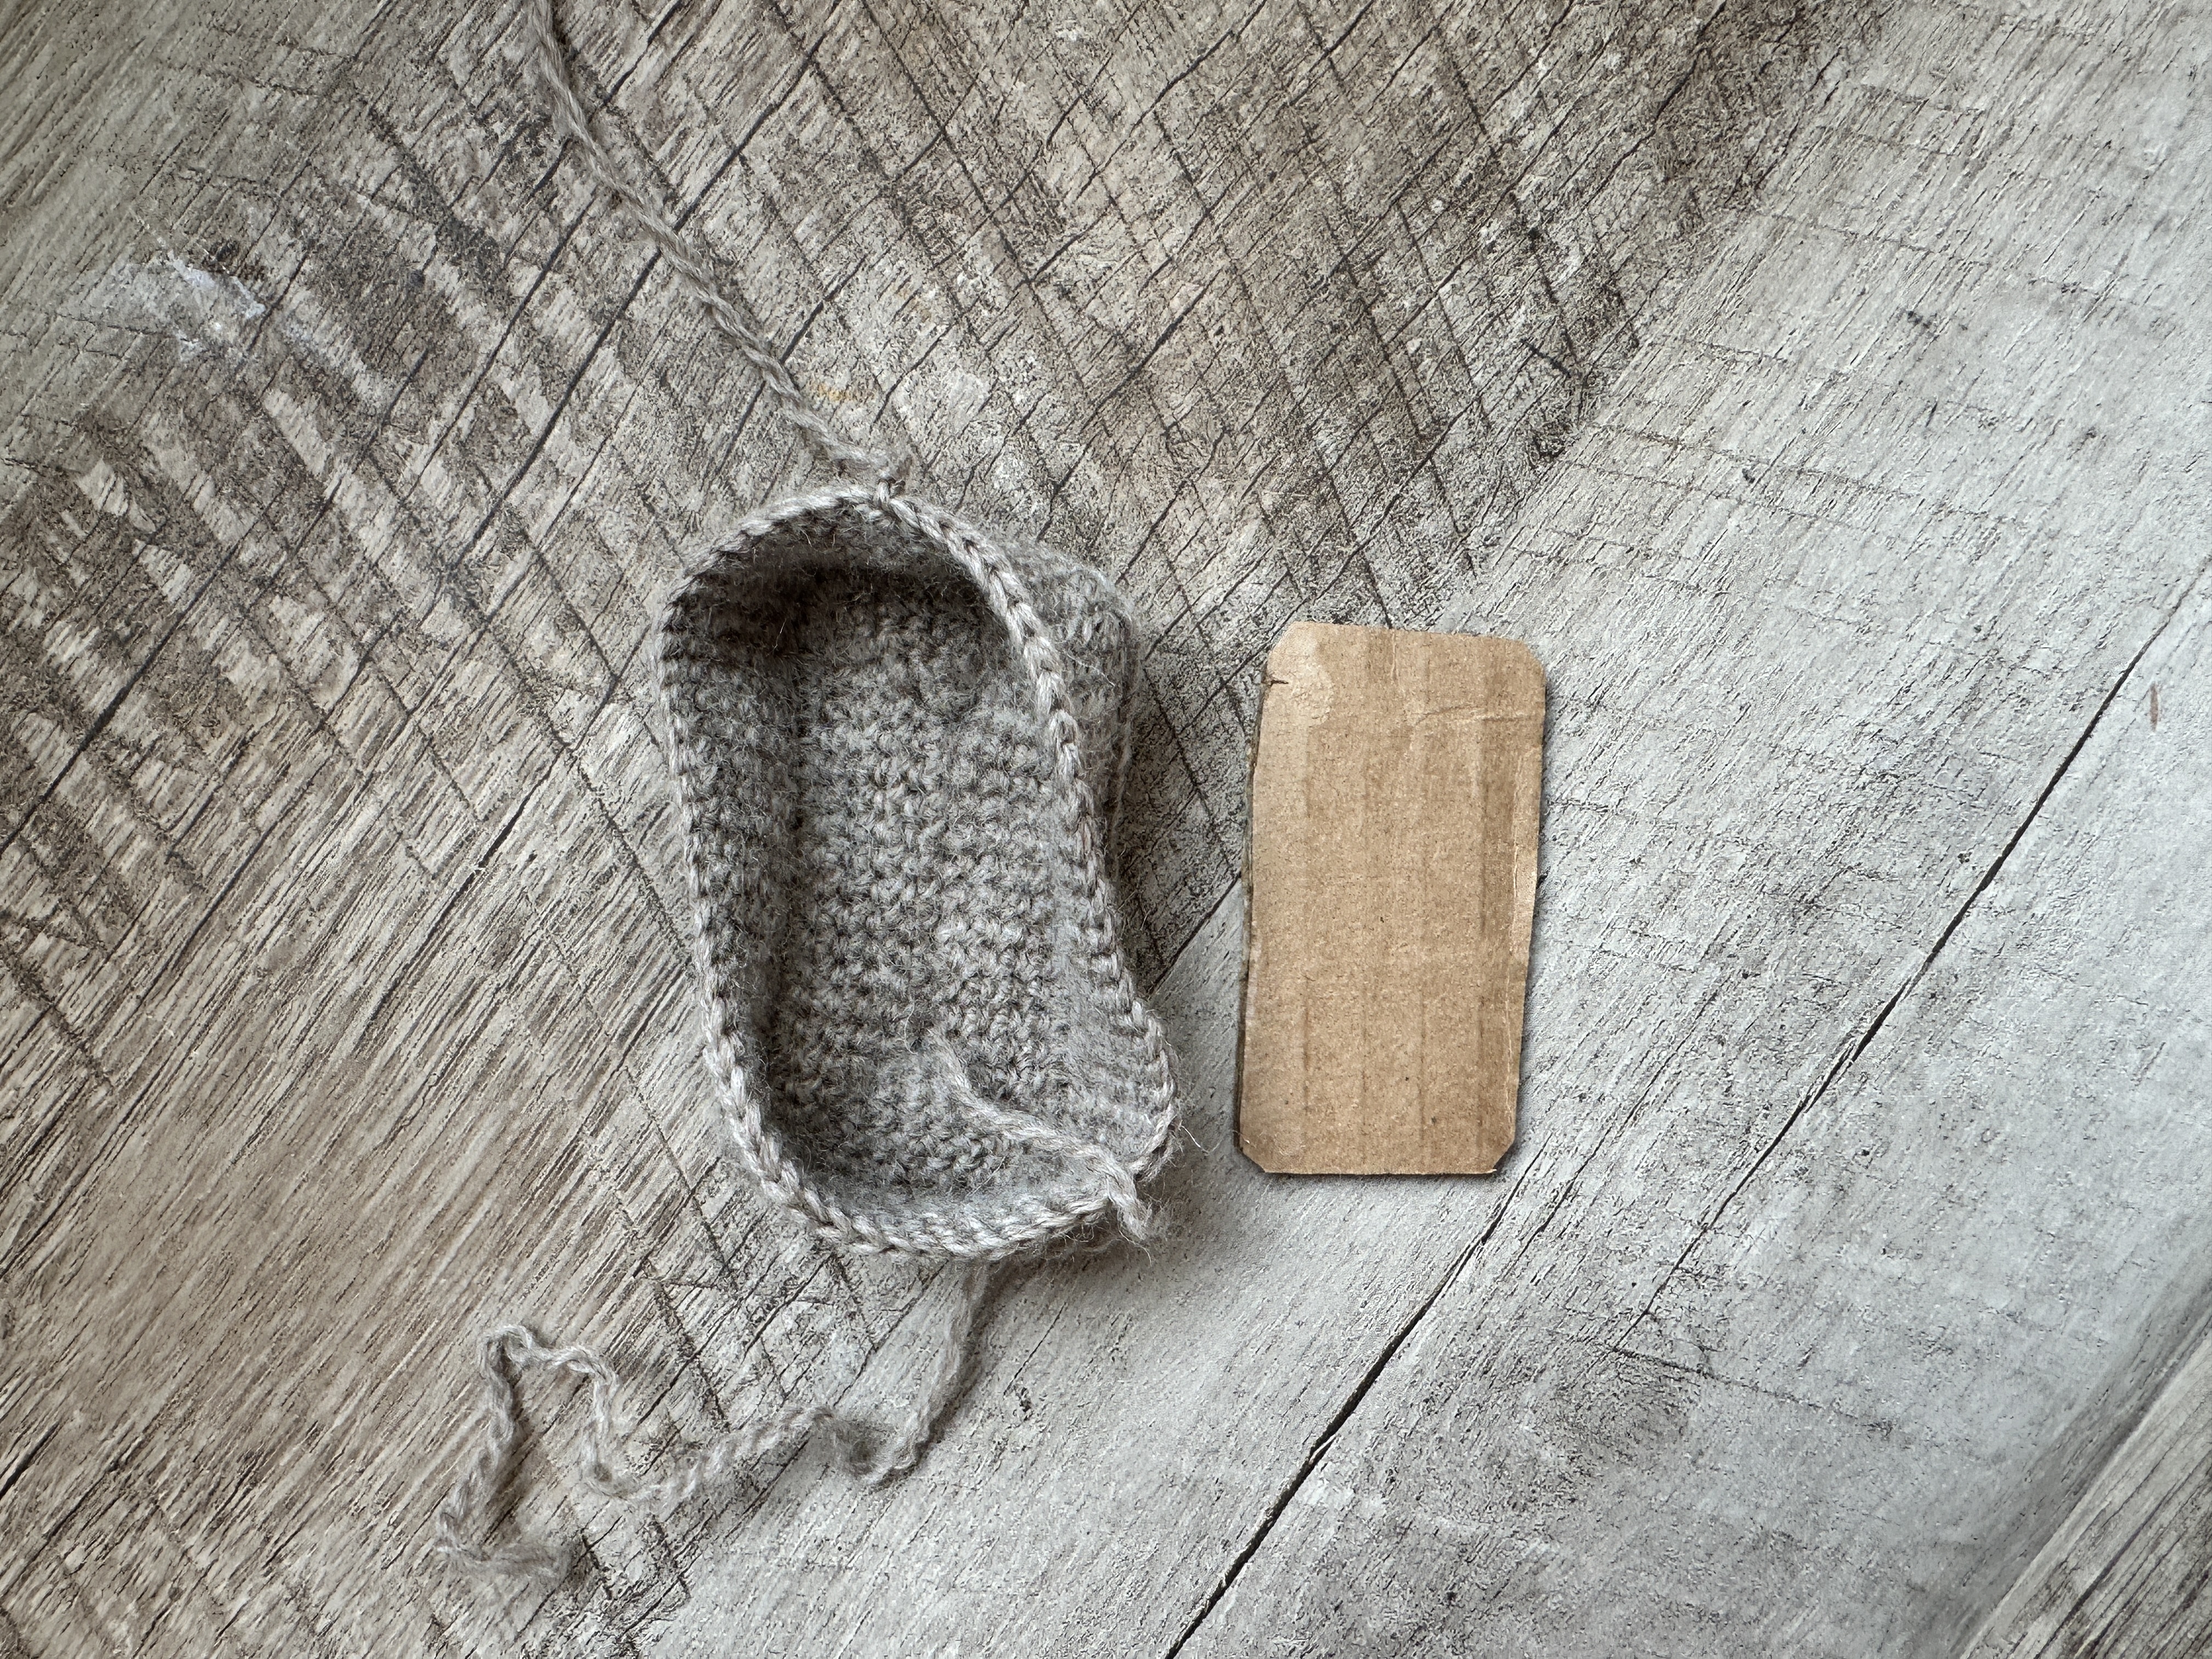
Using the bottom of your piece as a template, cut 2 pieces of cardboard to fit inside the bottom piece.
Place cardboard in the bottom, place a bit of polyfil on top, and place your second piece of cardboard on top.

Thread a length of yarn onto a darning needle, and sew the top piece onto the bottom piece. You will sew through the Front Loops Only on the top piece, and just under the 2nd row down on the bottom piece. Seam together using a running stitch.
BABY
Begin with Wheat Heather. Start with a Magic Ring.
1. Ch 1. Sc 9 into ring. Join. (9 sts)
2. Ch 1, sc in same st. *Work 2 sc in next st, sc in next st* work 4 times. Join. (13 sts)
3 – 5. Ch 1, sc in each st. Join. (13 sts)
6. Ch 1, *sc2tog, sc in next st* work 3 times. Sc2tog twice. Join. (8 sts)
Join Oyster Heather.
7. Ch 1, work 2 sc in each st around. Join. (16 sts)
8. Ch 1, *sc in next 7 sts, work 2 sts in next st. * work twice. Join.
(18 sts)
9. – 15. Ch 1, sc in each st around. Join. (18 sts)
Pause and stuff.
16. Ch 1, sc2tog 9 times. Join. (9 sts)
17. Ch 1, sc in each st around. Join. (9 sts)
Cut yarn, leave a tail. Use the tail to sew up the small remaining hole.

RUSTIC CROCHET NATIVITY – FREE MINI SET
Finished? Share your progress! You can email me at Bethany at whistleandivy dot com, share in our Facebook group
xoxo,


i do not have the yarns or time to make these this December, will these patterns continue to be available for free into next year ? please and thank you
Yes! The mini set is forever free on my website :)
Please check this row:
8. Ch 1, sc in next 7 sts, work 2 sts in next st. Join. (18 sts)
This will give 9 stitches, not the 18 listed at the end. Should this be repeated to get the 18?
yes sorry! It should be worked twice.
HI! I added the crab stitch to the top of the manger! I like the look of it!
Oooh! I like the sound of that!
Share a picture on Facebook, I would love to see!
https://www.facebook.com/WhistleAndIvy/posts/pfbid02MWkiQbma4xSCoKH2QuPoNJafHL6SVyA2KCvViwz9RkCZxT7GxepLaqtoqftrUDgtl
Hi! This has been a fun project.
Unfortunately for me, it looks like the directions and layout and such for the manger changed today? I was in the middle of the pattern and am now completely lost. Is it possible to get a copy of what it was previously?
Yep! I updated it to be an easier, more streamlined design (we are doing a nativity CAL this week!) Here is the old version: (not sure how the formatting will work out in a comment, so forgive me!)
BOTTOM: Ch 15. (ch 1 does NOT count)
1. Sc in 2nd ch from hook. Sc in next 13 sts. Turn. (14 sts)
2. – 10. Ch 1. Sc in same st. Sc in next 13 sts. Turn. (14 sts)
11. Work a border around your piece: Rotate 90 degrees clockwise. Work 2 hdc in same st (for a total of 3 sts, this makes a corner). Hdc 8 down your raw edge. Hdc 3 in last st (making a corner). Hdc in next 12 sts. Hdc 3 in last st (making a corner). Hdc 8 down raw edge. Work 3 hdc in last st (making a corner). Hdc 12 across top edge. Join with last sc from row 10. (51 sts)
12. Ch 1. Sc in back loop of first sc. Sc in third loop in each hdc around. Join with a sl st. (52 sts) 13. -17. Ch 1. Sc in each st. Join with a sl st. (52 sts) Cut yarn.
TOP: (this is a separate piece) Use Hare Heather
Ch 15. (ch 1 does NOT count)
1. Sc in 2nd ch from hook. Sc in next 13 sts. Turn. (14 sts)
2. – 10. Ch 1. Sc in same st. Sc in next 13 sts. Turn. (14 sts)
11. Work a border around your piece: Rotate 90 degrees clockwise. Work 2 more hdc in same st (for a total of 3 sts, this makes a corner). Hdc 8 down your raw edge. Hdc 3 in last st (making a corner). Hdc in next 12 sts. Hdc 3 in last st (making a corner). Hdc 8 down raw edge. Work 3 hdc in last st (making a corner). Hdc 12 across top edge. Join with last sc from row 10. (51 sts)
12. Ch 1. Sc in back loop of first sc. Sc in third loop in each hdc around. Join with a sl st. (52 sts) 13. – 14. Ch 1. Sc in each st. Join with a sl st. (52 sts)
Don’t cut yarn. Place a few small weights/washers in the bottom of the manger. You can also add a bit of stuffing, but don’t over stuff or the manger top will lose its shape. Nest the top manger piece inside bottom piece, on top of the rocks and stuffing, lining up the top of the edge of the top piece with the top of the edge the bottom piece. Using the loop from the last stitch on the top piece, work a row of sl sts around the top, going through both layers of the top piece and bottom piece.
Thank you so very much!
Thank you! I needed this too!
Oh gosh! It literally did NOT occur to me that someone would be in the middle of making it. I am so sorry!
Thank you! I like the new version, but it comes out too big, so I’m glad this was here.
Hey, there! I think there’s a typo for row 5 of the top piece. I believe it should be sc4, inc3, sc17, inc3, sc8, inc3, sc17, inc3, sc4 and subsequently the same with the bottom piece but with the hdc. That’s the only way I can come up with 62 and it look even… am I doing something wrong otherwise?
Let me take a look, stand by. Thank you Allie!
You are right! Classic case of copy and paste negligence 🫣 I am sorry, thank you for commenting!!
Rounds 16 and 17 for baby should have a stitch count of 9
THANK YOU!!
No need to apologize!!!