
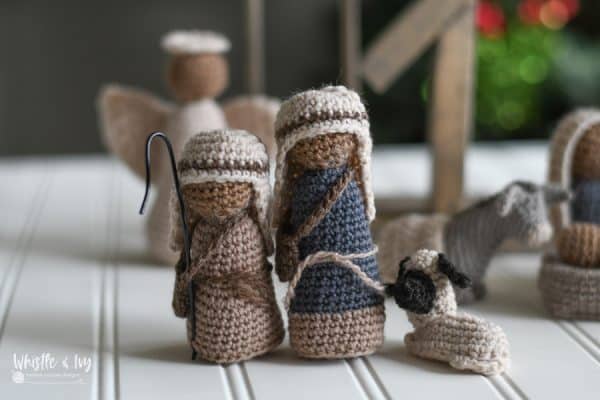
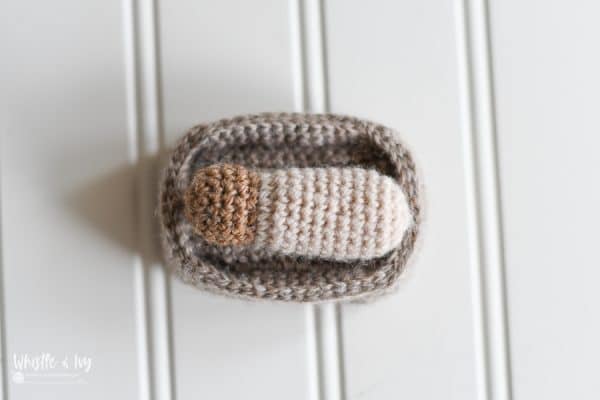
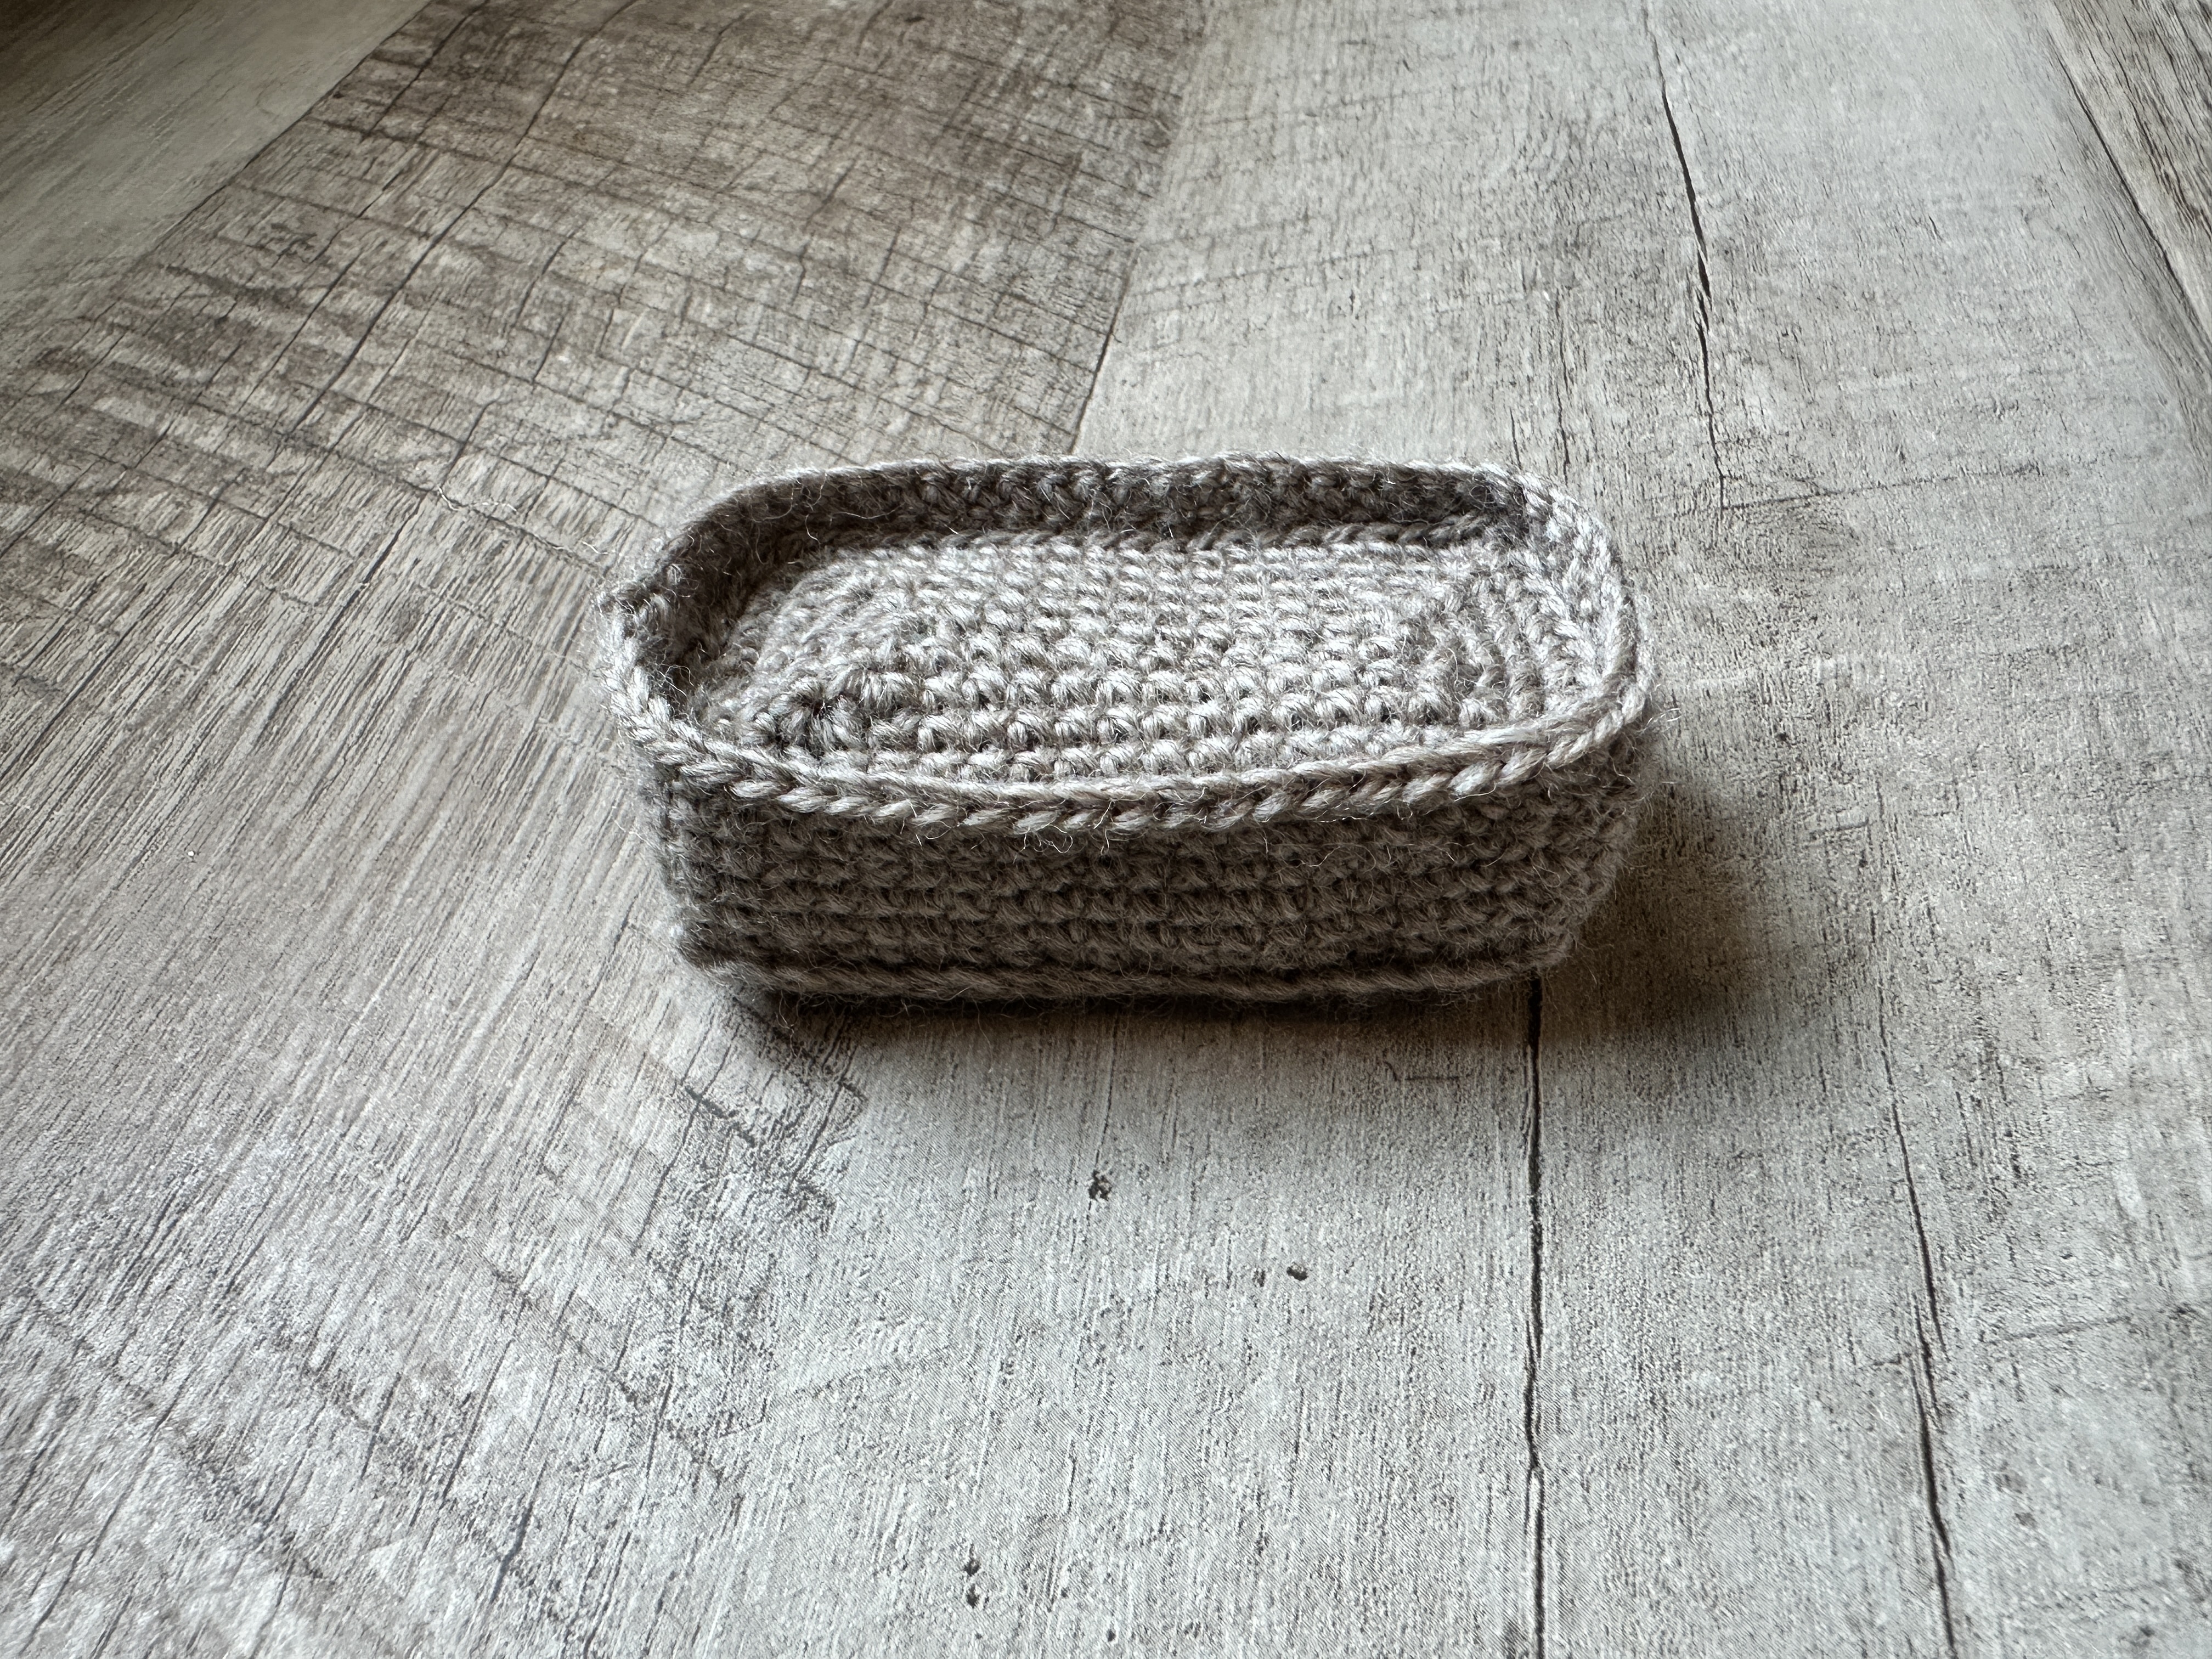
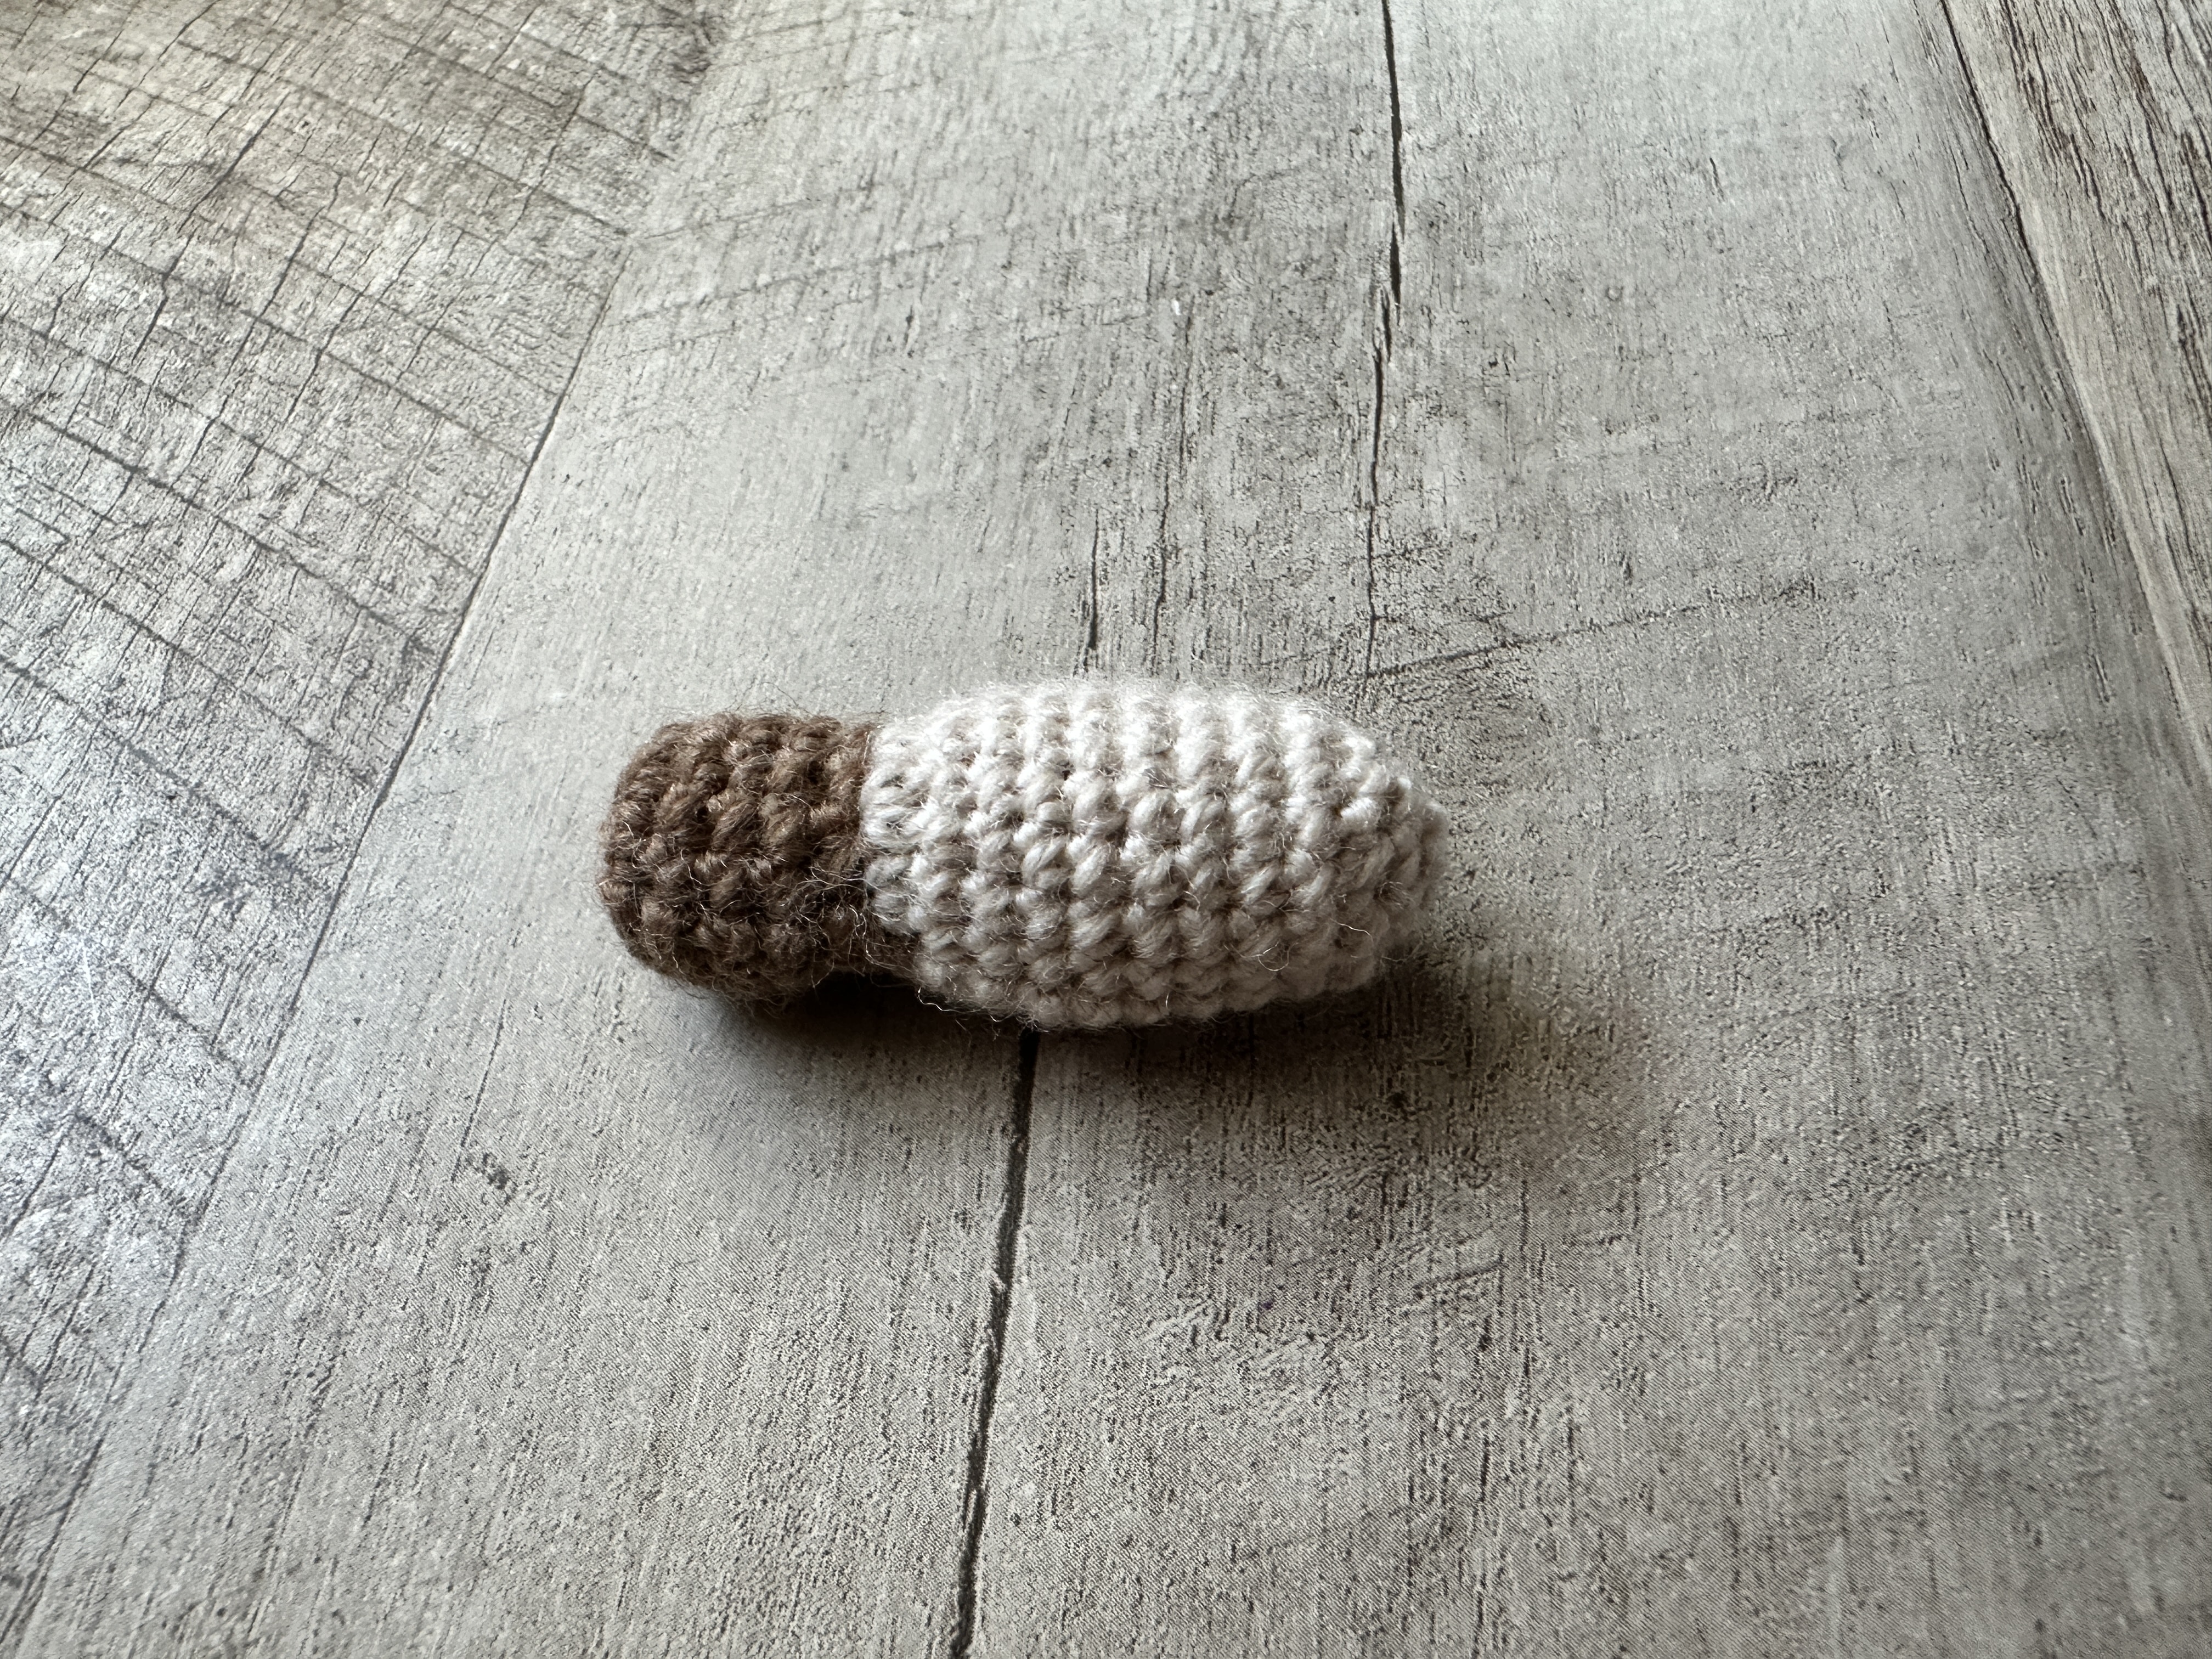
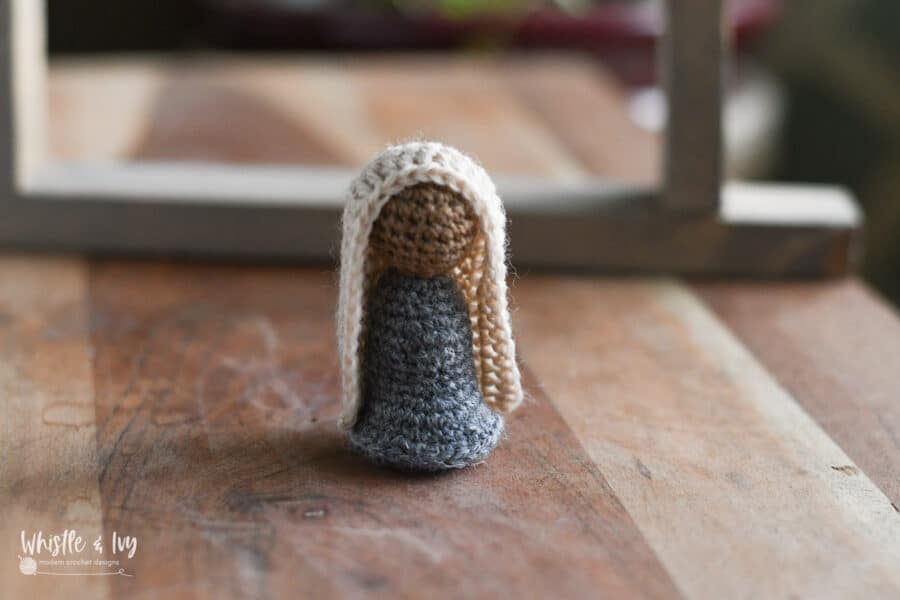
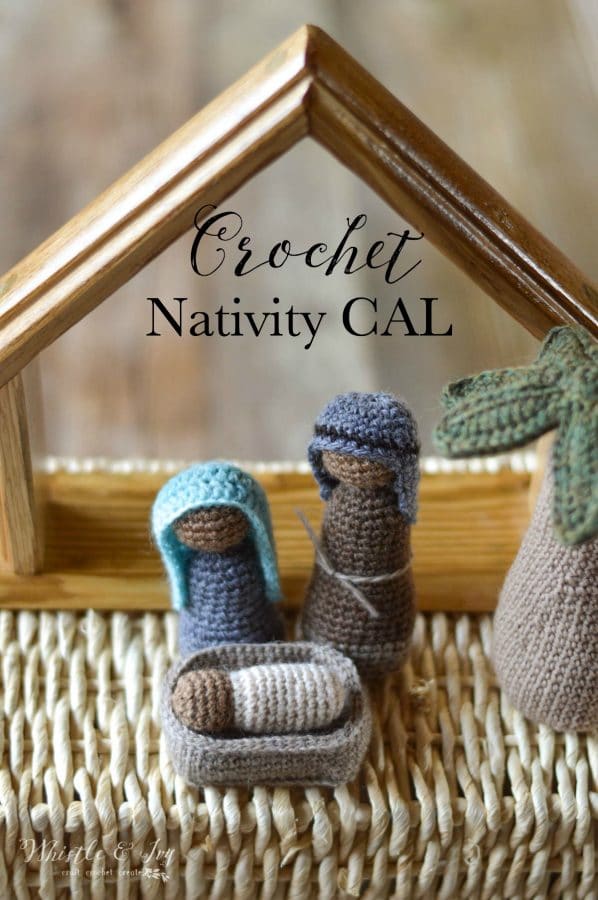
The most important part of the nativity, the Holy Child and His manger.
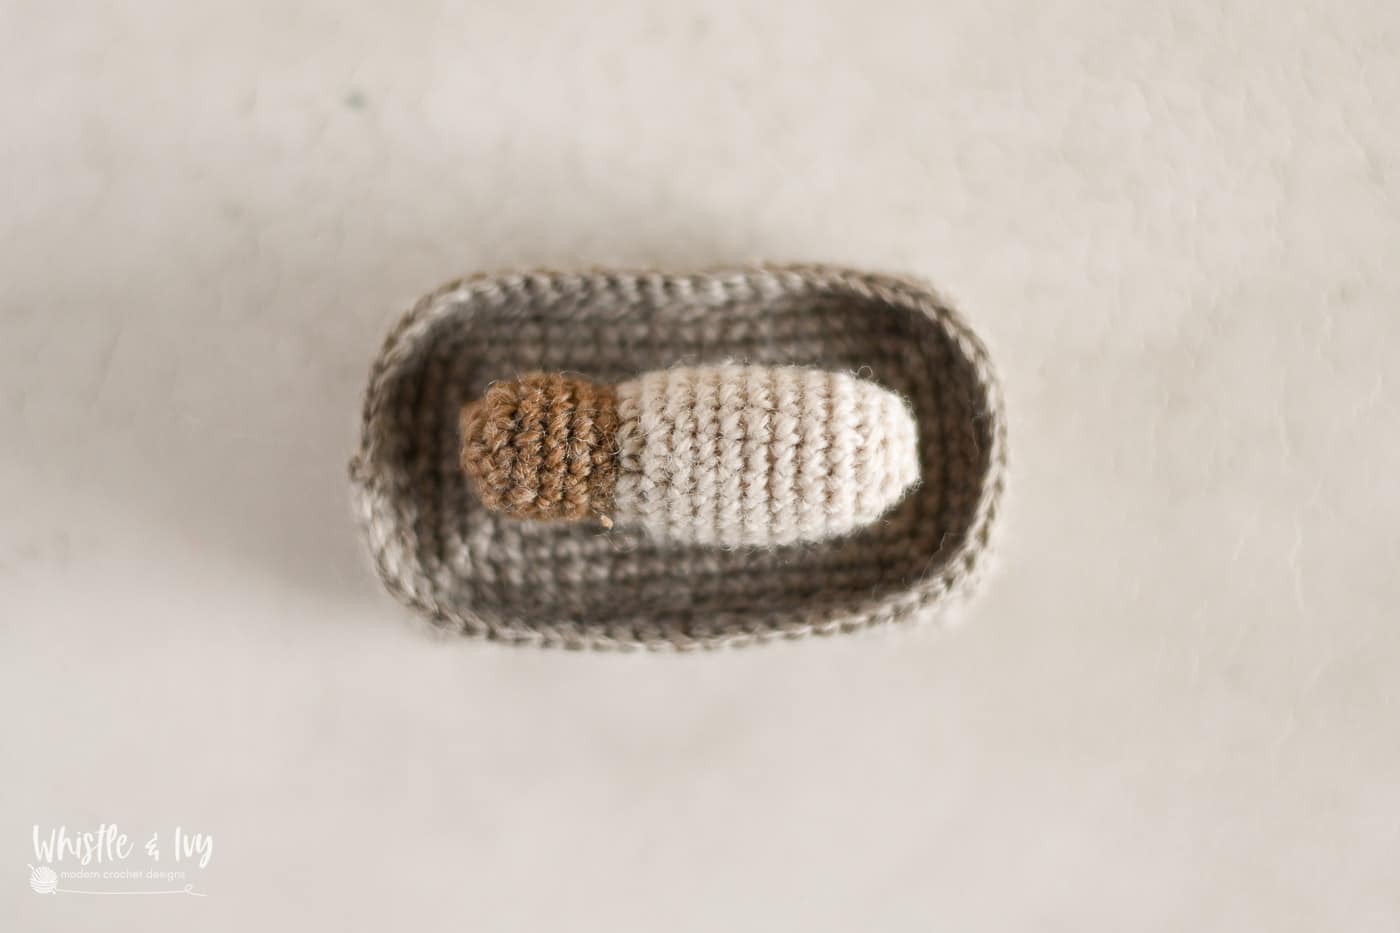
This first figure incorporate the quickest pattern in the set (Baby).
I did a bit of research on what the manger would have looked like, and it turns out the wooden thing with straw poking out is historically inaccurate. A feeding trough from this time period would have possibly been made of stone with a hollowed out space in the top, and most likely rectangular in shape.
This is the depiction I was going after with this design. I hope you enjoy it!

You’re tired of sifting through complicated tutorials and patterns that leave you feeling overwhelmed.
Let me help.
PICTURE THIS:
Instant access to a library of modern, easy-to-follow patterns
Gifting your handcrafted treasures to your loved ones.
Feeling accomplished by your beautiful makes
It’s time to make your crafting experience as joyful as it should be.
MANGER AND BABY
Please remember: You are free to use this pattern to make and sell, but do not republish or distribute this pattern in any way. DO NOT use my photos in your listings. Please do share my blog links! It’s a quick and FREE way of supporting Whistle and Ivy and more free crochet patterns in the future.
PLEASE read my Disclaimer before working my free patterns!
What you need: (affiliate links)
-Fingering Weight Yarn (Palette Yarn)
[Oyster Heather, Wheat Heather, Hare Heather]
– 3.5mm Hook
– Darning Needle
– Glue Gun
Abbreviations: (American terms)
Ch – Chain
Sc – Single Crochet
Sc2tog- SC decrease
St – Stitch
Gauge: 12 sc = 2″
Ready to make the full set? Get yours in my shop!
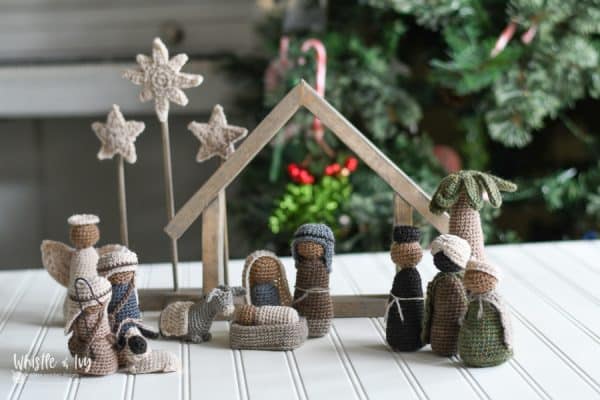

RUSTIC CROCHET NATIVITY – FULL SET CROCHET PATTERN
$8.50
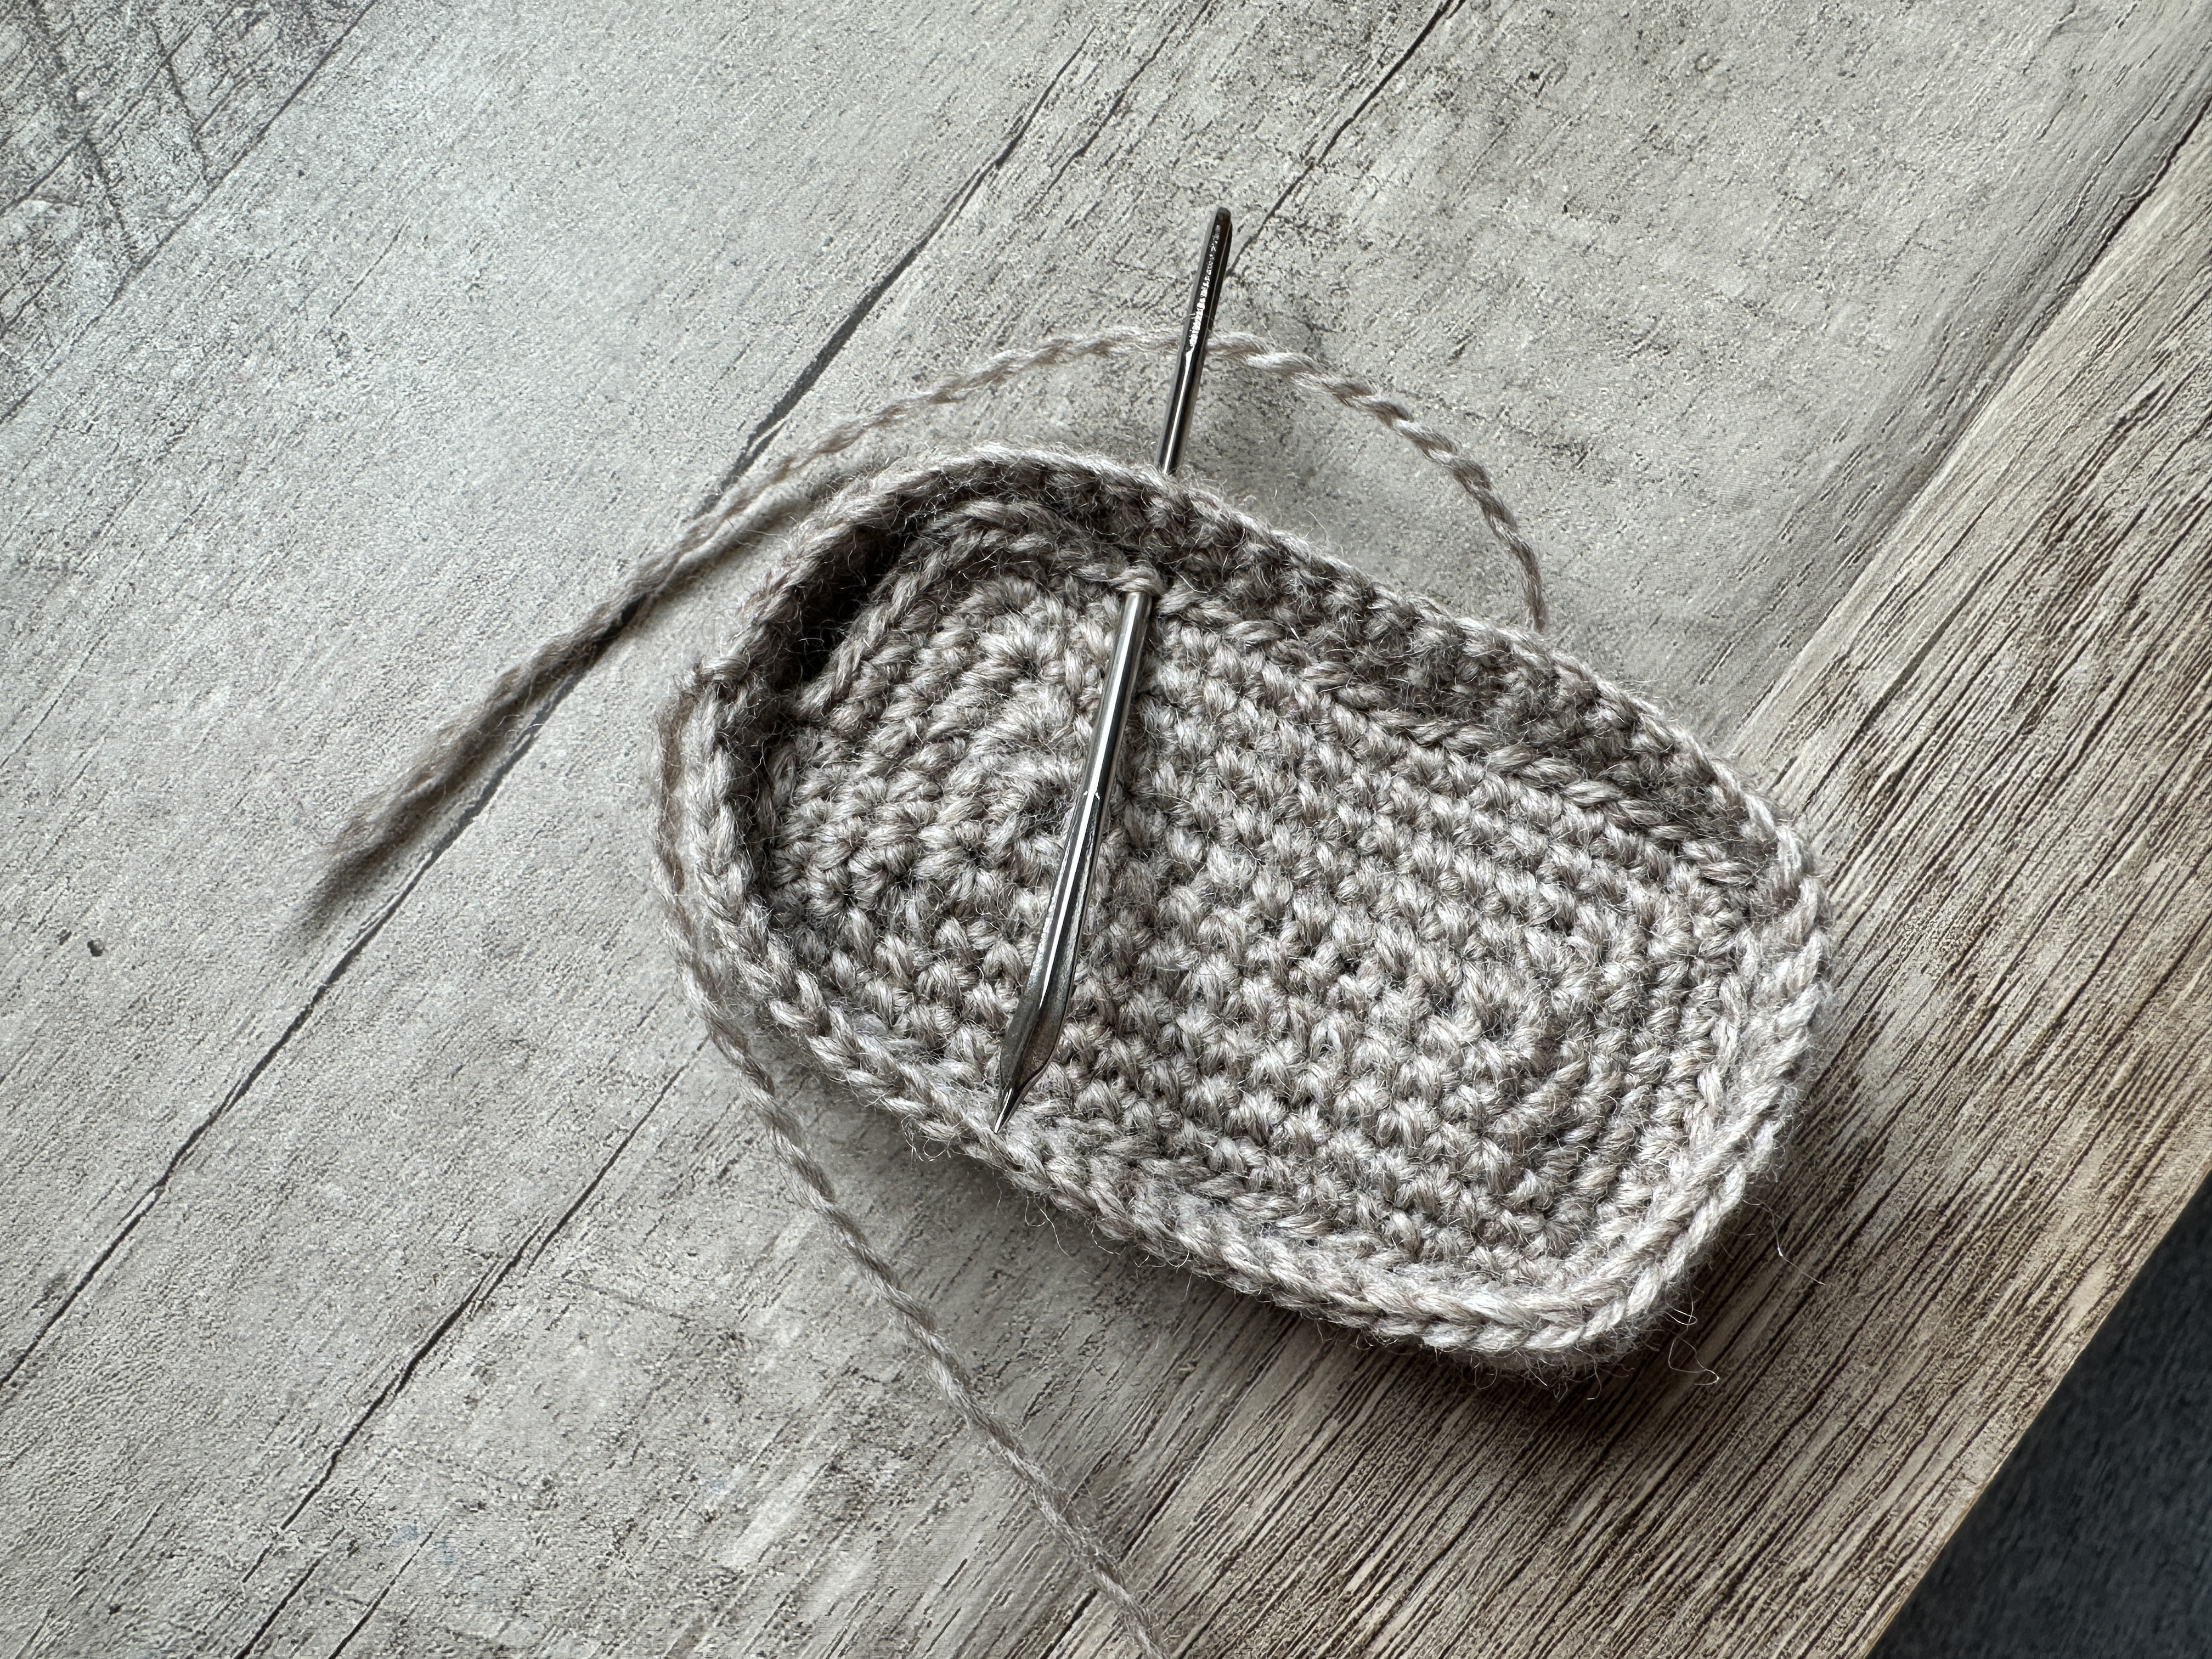
MANGER
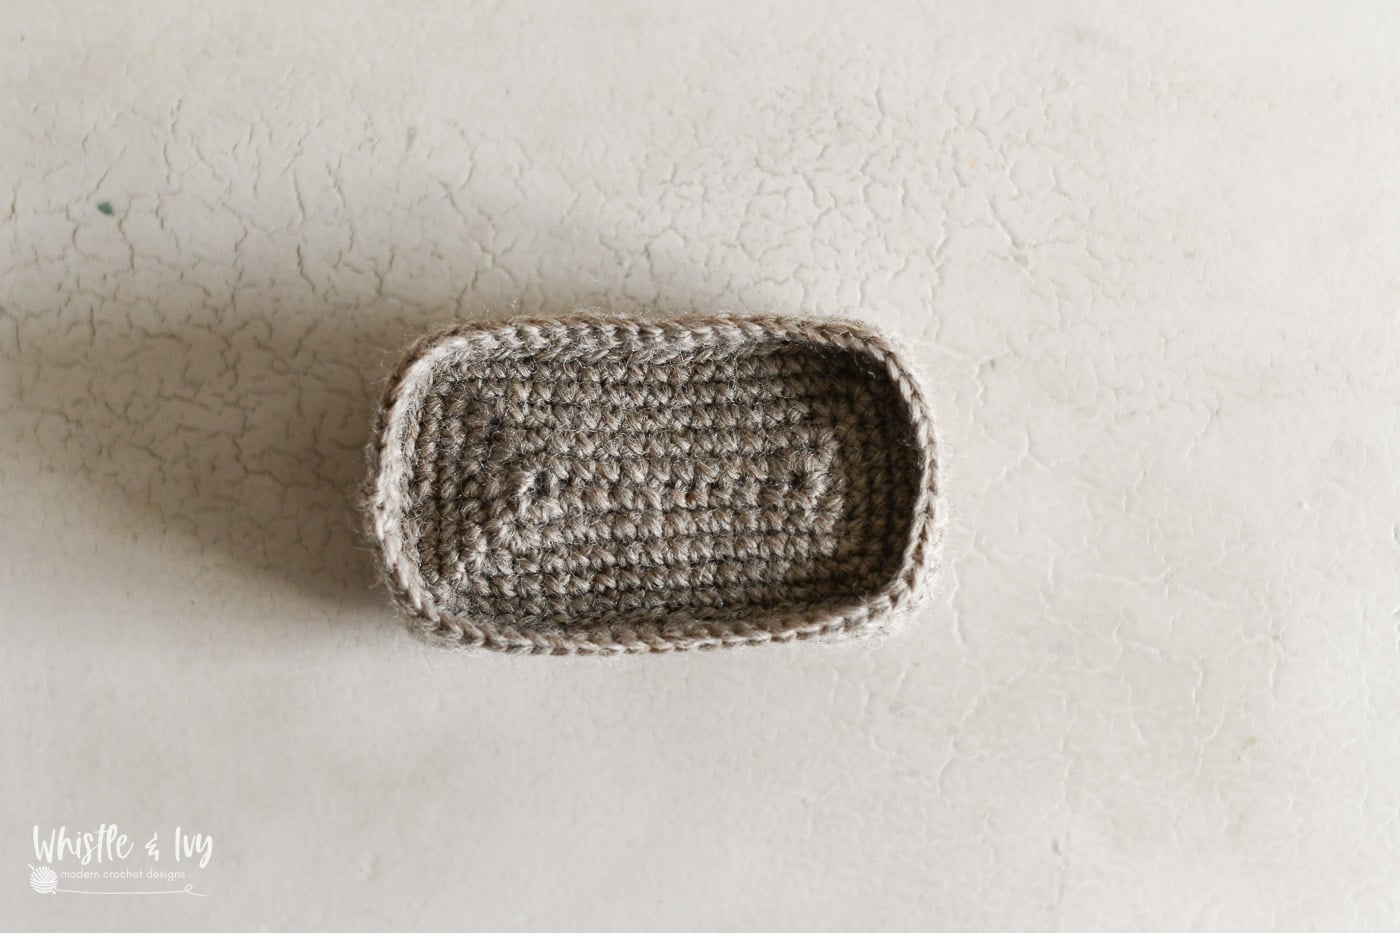
TOP PIECE:
Ch 12
Use gosling.
1. Work 3 sc in 2nd ch from hook, sc in next 9 chs. Work 6 sc in last ch.
Working on the other side of the ch, sc in next 9 sts. Work 3 sc in last st (same st as first 3 sc). Join. (30 sts)
2. Ch 1, sc in next st. In the next st: sc, hdc, sc. Sc in next 11 sts. In next st: sc, hdc, sc.
Sc in next 2 sts. In next st: sc, hdc, sc.
Sc in next 11 sts.
In next st: sc, hdc, sc.
Sc in last st. Join. (38 sts)
3. Ch 1, sc in next 2 sts. Work 3 sc in next st. Sc in next 13 sts. Work 3 sc in next st. Sc in next 4 sts. Work 3 sc in next st.
Sc in next 13 sts. Work 3 sc in next st.
Sc in last 2 sts. Join. (46 sts)
4. Ch 1, sc in next 3 sts. Work 3 sc in next st. Sc in next 15 sts. Work 3 sc in next st. Sc in next 6 sts. Work 3 sc in next st.
Sc in next 15 sts. Work 3 sc in next st.
Sc in last 3 sts. Join. (54 sts)
5. Ch 1, sc in next 4 sts. Work 3 sc in next st. Sc in next 17 sts. Work 3 sc in next st. Sc in next 8 sts. Work 3 sc in next st.
Sc in next 17 sts. Work 3 sc in next st.
Sc in last 4 sts. Join. (62 sts)
Tie off.
BOTTOM PIECE:
Repeat first 4 rounds of TOP PIECE.
5. Ch 1, hdc in next 4 sts. Work 3 hdc in next st. Hdc in next 17 sts. Work 3 hdc in next st. Hdc in next 8 sts. Work 3 hdc in next st.
Hdc in next 17 sts. Work 3 hdc in next st.
Hdc in last 4 sts. Join. (62 sts)
6. Ch 1, working through THIRD loop, sc in each st around. Join with a sl st. Join. (62 sts)
7 – 11. Ch 1, sc in each st. Join. (62 sts)
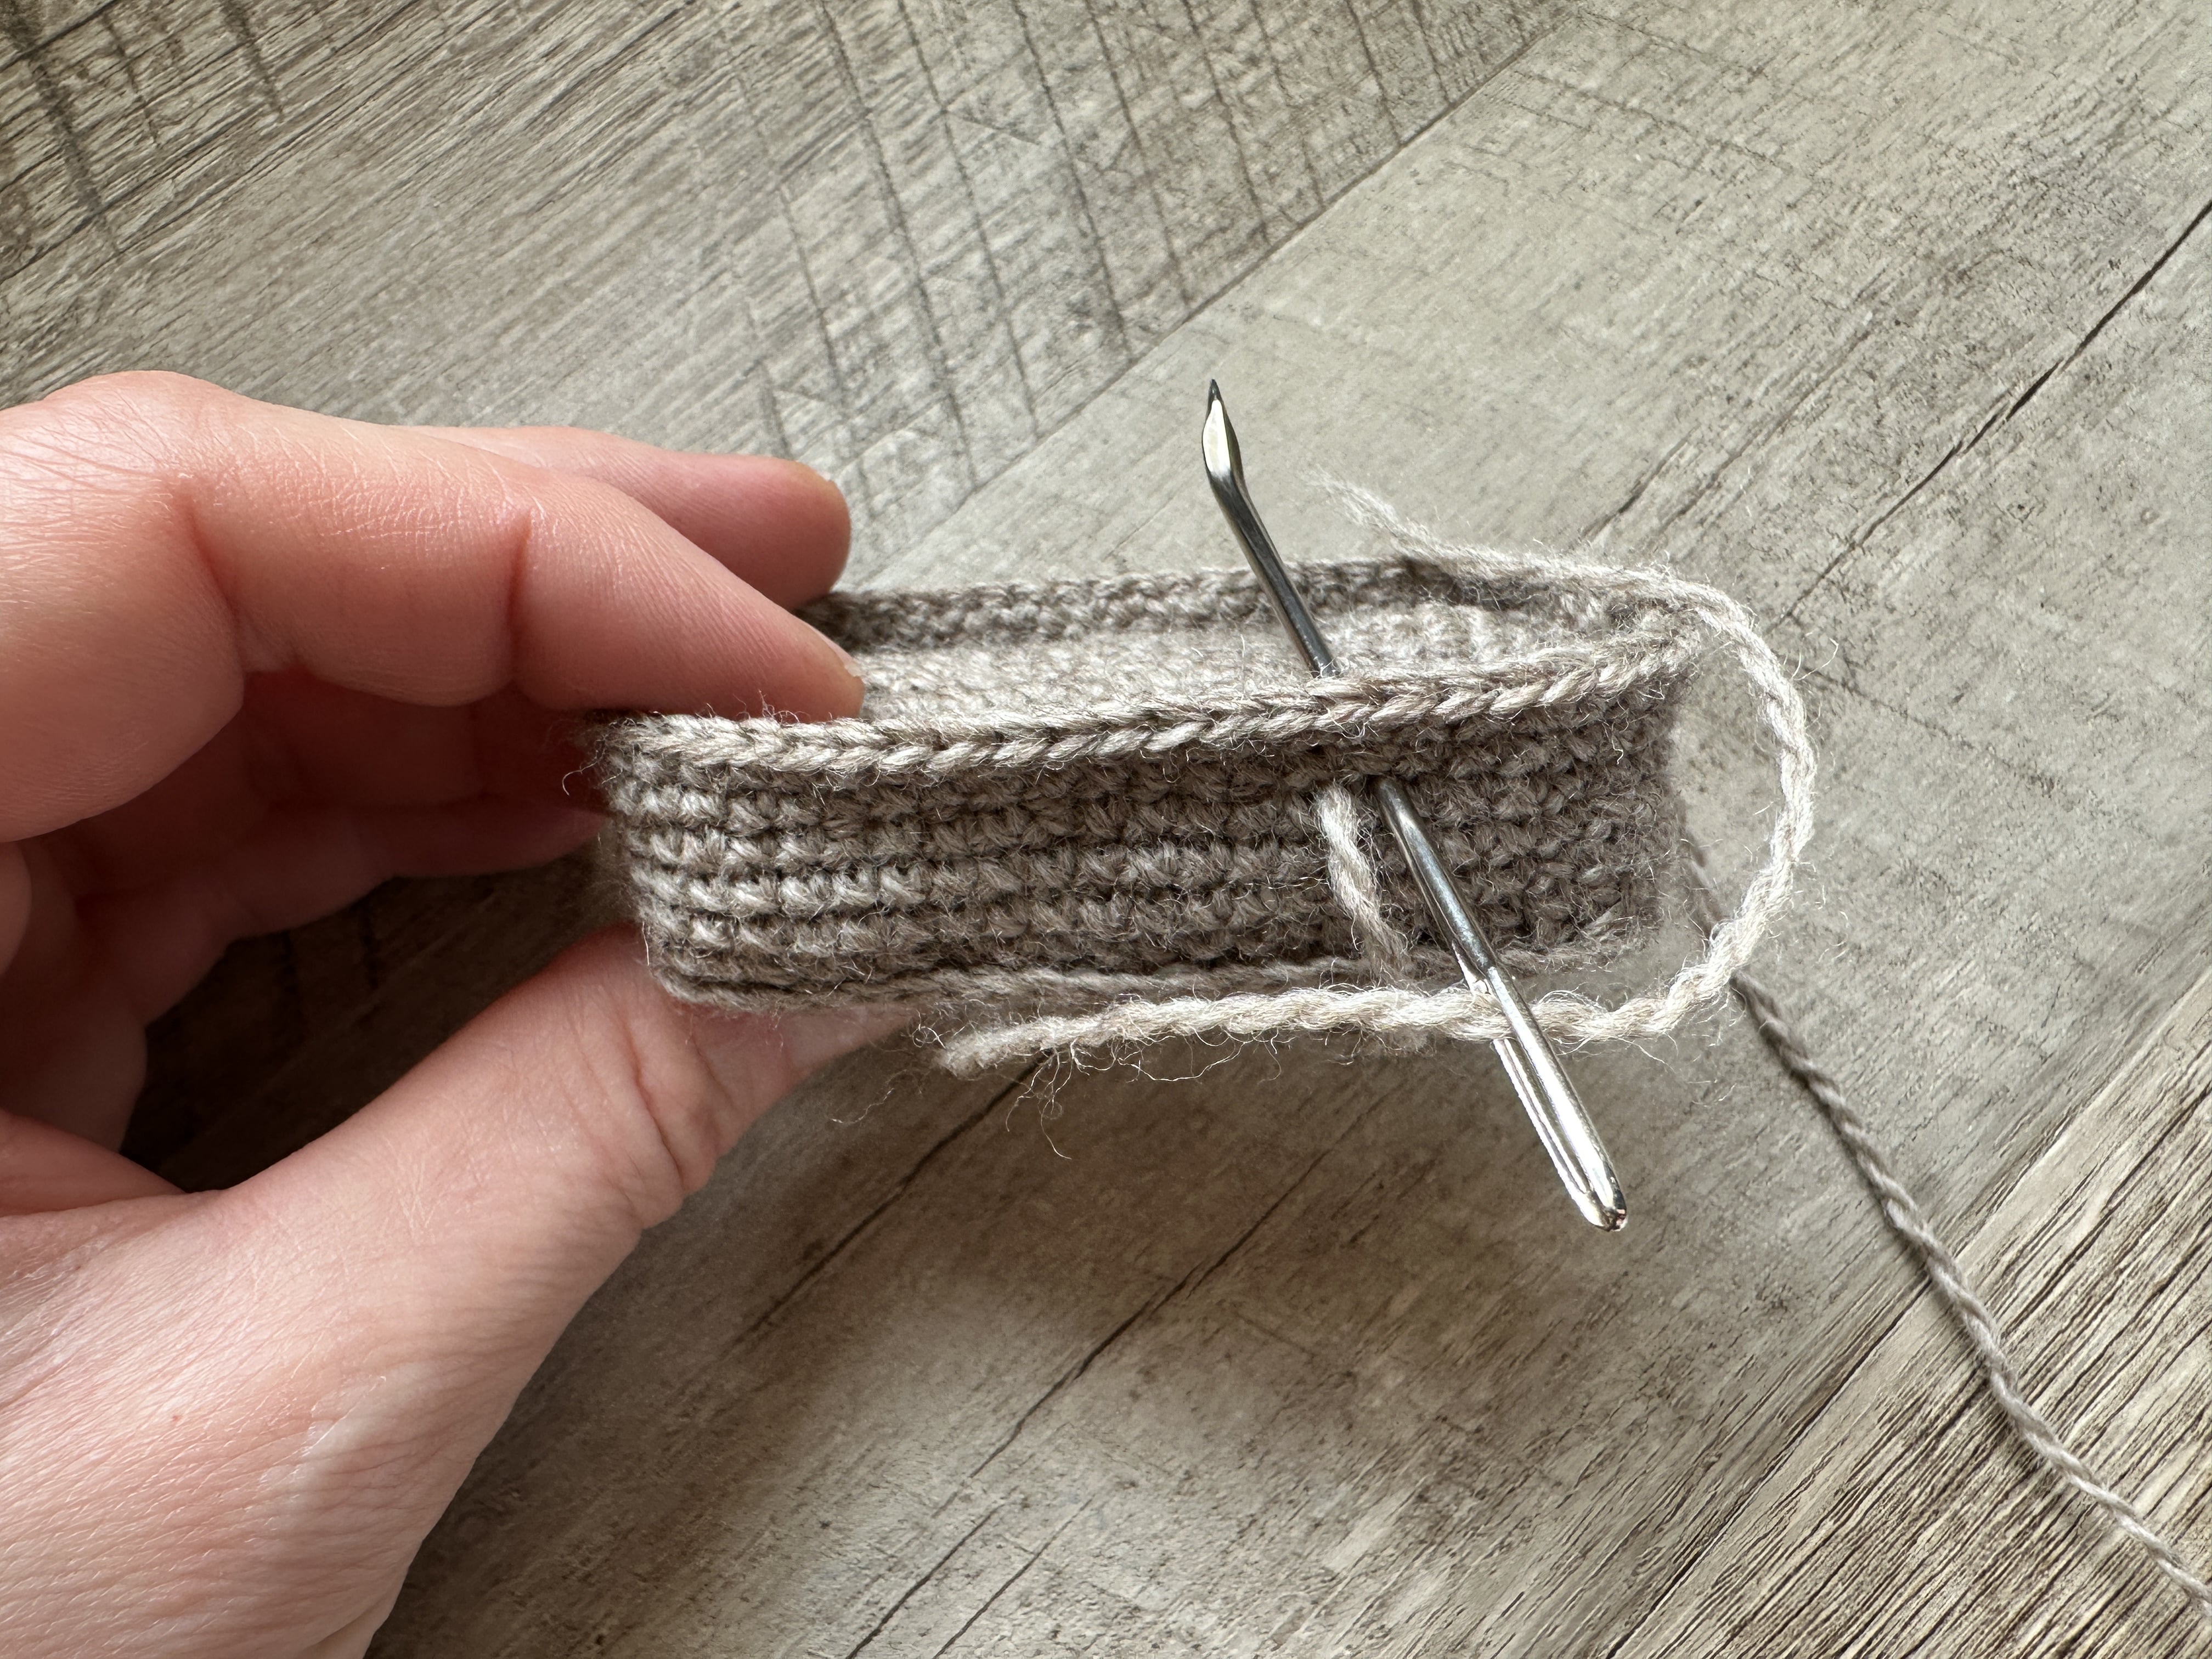
CONSTRUCTION:
Using the bottom of your piece as a template, cut 2 pieces of cardboard to fit inside the bottom piece.
Place cardboard in the bottom, place a bit of polyfil on top, and place your second piece of cardboard on top.

Thread a length of yarn onto a darning needle, and sew the top piece onto the bottom piece. You will sew through the Front Loops Only on the top piece, and just under the 2nd row down on the bottom piece. Seam together using a running stitch.
BABY
Begin with Wheat Heather. Start with a Magic Ring.
1. Ch 1. Sc 9 into ring. Join. (9 sts)
2. Ch 1, sc in same st. *Work 2 sc in next st, sc in next st* work 4 times. Join. (13 sts)
3 – 5. Ch 1, sc in each st. Join. (13 sts)
6. Ch 1, *sc2tog, sc in next st* work 3 times. Sc2tog twice. Join. (8 sts)
Join Oyster Heather.
7. Ch 1, work 2 sc in each st around. Join. (16 sts)
8. Ch 1, *sc in next 7 sts, work 2 sts in next st. * work twice. Join.
(18 sts)
9. – 15. Ch 1, sc in each st around. Join. (18 sts)
Pause and stuff.
16. Ch 1, sc2tog 9 times. Join. (9 sts)
17. Ch 1, sc in each st around. Join. (9 sts)
Cut yarn, leave a tail. Use the tail to sew up the small remaining hole.

RUSTIC CROCHET NATIVITY – FREE MINI SET
Finished? Share your progress! You can email me at Bethany at whistleandivy dot com, share in our Facebook group
xoxo,


Hi! I’m trying to make the manger— and stuck on row 11. So far I just have an oval piece and it’s making a boat shape (not laying flat). So I’m confused by the terms “the raw edge”. So I’m not just continuing around the edge of the oval?
It should not be an oval, it should be a rectangle. Have you been turning after each row? The top and bottom of the rentable should be pretty and neat, but the sides should be “raw” where the edges of the turning rows are at. Does yours look like the photo?
I was working in a round and not in rows. That’s my bad! I think I can get it now. Thank you!
Okay!
Hi there! When working these pieces, do the rows line up or are they staggered a little? I’m working on Baby Jesus. For His head will row 3 line up exactly where row 2 left off? I just want to make sure I’m doing this right. I appreciate any help! Thanks so much!! 😊
Hello! Are you asking if you meet back at the beginning or if the seam slants?
I guess I answered my own question because I finally figured it out! I was doing joined rows (not continuous) but I kept crocheting in the chain 1, so I was ending up with too many stitches.
I do have another question though. For the shepherd’s bag- mine keeps coming out oval, but I like the shape of yours better. You just keep working around, not turning correct?
Yes, it’s oval shape at first! Yes, joined rows, no turning.
This is darling, I am looking forward to making he whole nativity. Thank you for sharing your pattern.
Thank you so much Kristine! I am so thrilled you are enjoying it!
Hello, I recently purchased this pattern to participate in the crochet along, but patience I don’t have. 🙂 I love the pattern I have just the Shepards and animals to finish and to build my Manger (house) idk lol…. one thing I did do extra…. on the Manger it didn’t want to stay tucked down so I ran a stitch a long the inside edge where the sides met and that did the trick…. Thank you so much for making this pattern!!!!
You are so welcome! I am so happy you are enjoying it!
Gorgeous pattern! Easy to follow (I’m an experienced crocheter), subtle concept, NO SEW (yay!)
Love it!
Thank you so much!
I absolutely LOVE this pattern! In the manger, I see the top and the bottom are the same size, except for the edges. I made mine this way and the top is having a hard time fitting into the bottom, since they are the same. Should the base of the top be smaller in order to fit inside the base of the bottom? Am I missing something?
Nope, it still should work!
Thank you so much for sharing your talents with us. I’ve complete Baby JESUS, Mary & Joseph and it is so cute. Thank you again for the pattern. Blessings!
Hi Beth!! I’m super excited starting this project. What does it mean Hdc? Tks!
Cheers from Chile!!!
Hi Cecilia! HDC means half double crochet :)
Hi Bethany, I have just bought your pattern and am starting to make Joseph.
Can you please explain what you mean by “Sc in same st” after Ch 1? And how do you “Join” when you finish that row?
Thanks very much!
Hi Tammy!
This is not worked in a spiral, it’s worked in joined rows. So work a ch 1, then look below the ch 1 and notice the first st of the round. That is where you will work your first st. Then, once each st has been worked into, you will join with a sl st with the first st of the round.
Thanks so much for your quick reply Bethany! It’s working well for me now :)
I have no idea how to put together the two pieces of the manger. Could you send me a link to a video for the manger? I bought the pattern so I thought that would help, but I cannot get it to look like your example. Thank you.
There is no video Cindy, I am sorry! I would love to try and help. The smaller piece simply nests inside the taller piece and you sl st the tops together.
Hello again! I’m confused about the end of row 10 onto 11. I’m left handed so I know to turn clockwise. At the end of row 10 do I turn or just go clockwise and continue down the raw edge? Thanks in advance.
Yes! You are essentially just working a border of hdc all around the rectangle.
Hi Beth. I got stuck at row 11 of the manger. May I know how do I hdc down the raw edge? Do I use the loops? I can’t seem to find the loops. Do I need to go a row down the “loops”? Thank you.
There are no loops, just find somewhere to put your hook and try to make it as even as possible.
I see. Thank you. By the way, did you get to work out the issue in row 4 of the angel’s wings? (comment posted on the angel page)
Hi Beth, don’t understand how 11 , I’m a beginner. I was able to make Mary and Joseph. Thanks
Oops working on the manger row 11
You are working a “frame” around your rectangle so you eliminate the raw edges and can now work all around in joined rows.
Is the top of the manger wrong side up when you stitch it inside the bottom?
No the are both right side up (sides going up, like a little rectangular tray), the top piece nests into the bottom piece.
On line 12 of the top of the manger…it is hdc correct, not dc?
Row 12 or 11? Row 12 is worked in SC and row 11 is working in hdc
On the bottom of the manger step 12, what do you mean by in the third loop in each dc around?
It’s a loop on the back of a hdc stitch.
Hi, loving this pattern, thanks! Though I have a question. I do remember seeing somewhere that you made another pattern for the manger? And see others have found it. But I can’t find the pattern, Is there a link you could send me or maybe tell me where I might find it?
Thanks so much.
You want the old version? You can find it here:
https://www.whistleandivy.com/nativity-cal-manger/
Bethany it’s still linking to the newer pattern.
Yes, I have since updated everything. The older version is gone! But the newer version looks the exact same but uses less confusing instructions, so there is no need for the older version!
Hi, I’d lilke to buy this pattern on Ravelry, but I see it was published Nov 2016. And from this blogpost, I see that you have adjusted the pattern to make it easier. Are these adjustments reflected in the Ravelry pattern? I’d like to know please, otherwise I will just use these free updated blogposts. Thanks so much!
Yes the revelry pattern is updated!
I’ve made half dozen nativity sets in #10 crochet thread, which makes very loose looking stitches, no matter the tension. So for the manger on row 13 I’ve had to sc2tog at each corner (48 st) to cinch up my corners. It turned out well I’m happy to report (didn’t need to reduce when I used regular yarn).
I wish you would put a video on of the actual crocheting of the manger.
In row 11 don’t you actually go anti -clockwise . I’m not sure how to sc in the third loop in each hdc
around
Yes, you go counter clockwise, but that is the way you would normally work, unless you are left handed. The third loop is the loop behind the two loops. It makes a nice corner, but if it’s keeping you from finishing, you can simply work in the back loop instead.
Thanks,I managed to do the new manger pattern far more easily,looks more like your now. Appreciate it.
Gaye
how to down load these nativity patterns.
You can get the PDF on Ravelry:
https://www.ravelry.com/patterns/library/nativity-set-7
Love this! Quick question, for the manger in row 11 are we meant to ch 2 first for the corners as the pattern says ( turn 90 degrees, hdc 2 more in the same st for a total of 3) just wondering where the 3rd hdc comes from.
Oh and you have missed the h off the hdc in row 12 of the top.
Thanks so much for creating such and easy pattern!!
So there isn’t 3 hdc, there are 3 sts, because the last sc of the row, and then you work an additional 2 hdc in same stitch.