
This post contains affiliate links, click here for more info.
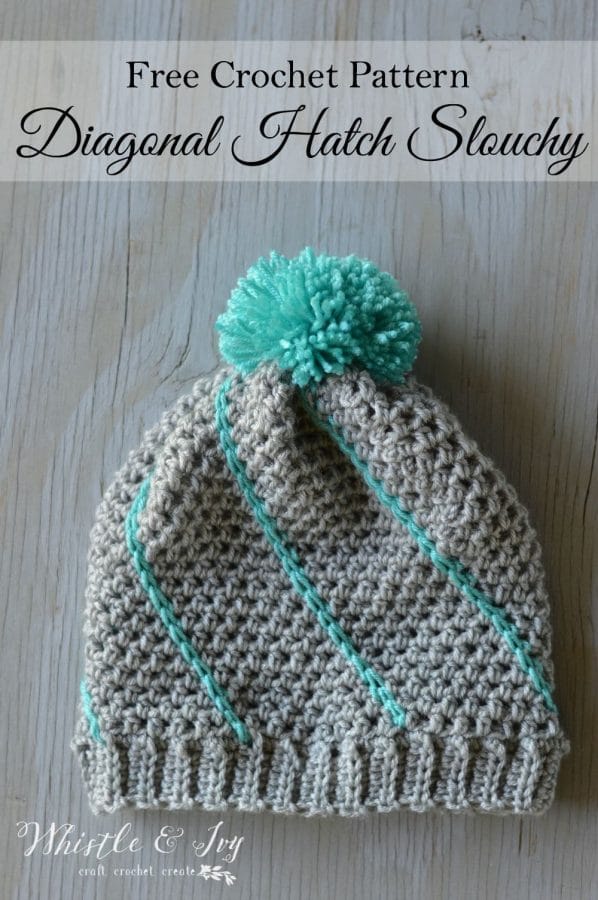
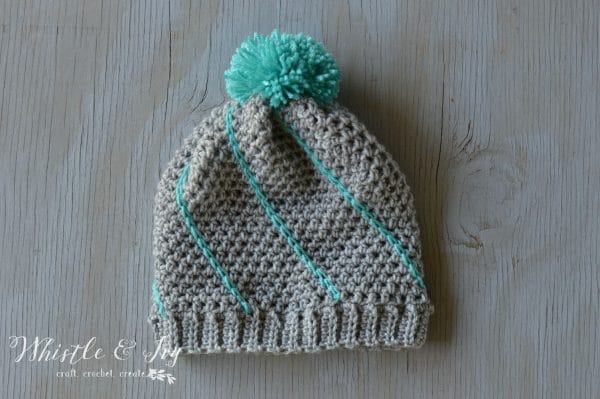
This week we finally did something I have been planning on doing since we moved into our first house; we ripped out the two overgrown and matted evergreen bushes in the front yard! I won’t bore you will the details, but suffice it to say, we were able get rid of them for free, but with a massive amount of elbow grease. I am so excited to plant some bulbs for spring time and have a bit neater looking front yard. Our house was built in the 50’s, so it will take quite a few projects to update it a bit. Even though we have been working on the shrubs, I was still able to revamp this crochet pattern from last year: the Diagonal Hatch Slouchy Hat.
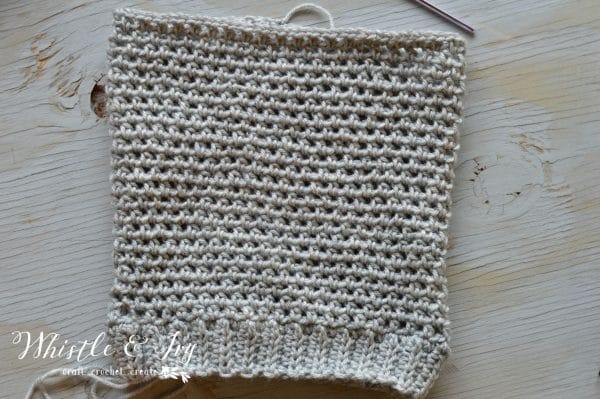
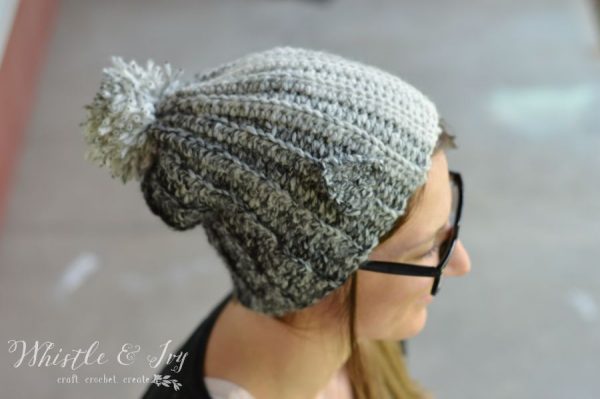
One of my favorite things about this hat is it works up so fast. And because you make the band first, the sizing is completely customizable.

You’re tired of sifting through complicated tutorials and patterns that leave you feeling overwhelmed.
Let me help.
PICTURE THIS:
Instant access to a library of modern, easy-to-follow patterns
Gifting your handcrafted treasures to your loved ones.
Feeling accomplished by your beautiful makes
It’s time to make your crafting experience as joyful as it should be.
Please remember: You are free to use this pattern to make and sell, but do not republish or distribute this pattern in any way. DO NOT use my photos in your listings. Please do share my blog links! It’s a quick and FREE way of supporting Whistle and Ivy and more free crochet patterns in the future.
Abbreviations: (American Terms)
Ch – chain
Sc – single crochet
hdc – half double crochet
Sl st – Slip Stitch
St – stitch
Sk – Skip
BLO – Back Loops Only
Diagonal Hatch Slouchy Hat
What you need:
- Worsted Yarn (Knit Picks Brava – Cornflower, Dove Heather)
- G Hook
- Sharp Yarn Needle (for weaving in ends nicely)
Hat:
1. Join yarn at the seam. Ch 1 and sc all around the hat. Work about 3 sc sts over two vertical rows for a total of about 76 sc sts. Join with a sl st.
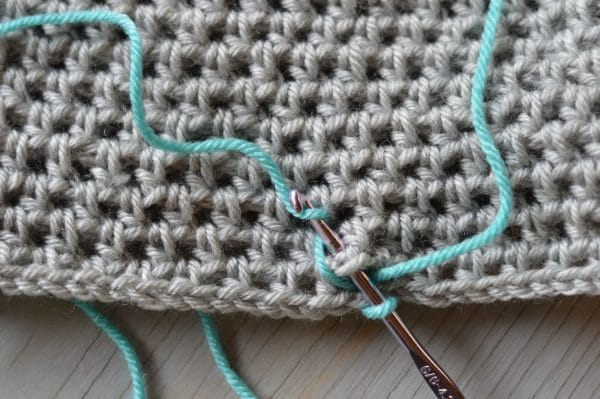
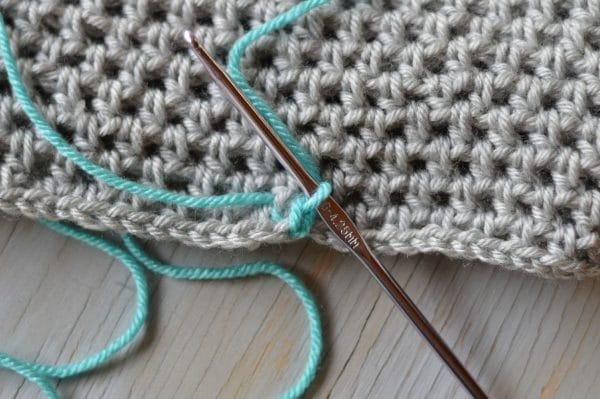
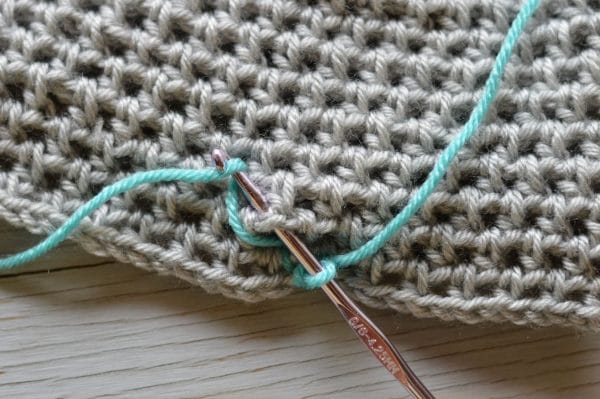
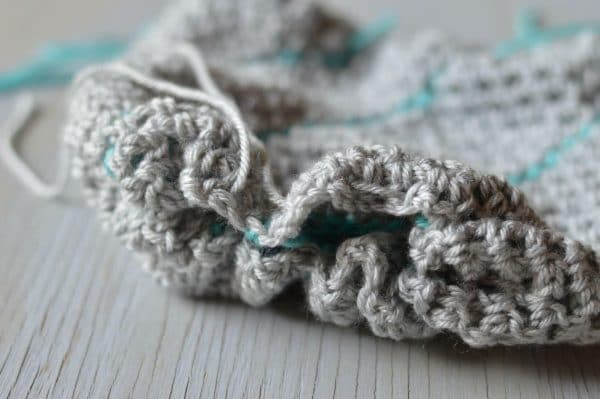
Now, using your second color you can work the hatches. The diagonal hatch is essentially a sl st working through the spaces between the hdc. They look diagonal because that is the shape that the spaces take naturally. Turn your hat upside-down, and work from the top (which is at the bottom) upwards. Start anywhere, pull up a loop in the middle ch of a space.
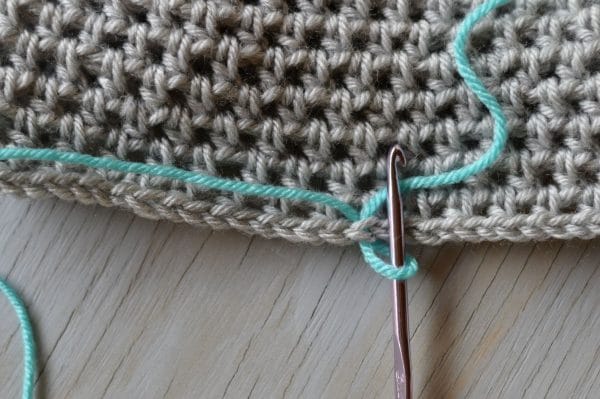
Insert your hook in the space below the ch you started at, and come up through the next space up.
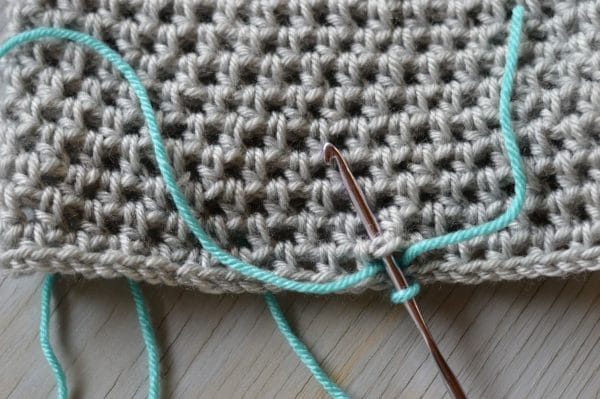
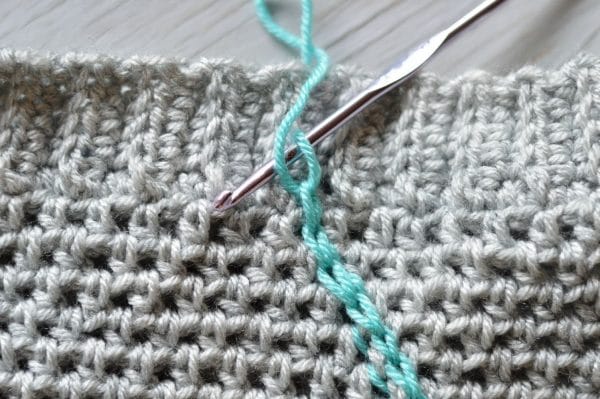
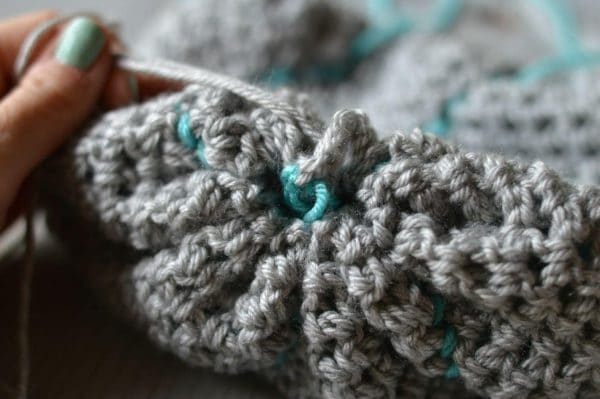
Tie a sturdy knot (weaving-in doesn’t really work with the contrasting colors), and clip ends.
Close the top by taking a piece of yarn, and sewing in and out through the top spaces. Be sure to turn your hat inside-out before closing it. I went in and out through every-other space. Pull it tight to close, and tie a very secure knot.

Don’t miss a pattern or post! Subscribe here.
Happy crocheting!


Bethany…. I absolutely love detailing my crochet project this way. I like to write stuff using this method also. Things like….” let’s it snow” ,or the person name,or initials.
Christmas trees are amazingly fun at Christmas time. Thanks for the tutorial!!
Your friend,
Debi in WI
I am having trouble with the diagonal stripe. I have the chain looking stitch, but also have another line along side it. Can you help please
That is how it looks, you are doing it right! Make sure it’s nice and loose though, so you may need to go up a few hook sizes.
I’m confused whe starting the hat. You say “Ch 1 and sc all around the hat. Work about 3 sc sts over two vertical rows for a total of about 76 sc sts.” So does that mean sc around the entire hat once and then start 3 D.C. For every two rows?
The rows are new vertical because the strip you made is a band. I just mean to explain how many stitches to work and how often to work them. If it’s confusing, just ignore that part and work a row of sc any way you can, achieving 76 total stitches for that row.
Im confused when it says (5 sts). Help! 😂
That is the total count for the row :)
Can this be made with a size H hook?
I’m so sorry, I know you addressed this row before, but I’m still a little confused. “Sl st one time, and ch 2” (seems easy enough). Work a hdc in the first ch sp (of the chain 2 I just did? Or from row 2?). Ch 1, hdc in next sp (my stitches are starting to lean like there isn’tenough room. Is there an implied stitch skip?) . Repeat this all around the hat (I would love to get to this step)
Is it sl st, ch 2, hdc in the next available stich, *ch 1 , hdc* repeat from *?
This hat is so cute and I would love some help in completing. Thank you!
You are working in the ch spaces between the hdc in the previous round. Does that make sense?
Hi! What is your gauge and which sz G did you use-4.00, 4.25 or 4.50? I made this with the 4.00 and it barely fits my 9yr old. It would be great if you could update, especially including the gauge swatch :) This hat is super cute btw and works up so fast- my kind of pattern lol
Ah! I’m sorry! Yes I will see about getting a gauge up. Terribly sorry for your frustration.
Hello! I got the hat component done. Very easy to follow! I’m not doing the swirl and notice that I have a line of v’s as shown in the picture, but I also have a line of stitches next to it. Does that make sense? What am I doing wrong?
Hm. I am not sure I am understanding! Can you show me a photo? You can email me directly, or tag/message me on Facebook.
I have tried and tried to make this hat, but each time I redo it, I end up doing something wrong. For some reason each time I try it the hat just gets wider and it doesn’t look like your hat did that. Could you maybe make a video tutorial on this hat? I would really appreciate that! And it would help me a lot!
Are you counting your stitches after each round?
I am not.
I am thinking you are working an extra stitch at the join. If you count, you can make sure you are working the same amount of stitches at each round, and your hat won’t get bigger as you go.
Alright I will try and see where I’m adding the extra stitch. Thank you!
I will definitely put this on my video list. I have ordered equipment and plan on revamping my whole youtube channel.
That would be so great thank you so much!
In round 2 of the hat portion, you say “working each hdc in the ch spaces.” Maybe I’m missing something, but there are no ch spaces in round 1, only sc. Is this a typo, or am I misreading something? TIA!
Also, for rows 3-22, are these rounds worked continuously, or joined with a slip stitch to the beginning of the round?
They are joined rows. It says to Ch 1 and join with a sl st.
Sorry! That begins on the second row, thanks for letting me know!
hey, i was wondering what does it mean slip stich one time? is it means in each round i will make a slip stich or it is one time only in the pattern?and if it in each round,where i should make it?thanks alot
It means work one slip st, and then ch 2. This staggers the row so you can work the hdc in the 1-ch sp from the previous round.
Is there a way to make this fitted instead of slouchy? My starting band is 70,for bigger head. Love this but where to join each round is very confusing
Yes, you can just make less rows so it stops at the top your head. Because it is gathered at the top, it won’t fit like a fitted beanie. How can I help explain the join better?
When making the foundation chain, do you count your slip knot as ch1?
I did step 1 but before I turn I have 1 more stitch I could make… Am I doing it wrong? (I didn’t count the slip knot as the first chain)
TIA
Hm. I don’t think so. Are you beginning in the 2nd ch from hook?
Yes I did. but I think I figured it out. Thank you :)
One more question… Does your “seam” (where you join each round) stay align with the seam on the band? Or does it kind of shift?
Mines been shifting to the left I’m not sure if it’s supposed to do that..
It shifts a bit, totally normal!
I had the same issue, but my seam shifted a lot. Is that normal? I had to take out a lot of rows because my hat was getting wider and bigger. Also, I don’t really understand what it means to slip stitch one time at the beginning of rows 3-22.
You are working one slip st, this moves you over so you can work in the 1 ch space from the previous round. Yes, your seam will shift because you are working in between the stitches from your previous round.
I’m having the same issue…. If I start in 2nd ch from hook I am actually in the 6th ch made and then have 5 more ch that I can HDC in…. Am I missing something?
Oops! You are trying to work a pattern that has a typo ;) That should be a ch 6.
Oh thank you! I thought I was crazy! Can’t wait to see my finished product!
How would you adjust this pattern for an infant?
You can make the band smaller to begin with by working less rows (depends on the age of the infant), and then make it about 6″ tall, or longer if you want it slouchy.
Is The starting chain suppose to be exactly 7 or is it suppose to be 70?
It’s 7. You are making the ribbed band first.
On Facebook Craft World is offering to send copies of your pattern to those not being able to use the link posted on Crafty World’s page. I don’t think that is appropriate.
What?! Can you send me a link?
What size (age group) does this hat fit roughly as completed just as patterned?
An adult woman.
What does BLO mean. I saw that on another set of directions recently. I have been crocheting for 40 years and do not know what that means. Help!
Sorry! It means back loops only.
Well now I have two in my future projects list! I had pinned the original. Love the update to it!
Thanks so much!
I love the little stripe and I thought it would be rather hard to do but that I can do. Soo cool
Thanks so much! I know it, looks tricky and complicated. ;)