
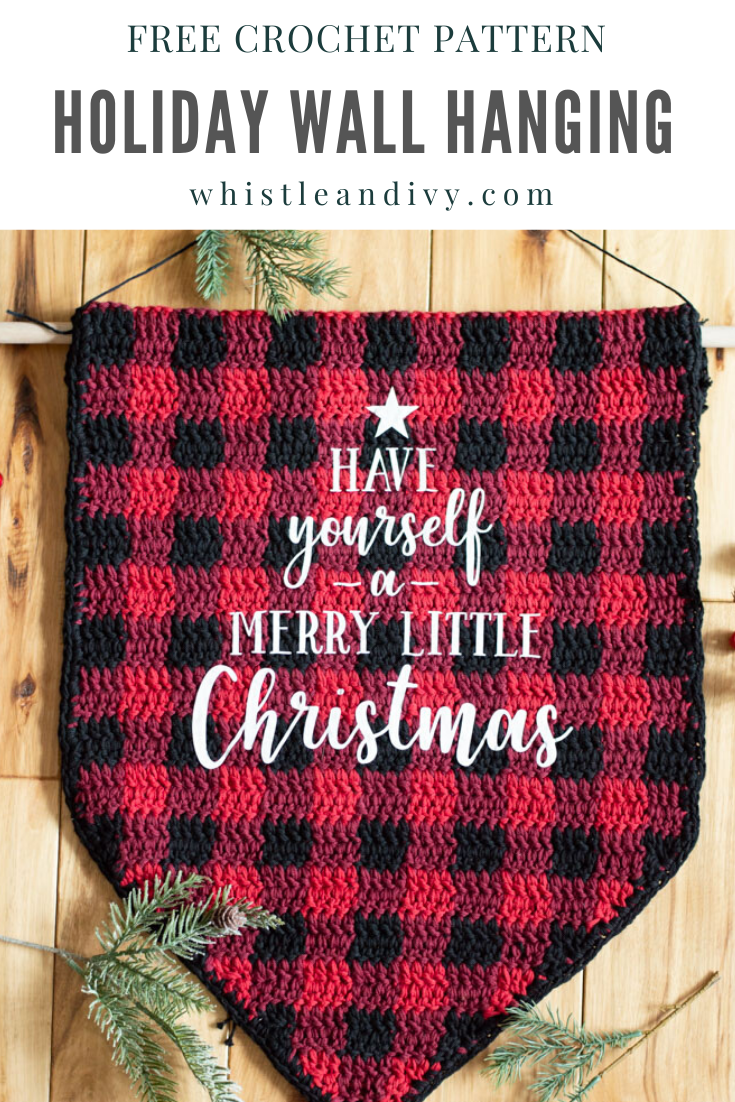
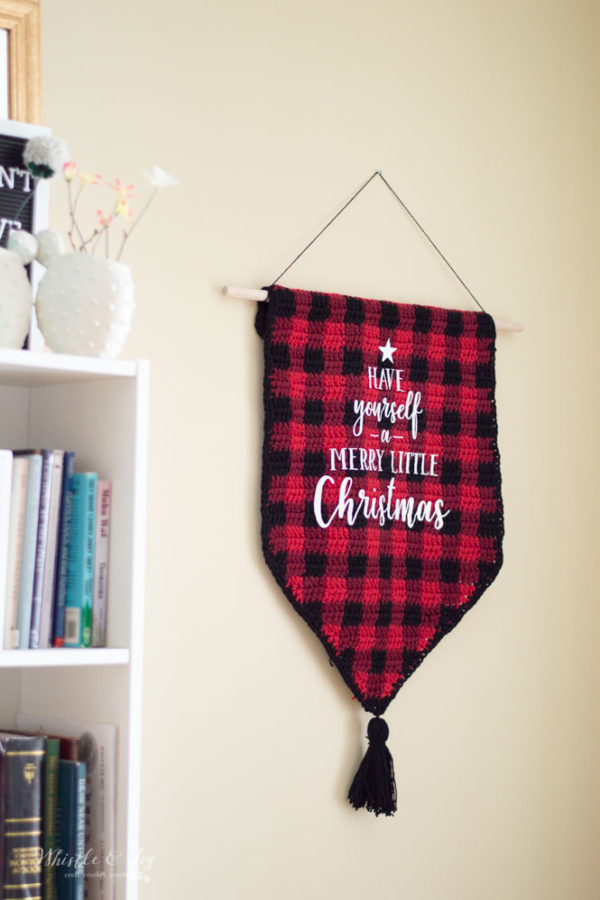
Add some handmade crochet plaid to your Christmas decor. This crochet plaid wall hanging is a simple crochet item with added heat transfer vinyl to make a crisp holiday greeting. This fun project is much easier than you think and you will love bringing together the two crafts. This post contains affiliate links, which means I get a small commission at no extra cost to you. Thanks for your support!
I’m kinda way surprised that crochet plaid wall hanging project came together so easily. I am a bit of a novice with my new Cricut Maker (I say “new” but I bought it last year on Black Friday and have done a total of 5 projects with it since…) so I wasn’t sure how the heat transfer vinyl (HTV) would work on yarn.
It actually works better than I expected! To be fair, crocheted fabric is not as smooth as a t-shirt, so it doesn’t works as perfectly, but it worked out so well I am devising new ways I can use HTV on other crochet projects. It opens up a lot of doors!
[convertkit form=1044470]

You’re tired of sifting through complicated tutorials and patterns that leave you feeling overwhelmed.
Let me help.
PICTURE THIS:
Instant access to a library of modern, easy-to-follow patterns
Gifting your handcrafted treasures to your loved ones.
Feeling accomplished by your beautiful makes
It’s time to make your crafting experience as joyful as it should be.
CROCHET PLAID WALL HANGING – FREE PATTERN
Please remember: You are free to use this crochet plaid wall hanging pattern to make and sell, but do not republish or distribute this pattern in any way. DO NOT use my photos in your listings. Please do share my blog links! It’s a quick and FREE way of supporting Whistle and Ivy and more free crochet patterns in the future.
PLEASE read my Disclaimer before working my free patterns!
What you need: (affiliate links)
– 7mm Hook
– Dishie 100% Cotton
1 Fiesta Red,
2 Pomegranate
2 Black
– White Heat Transfer Vinyl
– 5/8″ Dowel
– Christmas Cut File
– Darning Needle
Abbreviations: US Terms
Ch – chain
Sc – single crochet
Dc – Double Crochet
Dc2tog- Dc decrease
Dc3tog – Dc decrease of 3 sts
Sl st – Slip Stitch
St – stitch
Gauge: Not important
Note: Ch 2 doesn’t count, always work first st in the same st as chain. You will work with two strands. You can use one ball and pull from both ends.
(Worked from the top-down.)
With black:
1. Work a foundation sc with 52 sts. Turn.
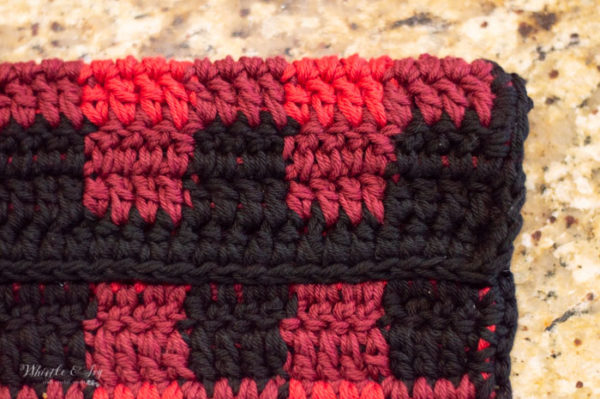
2. Ch 2. Dc in next 4 sts (switch to Pomegranate). Dc in next 4 sts. Switch the black. Continue alternating between pomegranate and black, switching every 4 sts. Turn (you will end on black). (52 sts)
3. Still using black, ch 2. Dc in next 4 sts (they should line up with the black from the previous row, making the completing square block). Switch to pomegranate. Dc in next 4 sts. Continue alternating between pomegranate and black, switching every 4 sts. Turn. (you will end on black). (52 sts)
Drop Black.
4. With Pomegranate, Ch 2. Dc in next 4 sts. Join red. Dc in next 4 sts with Red. Switch to pomegranate. Continue alternating between pomegranate and red, switching every 4 sts. Turn (you will end on pomegranate). You can drop red at the last st you used and pick it up when you come back to it, or you can carry it to the end and carry it until you need it again for the next row. (52 sts)
5. With pomegranate, ch 2. Dc in next 4 sts. Change to Red. Dc in next 4 sts. Switch to pomegranate. Continue alternating between pomegranate and red, switching every 4 sts. Turn (you will end on pomegranate). Be sure to carry red all the way to the end so you can pull it up when you need it in 2 rows.
Drop Red.
6. – 25. Repeat rows 2 – 5 respectively until you complete 25 total rows.
triangle bottom:
Continuing where you left off: Turn. Drop Red and bring up black.
26. Ch 2. Dc3tog. Dc in next st. Switch to Pomegranate. Dc in next 4 sts. Switch to black. Dc in next 4 sts. Continue alternating between Pomegranate and Black every 4 sts for the next 36 sts. With black, dc in next st. Dc3tog. Turn. (48 sts)
27. With black, Ch 2. Dc3tog (you will need to change to Pomegranate on the last dc of the decrease). With pomegranate, dc in next 3 sts. Switch to black. Dc in next 4 sts. Continue alternating between Pomegranate and Black every 4 sts for the next 32 sts. With pomegranate, dc in next 3 sts. Dc3tog (switch to black on the 2nd dc of the decrease)Turn.(44 sts)
Drop Black, pull up red.
28. With Red, Ch 2. Dc3tog. Dc in next st. Switch to pomegranate. Dc in next 4 sts. Switch to red. Dc in next 4 sts. Continue alternating between pomegranate and red every 4 sts for the next 28 sts. With red, dc in next st. Dc3tog. Turn. (40 sts)
29. With Red, Ch 2. Dc3tog (switch to pomegranate on 3rd dc of the decrease). With pomegranate dc in next 3 sts. Switch to red. Dc in next 4 sts. Continue alternating between pomegranate and red every 4 sts for the next 24 sts. With pomegranate, dc in next 3 sts. Dc3tog (Switch to red on the 2nd dc of the decrease). Turn. (36 sts).
Drop red, pull up black.
30. With black, dc3tog. Dc in next st. Switch to pomegranate. Dc in next 4 sts. Switch to black. Dc in next 4 sts. Continue alternating between pomegranate and black every 4 sts for the next 20 sts. With black, dc in next st. Dc3tog. Turn. (32 sts)
31. With black, Ch 2. Dc3tog (switch to pomegranate on the 3rd dc of the decrease). With pomegranate, dc in next 3 sts. Switch to black. Dc in next 4 sts. Switch to pomegranate, dc in next 4 sts. Continue alternating between pomegranate and black every 4 sts for the next 12 sts. With pomegranate, dc in next 3 sts. Dc3tog (change to black on 2nd dc of decrease). (28 sts)
Drop black, pull up red.
32. With red, dc3tog. Dc in next st. Switch to pomegranate. Dc in next 4 sts. Switch to red. Dc in next 4 sts. Continue alternating between pomegranate and red every 4 sts for the next 12 sts. With red, dc in next st. Dc3tog. Turn. (24 sts)
33. With red, Ch 2. Dc3tog (switch to pomegranate on 3rd dc of decrease). Dc in next 3 sts. Switch to red, dc in next 4 sts. Switch to pomegranate. Dc in next 4 sts. Switch to red. Dc in next 4 sts. Switch to pomegranate. Dc in next 3 sts. Dc3tog (Switch to red on 2nd dc of decease.) (20 sts). Turn.
Drop red, bring up black.
34. With black, Ch 2. Dc3tog. Dc in next st. With pomegranate, dc in next 4 sts. Switch to black, dc in next 4 sts. Switch to pomegranate. Dc in next 4 sts. Switch to black. Dc in next st. Dc3tog. Turn. (16 sts)
35. With black, Ch 2. Dc3tog (switch to pomegranate on 3rd dc of decrease). With pomegranate, dc in next 3 sts. With black, dc in next 4 sts. Switch to pomegranate. Dc in next 3 sts. Dc3tog (switch to black on 2nd dc of the decrease). Turn. (12 sts)
Drop black, bring up red.
36. With red, ch 2. Dc3tog. Dc in next st. Switch to pomegranate. Dc in next 4 sts. Switch to red. Dc in next st. Dc3tog. Turn. (8 sts)
37. With red, ch 2 Dc3tog (switch to pomegranate on 3rd dc of decrease). With pomegranate, dc in next 2 sts. Dc3tog (switch to red on 2nd dc of decrease. Turn. (4 sts)
Drop red, bring up black.
38. With black, ch 2. Dc2tog twice.
Don’t tie off.
BORDER:
Continuing where you left off: Ch 1. Work a row of sc down the raw edge of the triangle. Work 2 sc at the next corner. Sc down the raw side of the rectangle end. Work 3 sc in next corner. Sc across the foundation. Work 3 sc in other bottom corner. Sc up the other raw side. Work 2 in the next corner. Work a row of sc up the other side of the triangle part, and join with the first st of row 38.
Tie off.
NOTE: You MUST use 100% cotton yarn with this project ( I used Dishie) because you will need to apply the vinyl with a hot iron. I am not sure what other fibers can withstand a hot iron, but cotton worked really well.
I am not so good at designing graphics and I certainly couldn’t whip one up this season (Cubbie, I love you!), so I bought this bundle on Etsy. The bundle has some really cute sayings and I think I might have some other uses for them.
The main thing to remember with HTV is to lay the vinyl SHINY SIDE DOWN on your cutting mat, and to MIRROR your image before sending the job to your cutting machine.
**The Cricut Maker has precise settings, however it has two settings for heat transfer vinyl, so be sure to choose the vinyl under IRON-ON not VINYL. **
Once the vinyl is weeded, you can place it on your crochet plaid piece. It will be sticky, but might not stick well to the crochet fabric. That’s okay! Just place it and then iron it. Place a pillowcase between the vinyl and your iron.
If you find some of the vinyl hasn’t stuck yet, place the plastic back down and continue ironing. DO NOT peel back the plastic until all the vinyl is stuck to your crochet piece.
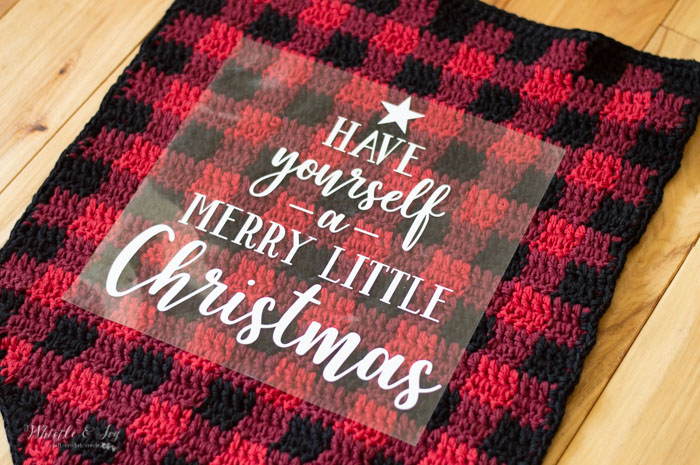
Let the vinyl cool for at least 5 minutes before peeling back the plastic.
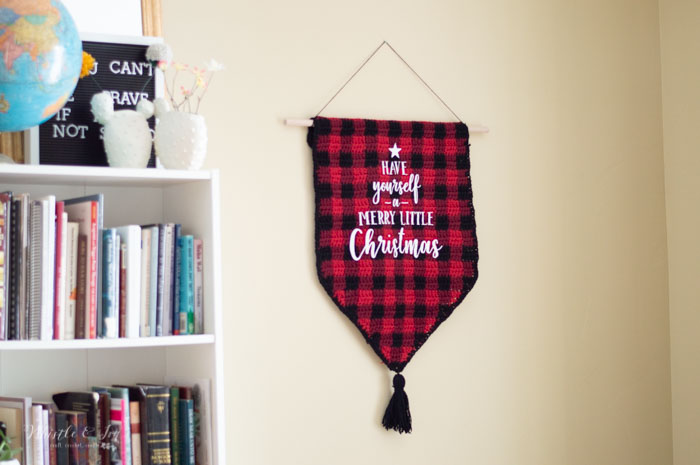
Next you can place the crochet plaid piece onto a dowel for hanging. At first I attempted sewing it in place, but you can see the stitches on the front and it was rather tedious, so I recommend hot gluing it. It’s not necessary to have the dowel in place when you are gluing.
Fold it down so 2 blocks are showing:
|
Glue it down with hot glue, forming a tube-like pocket that you can slide the dowel through.
Tie twine or string on either end to hang it with.
You can finish with a chunky tassel at the bottom!
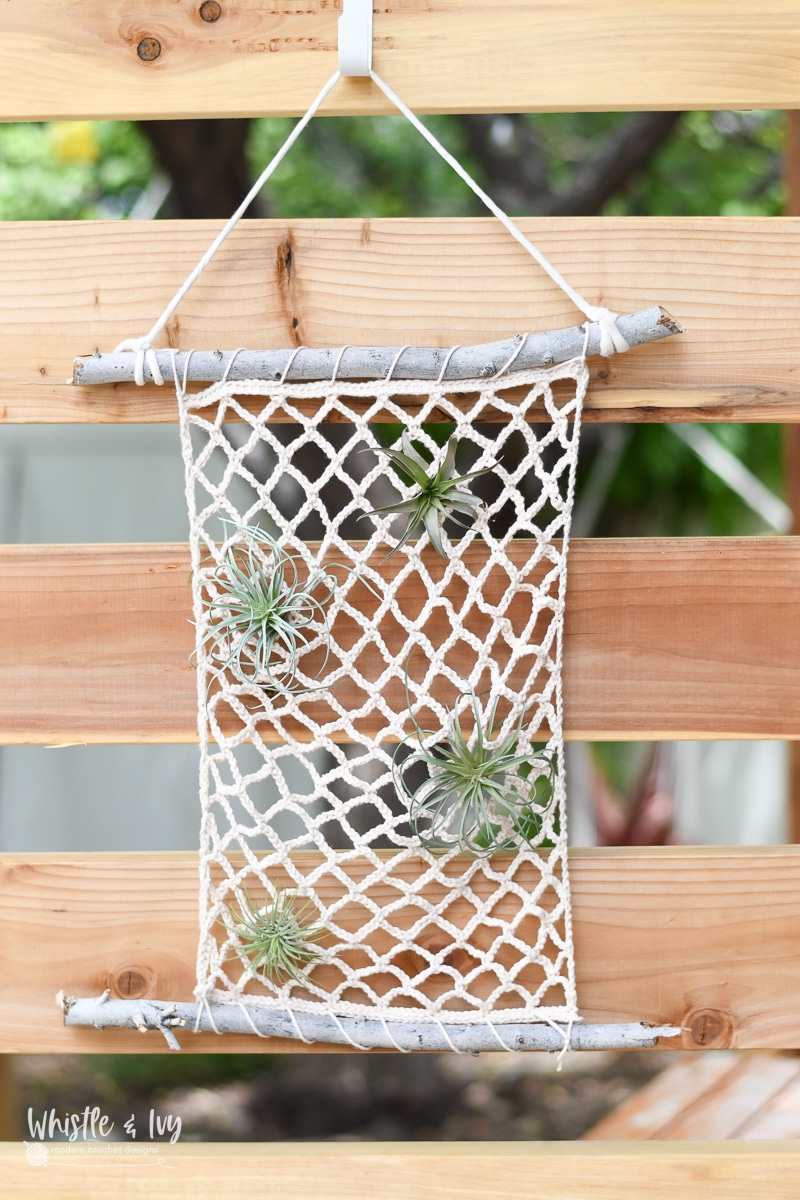
I really wanted to add some greenery to my crochet plaid wall hanging but I couldn’t figure out how to make it work. Hopefully you can, I would love to see your version!

[convertkit form=1044470]
xoxo,


Hello!
Do you have a suggestion for those of us that do not own a cricut machine, and still want to get the words on it? Are there pre-made iron transfers that can be purchased? Thanks!!
Working on this! I will get back to you!
hi, in looking at your banner, I thought that I could adapt it for a table runner.
I am a paid member and did not find it in the Christmas section or plaids.
how can I print a pattern and/ or do you have an idea of how do to what I want.
thank you
I’m sorry! I didnt put it in because I can’t provide the image file ( it doesn’t belong to me). What are your thoughts, should I put the pattern download without the file?
Hi, what letter is a 7mm hook? I have a k which is 6.5 and L which is a 8mm
It’s not a letter (so weird, how they do that, isn’t it!)
So it’s just a 7mm? Never seen that guess I will have to look at my craft store. Thanks
Mary… google ‘crochet hook conversion’ it will give you all the letters you are looking for. There is no size 7mm. For some reason it goes from 6.5 to 8mm. 6.5 is a K and 8 is an L.
I found the hook thank you. I made this and it seems pretty long could you tell me the length that you have , thanks
Just because I really don’t have anything for my door for Thanksgiving I thought maybe I would try this Holiday Wall Hanging in fall colors… using the Sugar n Cream 100% Cotton yarn in brown and orange…. and than see if I can have my grandaughter do the message.
I enjoy getting your emails every day… and I thought this one would be a good one to practice my Plaid crochet ….
Have fun crocheting!!
Toni
Love this idea!!
This is AWESOME 😊 I just got a cricut too (lots to learn) but I never even dreamed that I could use my cricut with my crochet projects WOW thanks for leading the way ❤️
You’re welcome!