
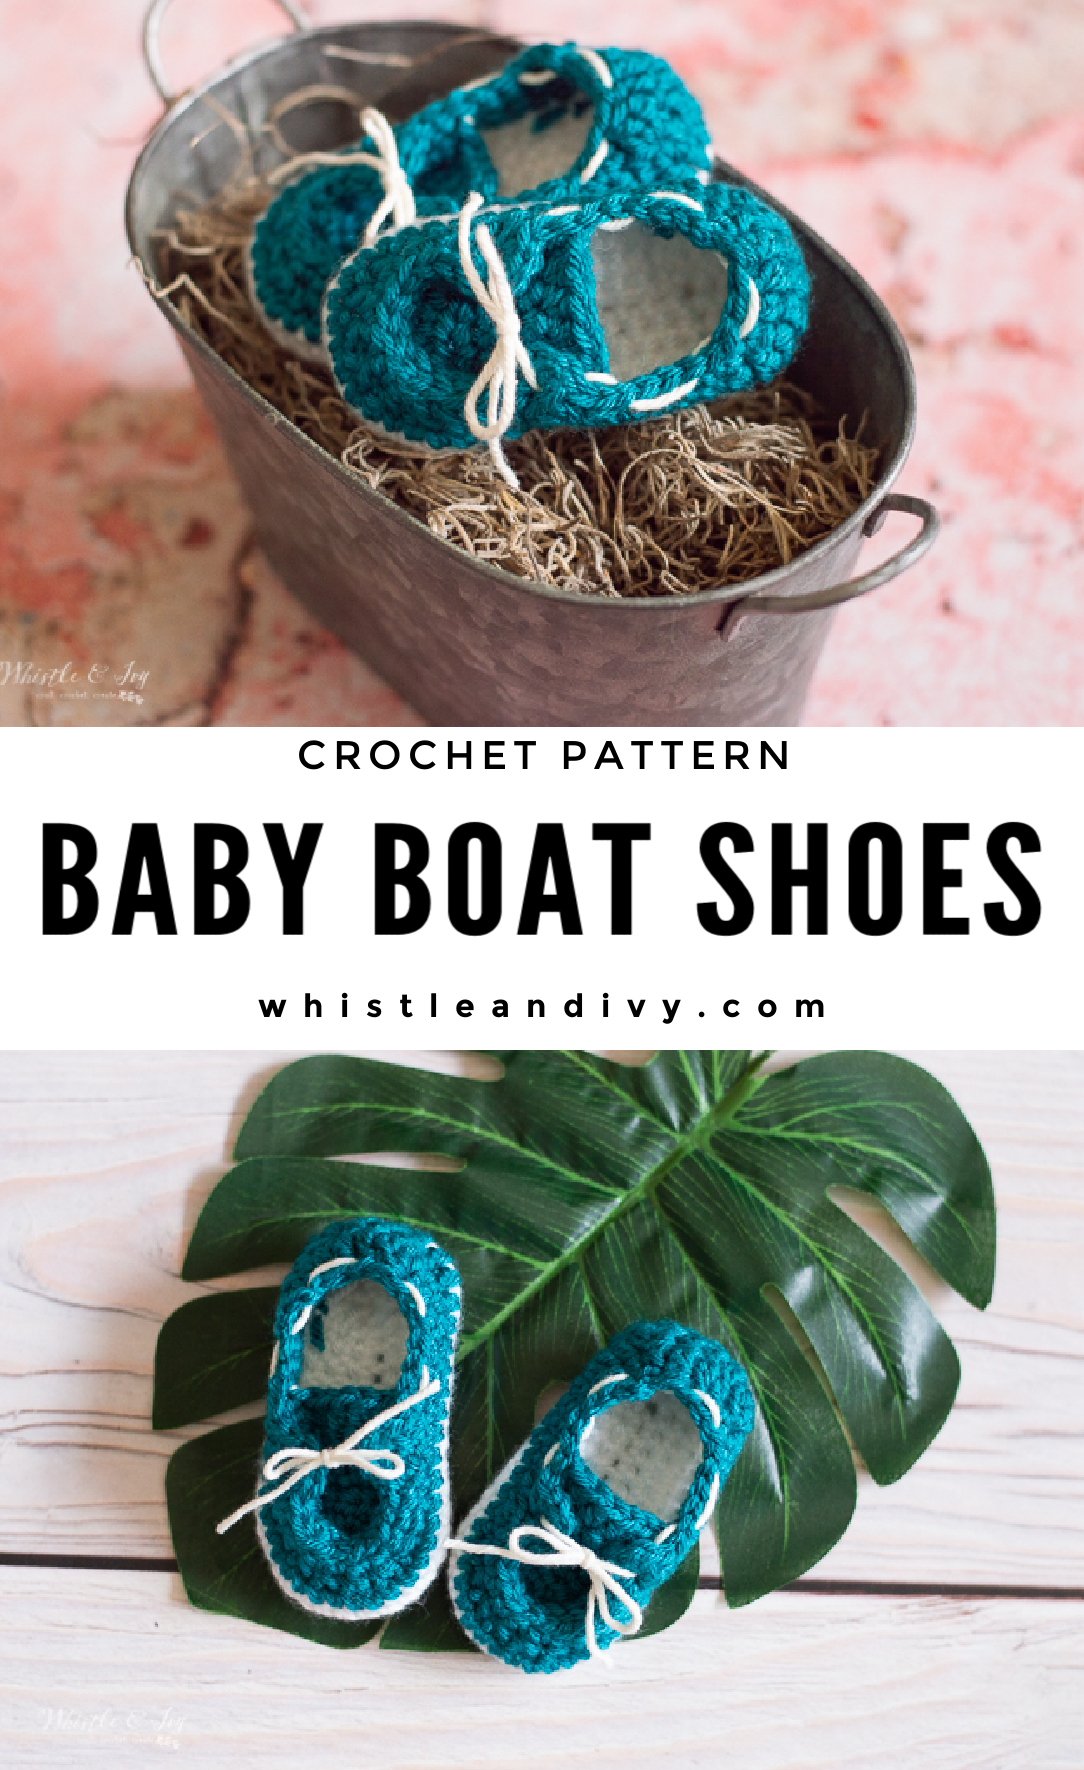
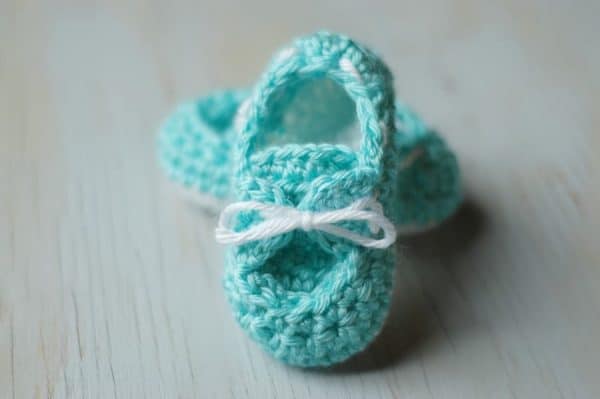
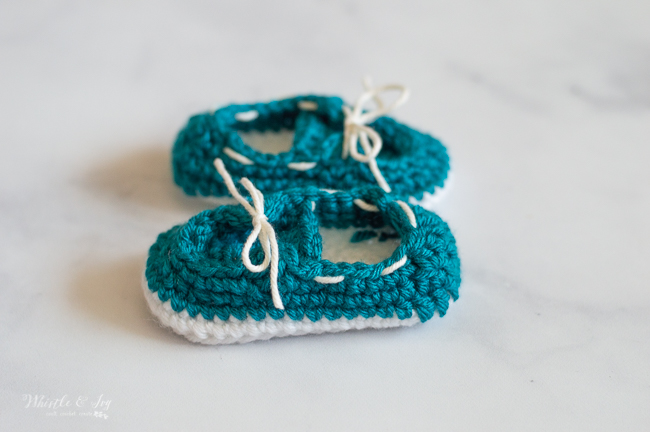
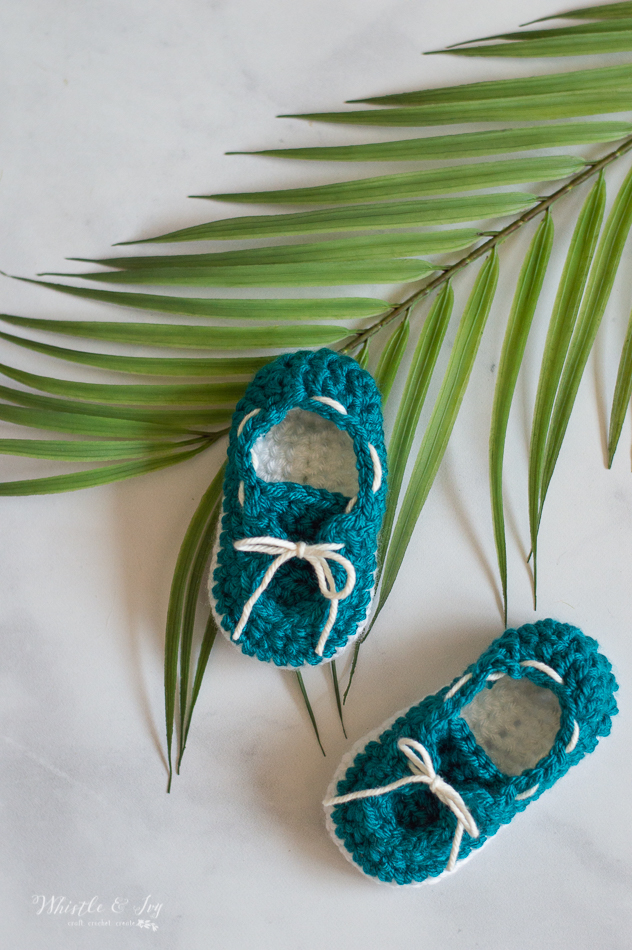
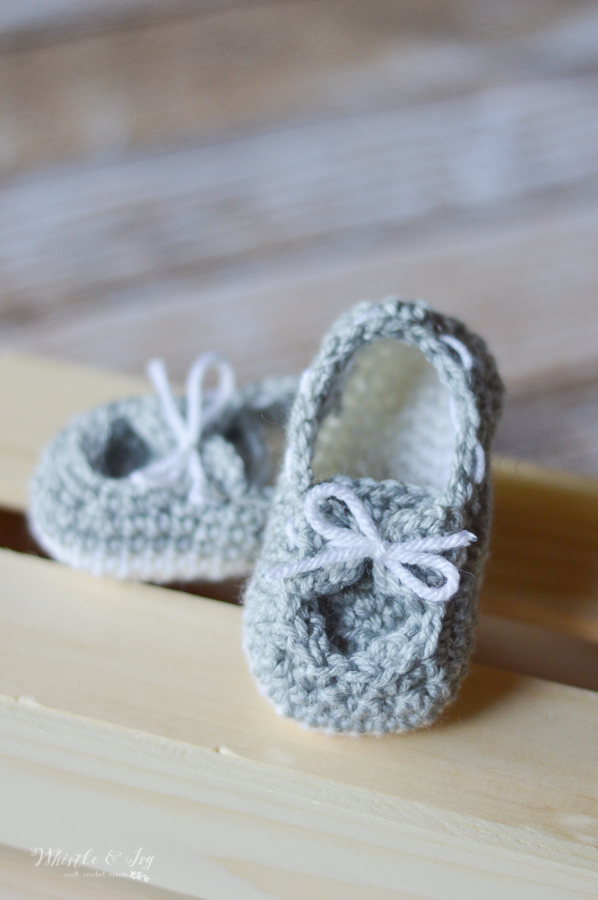
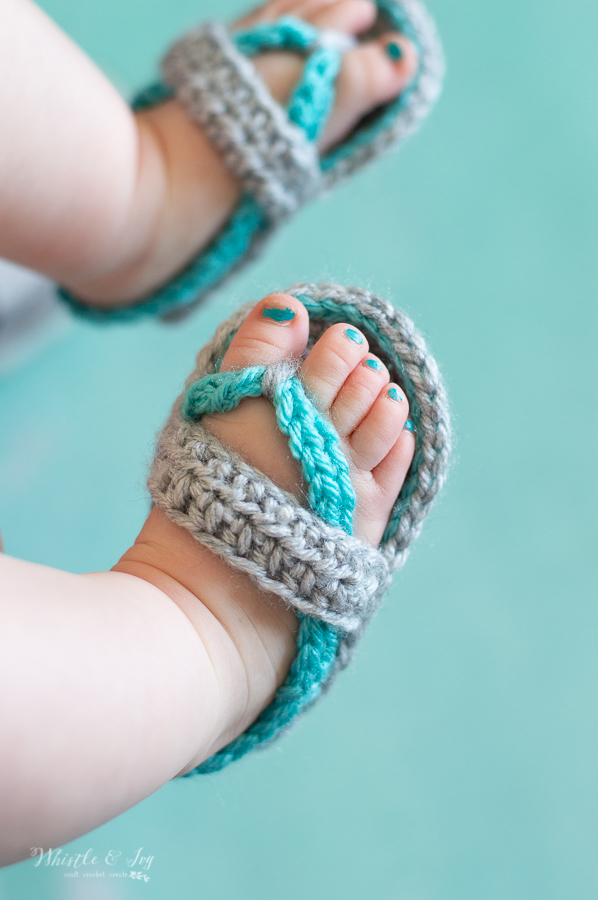
These darling crochet baby boat shoes look just like boat shoes or Sperry’s! Mama will love the trendy style and how soft and comfy these crochet booties are for Baby. These are great to make for your new little one, your toddler, or for an adorable baby shower gift! The free version includes 3-6 months, or you can get additional sizing, newborn – toddler, in the PDF from my shops! This post uses affiliate links, which means I earn a small commission from your purchase (click here for more info). Thanks for supporting Whistle and Ivy!
Imagine the warm sun on your cheeks, the balmy cool breeze coming off sparkling water, the glug-glug sound of water hitting large rocks and docked boats nearby, and maybe the soft cry of a water fowl. Your cares cannot be recollected as in this moment you only feel warm, airy, and carefree.
This is all the feelings I encapsulated into a crochet baby shoe design.
A bit over the top?
Maybe.
But I designed it as a young mother, trying my best, feeling like a failure, and wanting that picture-perfect, carefree seaside lifestyle for my life.
These shoes were the closest I could get at the time, but completing them and putting the finished booties on my chubby baby’s feet brought feels that came pretty darn close to that picturesque description: warm, light and comf
(we lived in Vegas at the time, so “warm” is not the word I would use to describe the weather at the time…)
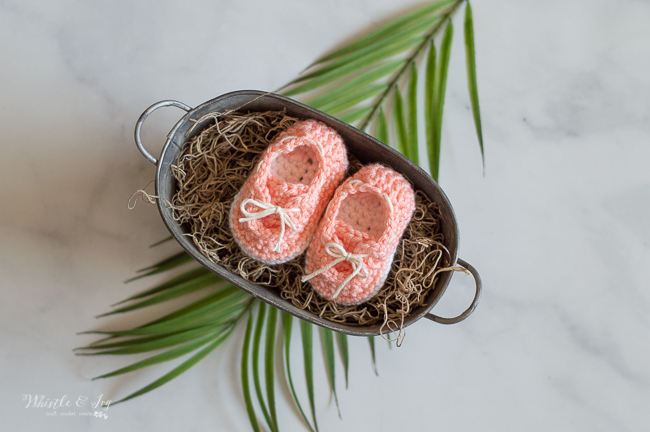
These cute crochet boat shoes are stylish, classic, comfy for baby, quick to make and so lovely to gift. They use very little yarn, so I am fairly certain you have everything you need to whip up a pair right now.

You’re tired of sifting through complicated tutorials and patterns that leave you feeling overwhelmed.
Let me help.
PICTURE THIS:
Instant access to a library of modern, easy-to-follow patterns
Gifting your handcrafted treasures to your loved ones.
Feeling accomplished by your beautiful makes
It’s time to make your crafting experience as joyful as it should be.
BABY BOAT SHOES – CROCHET PATTERN
I hope you enjoy this pattern! But please remember, the content contained herein is a copyrighted work, tediously designed by myself. Distribution of this pattern (or parts of it) in any way, digital or physical, or use of this pattern (or parts of it) to create your own patterns beyond personal use is strictly prohibited. You are welcome to sell what you make from this pattern, but please do not use any of my photos in your listings.
What you need: (affiliate links)
– 3.75mm Hook (or hook to achieve gauge)
– Medium Weight Yarn in your favorite Acrylic (Knit Picks Brava in 2 Colors)
– Darning Needle
Gauge: 9 sc = 2″ (Gauge Pattern)

WANT MORE SIZES?
Get EIGHT sizes from newborn to Toddler size 9, available in the downloadable PDF! Where would you like to shop today?
[Update: For those who have made these before, I have made an update to the small straps, you no longer need to turn your work. Hoping this update will make the pattern much easier to work!]
3-6 Months (Approx. 4”)
Ch 11.
1. Work 3 sc in 2ndch from hook, sc in next 4 chs, hdc in next ch, dc in next 3 chs, 7 dc in last ch. Working across the opposite side: Dc in next 3 chs, hdc in next ch, sc in next 4 chs. Join with a sl st. (26 sts)
2. Ch 1. 2 sc in next 3 sts. Sc in next 9 sts. 2 sc in next 5 sts. Sc in next 9 sts. Join. (34 sts)
3. Ch 1. *Sc in next st, 2 sc in next st* work 3 times. Sc in next 9 sts. *Sc in next st, 2 sc in next st* work 5 times. Sc in next 9 sts. Join. (42 sts)
4. Work this round in BLO: Sc in each st around (42 sts). Join with sl st and join second color. 5. Ch 1. Hdc in next st. Dc in next 7 sts. Hdc in next st. Sc in next 33 sts. Join. (42 sts)
6. Ch 1. Hdc in next st. Dc2tog. Dc in next 3 sts. Dc2tog. Hdc in next st. Sc in next 7 sts. Ch 4. Sc in 1st ch. Sl st into next st on shoe. Sc in next st. Sc2tog 7 times. Sc in next 2 sts. Ch 4. Sc in 1st ch. Sl st in next st on shoe. Sc in next 7 sts. Join. (33 sts, not counting 4 chains and sc)
7. Ch 1. Hdc in next st. Dc2tog. Dc in next st. Dc2tog. Hdc in next st. Sc in next 7 sts. Work 5 sc in 3-ch loop from previous round. (Starting in next sc) Sc in next 10 sts. Work 5 sc in 3-ch loop from previous round. (Starting in next sc) Sc in next 7 sts. Join. (39 sts) Tie off.

TONGUE:
Ch 5.
1. Sc 2nd ch from hook. Hdc in next 2 sts. Sc in last st. (4 sts) Turn.
2. Ch 1. Work 2 sc in same st. Hdc in next 2 sts. Work 2 sc in last st. (6 sts) Turn.
3.- 6. Ch 1. Sc in each st across. Turn. (6 sts)
7. Ch 1 Sc in next st. Hdc in next 4 sts. Sc in next st.
Finish off. Leave a long tail.
CONSTRUCTION:
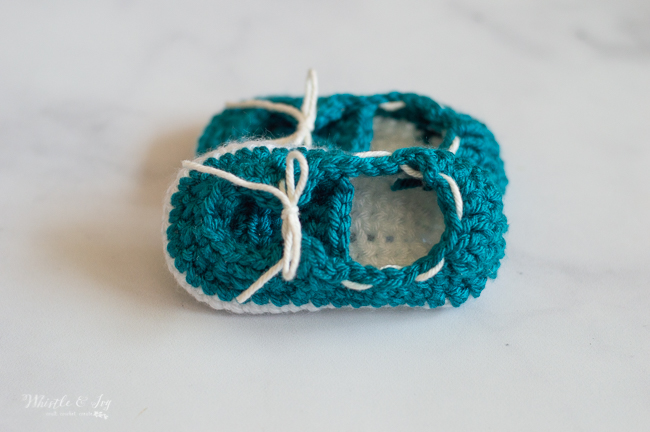
Attach to shoe with yarn needle and the tail. Start about 2 sts above the strap on the shoe, and go in and out with your needle, all around the toe and over to the other side. Make sure to secure the end very well.
To finish, using white yarn (I prefer cotton) and a yarn needle, sew down through the hole in the left strap. Leave enough yarn on your end to tie a bow later.
Continue around the shoe, just under the top loops, and sew around the shoe. Finish by going up and out through the right loop. Trim yarn if needed.
Did you enjoy these little baby boat booties! Follow us on Facebook!
(or join our Facebook Crochet Club!)

xoxo,


Hey! Where can I find the video for the toddler size boat slipper? I am ending up on the toe part for the dc decrease and I can not figure out how. Ive re did it about 4 times and cant get it right. Thanks in advance!
Hi Brooke! I don’t have a current video for this pattern, want to send me an email with a photo of your work and I can try to assist? Bethany (at) whistleandivy (dot) com
Do you have a pattern for these for older kids? Like size 1/2
Not at this time, very sorry! It has been on my list for a very long time 😬😅
Hi there. I’m wondering if you could help me adjust this shoe to a 2 year old’s feet (size 5)
Hi! That size is included in the full pdf version! See this post for my shop links.
Hi,
I love love love these and want to make them for my 18/24 grandson, is the chain still the same amount? And do you just do more rounds to get the correct sole size? 💚
Hi Mary!
The paid pattern download includes sizing from newborn to Toddler size 9 :)
Congratulations to your family on new baby! 4 is a good number!💚💜💙💕
Thank you so much Jackie!
Hi, I’ve made this twice now and the wider part of the sole is at the back and the smaller at the front?
Surely it should be round the other way? I’m flummoxed 🙃🤯🥴
Pease help 😩
Are you thinking the dc decreases are around the toe? That is actually the heel, the toe is completed later when you sew the top in places.
Awwww this is so cute!
Thank you!
Love Sis,what a sweetie. I like the cowl,hat combo, what a neat idea.
what size would you say the 9-12 month are? size 4?
Hi. I have a question regarding the heel of this slipper. It just seems like the decreases are pulling it in an awful lot. Someone has asked me to make a pair for them, but I’m afraid that the top edge is going to be cutting into the skin above the heel due to its shape. I had the same issue when I made the women’s size, so I did the sl sts extra loose, and they fit fine that way. I’d really like some advice on these.
Hi Katie! I have tested these on my own children and on my nieces and nephews. The decreases are to make them more functional so they stay on Baby’s feet. If you met the gauge, they should fit very well.
Finding this very difficult to follow, might help me if your pattern included which row corresponded to which part of the shoe – e.g. is row 5 the toe or the heel?? When I start row 5 I’m just slightly off centre the heel of the sole, so I’d end up with the decrease stitches just going down the side of the shoe. Did watch the video but doesn’t help me.
The row goes around the entire shoe. Are you getting off on step 5?
hello ……how are u doing .?
i applied it .with 4.5 hook size …3-6months …. its too small….
Did you meet the gauge?
hi, I’m making 9-12 months
Ch 4. Sc into 1st ch. Sl st into next st on top of shoe. Turn so you are working from the back of the small strap you just made, from the inside of the shoe.
can you please learn me what you mean about this how i make ( sl st into next st on the shoe ) ?
thanks ♡
Have you viewed the video? That might be most helpful to you. I am not sure how to better explain it.
Hi, I’m making the 0-3 month shoes, & the little strap has me confused. On the last row (or turn) of the first strap it says “… Sk 1 st and sl st into the next st on shoe. Turn.” what does Sk mean? At first I thought it was a typo but I tried doing both a Sl & Sc but neither seemed to work. please help.
Sorry for the confusion! It means skip.
The tongue part is confusing to me :| I hope you can elaborate further. It says “3-7” so I did the same instructions on row 3 all the way to row 7 but it doesnt’ look right. Mine turned out to be crooked and nowhere near how it’s supposed to look like.
Yes, that is correct! I am not sure why it would look crooked though. Are you beginning in the same stitch each time?
I will be teaching a 5th and 6th grade girls crochet class and wanted to give this as a possible project. Would it be okay to use for that? I wasn’t sure since it said I couldn’t redistribute it. Of not that’s totally fine. They are so adorable. I will be making them either way myself. Thanks for making the pattern.
How much yarn do these take. I need to order some more and don’t want to be left with loads left over. Thank you
Hardly any. You can make several pairs from one skein.
Step 3 is being really difficult for me, it seems there should be 2 sc in next st* work 7 times not 5 it’s the only way I can get it to end in the right place, everything is fine up till then. Please help
What is your stitch count? Did you watch the video?
I don’t understand what it means to move my marker up -up one stitch? I’m just starting to crochet and have done some baby booties please explain what that means. Thank you
You aren’t moving it up one stitch, you are moving it up with each round. The sole is worked like a spiral, not in joined rows, so it helps you know when you have reached the end of the row, and it helps catch a possible mistake within the row. It is optional, but I *highly* recommend it.
Those are adorable!! I so wish that I had the talent to do this! Thank you for sharing it with us at the #HomeMattersParty
Hi there thanks so much for the cute pattern! Just a quick question when You say slip stitch to the beginning of the round do you mean into the chain one or into the first sc? Because in round 6 the only way I can work the last 8 sc is if I do the last stitch I into the slip stitch. Unless that’s right? Some other patterns I’ve done say not to work the slip stitch as a stitch. Thanks for any help you can give :) I’m such a newbie!
You are welcome! You are working into the first st, the ch 1 doesn’t count. Is your count for the row correct? The sl st, and the ch 1 from the previous row will look like a little corner, and you won’t be working into either of them, your last stitch should be in the last st of the previous round.