
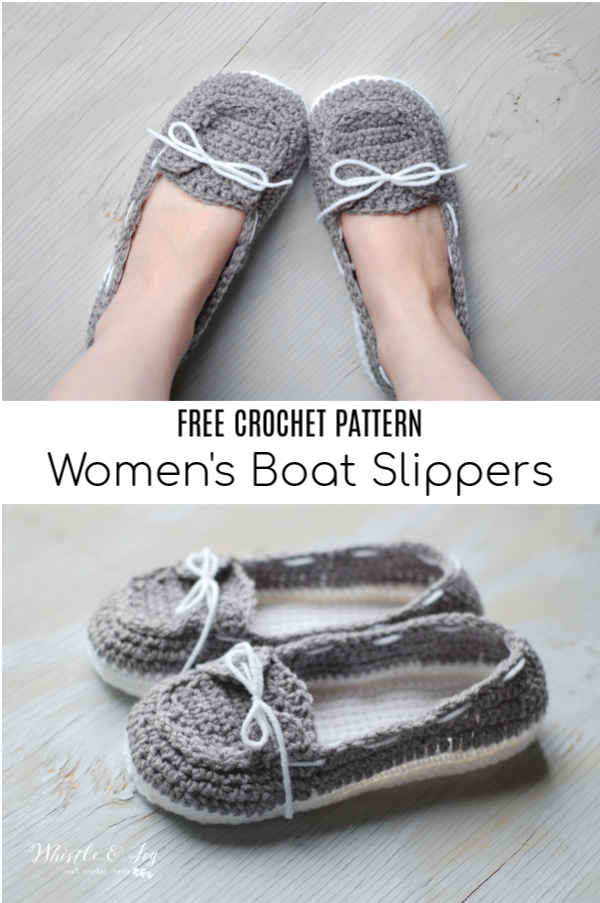
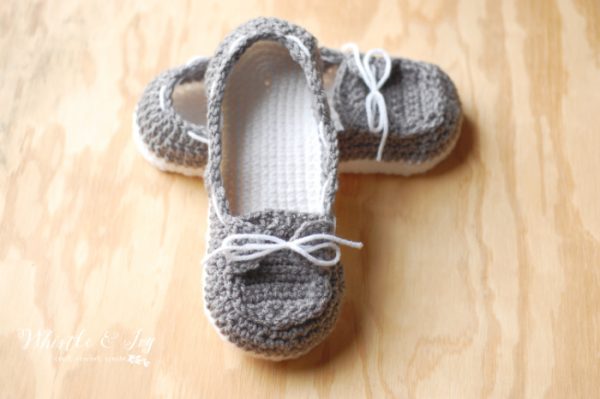
These crochet boat slippers look a bit like crochet Sperrys! You will love making them and love wearing them. They feature a double sole for extra comfort, and the ties are both decorative and to keep the slippers cozy and in place. Be sure to add one of these 7 tried and tested methods and make your slippers non-slip.
This post includes affiliate links, which means I get a small commission if you make a purchase at no extra cost to you. Thank you for your support!
These slippers (along with my Loafer Slippers) are one of my favorite patterns. I had the idea a few years ago to make these little Baby Boat Shoes. They turned out so darling that I decided I really wanted a pair for myself!
However, despite getting the pattern testing and making at least a million pairs (okay, that’s a slight exaggeration), it still had problems and I couldn’t bring myself to get it all fixed up until just this week.
Despite getting a bit burned out initially, these slippers still make me so happy and I hope if you make a pair that they make you happy too. ❤️

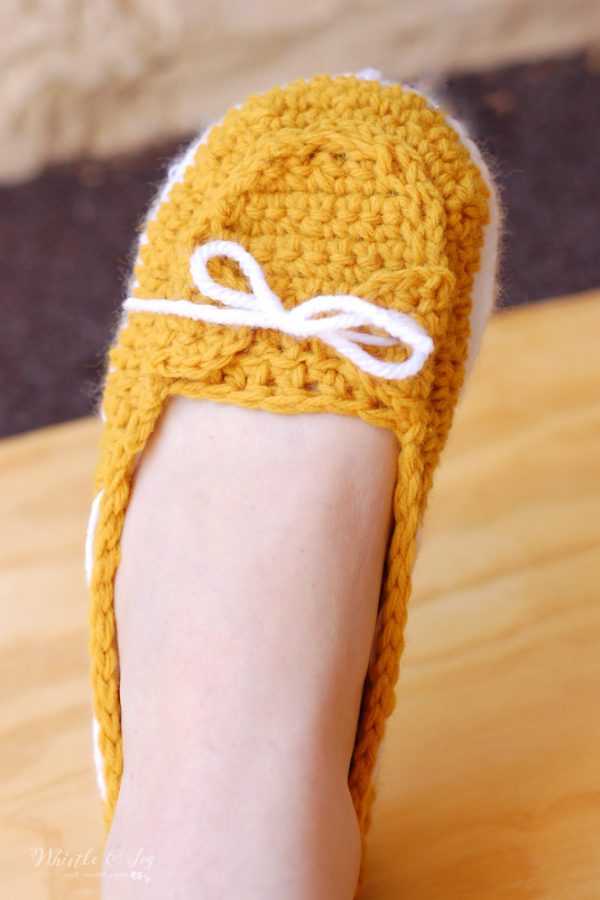
I made almost all of mine with white soles, but I can’t wait to see the colors you decide to use. I bet putting a bit of leather cord for the laces would be cute too!

You’re tired of sifting through complicated tutorials and patterns that leave you feeling overwhelmed.
Let me help.
PICTURE THIS:
Instant access to a library of modern, easy-to-follow patterns
Gifting your handcrafted treasures to your loved ones.
Feeling accomplished by your beautiful makes
It’s time to make your crafting experience as joyful as it should be.
CROCHET BOAT SLIPPERS – FREE CROCHET PATTERN
Please remember: You are free to use this pattern to make and sell, but do not republish or distribute this pattern in any way. DO NOT use my photos in your listings. Please do share my blog links! It’s a quick and FREE way of supporting Whistle and Ivy and more free crochet patterns in the future.
PLEASE read my Disclaimer before working my free patterns!
What you need: (affiliate links)
– Medium Weight Yarn in 2 color
– G hook
– Darning Needle
Abbreviations: US Terms
Ch – chain
Sc – single crochet
Sc2tog – Sc Decrease
Dc – Double Crochet
Dc2tog – Dc decrease
Hdc – Half Double Crochet
Sl st – Slip Stitch
St – stitch
Gauge: 8 sts = 2″ (Gauge Pattern)
⭐️ Want more sizes? US women Sizing 6-9 is available in the downloadable PDF!
Get it in the Whistle and Ivy Shop
Get it on Ravelry
Get it on Etsy
Love this pattern but want MORE? How about more sizes? You will LOVE The Endless Bundle – my membership program full of patterns, videos, courses, community, and much more. See you on the inside!
SIZE 8
Make two sole pieces for each shoe, 4 total.
SOLE: (approx. approx. 9 ½”)
(worked in the round)
Ch 26
1. Work 3 sc in 2nd ch from hook. Sc in next 16 chs. Hdc in next 3 chs. Dc in next 4 chs. Work 7 dc in last ch.Working across opposite side of chain, dc in next 4 chs, hdc in next 3 chs, sc in next 16 chs. Place a marker. Continue to round 2. (56 sts)
2. Work 2 sc in the next 3 sts. Sc in next 24 sts. Work 2 sc in the next 5 sts. Sc in next 24 sts. (64 sts)
3. *Sc in next st, work 2 sc in next st* work 3 times. Sc in next 24 sts. *Sc in next st, work 2 sc in next st* work 5 times. Sc in next 24 sts. (72 st)
4. *Sc in next 2 sts, work 2 sc in next st* work 3 times. Sc in next 24 sts. *Sc in next 2 sts, work 2 sc in next st) 5 times. Sc in next 24 sts. (80 sts)
5. *Hdc in next 3 sts, work 2 hdc in the next st* work 3 times. Hdc in next 24 sts. *Hdc in next 3 sts, work 2 hdc in the next st* work 5 times. Hdc in next 24 sts. (88 sts)
Join with sl st and tie off.
Match up your two sole pieces and using a sl st, stitch the two soles together, (wrong sides together) going through both loops of each sole. See Photos 1 & 2. Use white, or same color as your sole piece. (88 sl sts)
Body:
1. Using white yarn (or same color as your sole) start your round on st 18 from the middle of the toe. Face the toe downwards and count 18 to the right. See Photo 3. Going through the sl st loops, and working from the outside, Ch 1. Sc in same st. Sc 50. Hdc 7. Dc 10. Hdc 7. Sc 13. Join with sl st. Tie off. (88 sts)
2. Start your second color with a sl st in the sc where you made your join. Ch 1. Hdc in same st. Hdc in next 50 sts. Dc in next 24 sts. Hdc in next 13 sts. (88 sts)
Join with sl st.
3. Ch1. Sc in same st. Sc in next 3 sts. Sc2tog twice. *Sc in next 2 sts. Sc2tog* work 4 times . Sc in next 2 sts. Sc2tog twice. Sc in next 18 sts. Hdc in next 4 sts. Dc in next 4 sts. Dc2tog. Dc in next 8 sts. Dc2tog. Dc in next 4 sts. Hdc in next 4 sts. Sc in next 12 sts. (78 sts)
Join with sl st.
4. Ch 1. Sc in same st. Sc in next 29 sts. Sc2tog 3 times. Sc in next 5 sts. Hdc in next 4 sts. Dc in next 4 sts. Dc2tog 5 times. Dc in next 4 sts. Hdc in next 4 sts. Sc in next 5 sts. Sc2tog 3 times. (67 sts)
Join with sl st.
5. This is the start of the small straps on the top of the shoe:
(Starting in next st, not the same st) Sl st 4. *Ch 4 . Sc into 1st ch. Sl st into next st on shoe. Turn.ch 1. Sc in next st. Sc 3 in loop. Sc 1. (it’s into the side of the foundation sc, but it brings you back to the top of the shoe. ) Sk the 1st st, and sl into next st onto shoe. Turn. Ch 1. Sc in next st. sc 2 in each of the next 3 sts. Sc 2 . ( the second sc will be in the side of a st) sl st onto shoe*.
Sl st in next 20 sts.
Next strap: Repeat from * to *. Sl st in next 38 sts. Join with sl st. Tie off.
TOE FLAP:
Ch 6.
1. Sc in 2nd ch from hook. Sc in next 4 chs. Turn. (5 sts)
2. Ch 1. Work 2 sc in first st. Sc in next 3 sts. Work 2 sc in last st. Turn. (7 sts)
3. Ch 1. Work 2 sc in first st. Sc in next 5 sts. Work 2 sc in last st. Turn (9 sts)
4. – 7. Ch 1. Sc in same st. Sc 8 across. Turn. (9 sts)
8. – 10. Ch 1. Sc in same st. Hdc in next 2 sts. Dc in next 3 sts. Hdc in next 2 sts. Sc in last st. Turn. (9 sts)
Tie off, leave a long tail.
Using a yarn needle, attach your toe flap. Make sure to secure where the corner of the flap meets the side of the slipper. Take your yarn needle, and go in and out through the slip stitches (they look a bit like they are on the outside of the slipper). Catch whichever piece of yarn on the flap that corresponds with the slip stitch. Finish by adding the “laces” with your yarn needle.
========================================
PHOTO 1
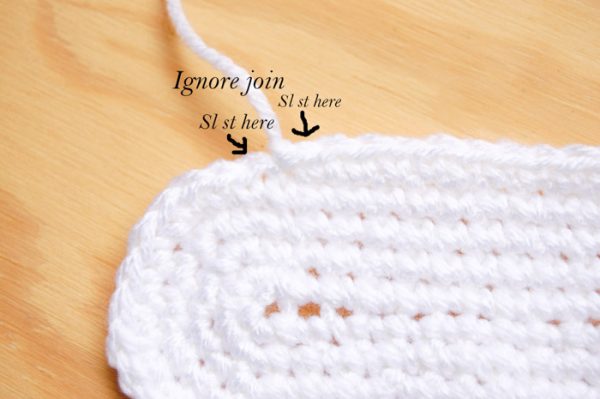
PHOTO 2

PHOTO 3

Love this pattern but want MORE? How about more sizes? You will LOVE The Endless Bundle – my membership program full of patterns, videos, courses, community, and much more. See you on the inside!
xoxo,


Hi- I just want to ask, are the sizes US sizes, or UK, as they are different and I want to do the right one before starting?
( I LOVE the pattern, just what I have been waiting for, a true moccasin style slipper. Thank you for sharing for free.)
Hello! These are US sizes. I am so glad you like the pattern! Happy crocheting! :)
Thanks for the free pattern! These are adorable! Did you use the medium weight Red Heart yarn?
Thanks so much Tracie! Yes I did.
Hi Bethany, question…. I don’t want 2 soles. How would I finish without the second sole? I want to change my color for the body tho.
Thanks!
Do everything the same. The sl sts still need to be there even if they aren’t sewing the two together. Work them around the single sole, then finish the rest of the slippers through the sl sts, as normal.
Thanks for sharing. That’s so great! I likely it, and I start crochet these slippers. Thank you again :)))
You’re welcome!
Love your crochet boat slippers! and great colors too :) Pinned and saving! Hope you stop by our Snickerdoodle Sunday sometime and link up!
Thank you so much! I will :)
Thank you for sharing this pattern for free! I will have to go through my stash and see if I have some “perfect” yarn.
I’d love if you’d link up at my Yarn Fanatic Party! http://philwife.blogspot.com/2014/09/yarn-fanatic-party-6.html
You’re welcome! Thanks for the invite!
Thank you so much for sharing the pattern for these adorable slippers. I can’t wait to get some yarn tomorrow and get started!
You are welcome! :) :)
Super cute slippers. Thanks for linking at Bewitchin’ Projects Block Party, hope you will join us again this week!
-Shonee
http://www.hawthorneandmain.com
Thank you! Thanks for hosting!
Oh my word, I love these! I wish I knew how to crochet!!
Thank you! I learned on youtube :)
HiBethany Just wondering where n utube you found these instructions. I think I need a visual
I just meant I looked up videos on how to do all the stitches when I was first learning. I don’t remember exactly which videos I watched, but if you search each stitch, several videos will pop up showing you have to work them. I also searched how to make a baby hat, and that was my first project.
Thank you so much for sharing this, I’ve admired these for a long time and will try it… do you have notes as to what your short cuts mean? Im not good at reading and was wondering if you had this on your site somewhere….
You’re welcome! Yes under the FAQs tabs.
Where it says to start in the 18th st and work from the outside do that mean that I’ll be working toward the toe or toward the heel? The way I see it in my mind is toward the toe but I just want to be sure
Thanks in advance
Yes, towards the toe.
Those are really cute! Would make a great gift!
Thank you!! Yes they would :)
I love these. My four children all want a pair now. Your pattern is easy to follow and I appreciate you sharing it. I’m left handed and some times I have trouble with patterns but this one turned out nicely. Thank you.
Thank you! You are very welcome! :)
These are really cute. Thanks for sharing your pattern. I just pinned it :)
Thank you! And you are welcome :)
Hello Bethany! I’m working the size 9 and finished the first half of my sole. It measures 9.25″, which is half an inch shorter than your estimate. Is this going to be ok for the slipper? Or should I do some adjusting before I continue? Thanks!
Hi Alexandra! Yes you should probably go up a hook size. The sole should only be about 1/4” shorter than your foot.
Super cute!!!
Thanks!
These are amazing. I’d love to give them a try when I get a little time. Christmas holiday maybe!?! Pinning for now, thanks for the pattern.
Thank you! Yep, I’ll be making a few pairs around Christmas too :)
Thanks for putting out this pattern I can’t wait to try it!! I do have a quick question though. What about half sizes? I need to make an 8 1/2. What should I do?
You’re welcome! Go a size down, so work a size 8 (they will stretch).
Aw, I feel her pain. :(
I really want to get better soon because I seriously want to make these slippers. I’d like to make them in every color haha.
These are precious! I would love to make myself a pair if it weren’t for my tennis elbow. (I can’t seem to crochet without aggravating my elbow and that SUCKS!) I have big feet, though, so I probably would have to do some adjusting to make sure the slippers fit me. I might manage to have a real adventure with this pattern if my elbow ever cooperates.
Thank you! I’m sorry! My mom has problems with her elbow as well, and it’s very miserable :( I hope you feel better and have a chance to try this pattern out!
Hi I love the look of these and I am a very new beginner to crotchet I downloaded your pattern but I wish you had a video to making the whole shoe. Even step by step pictures and instructions would help. I really want to make these for my daughter, but she thinks I can’t do it. So I want to prove her wrong. Thank you!!!
Hi Mary! I am working on getting videos made for all my patterns, so subscribe to my channel to get a notification! Until then, just keep practicing! This is not really a beginner pattern, but it’s not super advanced either. You can do it, even if it takes a bit of time. I can try to help if you have specific problems, let me know.