
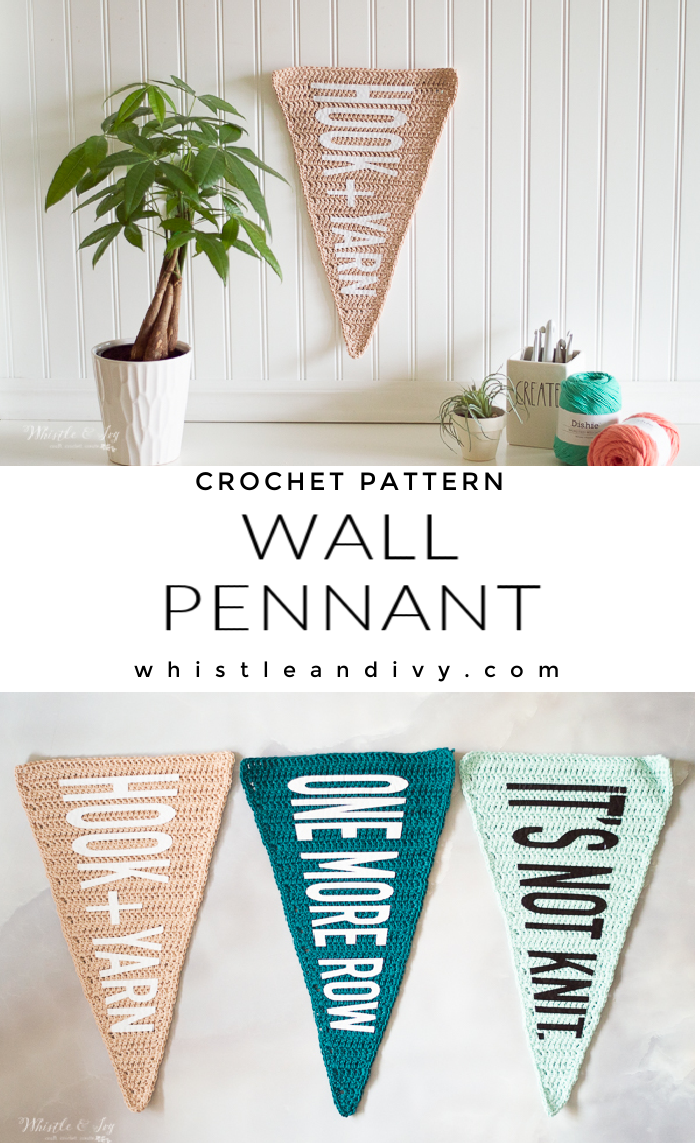
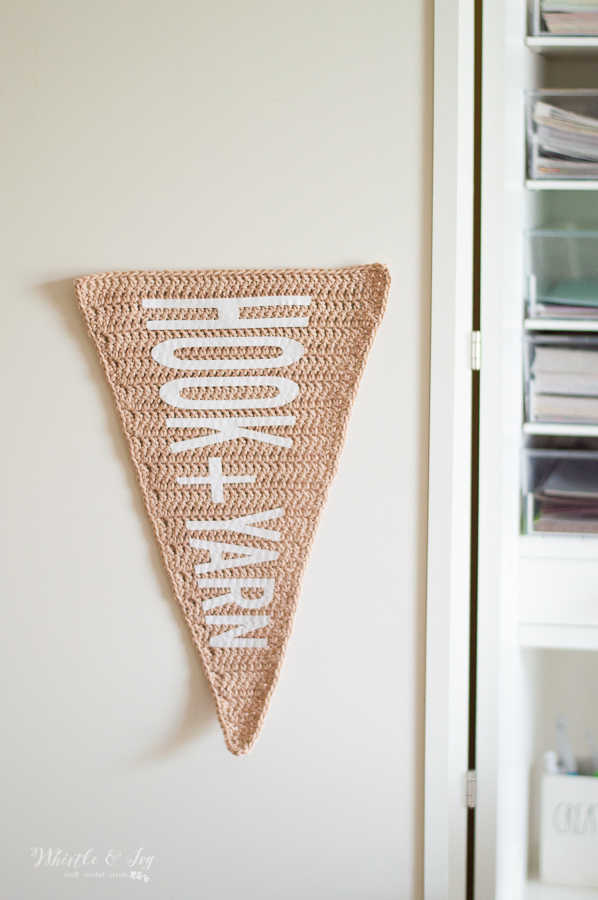
This cute crochet wall pennant is a great way to decorate your walls with crochet! Add some fun words or phrases with heat transfer vinyl. The free pattern includes one cut file, while the PDF download found in my shops includes the crochet wall pennant pattern written completely out plus FIVE different cut files! This post contains affiliate links, which means I earn a small commission at no extra cost to you. Thanks for your support!
I started this crochet pennant project several year ago. I tabled it because I couldn’t figure out the best way to get the words on it. I had bought a bunch of sticky-back felt letters, but they didn’t look as pretty as I had imagined.
So in a bin it went.
A while ago while cleaning out some old bins, I stumbled on my old sample. At this point, I have a couple heat transfer crochet projects under my belt, (my plaid wall hanging and my snowfall wall hanging), so I knew that iron-on vinyl would bring this project idea to fruition!

Natural fibers are imperative! You need to choose a cotton, bamboo, ect. because synthetic fibers will melt when you apply the heat transfer vinyl with an iron. I chose a 100% cotton yarn, but use what works best for you, as long as it can take the heat.

You’re tired of sifting through complicated tutorials and patterns that leave you feeling overwhelmed.
Let me help.
PICTURE THIS:
Instant access to a library of modern, easy-to-follow patterns
Gifting your handcrafted treasures to your loved ones.
Feeling accomplished by your beautiful makes
It’s time to make your crafting experience as joyful as it should be.
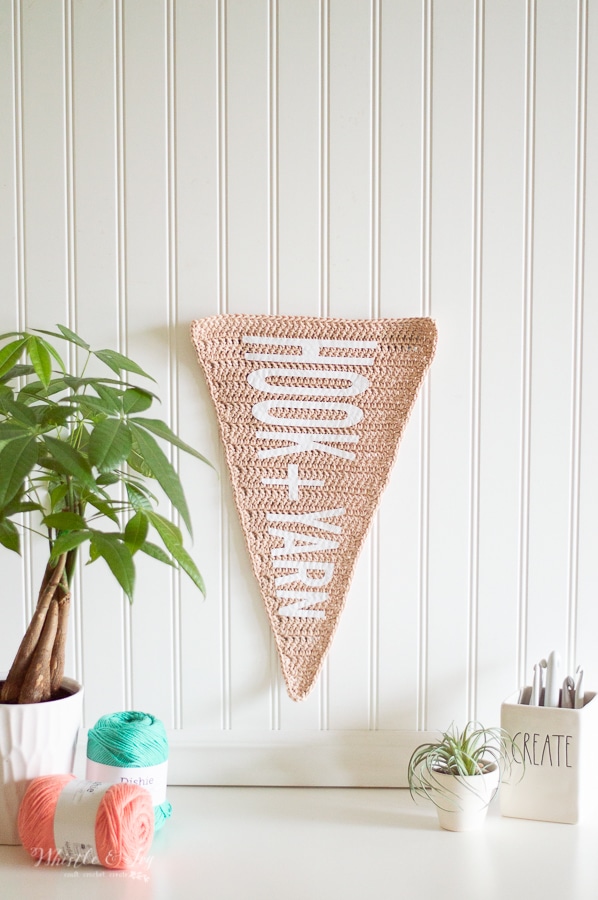
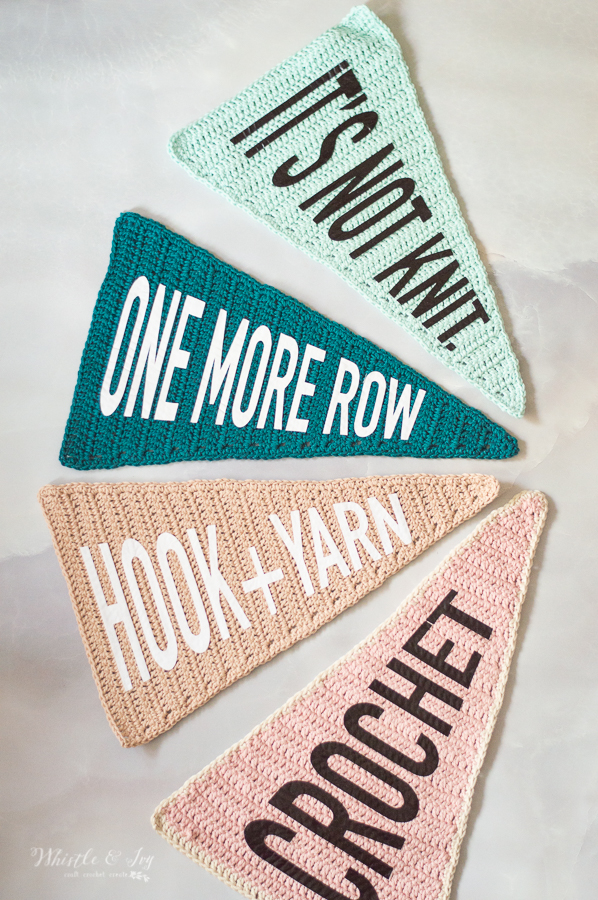
Aren’t they cute? I can’t wait to get them up on my wall! When I started this project, I thought the bold black lettering would work the best, but I definitely prefer the white, it looks a bit more modern.
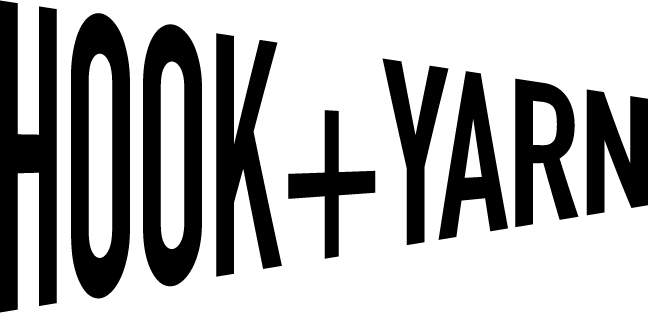
Included in the pattern download are a few cut files for you to use to make your crochet pennant. The freebie is the cut file that says “HOOK + YARN” . The other 4 say “CROCHET”, “IT’S NOT KNIT.”, “CROCHET”, and “HOOKER”.
CROCHET WALL PENNANT – FREE CROCHET PATTERN
What you need:
– 4mm Hook
– Yarn (1 ball of Dishie 100% cotton)
– Cut File
Abbreviations: US Terms
Ch – chain
Sc – single crochet
Dc – Double Crochet
Sl st – Slip Stitch
St – stitch

LOVE THIS PATTERN BUT HATE THE ADS?
The written pattern below is FREE in-text! If you would like an ad-free PDF The PDF download pattern is also formatted for easy crocheting on-the-go or for easy printing, it doesn’t include ads or comments. The pattern file pack also includes 5 different cute files in both PNG and SVG format. Thanks for your support!
Gauge: 22 dcs = 5” (Gauge Pattern)
(Worked from the tip down)
Ch 3.
1. Work 3 dc in 1st ch. Turn. (3 sts)
2. Ch 2. Dc in each st. Turn. (3 sts)
3. Ch 2. Work 2 Dc in same st. Dc in next st. Work 2 dc in last st. Turn. (5 sts)
4. Ch 2. Dc in each st across. Turn. (5 sts)
5. Ch 2. Work 2 dc in same st. Dc in next 3 sts. Work 2 dc in last st. Turn. (7 sts)
Repeat this sequence of increasing in the first and last st, and then working a st in each st the following row, turning after each row, until you have 38 rows, consisting of 39 sts.
BORDER:
Continuing where you left off (alternately, you can break yarn and join a contrasting yarn) and work down the raw side. Ch 2. Work a row of sc down the side of the pennant, spacing them as evenly as possible. When you get to the sharp tip, work 2 sc, ch 1, work another 2 sc. Sc up the other side of the pennant. Join with a sl st.
Weave in ends.
Adding Heat Transfer Vinyl to your crochet pennant
Be sure to mirror the design and cut it with the shiny side down.
I get all my vinyl at Expressions Vinyl. They have the best quality and the best prices by far!
When ironing on, you will have to remember that your piece is not flat and smooth like a t-shirt, so you will need to iron for extra time and apply extra pressure so the vinyl conforms to the shape of your stitches. When in doubt, try the tip of the letters and if they don’t stay, try ironing again. DO NOT peel all the plastic backing up if your design isn’t sticking properly.
You will not get as firm of a hold as you would with fabric, so keep that in mind. It just needs to stick well enough to stay in place. This will not be an item that will be worn or frequently laundered so a firm hold is all you need.
I can’t wait to see yours! Be sure to tag me on Insta when you make your Whistle and Ivy creations! @whistleandivy
xoxo,

