
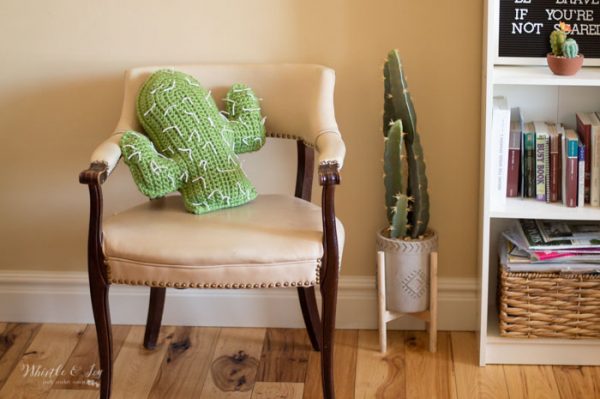
This pretty crochet cactus pillow is very easy to make, perfect for your desert chic decor! Try playing with different hooks and yarn weights to get different sized pillows. This cactus pillow will add new life and brighten up your space. This post contains affiliate links which means I get a small commission if you make a purchase at no extra cost to you. Thank you for your support!

I breathed a huge sigh of relief when I woke up this morning. I don’t hate the winter per se, but when it gets to the tail end, I admit I am happy to see it go. I am very happy to welcome the arrival of spring today! Because I live in Utah, I can bet there will be at least one more snow storm, but for now I am enjoy the sunshine and freshening the rooms in my home with a bit of spring greenery.
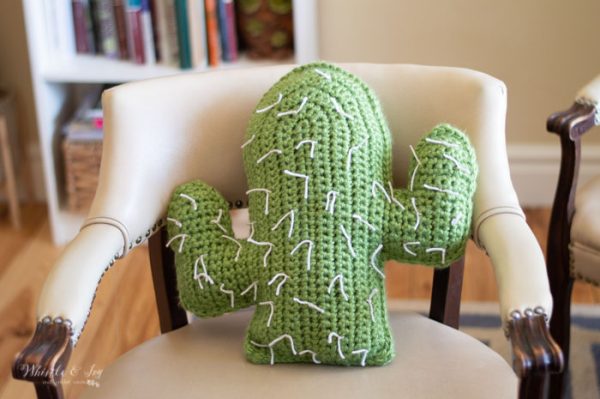
I designed this crochet cactus pillow last year, but I found during some recent site maintenance that Darice no longer sells the yarn I originally made this pillow with, so it was time for a refresh! After some quick research and pondering different color palettes, I decided to go with Lion Brand Hometown in Oklahoma. I thought the color was absolutely perfect.

You’re tired of sifting through complicated tutorials and patterns that leave you feeling overwhelmed.
Let me help.
PICTURE THIS:
Instant access to a library of modern, easy-to-follow patterns
Gifting your handcrafted treasures to your loved ones.
Feeling accomplished by your beautiful makes
It’s time to make your crafting experience as joyful as it should be.
CROCHET CACTUS PILLOW – FREE CROCHET PATTERN
What you need:
– 8mm Hook
– 3 Skeins of Lion Brand Hometown USA
– Polyfil
Abbreviations: US Terms
Ch – chain
Sc – single crochet
Hdc – half double crochet
Dc – Double Crochet
Sl st – Slip Stitch
St – stitch
Gauge: Not important, just make sure you stitches are tight enough so the stuffing doesn’t show through.
Approx. finished size: 18″ tall x 16″ wide

LOVE THIS PATTERN BUT HATE THE ADS? ?
The ad-free PDF crochet pattern for this crochet cactus pillow is also available in my shops! Where would you like to shop today?
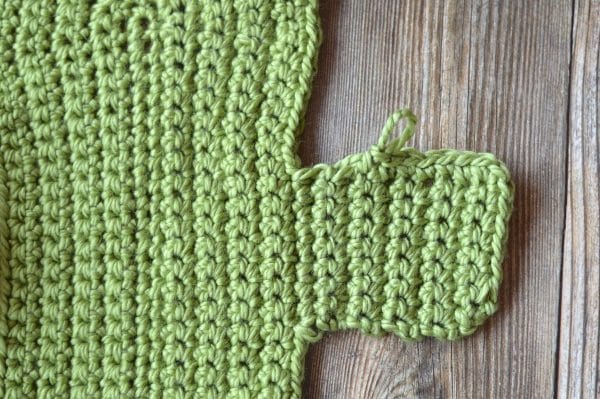
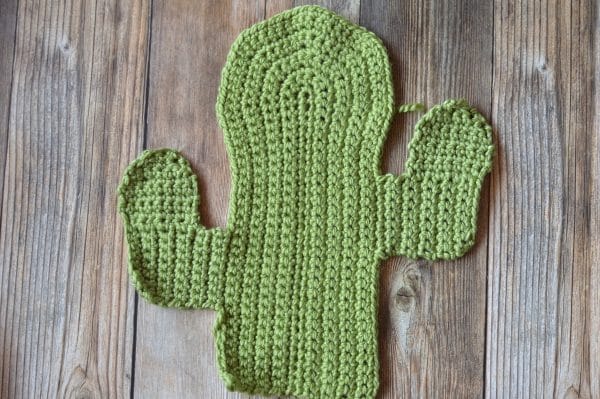
TRUNK PATTERN:
(Make 2)
Ch 30.
1. Sc in 2nd ch from hook. Sc in next 27 sts. Work 4 sc in last st. Working across opposite side of ch, sc in next 28 sts. Turn. (60 sts)
2. Ch 1. Sc in next 28 sts. Work 2 sc in next 4 sts. Sc in next 28 sts. Turn. (64 sts)
3. Ch 1 Sc in next 28 sts. *Sc in next sts. Work 2 sc in next st* work 4 times. Sc in next 28 sts. Turn. (68)
4. Ch 1. Sc in next 28 sts. *Sc in next 2 sts. Work 2 sc in next st* work 4 times. Sc in next 28 sts. Turn. (72)
5. Ch 1. Sc in next 28 sts. *Sc in next 3 sts. Work 2 sc in next st* work 4 times. Sc in next 28 sts. Turn. (76)
6. Ch 1. Sc in next 28 sts. *Sc in next 4 sts. Work 2 sc in next st* work 4 times. Sc in next 28 sts. Turn. (80)
7. Ch 1. Sc in next 28 sts. *Sc in next 5 sts. Work 2 Sc in next st* Work 4 times. Sc in next 28 sts. Turn. (84)
8. Ch 1. Sc in next 28 sts. *Sc in next 6 sts. Work 2 sc in next st* work 4 times. Sc in next 28 sts. Turn (88)
9. Ch 1. Sc in next 28 sts. *Sc in next 7 sts. Work 2 sc in next st* work 4 times. Sc in next 28 sts. Turn. (92)
Work 2 more sc in last st (3 total) work a row of sc across the bottom, spaced as even as possible. Work 2 in last st and join with 1st st of the round. Tie off.
YOU MAY ALSO LIKE:

ARM PATTERN:
Turn trunk so the round end is to the left. Start 15 sts in from the flat end. Join yarn.
1. Ch 1. Sc 8. Turn. (8)
2. – 9. Ch 1. Sc 8. Turn. (8 sts)
10. Ch 1. Sc 6. Sc2tog. (7 sts) Turn.
11. Ch 1. S2tog. Sc 5. (6 sts).
12. Sc 2 more in last st. Turn 90 degrees counter-clockwise. You will be working across the side of the arm you just made to make the shape go upwards. Sc 6. Turn.
13. – 17. Ch 1. Sc in next 8 sts. Turn. (8 sts)
18. Ch 1. Sc2tog. Sc in next 4 sts. Sc2tog. (6 sts)
19. Ch 1. Sc2tog. Sc in next 2 sts. Sc2tog. (4 sts).
20. Ch 1. Sc2tog twice. Tie off.
Flip your piece and orient it so the arm is at the bottom and the round part is to the left. Join yarn 9 sts in from the flat side. Repeat arm instructions.
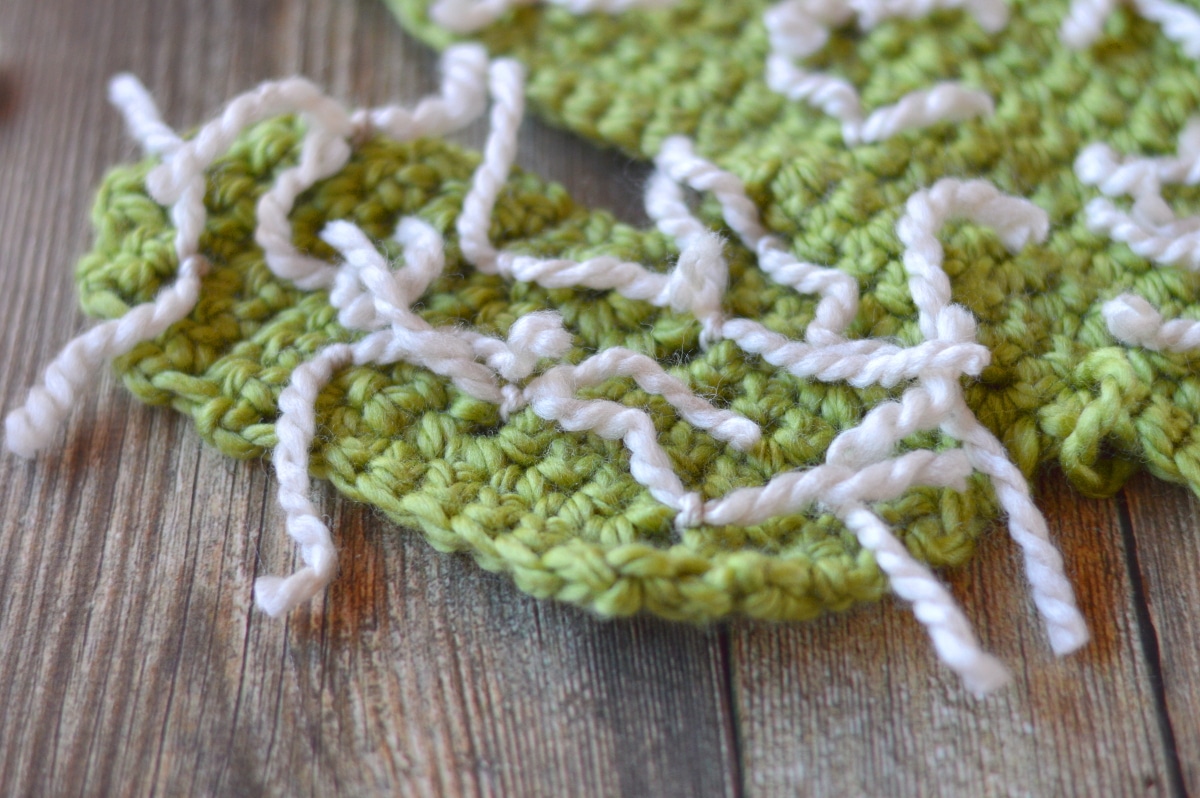
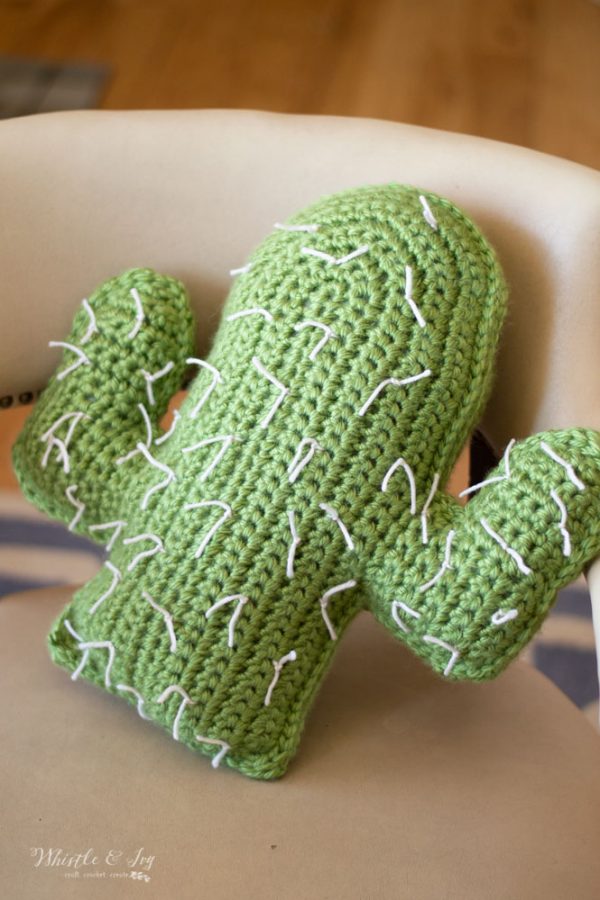
Optional: You can add some “spines” by trying bits of yarn on the front piece of the cactus. Be sure to do this before you sew the two pieces together. Cut several strips of Fleece-colored yarn. Pull one end through and tie a double knot (similar to tying a quilt). Once they are all tied, you can trim them down a bit. It looks a bit messy when they are long. (I also tried with medium weight yarn, that that looks nice as well.)
CONSTRUCTION:
Line up your two pieces. Starting along a straight side or along the bottom, start working a round of sl st to sew the top to the bottom. Once you have worked 3/4 of the way around, stop and stuff the pillow as firmly as possible (take care to stuff the arms very stiffly so they stay firm). Finish working your row of sl st to finished sewing the pillow together.
Happy first day of spring, y’all!


Hi! If I wanted to make the body a bit skinnier and the right arm slightly taller how would I go about that?
Hi Sam! You would work a longer foundation, fewer rounds, and then extra rounds on the arms once you start working the horizontal stitches.
Hi can I please have your cascus Eating pattern .I saw it on Pinterest,they were so cute,that I would like to make them for one of my daughter for Christmas as a gift. Thank you and have a Blessed day.
Hello!
That cactus earrings pattern is available in my shop!
You can find it here:
https://whistleandivy.podia.com/crochet-cactus-earrings
Very cute love the contradiction – spiky and comfy. Thank you for sharing this pattern.
Thank you! You’re welcome!
J’ai rentré le mot de passe indiqué pour avoir les explication de l’ourson mais çà ne marche pas !!
YAY congrats!!!! I have 4 little ones… so exiting!! Each one makes more fun and love in the family!!
I LOVE this pattern!
Thank you!
Is the yarn called Oklahoma City Green? I found the yarn , but it looks a little different
Than the picture…
Yep that’s what I used 👍
Thanks, do you know if I can print this pattern? If yes, how?
Sure. You can print it like any other web page :) Just hit print!
Hi. Can you please tell me the height of the finished large cactus is? Thank you!
It’s approx. 18″ tall x 16″ wide
At the end of the pattern is that the number of sts you are suppose to have? It doesn’t make sense to me.
1. Sc in 2nd ch from hook. Sc 17. Sc 4 in last ch. Sc 18. (40 sts)
2. Ch 1. Sc 18. 2 sc in next 4 sts. Sc 18. Turn. (44 sts)
3. Ch 1. Sc 18. *Sc. 2 sc in next st* work 4 times. Sc 18. (48 sts)
4. Ch 1. Sc 18. *Sc 2. 2 sc in next st* work 4 times. Sc 18. (52 sts)
5. Ch 1. Sc 18. *Sc 3. 2 Sc in next st* work 4 times. Sc 18. (56 sts)
6. Ch 1. Sc 18. *Sc 4. 2 sc in next st* work 4 times. Sc 18. (60 sts)
7. Ch 1. Sc 18. *Sc 5. 2 Sc in next st* Work 4 times. Sc 18. (64 sts)
8. Ch 1. Sc 18. *Sc 6. 2 sc in next st* work 4 times. Sc 18. (68 sts)
9. Ch 1. Sc 18. *Sc 7. 2 sc in next st* work 4 times. Sc 18. (72 sts)
10. – 12. Ch 1. Sc in each st around. Turn. (72 sts)
yes, that is the total count of stitches for the row.
Thank you. I was confused.
You’re welcome!
I have crocheted for 50 yrs but mostly baby blankets and blankets and hats and scarves.. I just started crocheting animals and pillows. So I confuse easily. lol
No problem at all, I am here to help :)