
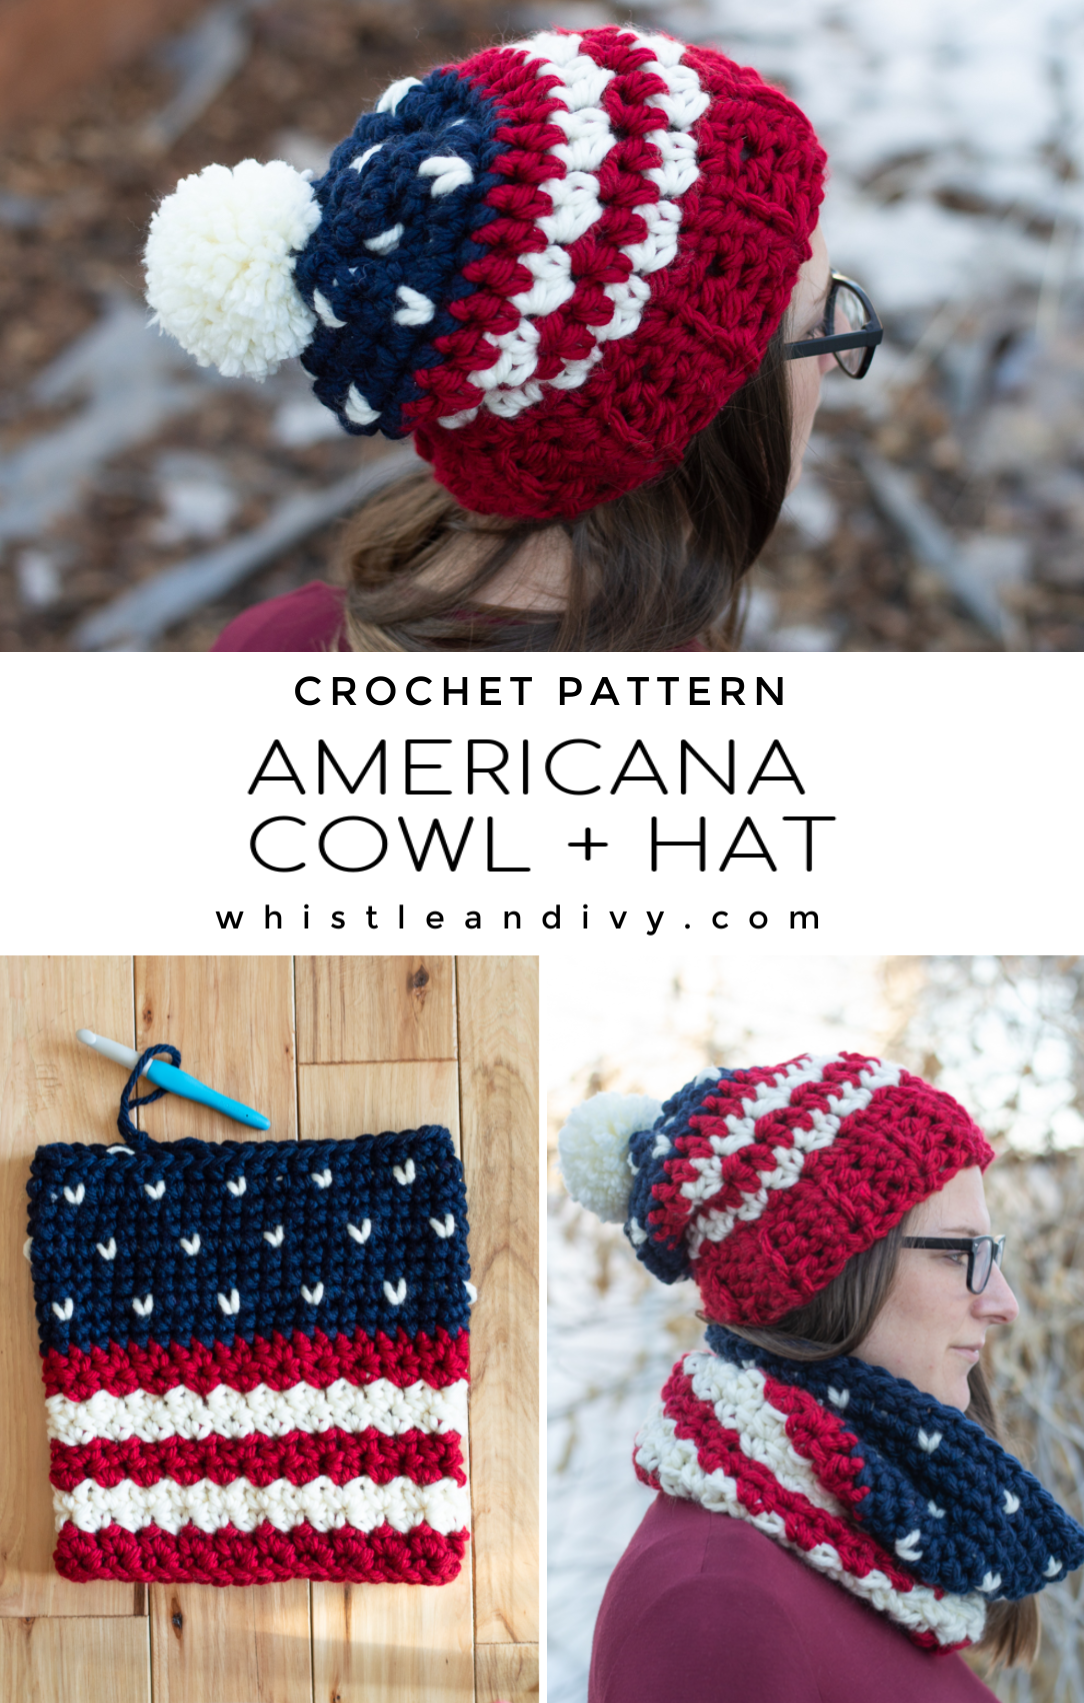
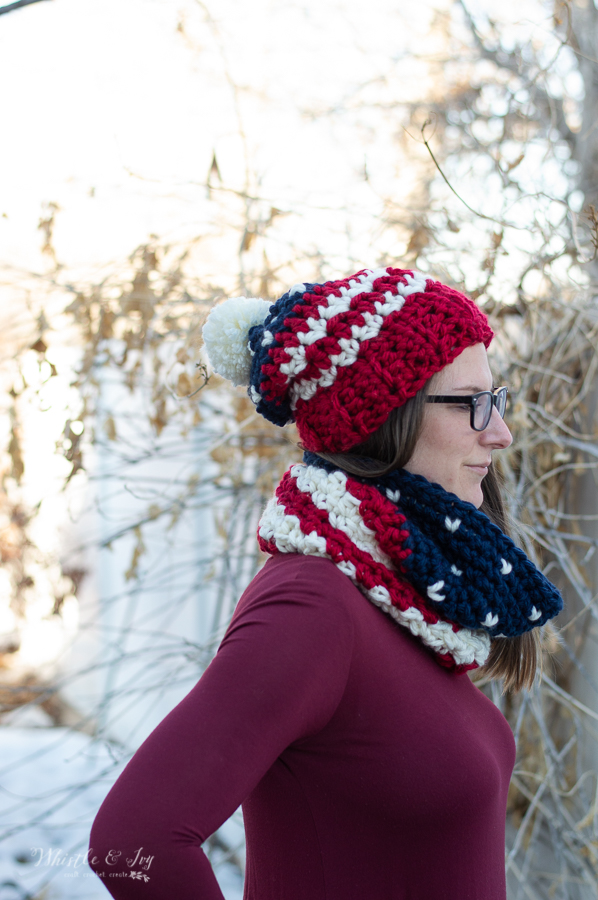
This chunky crochet Americana hat and cowl set works up quick with silky smooth #6 Bulky yarn. It creates a drapey, cozy set perfect for chilly winter days. Not a fan of red? Make this pretty set in your favorite color combo! The knit stitch and stripes go perfectly with any color palette you choose. This post contains affiliate links, which means I get a small commission at no extra cost to you. Thanks so much for your support!
Welp, it’s still very much winter here. As much as I would like to move on to spring crochet designs, I will still need to wear cozy crochet accessories for at least six more weeks (it’s still below freezing at the warmest part of the day!).
I really wanted to release this crochet Americana Hat and Cowl set at the beginning of the week for the US Presidential holiday, but I am pretty sure I got about 8 hours of collective sleep this week.
It’s fine. I’m fine. Everything’s fine. 😂
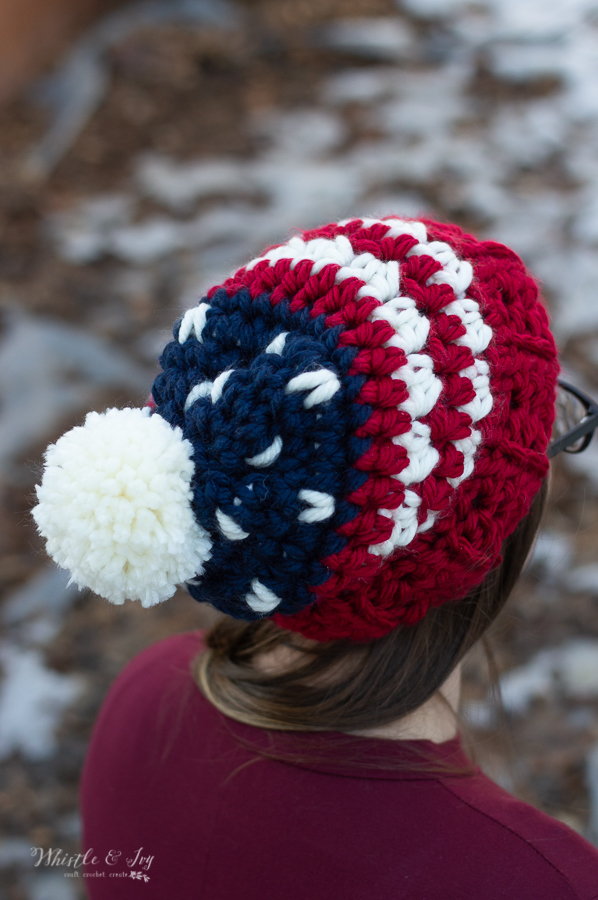
I think this snowfall stitch is such a quintessential winter technique. I love it in all its cozy forms.
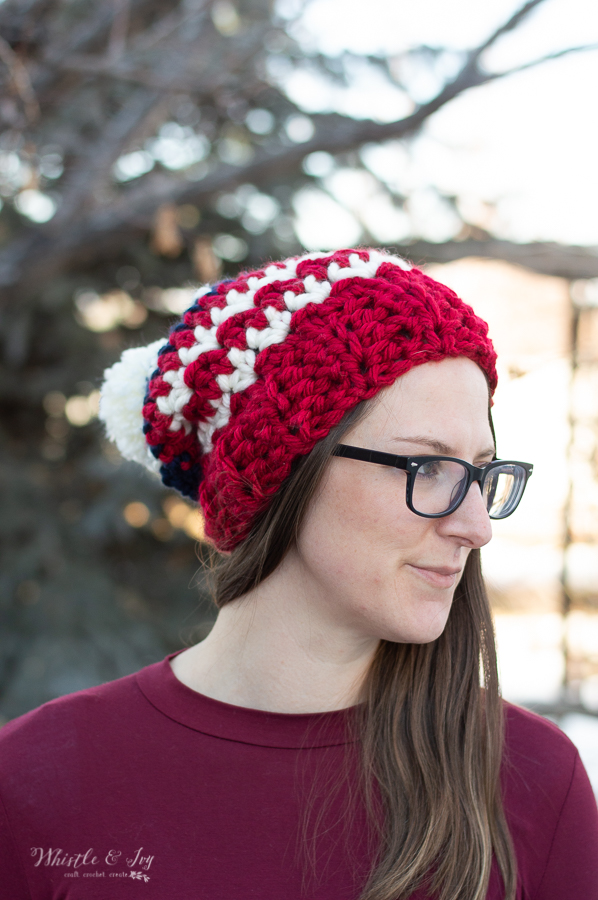
I have been lounging in this this chunky, squishy hat as I write this pattern up and I think I might whip up another one in different colors because I think it will work with any color palette, not just in red, white and blue.
I’ve used Mighty Stitch Super Bulky to make a couple projects before (Chunky V-Stitch Cowl + Chunky Fringe Clutch) and I love how quickly it works up and how squishy it feels. This yarn is smooth and soft, but not fuzzy or pill-y.
This is my first hat project that uses Mighty Stitch Super Bulky and the drape is so lovely. I was a tad worried it might be too heavy, but turned out very nice. I don’t normally wear hats inside but after this photo shoot I couldn’t take this dream hat off. So comfy.

You’re tired of sifting through complicated tutorials and patterns that leave you feeling overwhelmed.
Let me help.
PICTURE THIS:
Instant access to a library of modern, easy-to-follow patterns
Gifting your handcrafted treasures to your loved ones.
Feeling accomplished by your beautiful makes
It’s time to make your crafting experience as joyful as it should be.
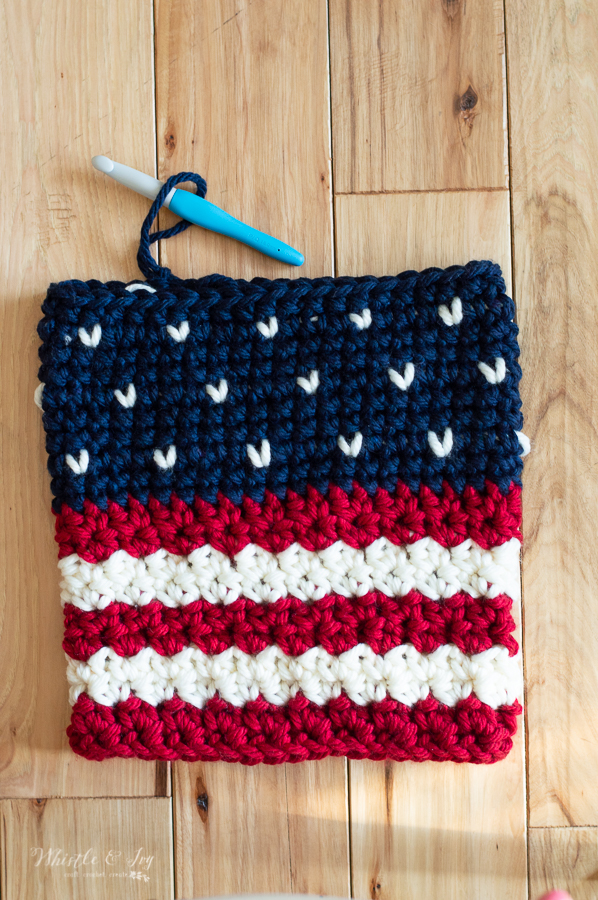
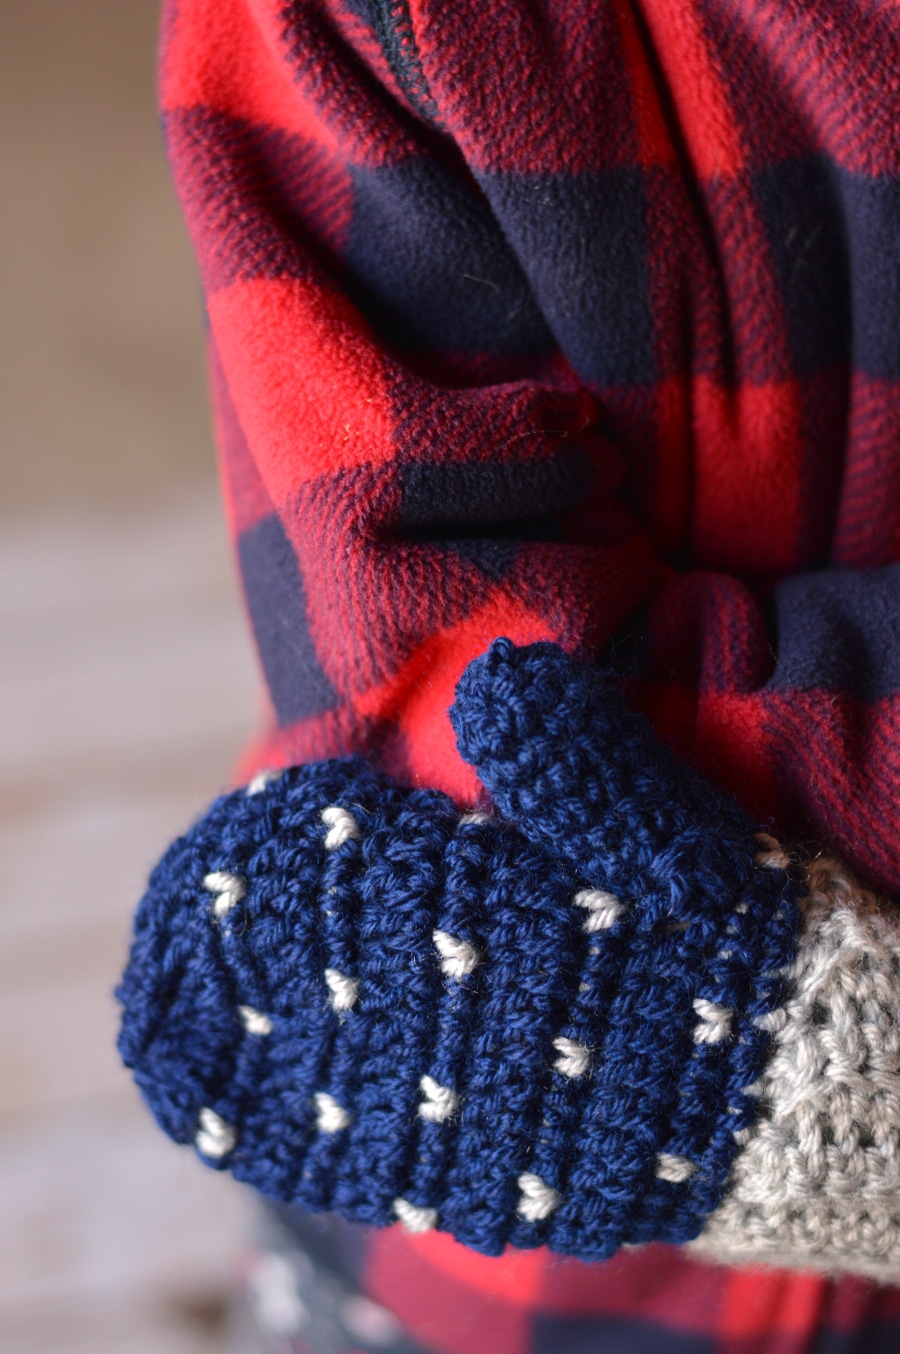
The stripes part of the hat and cowl are made using the grit stitch (I used this stitch with my Baby Hooded Cowl). It’s such an easy technique and I love the pretty texture. You are basically just working a sc and hdc in the same st, then skipping the next stitch (this keeps the count consistent). I love how it looks.
Ready to make yours?
CROCHET AMERICAN HAT AND COWL – FREE CROCHET PATTERN
Please remember: You are free to use this crochet American hat and cowl pattern to make and sell, but do not republish or distribute this pattern in any way. DO NOT use my photos in your listings. Please do share my blog links! It’s a quick and FREE way of supporting Whistle and Ivy and more free crochet patterns in the future.
PLEASE read my Disclaimer before working my free patterns!
What you need: (affiliate links)
– 15mm Hook
– Might Stitch Super Bulky – Love Letter, Cream, Navy
( To make both, you will need 2 Cream, 3 Love Letter, 2 Navy; to make just the hat, you need one of each; to make cowl you need 1 Cream, 2 Love Letter, 2 Navy)
– Large Plastic Darning needle
Abbreviations: US Terms
Ch – chain
Sc – single crochet
Hdc – Half Double Crochet
Sl st – Slip Stitch
St – stitch
BLO – Back loops only
Gauge: 11 sc = 8″ (Gauge Pattern)

LOVE THE PATTERN BUT HATE THE ADS?
The ad-free PDF is available in my shops! Perfect for crocheting on the go using your device, or easily printed, the PDF doesn’t include ads or comments. Thanks for your support!
NOTES: for the snowfall technique, I recommend dragging the yarn behind the stitches instead of carrying it within the stitches. For some reason, I could see the white carried yarn too much for my liking with this piece, dragging it behind will eliminate this problem.
CROCHET AMERICAN COWL PATTERN:
1. Begin with a long tail.
With Love Letter: Chainless foundation sc – 44 sts
See how to do a chainless foundation below: (if the video doesn’t load, please disable your adblocker)
2. Ch 1. Work a hdc and sc in same st. Sk next st. *Work a hdc and sc in next st. Sk next st* work 21 times. Join with the first st. (42 sts)
Switch to Cream.
3. Ch 1. Sk same st. Work a sc and hdc in next st. * Sk next st. Work a hdc and sc in next st* work 21 times. Join with first st. (44 sts)
4. Ch 1. Work a sc and hdc in same st. Sk next st. *Work a sc and hdc in next st. Sk next st* work 21 times. Join with the first st. (44 sts)
Switch to Love Letter
5. Ch 1. Sk same st. Work a sc and hdc in next st. * Sk next st. Work a hdc and sc in next st* work 21 times. Join with first st. (44 sts)
6. Ch 1. Work a sc and hdc in same st. Sk next st. *Work a sc and hdc in next st. Sk next st* work 21 times. Join with the first st. (44 sts)
Switch to Cream
7. Ch 1. Sk same st. Work a sc and hdc in next st. * Sk next st. Work a hdc and sc in next st* work 21 times. Join with first st. (44 sts)
8. Ch 1. Work a sc and hdc in same st. Sk next st. *Work a sc and hdc in next st. Sk next st* work 21 times. Join with the first st. (44 sts)
Switch to Love Letter
9. Ch 1. Sk same st. Work a sc and hdc in next st. * Sk next st. Work a hdc and sc in next st* work 21 times. Join with first st. (44 sts)
10. Ch 1. Work a sc and hdc in same st. Sk next st. *Work a sc and hdc in next st. Sk next st* work 21 times. Join with the first st. (44 sts)
Cut Love Letter, drop Cream.
11. – 12. With Navy, Ch 1. Sc in each st around. Join with a sl st. (44 sts)
13. With Navy, Ch 1. Sc in same st. *Work the next sc with cream, pull the last loop through with Navy, so only the “V” part of the st is white. With navy, sc in next 3 sts* work 10 times. Work the next sc with cream, pull the last loop through with Navy, so only the “V” part of the st is white. With navy, sc in next next 2 sts. Join with sl st. (44 sts)
14. With Navy, Ch 1. Sc in each st around. Join with a sl st. (44 sts)
15. With navy, Ch 1. Sc in same st. Sc in next 2 sts. *Work the next sc with cream, pull the last loop through with Navy, so only the “V” part of the st is white. Sc in next 3 sts.* work 10 times. Work the last sc with cream, pull the last loop through with Navy, so only the “V” part of the st is white. Join with first st. (44 sts)
16. – 17. With Navy, Ch 1. Sc in each st around. Join with a sl st. (44 sts)
18. With Navy, Ch 1. Sc in same st. *Work the next sc with cream, pull the last loop through with Navy, so only the “V” part of the st is white. With navy, sc in next 3 sts* work 10 times. Work the next sc with cream, pull the last loop through with Navy, so only the “V” part of the st is white. With navy, sc in next next 2 sts. Join with sl st. (44 sts)
19. With Navy, Ch 1. Sc in each st around. Join with a sl st. (44 sts)
Tie off.
Using your long beginning tail, sew the ends bottom of the foundation together.
Weave in all ends.
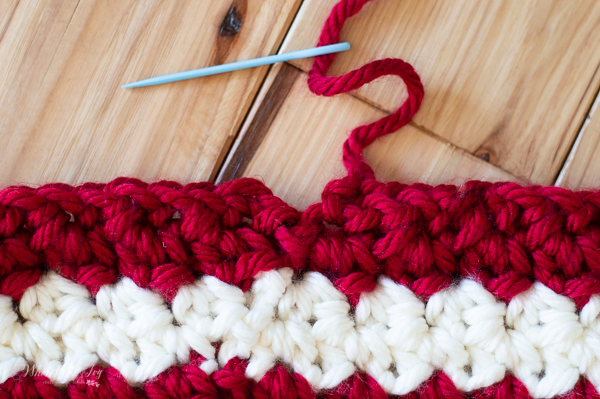
I really love how this cowl hangs. Because the colors are stacked, it hangs so you can see the bottom from the back and the front part shows better from the front. It looks so cute!
CROCHET AMERICAN HAT PATTERN:
(ADULT SIZE)
BAND:
With Love Letter:
Ch 5
1. Hdc in 2nd ch from hook. Hdc in next 3 sts. Turn. (4 sts)
2. Ch 1. Hdc in same st. Hdc in next 2 sts in BLO. Hdc in last st going through both loops. Turn (4 sts)
Repeat row 2 until your band measured 19″ when gently stretched.
Fold in half so the two ends meet. Sl st the ends together forming a band. Flip the band so the seam is on the inside and the loop is at the top. Continue to make the body without cutting yarn:
HAT BODY:
1. Ch 1. Work 32 sc as evenly as possible across the top of the band. Join with first st. (32 sts_
2. With cream, Ch 1.
Sc and hdc in same st. Sk next st. *Sc and hdc in next st. Sk next st* work 15 times. Join with first st. (32 sts)
Drop cream, pull up Love Letter.
3. Ch 1. Hdc in each st around. Join with first st. (32 sts)
Drop Love Letter. Pull up Cream.
4. Ch 1. Sc and hdc in same st. Sk next st. *sc and hdc in next st. Sk next st* work 15 times. Join with first st. (32 sts)
Drop Cream, pull up Love Letter.
5. Ch 1. Hdc in each st around. Join with first st. (32 sts)
Cut Red. Drop Cream. Join Navy
6. With Navy, Ch 1. Sc in each st around. Join with first st. (32 sts)
7. Ch 1. Sc in same st. Sc in next 2 sts. *Work the next sc with cream, pull the last loop through with Navy, so only the “V” part of the st is white. With Navy, sc in next 3 sts* work 7 times. Work last sc with cream, pull the last loop through with Navy, so only the “V” part of the st is white. Join with first st. (32 sts)
This is called my Snowfall Technique, please view a video below for more help. (if the video doesn’t load, please disable your ad blocker).
8. With Navy, ch 1. Sc in each st around. Join with the first st. (32 sts)
9. With Navy, Ch 1. Sc in same st. *Work the next sc with cream, pull the last loop through with Navy, so only the “V” part of the st is white. Sc in next 3 sts with Navy.* work 7 times. *Work the next sc with cream, pull the last loop through with Navy, so only the “V” part of the st is white. Sc in last 2 sts with Navy. Join with first st. (32 sts)
10. With Navy, ch 1. Sc in each st around. Join with first st. (32 sts)
Cut Cream, leave a long tail with Navy.
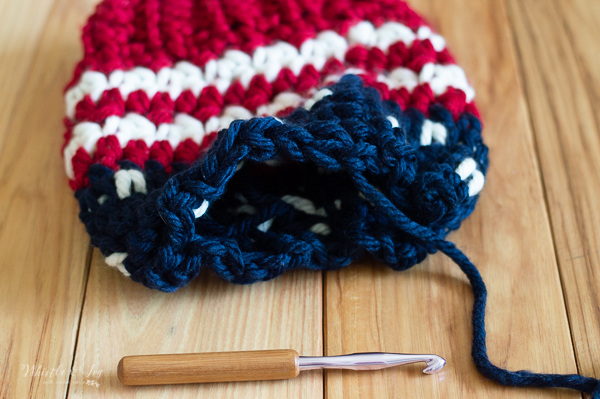
CLOSING:
Turn your hat inside-out. Using your hook or a large-eye plastic darning needle, weaving the tail in and out around the top row of the hat. Pull the end, cinching the hole shut. Weave the end, securing the cinched hole.

I made my pom-pom with leftover Cream. I used a Clover pom-pom maker (the larger blue one), and I recommend you use a lighter-weight yarn to tie the chunky pom-pom together. You will be able to get it pulled tighter and the pom will be easier to sew on with the lighter yarn.
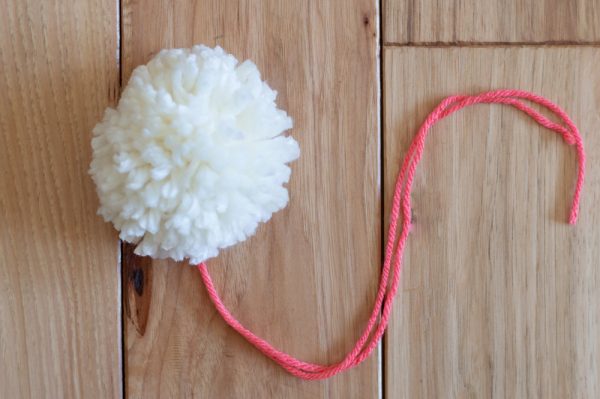
Need help getting the pom-pom attached? Check out this post.
I just love this hat so much. The silky smooth chunky yarn is so comfortable and it makes this hat so comfy-cozy. I wrote the pattern for a bit of American pride, but I think the pattern is simple enough that you can use different color combinations and it would look beautiful.
I can’t wait to see what you do with it!

xoxo,


Love how your hat turned out! I always admire people who can make a creation come to life.
Kate,
https://runawayfiancee.blogspot.com/2020/03/why.html
Hi Beth,
Where do you buy your Mighty Stitch Super Bulky yarn?
Dear Bethany,
I wonder if you will clarify a word or two in:
HAT BODY:
1. Ch 1. Work 32 sc “as every as possible” across the top of the band.
And a misspelling:
“top row of the “had” (I think this should be “hat”) .
Thank you.
Ah thank you! “As evenly as possible”.