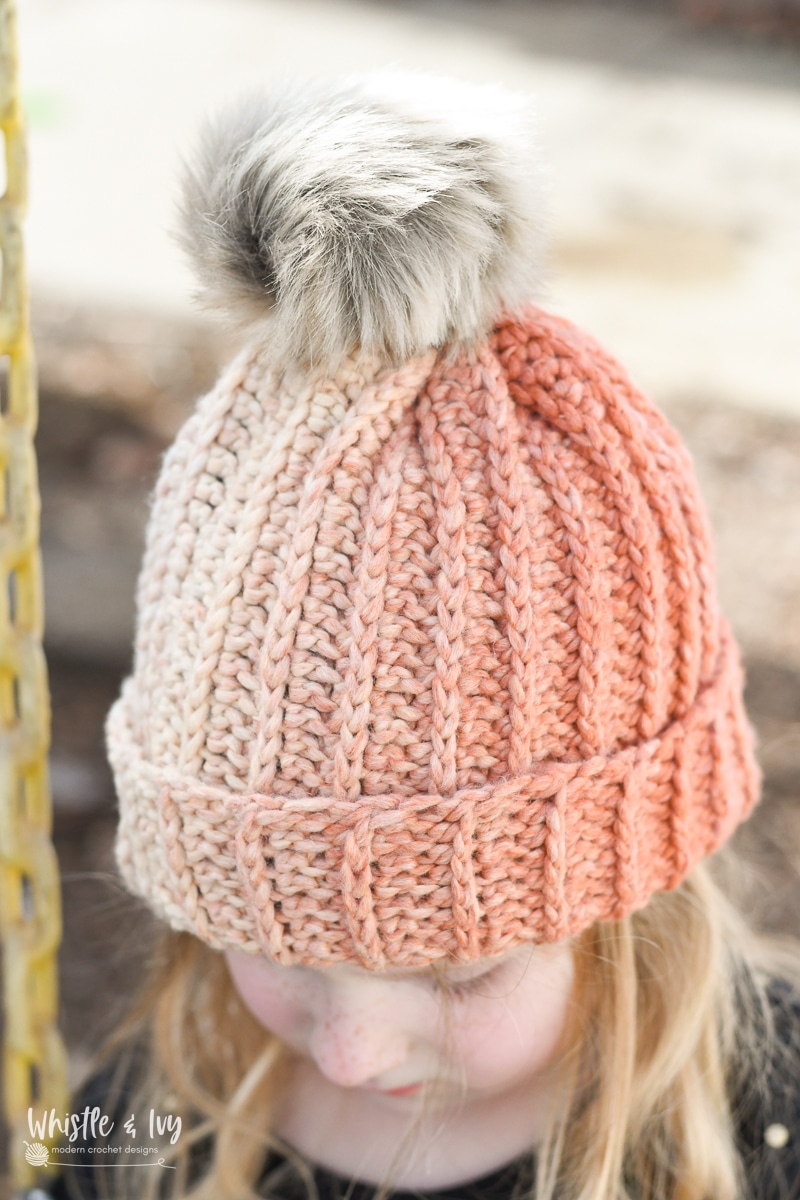
This cute crochet chevron hat is made up of single crochet stitches and alternates between two colors to make up the graph creating a stunning chevron effect. The pattern includes a link to a helpful video that shows how to easily change colors and read the graph. This post contains affiliate links, which means I earn a small commission if you make a purchase. Thanks for your support!
Crochet Donut Coasters – CROCHET PATTERN
These cute crochet donut coasters have all the charm of your favorite fried dessert, with none of the calories! They keep your furniture protected while providing a whimsical touch.
This post in brought to you by WeCrochet, an online yarn shop just for crocheters! Get yarns, hooks, bags and more!
This post contains affiliate links, which means I get a small commission at no extra cost to you. Thanks for your support!
I’ve been gluten-free (not by choice) for about 2 years now. Ah, I miss donuts. My kids love them and have requested them for birthdays in leu of cake a few times.
Donuts are such a lovely dessert because they are both delicious and darn adorable.
Even though I can’t eat donuts (the GF ones just aren’t the same), I can still enjoy their cute aesthetic! These crochet donut coasters are a cute way to add faux-sugary, whimsical fun to your decor.
When looking through my stash, I knew I wanted to use Shine for these coasters. It’s one of my very favorite cotton yarns. For one, Shine has a color palette of 300 colors so it usually has exactly what I need. It also has a luxurious silky sheen and soft feel to it that I adore. It’s blended with Modal all-natural beechwood fiber.
I decided to go with classic flavors colors: Cream, Blush and Coffee. I also found a slightly lighter brown called Thicket in my stash after I took this photo so I used that one too. I have dark chocolate and milk chocolate!
Where can you get this fabulously silky and soft cotton yarn? At WeCrochet! Not only do they have a vast array of affordable everyday yarns, fabulous and gorgeous dyed yarns and luxurious fiber yarns, they also have crochet-specific accessories! You need to check out WeCrochet!
These crochet donuts were pretty fun to decorate. At first I thought it would be neat to use those long barrel-shaped seed beads as sprinkles, but the ones I had were too tiny and I couldn’t fit my needle through the hole.
I scrapped that idea and decided to simply sew on the sprinkle shapes with yarn. I tried both yarn and embroidery thread and they both turned out great. You can decide which look you prefer and go with it.
I also decided to make these crochet donut coasters double-layered. I like my coasters to be substantial, but you are welcome to make yours with just one layer. Simply skip making the second layer and go straight to attaching the icing to the one layer.
CROCHET DONUT COASTERS – CROCHET PATTERN
What you need:
– 4 mm Hook
– 2 Skeins of WeCrochet Shine Worsted in Willow; 1 skein of Blush, Coffee, Cream (or other icing colors you would like)
– Embroidery thread or contrasting yarn for sprinkles
– Darning needle
– Hot Glue (optional)
Abbreviations: US Terms
Ch – chain
Sc – single crochet
Dc – Double crochet
Sl st – Slip Stitch
Sk – Skip
St – stitch
WANT MORE?
You will LOVE The Endless Bundle – it’s literally ENDLESS! My membership program includes the entire Whistle and Ivy ad-free pattern library (to download and keep!) videos, full tutorials, courses (including my Learn Crochet Plaid course!), community, and much more. See you on the inside!
⭐️ LEARN MORE ⭐️
The ad-free PDF for this Crochet Donut Coasters Pattern is also available in my shops!
Where would you like to shop today?
Whistle and Ivy Shop
Ravelry
Etsy
CROCHET DONUT HALF
(work 2 per coaster)
You will get approx. 5 donut halves per skein of Shine
Begin with long tail.
Ch 20. Join with first chain forming a loop.
1. Ch 2. *Dc in next ch. Work 2 dc in next ch. Dc in next ch. Work 2 dc in next ch. Dc in next ch. Work 2 dc in next 2 chs.* work twice. *Dc in ch. Work 2 dc in next ch* work 2 times. Dc in last 2 sts. Join. (30 sts)
2. Ch 2. *Dc in next st. Work 2 dc in next st* work 15 times. Join. 45 sts.
3. Ch 1. *Sc in next 2 sts. Work 2 sc in next st* work 15 times. Join. (60 sts).
If making two, tie off first one, leave 2nd one attached to skein.
CROCHET ICING:
Ch 20.
Sl st into first st forming a loop.
1. Ch 1. Sc 30 into the loop. Join. (30 sts)
2. Ch 1. *Sc in next 2 sts. Work 2 sc in next st* work 10 times. Join. (40 sts)
3. Ch 1. Sc in next 2 sts. *Sk next st. Work 5 dc in next st. Sk next st. Sc in next 5 sts* work 4 times. Sk next st. Work 5 dc in next st. Sk next st. Sc in next 3 sts. Join. (50 sts)
CONSTRUCTION:
Place the crochet donut halves wrong sides together, with the attached half on the back. Pull the loop through the top layer. Sl st all around the outside, sewing the two donut halves together. Tie off.
Using the long tail you began with, hand sew around the inside hole, sewing the two layers together. Tie off.
Next, add the sprinkles or toppings to the icing pieces. I liked the look of both embroidery thread and yarn, so just choose which one you prefer. Simply sew in and out in a random pattern so it looks like sprinkles.
You can also mix it up with different colored yarns to have rainbow sprinkles!
I tried sewing a line that looks like a frosting drizzle! To do this a bit more authentically, make sure the line looks like the drizzle goes across the hole and back, instead of zig-zagging up one side of the hole and down the other.
Once your icing pieces are decorated, you can attach them to your crochet donuts. You can use your long tail to sew them on, or you can weave in all your ends and simply hot glue it in place. I used hot glue and its worked perfectly.
For best results, glue around the inside hole first, then work your way around the outside of the icing, putting your glue as close to the outside as possible without it squishing out. Use small lines of glue or even dot shapes all around the outside.
Aren’t they cute?
Enjoy my friend! Happy crocheting!
xoxo,
Heart Stitch Crochet Blanket – Crochet Pattern
Learn to make this adorable crochet heart stitch baby blanket in the cute Puppy Love Stitch! This pretty stitch resembles adorable little hearts. The look is easy to achieve and is done in simple rows. The post contains affiliate links, which means I get a small commission if you make a purchase, at no extra cost to you. Thank you for your support!
Crochet Camo Hat – Crochet Pattern
Make this crochet camo hat using color work and a graph! This new pattern is part of my new crochet color work course, which includes all my color work hats. Learn the basics of how to make a stretchy brim, how to keep yarns from getting tangled, the basics of fair isle and tapestry crochet. When you are ready, pick which graph to use to make your hat!
This crochet camo hat has been in the works for a while. To be perfectly honest, I had a hard time finding the perfect colors. This hat I made with Lion Brand Basic Stitch Anti-Pill. Someone mentioned that it has more of a feminine quality to it! I made another one in Lion Brand Heartland, and it looks much more traditional.
I also tried the next on one in SC BLO, while the first one I did using a cross stitch sc. I love the look of both of them, but the BLO hat defiantly has a nicer drape and less stiffness to the fabric. It can be done either way, but the BLO hat will be a bit taller.
Have you tried color work before?
It is so much fun. I love to see the design come to life as I go along. Even if you are brand new to color work, the hat course includes videos with basic instructions for working color work, carrying yarn and changing colors.
It is really easier than you think, I promise. I think the most helpful thing in the course is a quick tip to keep your yarns from getting tangled up!
CROCHET CAMO HAT
What you need to make this hat:
– size 5.5mm hook
– Medium Weight yarn with a soft drape in 3 colors
– Fur Pom-pom (optional)
HOW TO GET THIS CROCHET CAMO HAT PATTERN:
This camo hat is available in my NEW Colorwork Hats course/bundle!
You can check out the course and see everything that is included here.
You can also join the Endless Bundle, the Whistle and Ivy all-access pass membership!
It includes this NEW hat course PLUS:
+ ALL my pattern downloads
+ Crochet themed cut files
+ Full Tutorial videos
+ Tips Videos
+ Technique Videos
+All courses including Learn Crochet Plaid
You can also get the PDF in my individual shops.
Where would you like to shop today?
Whistle and Ivy shop
Ravelry
Etsy
I hope you give this crochet camo hat a try!
I think I need to make a scarf and cowl as well…
xoxo,
Faux Knit Crochet Pencil Pouch – CROCHET PATTERN
This cute little crochet pencil pouch features cute little stitches that look that knit! But this pouch contains only crochet stitches!
This post in brought to you by WeCrochet, an online yarn shop just for crocheters! Get yarns, hooks, bags and more!
This post contains affiliate links, which means I get a small commission at no extra cost to you. Thanks for your support!
I have recently been going through some long forgotten patterns in my WIP bins. I found a half-done snowfall pouch, and thought maybe I was time to give it a new life!
Back when I published my snowfall hat, I wanted to make all the patterns I could think of with that cute stitch. It looks so pretty and is so easy to do.
I still have quite a few half-done “snowfall” projects using this technique, and I hope I can get to all of them.
Although the technique does has an inherit wintry feel, this pouch is definitely note solely a cold weather project. Making it in bright colors would so fun and perfect for any season.
I used WeCrochet Shine Worsted to make this cute little crochet pencil pouch. Shine is one of my very favorite cottons to work with. It is a cotton and beechwood blend, so it has a silky texture and sheen that you won’t find with other cotton yarns, and it still made of all-natural fibers.
FAUX KNIT PENCIL POUCH – CROCHET PATTERN
What you need:
– 5 mm Hook
– WeCrochet Shine Worsted in Sailor and White
– 2 large buttons of your choice
Abbreviations: US Terms
Ch – chain
Sc – single crochet
DC – Double crochet
Sl st – Slip Stitch
St – stitch
WANT MORE?
You will LOVE The Endless Bundle – it’s literally ENDLESS! My membership program includes the entire Whistle and Ivy ad-free pattern library (to download and keep!) videos, full tutorials, courses (including my Learn Crochet Plaid course!), community, and much more. See you on the inside!
⭐️ LEARN MORE ⭐️
The ad-free PDF for this Faux Knit Crochet Pencil Pouch is also available in my shops!
Where would you like to shop today?
Whistle and Ivy Shop
Ravelry
Etsy
Need help with the snowfall stitch? Watch a video below (if it doesn’t load, please disable your ad-blocker).
Ch 29.
1. Work 2 sc in 2nd ch from hook. Sc in next 26 chs. Work 4 sc in last ch.
Working back across the other side of the chain, sc in next 26 chs. Work 2 sc in last ch (same ch as the first 2 sc). Join with first sc. (60 sts)
2. Ch 1. Work 2 sc in same st. Sc in next 28 sts. Work 2 sc in next 2 sts. Sc in next 28 sts. Work 2 sc in last st. Join. (64 sts)
3. Work this round through the Back Loops Only:
Ch 1. Sc in each st around. Join. (64 sts)
4. Ch 1. Sc in each st around. Join. (64 sts)
5. This round starts the “snowfall stitch”. See the video above if you need help working this technique. For the sake of the pattern, I will use the phrase ” work a snowfall stitch'” when you are working the small white knit-look stitch.
Ch 1. *Sc in next 3 sts with main color. Work a snowfall stitch in next st* work 16 times. Join. (64 sts)
6. With main color, Ch 2. Dc in each st around. Join with first dc. (64 sts)
7. Ch 1. Sc in next st. Work a snowfall st in next st. With main color, sc in next 3 sts. Work a snowfall stitch in next st* work 15 times. With main color, sc in last 2 sts. Join. (64 sts)
8. With main color, Ch 2. Dc in each st around. Join. (64 sts)
9. – 12. Repeat rows 5 – 8 respectively.
13. Ch 1. Sc in next 10 sts. Ch 8. To form a button loop, sc in next st. Sc in next 13 sts. Ch 8. Sc in each remaining st. Join. Tie off.
CONSTRUCTION:
To finish your cute crochet pencil pouch, sew large button on the outside of the opposite side of the pouch from the button holes.
Finished! Perfect for carrying all your favorite pens and markers!
Be sure to check out WeCrochet to see all their fabulous yarns and crochet accessories.
xoxo,
- 1
- 2
- 3
- …
- 113
- Next Page »