
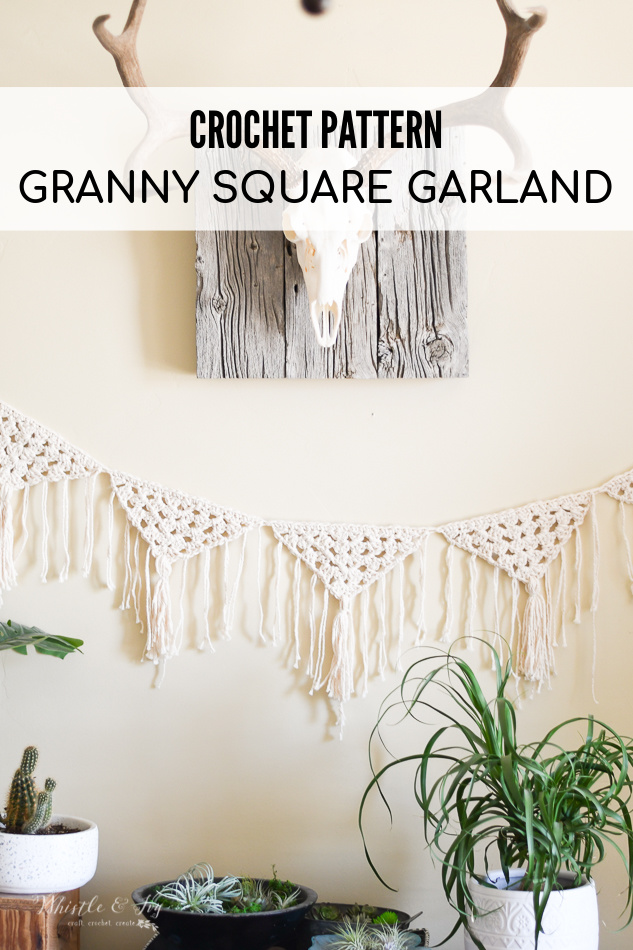
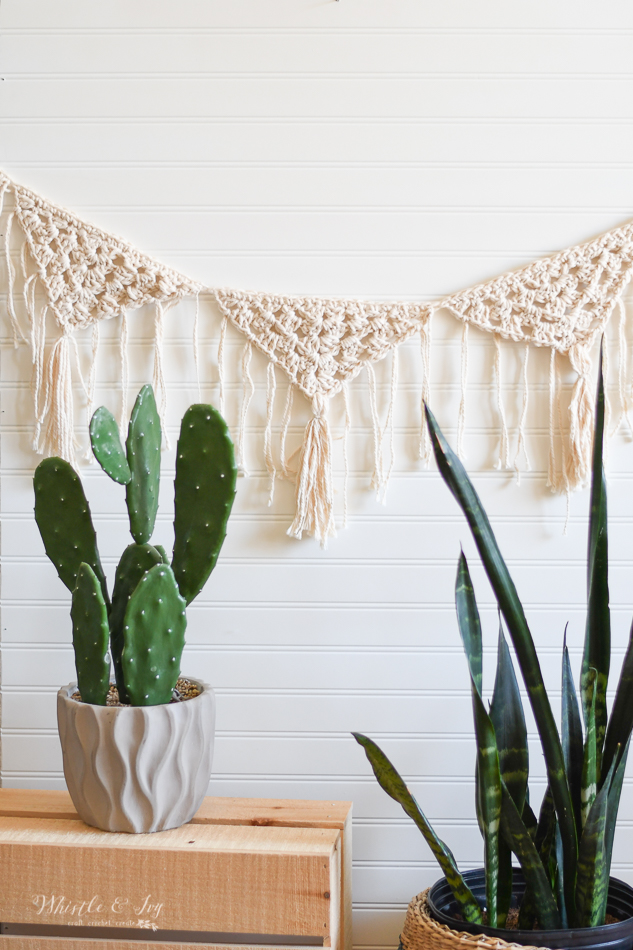
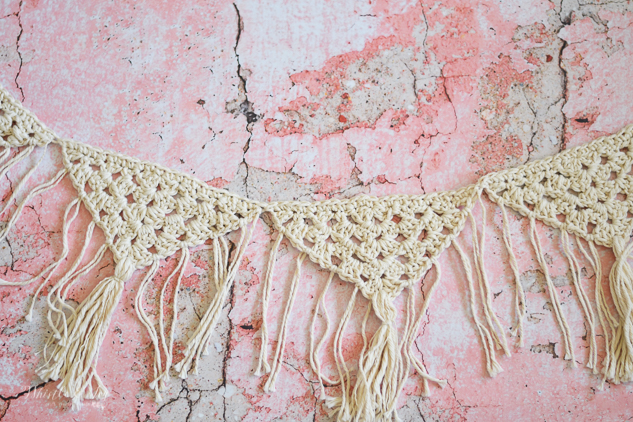
This easy boho crochet garland uses basic crochet stitches and techniques to create a modern piece of crochet decor! One of the very first stitches you will learn in crochet is the granny stitch, use it to make something pretty and modern!
This post contains affiliate links, which means I get a small commission at no extra cost to you. Thanks for your support!
Do you have a color that you find yourself gravitating to time and time again? I have a few, but one of my favorites is a gorgeous creamy off-white! It works perfect in every setting, every color scheme, every style.
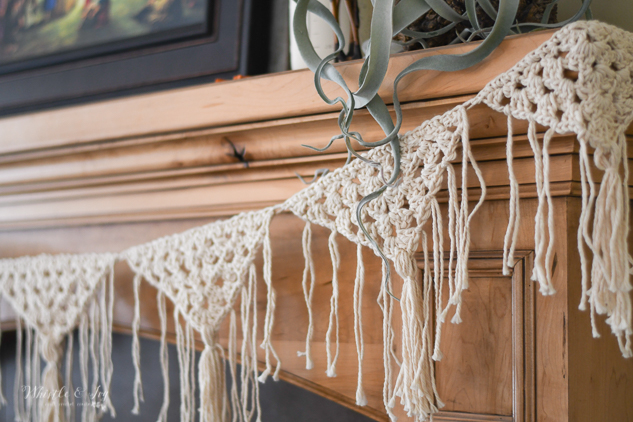
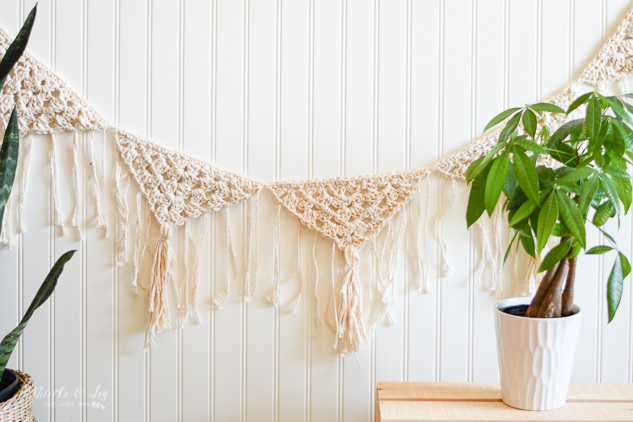
This crochet garland uses the time-honored granny stitch, so it’s great for beginners. The twist is that it’s a triangle instead of a square, so the shape paired with the added fringe gives it a modern infusion. It was quick to make and fringe is such a fun addition to a lot of projects. I can’t decide whether to hang this in the baby’s room, put on my porch or hang it across the mantel. The look of this crochet garland is is so versatile!

You’re tired of sifting through complicated tutorials and patterns that leave you feeling overwhelmed.
Let me help.
PICTURE THIS:
Instant access to a library of modern, easy-to-follow patterns
Gifting your handcrafted treasures to your loved ones.
Feeling accomplished by your beautiful makes
It’s time to make your crafting experience as joyful as it should be.
BOHO CROCHET GARLAND – CROCHET PATTERN
What you need:
– 7mm Hook
– 2 Hanks of WeCrochet Billow in “Bare Billow”
– Darning needle
GAUGE: not important
Abbreviations: US Terms
Ch – chain
Dc – Double Crochet
Sc – single crochet
Sl st – Slip Stitch
St – stitch
Sp – Space
LOVE THIS BUT HATE THE ADS?
This granny stitch garland can be purchased in my shops! Where would you like to shop today?
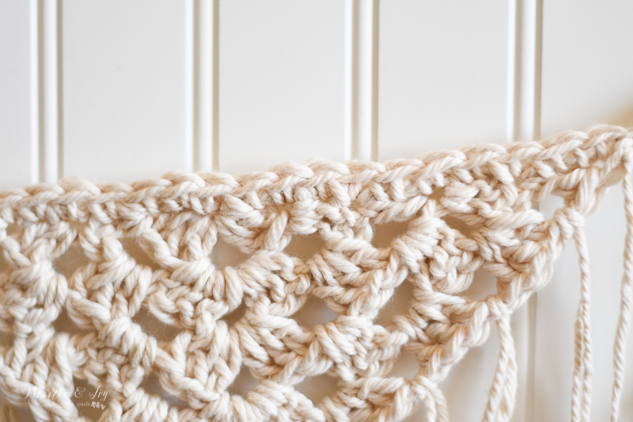
GRANNY SQUARE TRIANGLES:
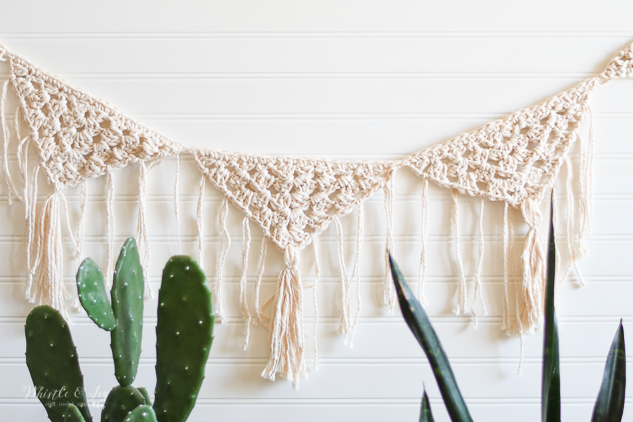
Hypotenuse (longest side) is approx. 9″ long.
You can get 7 triangles (without fringe) from one hank of suggested yarn.
Start with a magic ring.
1. Working into the ring: Work 3 dc. Ch 2. Work 3 dc. Turn. (8 sts)
2. Ch 2. Work 2 dc in same st. Ch 1. Working into next ch 2 sp: Work 3 dc. Ch 2. Work 3 dc.
Ch 1. Work 2 dc in last st. Turn. (14 sts)
3. Ch 2. Work 2 dc in same st. Ch 1. Work 3 dc in next ch 1 sp. Ch 1. Working into next ch 2 sp: Work 3 dc. Ch 2. Work 3 dc. Ch 1. Work 3 dc in next ch 1 sp. Ch 1. Work 2 dc in last st. Turn. (22 sts)
4. Ch 2. Work 2 dc in same st. Ch 1. *Work 3 dc in next ch 1 sp, Ch 1.* work twice.
Working into next ch 2 sp: Work 3 dc. Ch 2. Work 3 dc. Ch 1.
*Work 3 dc in next ch 1 sp. Ch 1.* work twice. Work 2 dc in last st. Turn. (30 sts)
5. Ch 2. Work 2 dc in same st. Ch 1. *Work 3 dc in next ch 1 sp, Ch 1.* work 3 times.
Working into next ch 2 sp: Work 3 dc. Ch 2. Work 3 dc. Ch 1.
*Work 3 dc in next ch 1 sp. Ch 1.* work three times. Work 2 dc in last st. Turn. (38 sts)
You can choose to weave in your ends or use them as added fringe.
CONSTRUCTION:

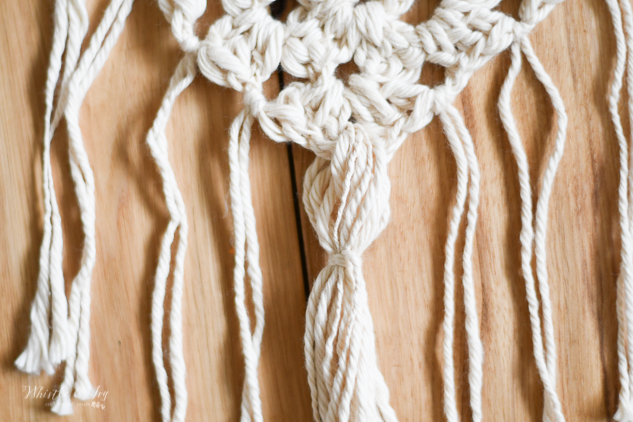
To create fringe, cut 8 lengths of yarn double the length of the length of the fringe you would like. Attach one piece in each of the space up and down the sides of each triangle. To do this, half your length, push the middle loop through the hole, then pull both end through the loop, pulling to tighten.
Add a fluffy tassel at the very bottom. Wrap yarn around a card about the width of the length you would like your finished tassel to be. Wrap 9 or 10 times. Cut the bottom, leaving the top loops uncut. Pull through the bottom ch space. Tie a shorter length of yarn around the middle, making the lengths into a tassel.
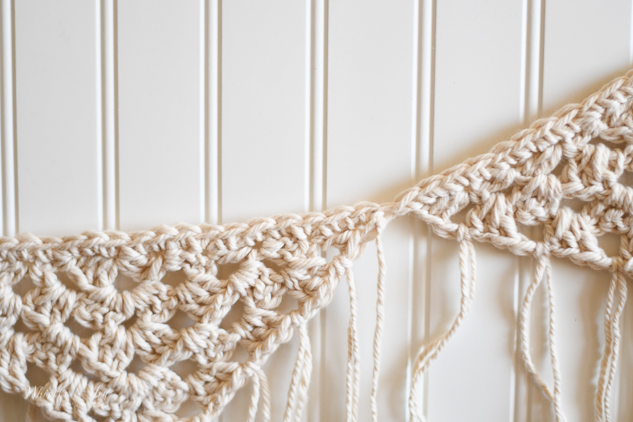
From here, you can sc each triangle together. Starting with one, join at the top right of the raw hypotenuse of the triangle. Sc across this raw edge as evenly as you can.
When you get to the end, grab your second triangle. Without breaking the yarn, and continuing to work as evenly as possible, sc into the first sp of the next triangle and continue sc across it. Repeat with all your triangles until they are all sewn together.
String your crochet garland up to add some pretty to any place!
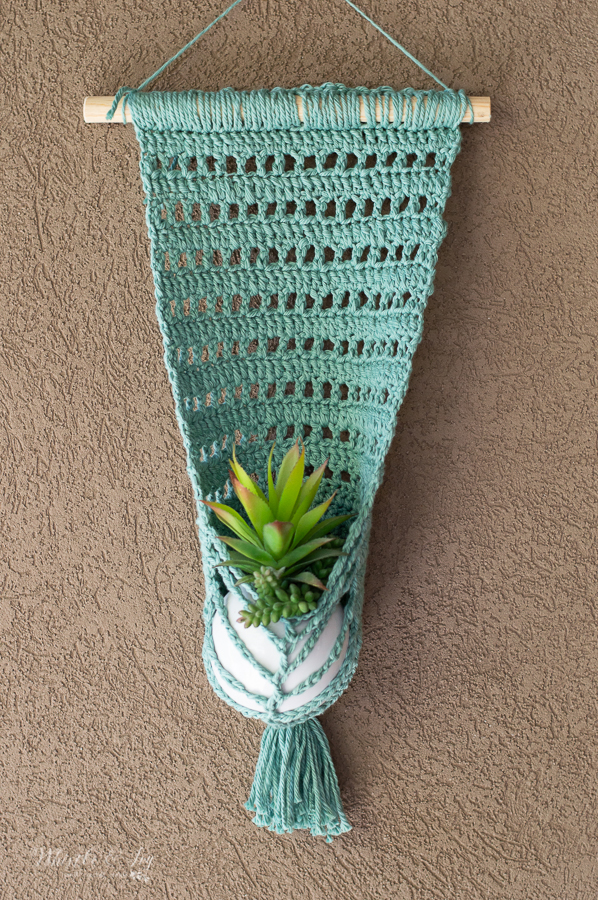
Want more cute wall decor? Try making this planter wall hanging!
xoxo,


Love it! Great job Beth and thanks for sharing.
Thank you Tracy!