
This post uses affiliate links. For more info, click HERE. Thanks for supporting Whistle and Ivy!
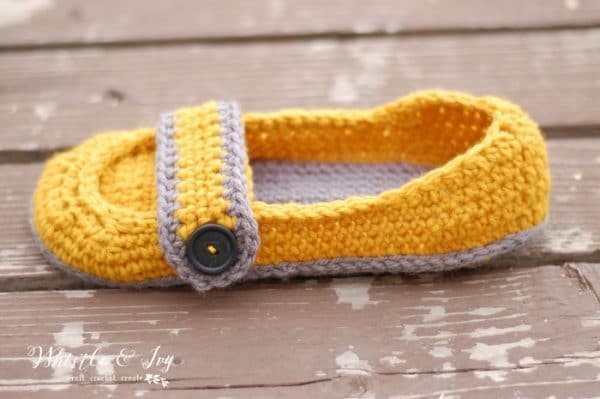
Well, I don’t know about you, but I have been cold! I haven’t needed snow boots for a few years, but I just ordered a pair, and I think they are definitely going to get some use up here. And since my husband likes to keep the house a bit cool, I really needed more slippers for my cold feet. I have designed a couple other pattern, but I wanted to make something new, and these Button Strap Slippers turned out very cute!
They turned out pretty cute and I think I will make another pair in a different color. I wrote the pattern for size 8, but sizing up should be pretty easy for you as I included instructions.
By using this free pattern, you are agreeing to NOT redistribute this pattern (whether electronically or by printing and handing out copies). Sharing is a form of theft! If you would like to share, please direct others to my page. Pageviews enable me to publish my patterns for free, so please help me to continue to do so.
You are free to sell items you make from this pattern! By using my pattern and selling your items, you are also agreeing that you will give credit by adding a link to the original blog post in each individual listing, or on your tags. And DO NOT use my photos to sell your items. Thank you!
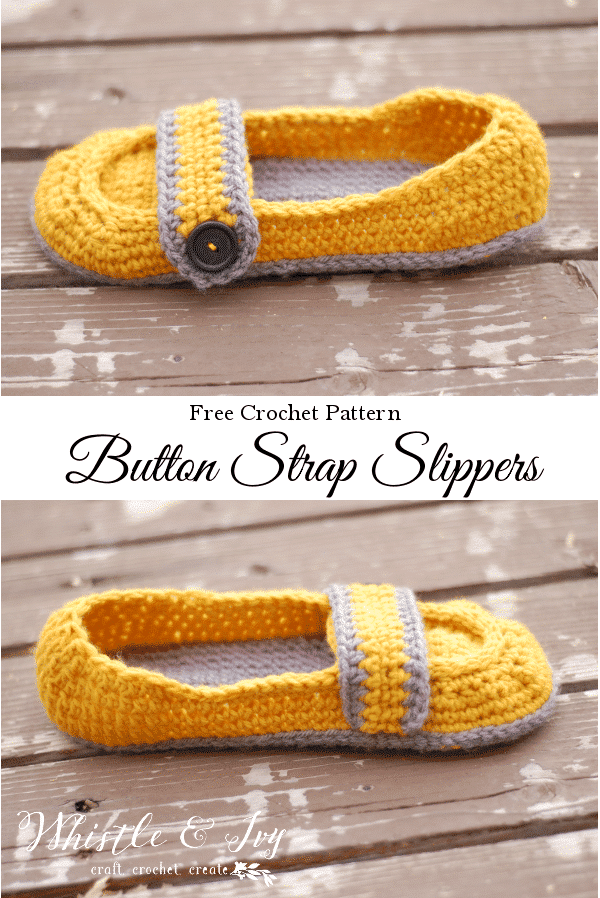
Button Strap Slippers
You will need:
–Red Heart Yarn for Body (Gold)
–Red Heart with Love for Sole (Pewter)
-2 Chunky Buttons
–Size h Hook (or Hook to achieve gauge/length)
Gauge: 7 sts = 2″
Size 8***
Sole: Make two sole pieces for each shoe, 4 total. (approx. 9 ¾” long) The sole is worked in the round.
Ch 26
1. 4 sc in 2nd ch. Sc 16. Hdc 2. Dc 5. Dc 7 in last ch. Working across opposite side of chain, dc 5, hdc 2, sc 16. Join with the first sc with a sl st. (57 sts)
2. Ch 1. 2 Sc in the next 4 sts. Sc 24. 2 sc in the next 5 sts. Sc 24. Join with a sl st. (66 sts)
3. Ch 1. Hdc. *Hdc. 2 hdc in next st* work 3 times. Hdc 25. *Hdc, 2 hdc in next st* work 5 times. Hdc 24. Join with sl st. (74 sts)
4. Ch 1. Sc. *Sc 2, sc 2 in next st* work 3 times. Sc 25. *Sc 2, sc 2 in next st* work 5 times. Sc 24. Join with a sl st. (82 sts)
5. Ch 1. Hdc. *Hdc 3, hdc 2 in the next st* work 3 times. Hdc 25. *Hdc 3, 2 hdc in the next st* work 5 times. Hdc 24. (88 sts)
Join with sl st and tie off.
Match up your two sole pieces and using a loose sl st, stitch the two soles together, going through both loops of each sole. Use the color you want the slipper body to be.
Body:
1. Start your round on 18th st from the middle of the toe. Face the toe downwards and count 18 to the right. Going through the sl st loops and working towards the toe: Ch 1. Sc in same st. Sc 50. Hdc 7. Dc 8. Hdc 7. Sc 15. (88 sts) Join with sl st.
2. Ch 1. Sc in same st. Sc 50. Hdc 7. Dc 8. Hdc 7. Sc 15. (88 sts) Join with sl st.
3. Ch 1. Sc in same st. Sc 4. Sc2tog twice. Sc 2. Sc2tog 7 times. Sc 2. Sc2tog twice. Sc 20. Hdc 7. Dc 8. Hdc 7. Sc 15. (77 sts)
Join with sl st.
4. Ch 1. Sc in same st. Sc 4. Sc2tog twice. (Sc 2. Sc2tog) Twice. Sc 2 . Sc2tog twice. Sc 17. Hdc 7. Dc2tog. Dc 4. Dc2tog. Hdc 7. Sc 15. (69 sts) Join with sl st.
5. Ch 1. Sl st 30. Sc 2. Sc2tog three times. Hdc. Dc2tog 4. Hdc. Sc2tog three times. Sc 2. Sl st 13. (59 sts)
Secure end and tie off.
Toe Flap: (Make 2)
1. Ch 3. Sc 2 into 2nd ch from hook . Sc 2 in last st. Turn (4 sts)
2. Ch 1. Sc 2 in same st. Sc 2. Sc 2 in last st. turn. (6 sts)
3. Ch 1. Sc 2 in same st. Sc 4. Sc 2 in last st. (8 sts)
4. – 12. Ch 1. Sc in same st. Sc 7. (8 sts)
Sc all around your flap. Tie off but leave a long tail.
Strap (Make 2)
Ch 18.
1. Sc into 5th ch from hook. Sc 13. Turn
2. Ch 1. Sc in same st. Sc 12. Sc 5 in the 5-ch-loop. Sc 13. Turn.
Start new color with sl st.
3. Ch 2. Hdc in same st. Hdc 12. Hdc 2 in the 5 sts around the loop. Hdc 13. Leave your long tails.
Construction:
Using your yarn needle, line up your toe flap and sew it in place. Make sure you secure the first st firmly by going in and out a few times. Work your way around until your entire flap is sewn in place. I like to stop after each st, or every other st to confirm everything is in place and even.
After your flap is sewn in in place, line up your strap. I like it right at the edge of the flap. Using your hook, reach through from the inside out, and grab the tails of your strap. You should have 4. Make sure you are pulling them each through a different space. Once all 4 tails are inside the shoe, tie 2 tails together (2 knots) securely and trim or weave in ends if you prefer.
***To make a different size, go up or down 2 ch on your foundation ch. Make sure to adjust accordingly on the sides. The toe and heel should NOT be changed, just the length. Be sure you make the entire soul for sizes 5, 6, 7 in single crochet stiches to make it narrower. Keep in mind, if you are changing the length of the ch by two, your entire round/row count will go up/down 4 sts.
I hope you enjoy these Button Strap Slippers! Share your creations with me, tag me on Instagram! (@whistleandivy)
Like this post? Subscribe!

Join our Facebook Community! We need YOU!
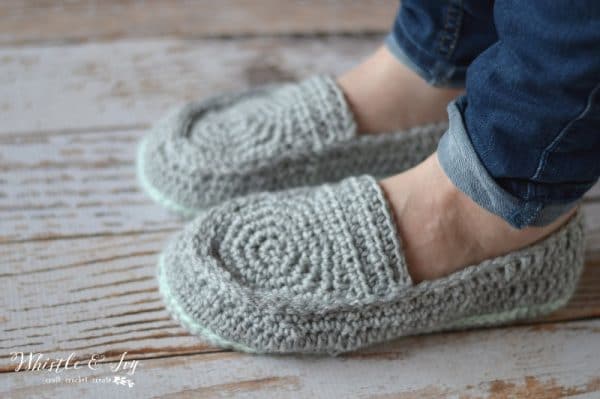
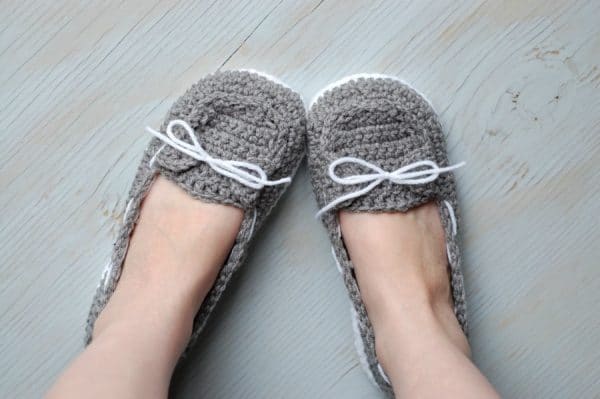
You may also like these FREE slipper patterns:


Hi Bethany
Lovely pattern, this may have been asked already so apologies if it has, is the size 8 a UK shoe size?
Thank you! This is US sizing.
I’m having a small problem with the soles. On row 4, the part that says “*sc 2, sc 2 in the next st* work 3 times” does that just mean 2 sc in the next 6 st? There’s something similar in row 5 as well.
You are repeating the entire instructions in between the asterisk a total of 3 times.
Working size 8… At the end of round 5(sole) I have 90 stitches… instead of the 88 shown… where can I add the stitches for the body of the shoe?
I would add one on each long, straight side of the slipper.
That’s what I ended up doing. Took a little longer counting and whatnot but I got it figured out. Thanks!
I made these slippers for my first “real” project (other than a quick headband). I used navy and gray yarn. These turned out SO CUTE and the pattern was very easy to follow for a first-timer. I really appreciate you sharing your pattern and creativity. Can’t wait to try more of your patterns!
yay! I am so happy you love the pattern! I hope you find a few more things to make here, too :)
No worries! Thank you.
Thanks again for a great pattern! Now my daughter wants s pair of her own. Any suggestions on how to modify this pattern to fit a girls size 12? Thanks in advance 😊
I am not sure, I am sorry! I haven’t made that size before, but I have been meaning to make my boat slippers into children’s sizes. Sorry!
I have a question about the straps. When beginning the first row, are you doing 1 sc in the 5th ch from the hook then an additional 13 sc for a total of 14 sc? If so, then in row 2, I count 13 sc before the 5 sc in the loop so am I skipping the V right before the loop or should I do a 14 sc before I get too the loop? Thanks for any help. I love your pattern. Super cute.
You might be right! Don’t skip stitches, work a st in each st along the length.
Is there a video tutorial of this somewhere, my increases keep getting messed up.
I’m sorry, there isn’t :(
Hi. I can’t seem to find the women’s strap flip flop summer slipper pattern. Could you email it to me? I have gone to the sites. Thank you
You can find it here:
http://www.whistleandivy.com/2015/05/womens-strap-flip-flops-summer-slippers.html
I am stuck on making the sole. I did 1sc 2 sc (3times) 24 sc. 1 sc. 2 sc (5 times) 24 sc. When trying to do the next step I end up with 8 stitches left. Help……
Are you repeating the entire sequence? I think you aren’t working the increases right.
Just clarify the soles of the shoe should be Row 1 – 26 stitches, Row 2 – 56 stitches, Row 3 – 64 stitches, Row 4 – 72 stitches, Row 5 – 80 stitches, Row 6 – 88 stitches
Which size?
8 – Just like the pattern you provided.
Oh yes! Sorry. Yes, those stitch counts are correct.
Hi Beth,
I love your patterns! I have a question about starting the body of the slipper. I’m left handed and I’m not sure if I start 18 stitches to the right if I will be working in the wrong direction? I am just a beginner so I could be completely wrong lol. Also I am closer to a size 10 so i went up 4 stitches. Am I correct then that the sole is increased a total of 8 stitches all around? How to I account for the increase of 8? Does that change where I start? Should I still begin 18 stitches to the right? Sorry for all the questions and thank you!!
Hi Julie,
I am sorry, I can’t help you with the left-handed part, I would have no idea on that! But the size increase will not change your starting position. As far as sizing up, you will make them longer, so do the toe and heel the same, and just add the extra stitches in the length on the side. Does that make sense?
Hi Beth,
Thank you! When I start the body of the slipper I am crocheting towards the heal. Is that correct? If I am supposed to crochet in the direction of the toe then I think I am going in the wrong way lol.
Oh no! Yes, you should be working towards the toe. Make sure the outside (the right side) of your stitches are facing outwards.
Here is a link to a pair of these slippers that I made. Thanks, Bethany, for the great pattern! https://flic.kr/s/aHsk5s8Bgw
They turned out great, yay! You are welcome :)
Bethany,
How did you sew the toe flap in? From the back side? Into the top stitches around the body or underneath? Thanks!
From the top, going through the loops on the shoe from the last row. That is what I did, but you can do whatever it easier for you!
Love these! However, having problems with the body. Step 3. Sc2tog twice. tog? I’ve never seen this abbreviation before. Is it 2 sc in a single spot? I tried working it that way but it isn’t coming out at the end of the row. It is too short.
Thank you so much
Thanks! Sc2tog means single crochet 2 together, or a sc decrease.
Got it! Perfect. Thank you so much
You’re welcome!
I just finished crocheting the yellow slippers. Your directions are very clear. I will make more of these. Thanks so much!
Thanks so much Mary! I appreciate your sweet comment :) I am so glad you like my pattern!