
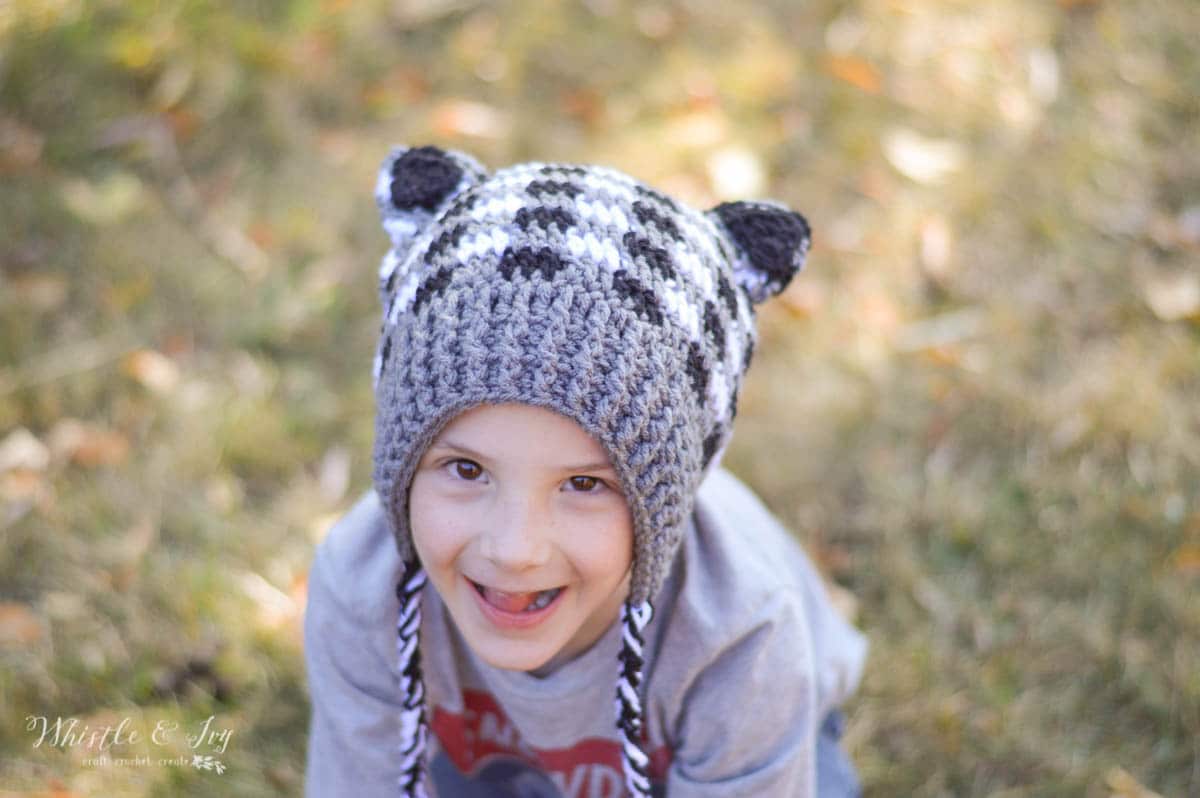
These cute crochet woodland animal hats feature a cute plaid and gingham color scheme! They are worked from the bottom up and forming the ears is simply done by closing the top flat and cinching the ears a bit. The pattern includes sizing for the whole family
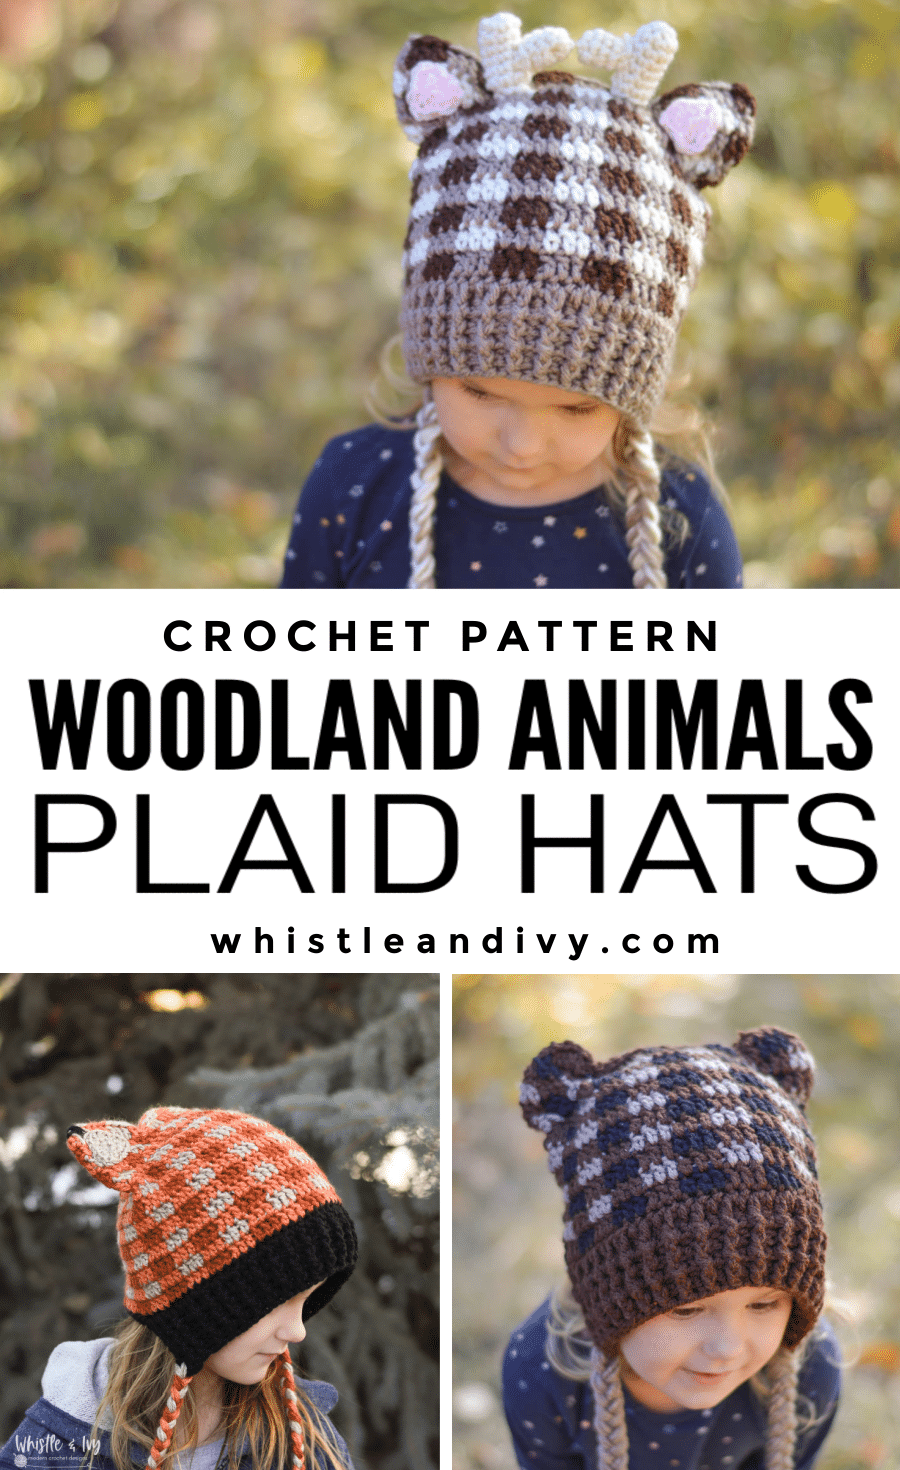
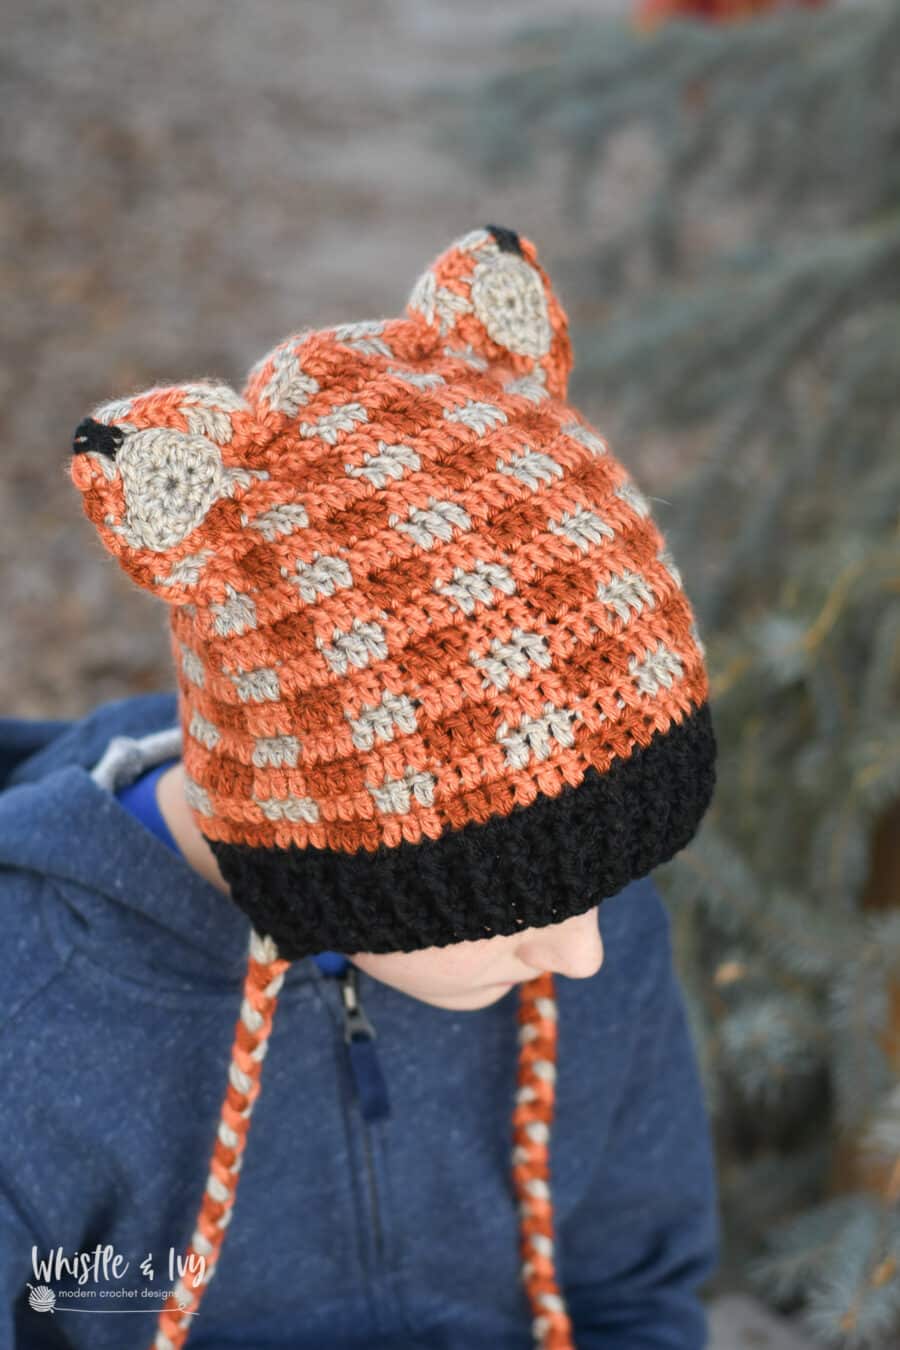
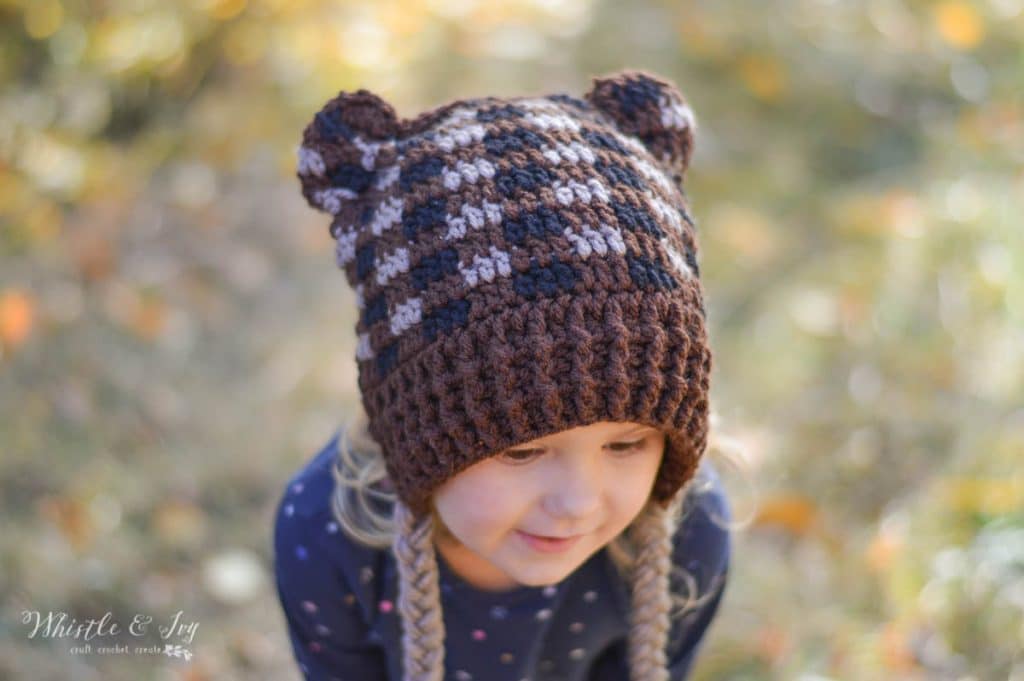
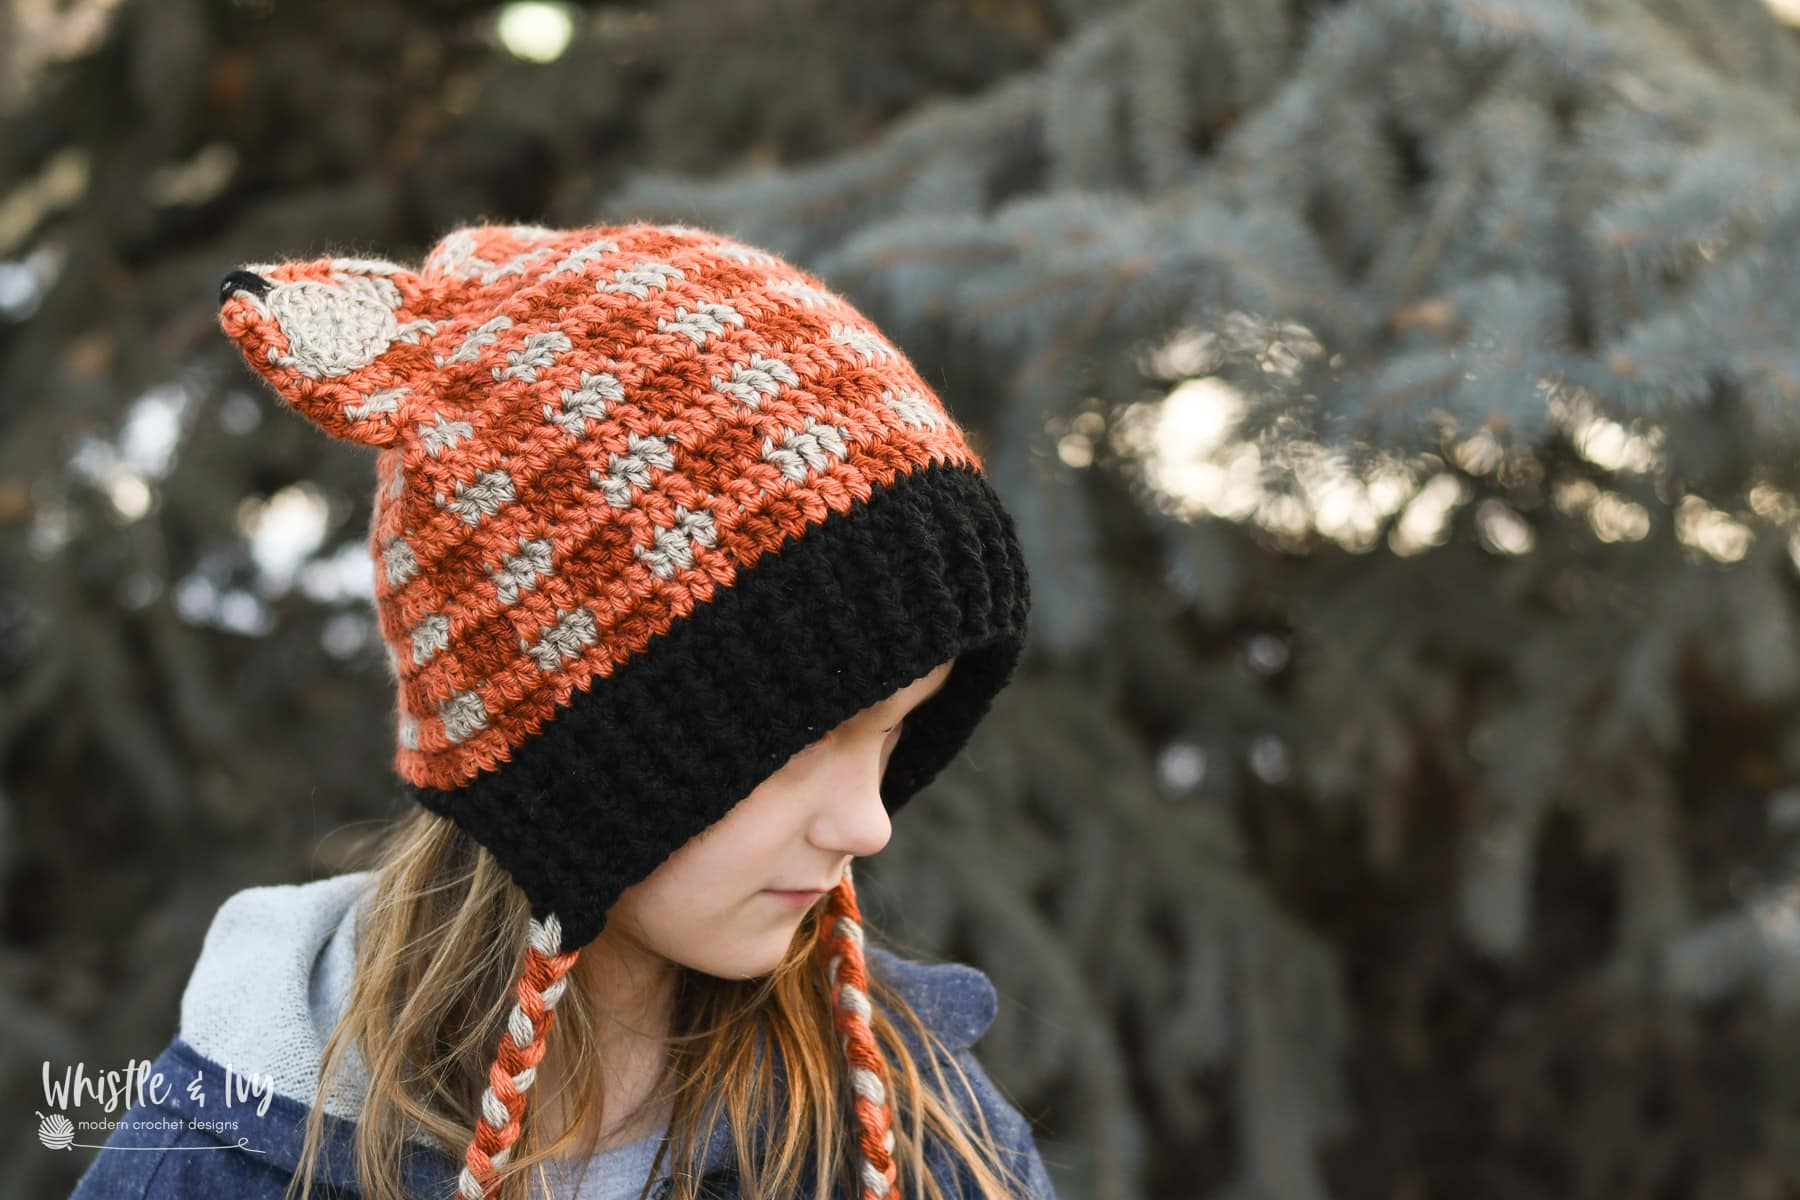
One of my favorite patterns from Plaid Week this year was my Plaid Fox Hat. It was a vision that came together beautifully and I was so happy with how the pattern turned out. When I shared in on Facebook, I had a few people throw out ideas for other animals. I loved the idea of a whole woodland animal set, so I got to work designing other Plaid Woodland Animal Hats. The Raccoon and Deer were simple enough, but the Bear was a bit tricky. Bears have roundish ears so I had to do a bit of experimenting. Luckily, and idea of how to make the ears round came to me, and it worked out beautifully!
This post is going to be image heavy because my darling children were so sweet during our photo session. Those faces melt my heart! I really wanted to share all of them, but I forced myself to narrow it down.
.

You’re tired of sifting through complicated tutorials and patterns that leave you feeling overwhelmed.
Let me help.
PICTURE THIS:
Instant access to a library of modern, easy-to-follow patterns
Gifting your handcrafted treasures to your loved ones.
Feeling accomplished by your beautiful makes
It’s time to make your crafting experience as joyful as it should be.
PLAID CROCHET WOODLAND ANIMAL HATS – FREE CROCHET PATTERN
Please remember: You are free to use this pattern to make and sell, but do not republish or distribute this pattern in any way. DO NOT use my photos in your listings. Please do share my blog links! It’s a quick and FREE way of supporting Whistle and Ivy and more free crochet patterns in the future.
PLEASE read my Disclaimer before working my free patterns!
What you need:
– 5mm, 6mm, 7mm Hooks
-Worsted Weight Yarn
– Darning Needle
Abbreviations: US Terms
Ch – chain
Sc – single crochet
Hdc – half double crochet
Dc – Double Crochet
Dc2tog – Dc decrease
Sc2tog – Sc decrease
Fpdc – front post dc
Bpdc – back post dc
Sl st – Slip Stitch
St – stitch
FREE children’s versions are available for each size, but to get additional sizing, please consider supporting Whistle and Ivy by purchasing a PDF download.
The PDF is ad-free and includes sizing for Baby to Adult XL.
WOODLAND PLAID CROCHET HATS – CROCHET PATTERN
$4.50
This sweet woodland hat pattern includes 3 animal variations: Bear, Fox, and Deer. Pattern is written in US Standard English terms. Sizes included: Adult XL down to 6-12 Month baby.
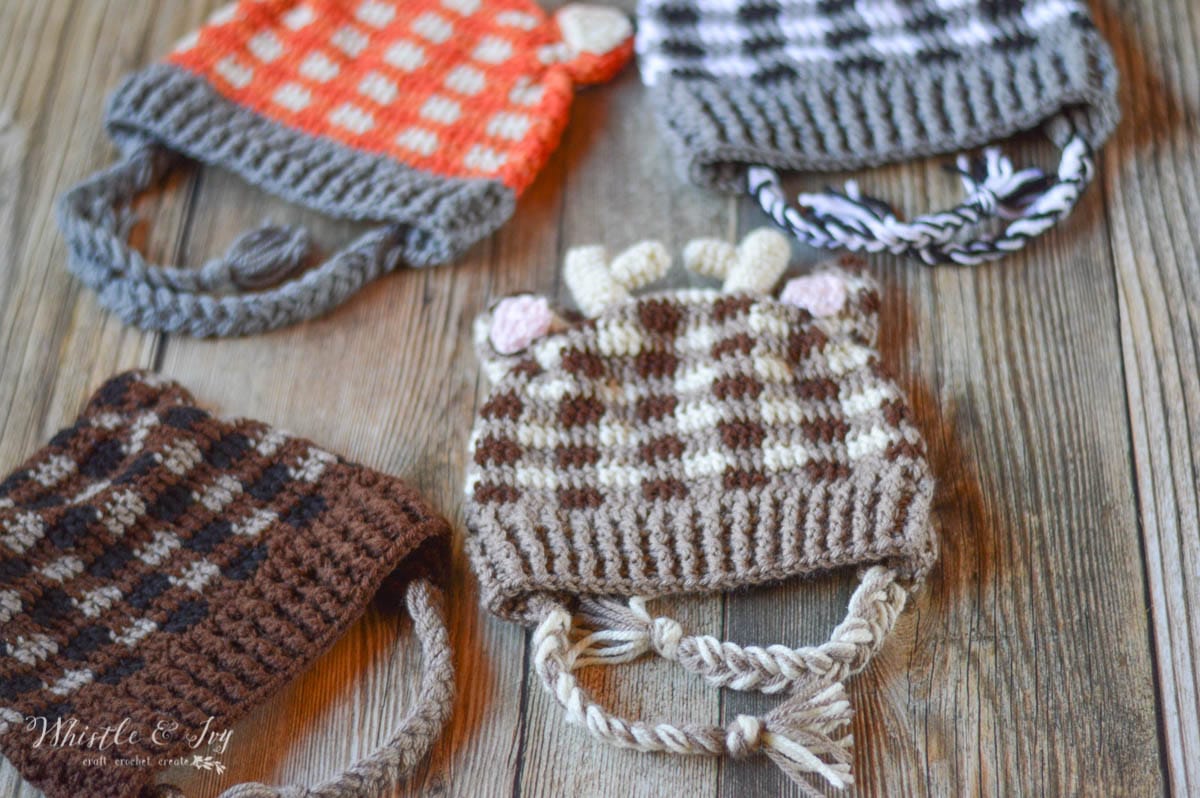
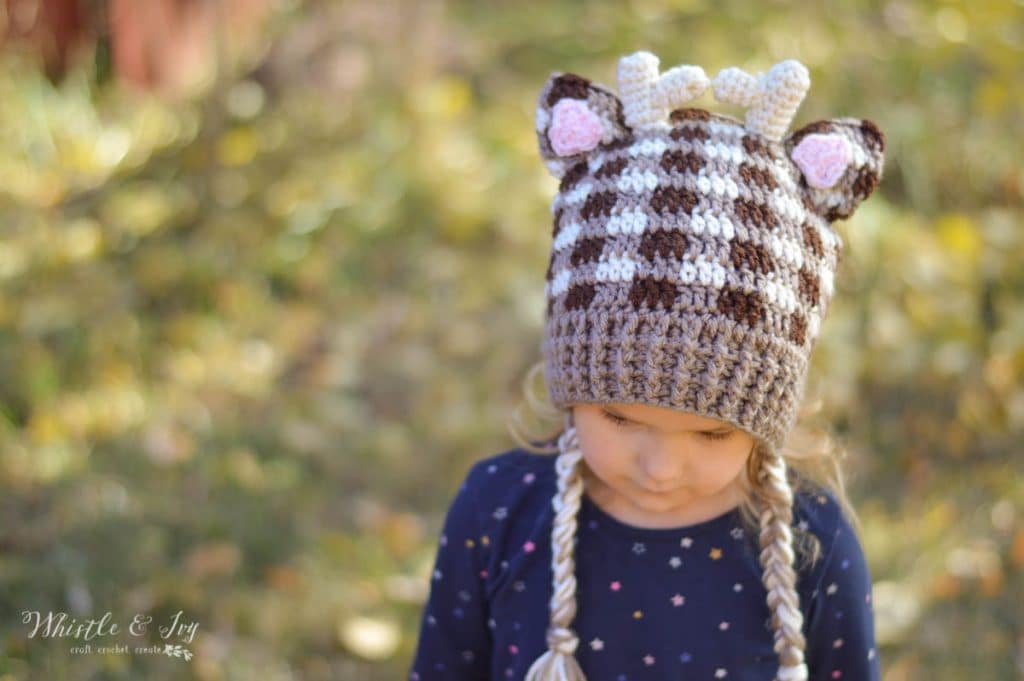
Raccoon/Fox/ Deer
To make the different animals, you can change colors.
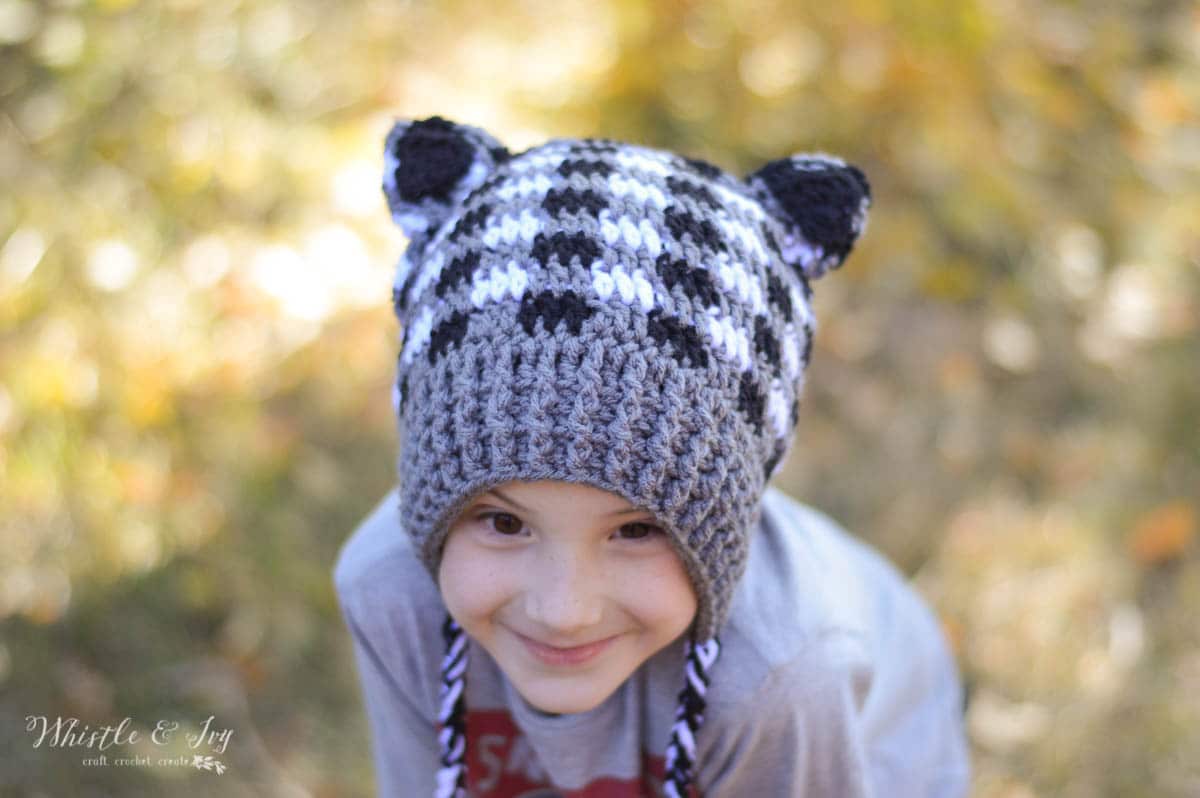
For raccoon use black, gray and white.
For deear, use dark brown, light brown and cream
For fox use dark orange, light orange and cream.
CHILD/TODDLER
(Worked from the bottom up, but you will add the ribbed brim last)
Use J Hook for Child (18″ circumference
Use H hook for Toddler (16.5″ circumference)
1. Using brim color : 65 st sc foundation. Join with a sl st forming a circle. Working in joined rounds.
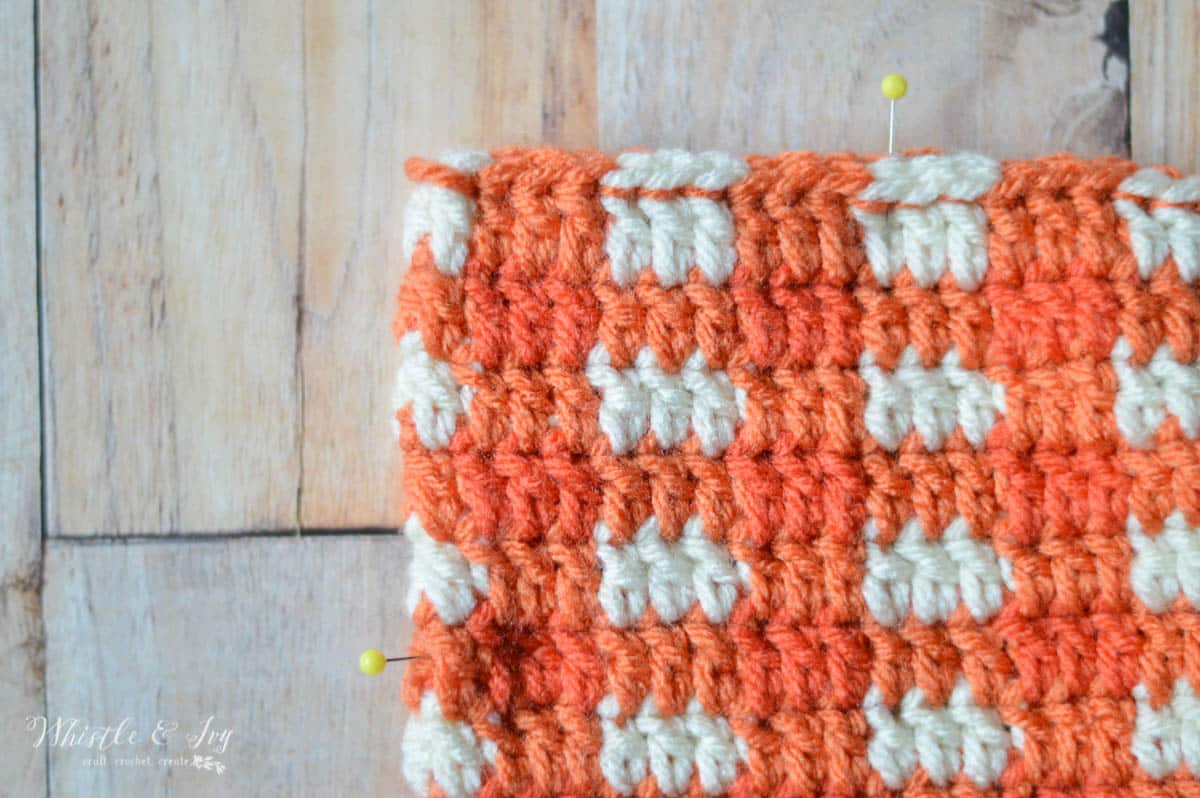
2. Using your Mid color: Ch 2. Dc in same st. Dc in next st. (Counts as the first plaid block)Work the Plaid Stitch alternating between Dark and Mid. (65 sts)
3. Ch 2. Dc in same st. Dc in next st. Work Plaid stitch, alternating between Light and Mid. Join with a sl st. (65 sts)
4. – 11. Ch 2. Dc in same st. Dc in next st. Work Plaid Stitch. Join with a sl st. (65 sts)
Clip ends.
Using the tail from the beginning sc foundation, sew up the bottom of where the stitches meet.
Brim:
Turn hat upside down with seam facing you. Count 8 to the left, start in the 9th st.
1. Ch 2. Dc 50. Turn. (50 sts)
2. – 5. Ch 2. Alternate Fpdc and bpdc across. Turn. (50 sts)
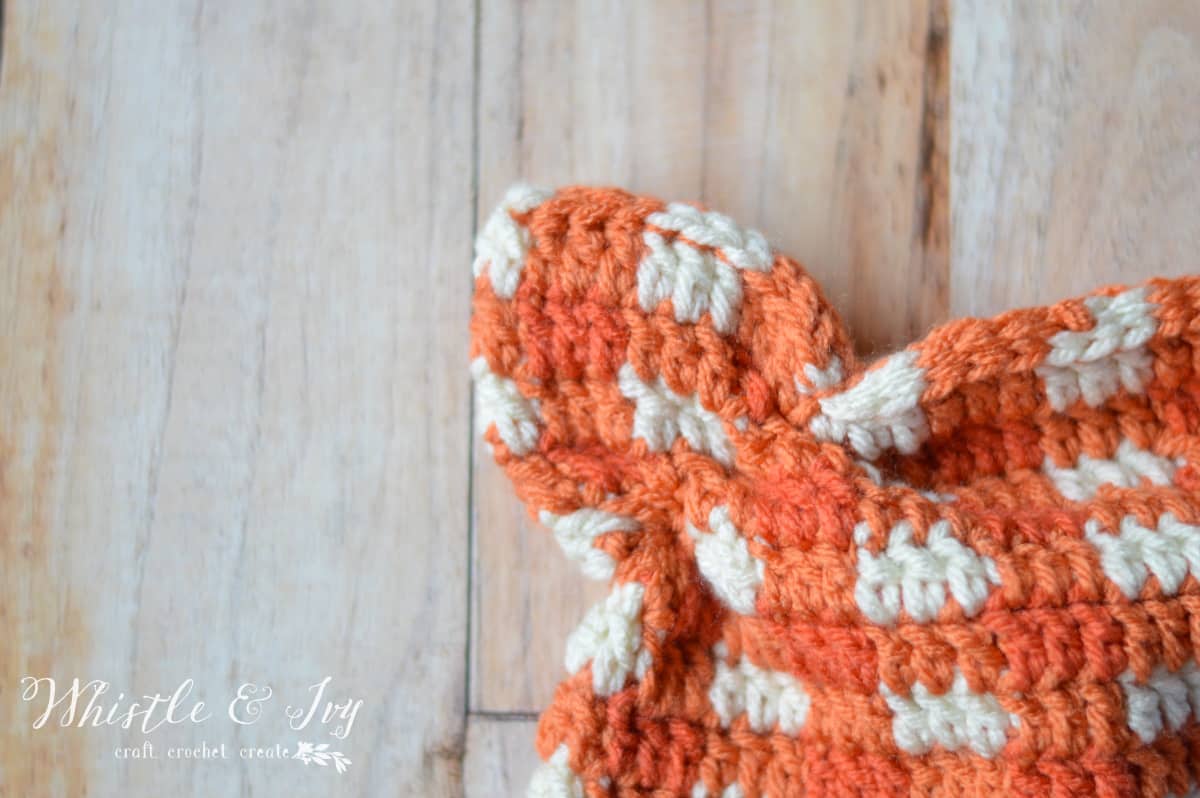
FORM THE EARS:
To form the ears, thread your darning needle with a length of yarn. With pins, mark 2.5 inches in from the top corner, and 2.5 inches down from the top corner. Sew a loose running stitch from the top pin to the bottom/side pin. Pull the ends and cinch the ear tight. Taking care that it stays tight and cinched, weave in both ends securing the air. Clip ends.
Flatten hat so the the seam is in front and front flap is in the exact middle. With the back of the hat still facing you, sl st all across the top, closing the hat.
To form the ears, thread your darning needle with a length of yarn. With pins, mark 2.5 inches in from the top corner, and 2.5 inches down from the top corner.
Sew a loose running stitch from the top pin to the bottom/side pin.
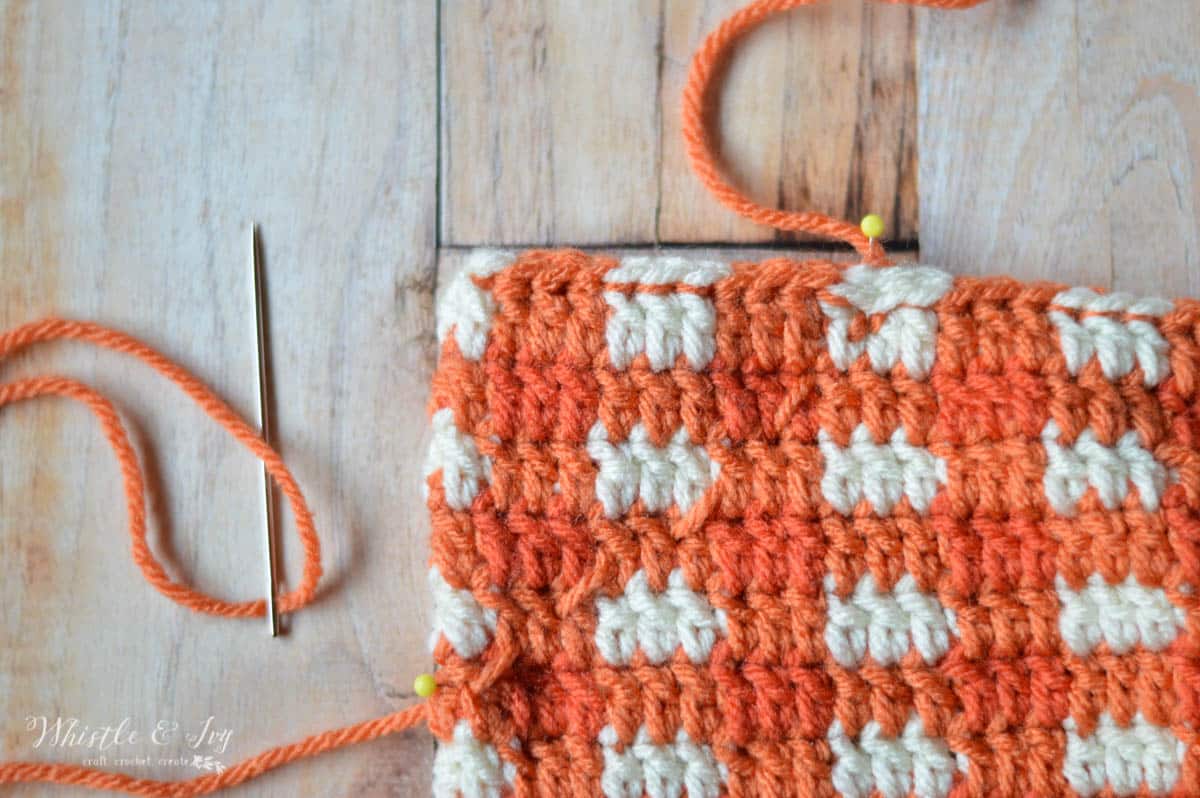
Pull the ends and cinch the ear tight. Taking care that it stays tight and cinched, weave in both ends. Clip ends.
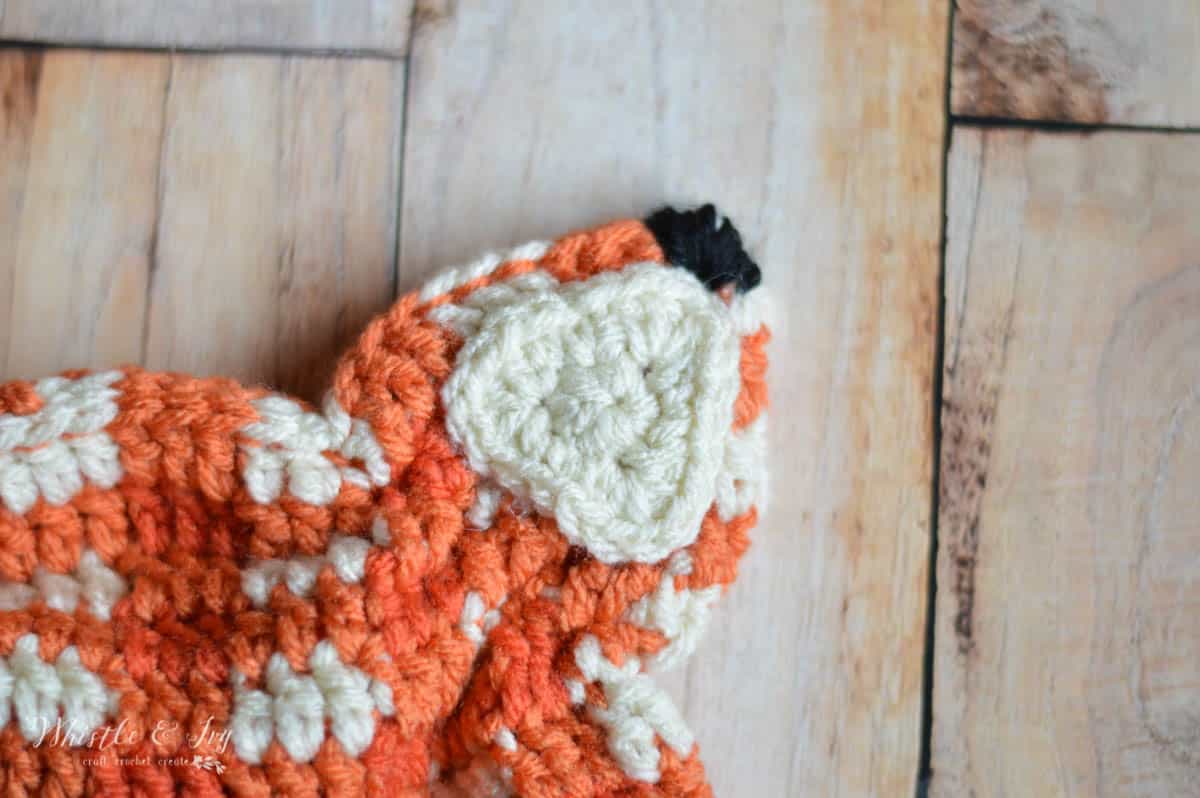
Inside Ears: (pink for deer, black for raccoon, cream for fox)
With H Hook
Magic Ring
1. Ch 2. *Dc. Sc. Dc. ch 2.* work 3 times. Join with first dc.
Pull ring tight. Break yarn. Leave a long tail if you are sewing it on. Weave in ends if you are gluing it on.
Attach the inside ears to the ears on the hat. You can either sew it in place or attach it with hot glue. If using hot glue, be sure to apply glue as close to the edge as possible as an unglued edge can curl up over time.
Antlers: (for Deer Hat)
Main Beam:
Magic Ring
1. Ch 1. Sc 7 into the ring. Join with a sl st. (7 sts)
2. – 7. Ch 1. Sc in each st around. Join with a sl st.
(Work 2 more rows for adult hat)
Stuff firmly with Polyfil.
Second Point:
Magic Ring
Ch 1. Sc 5 into ring. Join with a sl st. (5 sts)
2. – 4. Ch 1. Sc in each st around. Join with a sl st. (5 sts)
(Work one more row for adult hat)
Stuff firmly with Polyfil. Sew onto Main Beam.
Sew Antlers onto the hat on the row before the seam at the top, and inside from the ears.
Finish the hat by making the tassels. Cut 9 lengths of yarn about 25″ long. Pull them through the corners of the ear flaps halfway, so 18 strands hang down. Twist the strands in a braid and secure with a knot. Clip ends.
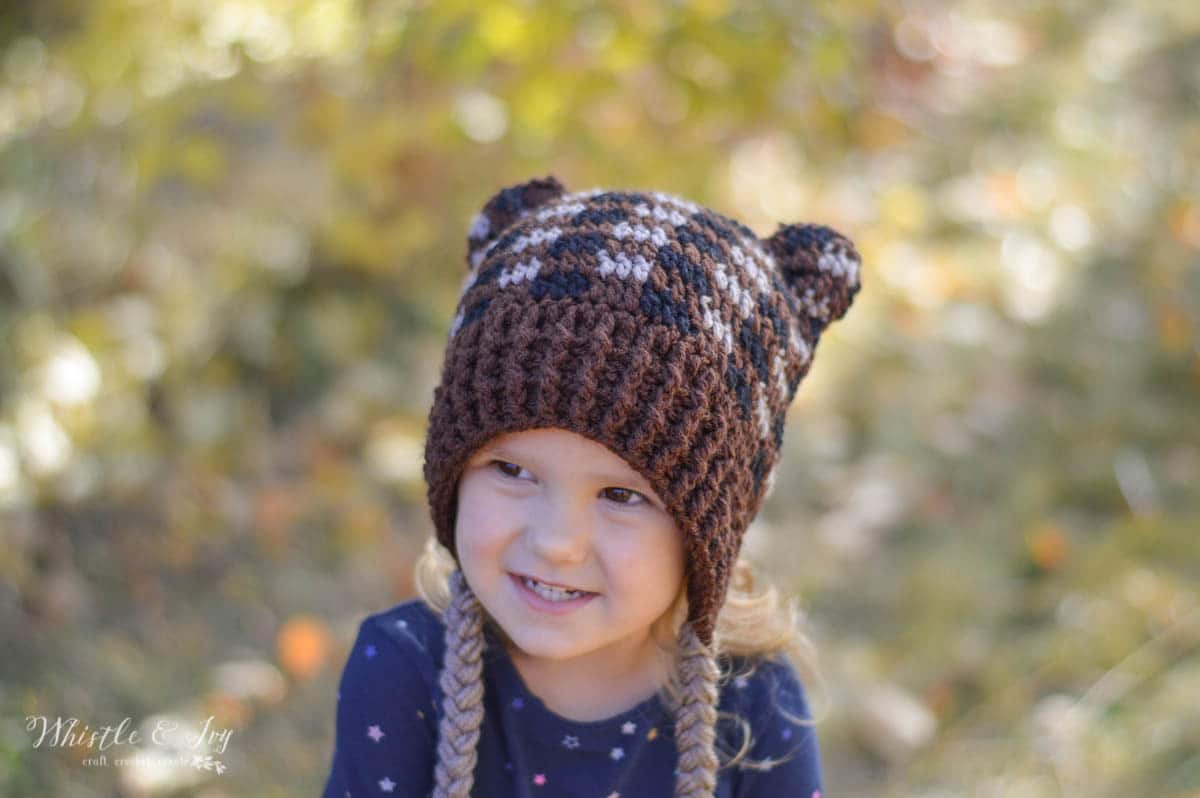
Bear:
CHILD/TODDLER:
Use J Hook for Child (18″ circumference
Use H hook for Toddler (16.5″ circumference)
(Worked from the bottom up, but you will add the ribbed brim last)
1. Using brim color 65 st sc foundation. Join with a sl st forming a circle. Working in joined rounds. Break foundation yarn.
2. Join Mid. Ch 2. Dc in same st. Dc in next st. (counts as first plaid block)Work the Plaid Stitch alternating between Dark and Mid. (65 sts)
3. Ch 2. Dc in same st. Dc in next st. Work Plaid stitch, alternating between Light and Mid. Join with a sl st. (65 sts)
4. – 9. Ch 2. Dc in same st. Dc in next st. Work Plaid Stitch. Join with a sl st. (65 sts)
10. Ch 2. Dc in same st. Dc in next st (counts as first dc block. Work Plaid Stitch for 10 Dc sts. Dc2tog 3 times. Work plaid st for 28 sts. Dc2tog 3 times. Plaid st in remaining stitches. (59 sts)
11. Ch 2. Dc in same st. Sc in next st (counts as first dc block. Work Plaid Stitch for 9 Dc sts. Dc2tog 3 times. Dc 25. Dc2tog 3 times. Work plaid st across remaining sts. (53 sts)
12. Using only Chocolate: Ch 1. Sc 7. Dc 4. Sc3tog. Dc 4. Sc 17. Dc 4. Sc3tog. Dc 4. Sc 7. Join with sl st. (49 sts)
Clip ends.
(For help working the plaid decreases, please see the video above!)
Brim:
Turn hat upside down with seam facing you. Count 8 to the left, start in the 9th st.
1. Ch 2. Dc 50. Turn. (50 sts)
2. – 5. Ch 2. Alternate Fpdc and bpdc across. Turn. (50 sts)
To form the ears: Measure 2.5″ for toddler/child down from the top of the Chocolate sc in row 10, and the same measurement in from the side (see the Fox Hat for reference). Sew a loose running stitch with a darning needle and some yarn. Pull the ends and cinch the ear tight. Taking care that it stays tight and cinched, weave in both ends, securing the ear. Clip ends.
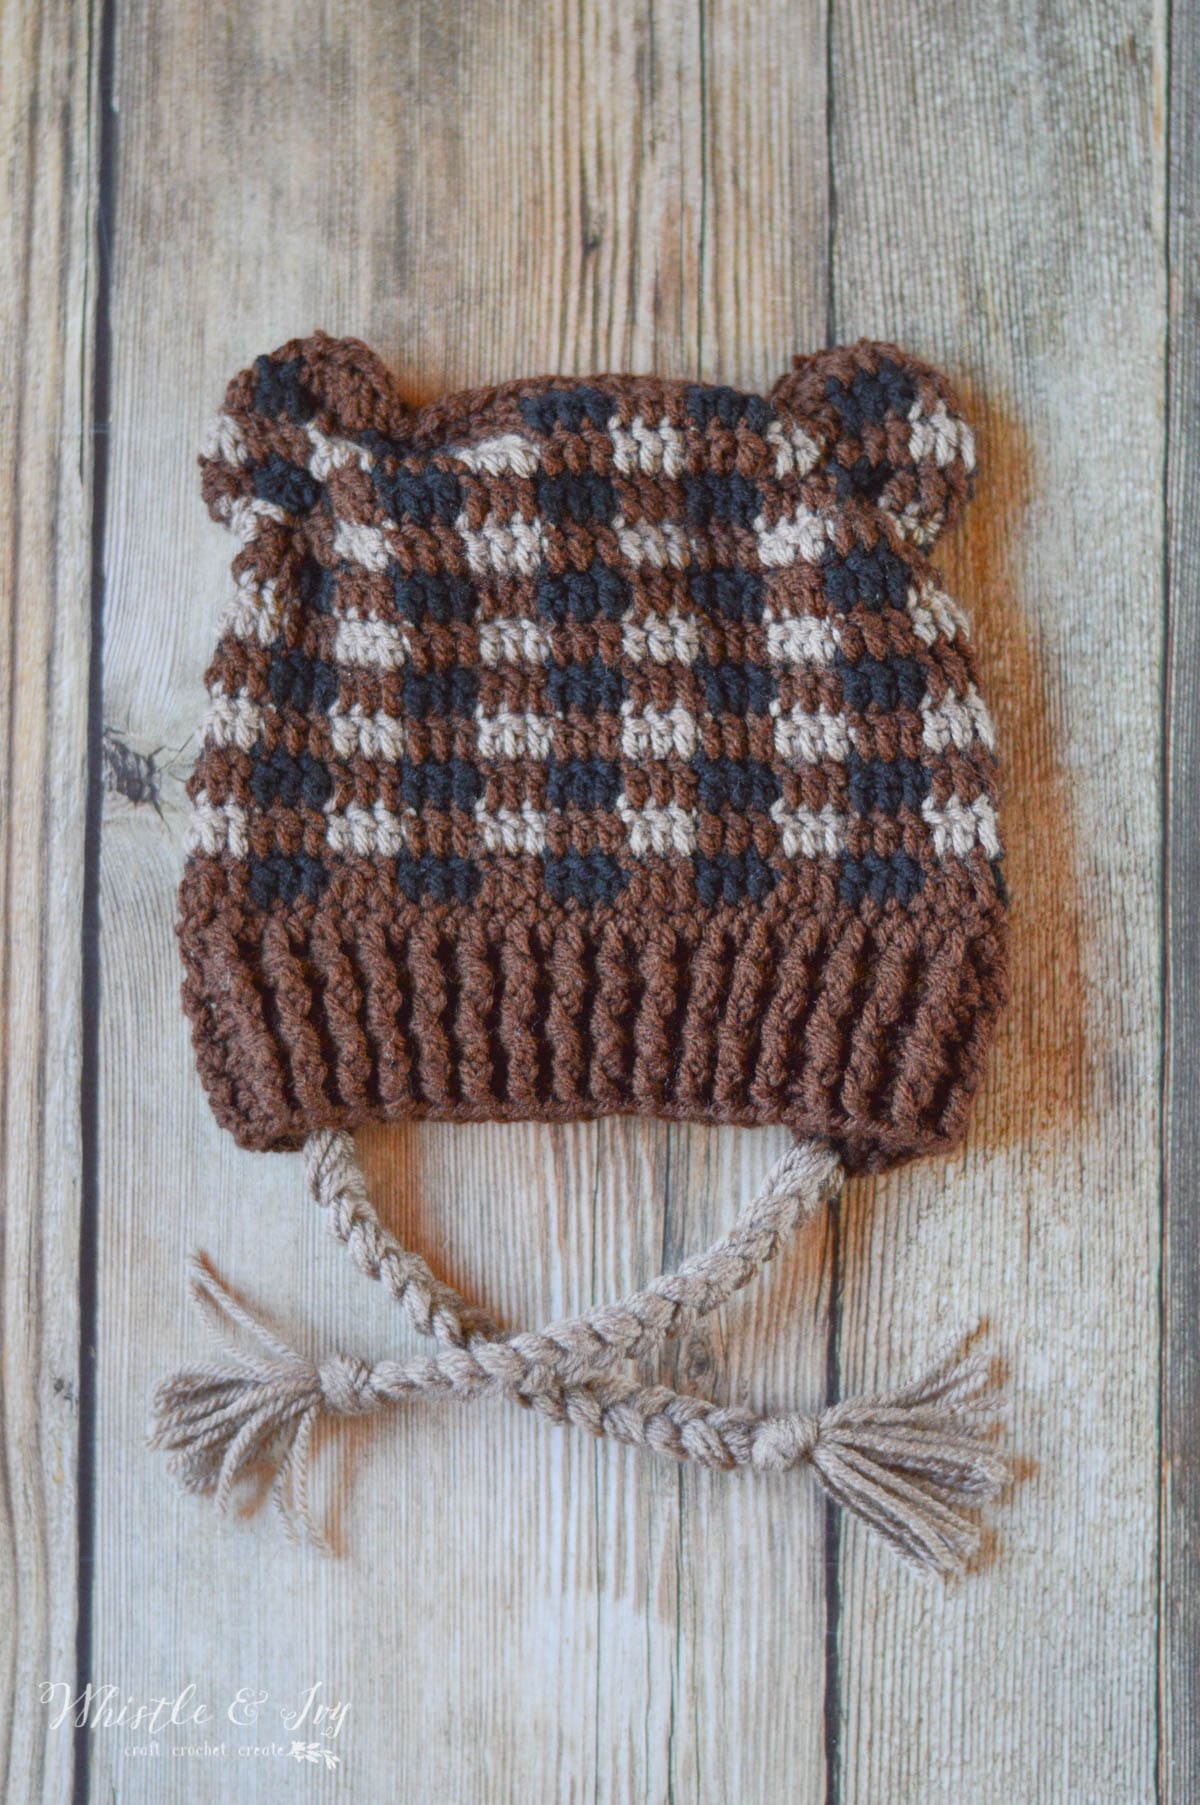

Didn’t they turn out adorable? I think the crochet deer hat is my favorite, but the crochet bear hat is so cute too. I am so happy with how the ears turned out.
Which crochet woodland animal hat is going on your project list this weekend?
xoxo,


Charming hats… Very nice creation. Brilliant job. Thank you Bethany.
These are so adorable! I’m making them for my grandchildren. Thank you for the pattern!
You are very welcome!
How do you close the hats so they are flat and flush like your photos!?
The instructions explain to sc across the top to close. Is that what you mean?
Hello I am working on the 6 to 12 month baby deer hat and I don’t know what a tst is on step 4 through 9. Thank you !
That is a typo, it should say “st”
I just finished the bear hat, And i’m not sure if I did something wrong with the brim, or what, but it looks nothing like yours. Yours looks more like DCs than SCs….Am I missing something?
Or maybe 3 rounds of the SC foundation? I’m fairly new to crocheting, but I definitely did SC and I didn’t get the same vertical lines/width/ribbing…
The baby brim is different than the other sizes, it is sc all around. The other sizes alternate bpdc, fpdc.
I am crocheting the child size Deer hat which has a base foundation of 65 stitches and I do not quite understand counting left eight stitches and starting the brim in the ninth stitch double crocheting 50 stitches and turning. This leaves quite a space between the beginning and the end of of the brim. What am I missing?
Yes, there is a space, the sides make ear flaps. If you scroll down a bit further you can see a side-veiw photo of my son wearing the orange hat.
I’m working on the bear hat for a toddler, and I’m having trouble with the slip stitch ending of a row and beginning the next. When I slip stitch, and do a Ch 2, DC the way your video shows, I get what looks like four lines, but it ends up being in line with the 3 lines from the first plaid row, even though there are only 3 DC in that patch below…I’m so confused, not sure I’m doing wrong. Can you help?
The ch 2 will appear to be a stitch. I haven’t updated the video yet with the new join, but you can view it here:
https://www.youtube.com/watch?v=mEjiDFtIcAQ
That is why I write the first block out the way I do, only working 2 dc + the chain.
Thank you so much for the patterns and for all your explanations and videos! I haven’t started yet — just looking over all the instructions. Maybe this will make sense once I’m working, but here’s my question about the join: if you ch 2, dc in the same st, and dc in the next st to make it look like 3 sts, you’ve actually only worked 2 of the 3 sts in that block. What happens to the the 3rd st? Thanks for your help :)
Thanks! There is no third stitch, you just have 2 sts in the first block.
Well, that certainly explains it then! LOL Thanks for letting me know so quickly :)
You are welcome!
Hi Bethany, I would like to make the deer hat pattern for my daughter for Christmas and I have been looking at your pictures and wondered about the color for the inside of the deer ears. Is the inside of the deer ears a pink color or the same aran color as the rest of the hat. It just looks a little pink in the pictures so I wanted to ask to see. Thanks so much for your wonderful patterns!
Hello! I used a bit of leftover yarn that I had in my stash, as it only takes a few yards. Any aran weight will do!
I just finished the hat but I’m wondering how to attach the braids to the hat?
Thanks,
Pat
Hi Pat! You will take a length of yarn that is twice as long as you would like, then pull it through halfway, so the two ends hang down evenly. Then you braid the ends together.
So adorable. I love the tiny antlers. Would love for you to stop by and link this up to More The Merrier Monday.
Jamie
http://diyhsh.com/
I love your plaid crochet patterns! I find them on Pinterest and, looking through my board, I have tons of them pinned! Beautiful work! Thank you! I’ll let you know when I get around to making one, lol!
Thank you very much! I hope you do!
I’m doing the child size bear hat and am stuck on the decreases. Do I keep doing the same color in 3-stitch blocks? If I do that I wind up lining up my mid with the mid in the row below, so it’s not plaid anymore
No, since you are decreasing, you can’t do 3 anymore, you just need to change colors so they visually line up.
Thanks!! That’s what I thought, but then I started second guessing myself haha. It was probably too late at night to be working on it ;)
:) :) I know late night crocheting VERY well!
One more q, how many strands and how long long for each strand on the braids on child size?
A measurement from about nose to fingertip is generous, so somewhere around there. I don’t really measure, lol
I am a bit confused on the finishing for the brim for some of the hats. Some say to finish alternating FPDC and BPDC. Some say Working in Back Loops Only, sc in each st around. The pictures all look like the FP/BP method. I purchased your ad free PDF and it states the same. Is this just a simple typo and I should finish them all the same? Or do some of the hats have a different looking brim/band? I am going to make a mommy/toddler set for Christmas gifts and i am so excited to give them. These are absolutely adorable!
Thanks! The infant one is the only one that uses BLO, simply because going all around works better for the smaller head. But you can still do the bpdc/fpdc for that one as well, if you prefer. If you look at the end of the fox hat part, after the baby brim part there is a photo of the small hat the with different brim.
Oh… I see now. I didn’t catch that. I can’t wait to get going on these hats. I made a child sized beanie for practice on the plaid stitch. Your explanation & video made it so easy.
It’s not clear to me how you create the ears or finish the top. Would you please explain?
Sorry, I explain it a bit more extensively in the first pattern, the Fox Plaid Hat. You can see it here:
https://www.whistleandivy.com/2017/10/crochet-plaid-fox-hat.html
Hi do you sew the deer hat together at the top same as plaid hat? Or do you do the ears then sew it?
Same as the fox hat. You sew across the top, then cinch the ears.
Thank you for absolutely adorable patterns! I’ve already tried your previously published plaid hatsm and they are so lovely too.
Could you please explain, I don’t quite get it- when you start the brim, the number of DC decreases and I cant catch the logic – from 71 to 65? from 65 to 50 etc. – means I should pass some dc from the previous raw? 2 dc tg or how?
And also do not properly get this – “start with the 9 st”
Thanks in advance for the comment)
Helo Anna! Thank you!
The brim does not going all they way around, the edges of it form the ear flaps. I should have included a photo from being. So you will begin the brim in the 9th stitch from the seam and work 50 sts, then turn. This will leave the back unworked and the brim will just be in front. You can see a better photo in the fox post:
https://www.whistleandivy.com/2017/10/crochet-plaid-fox-hat.html
These patterns are so cute! I’m just having trouble getting started. I’m a little confused by the first set of instructions (making the deer hat for a toddler). It says to break the foundation yarn once you have slip stitched to form a circle. I’m assuming by “break foundation yarn” you mean cut it? But then the pattern continues on, so I’m just not sure why you would cut it? Clarification would be much appreciated :) thanks so much!!
Sorry for the confusion! This is if your ribbed brim (to be worked later using the same color as foundation) is a different color that the colors you used to work your plaid stitch. I will rewrite it to make it less confusing.
So yes, I went back and deleted the part about breaking yarn. It was necessary for the fox hat (the original design), but doesn’t make sense with the other hats Sorry for the confusion!
Hi Never seen Mid before what does that mean you used it as – Using brim color (mid) ???
Thanks so much for the pattern suoer cute and your kids re so cute
It is indicated your mid color, the color you are alternating every row. You can read all about the Plaid Stitch here:
https://www.whistleandivy.com/2017/08/how-to-crochet-buffalo-plaid-the-plaid-stitch.html
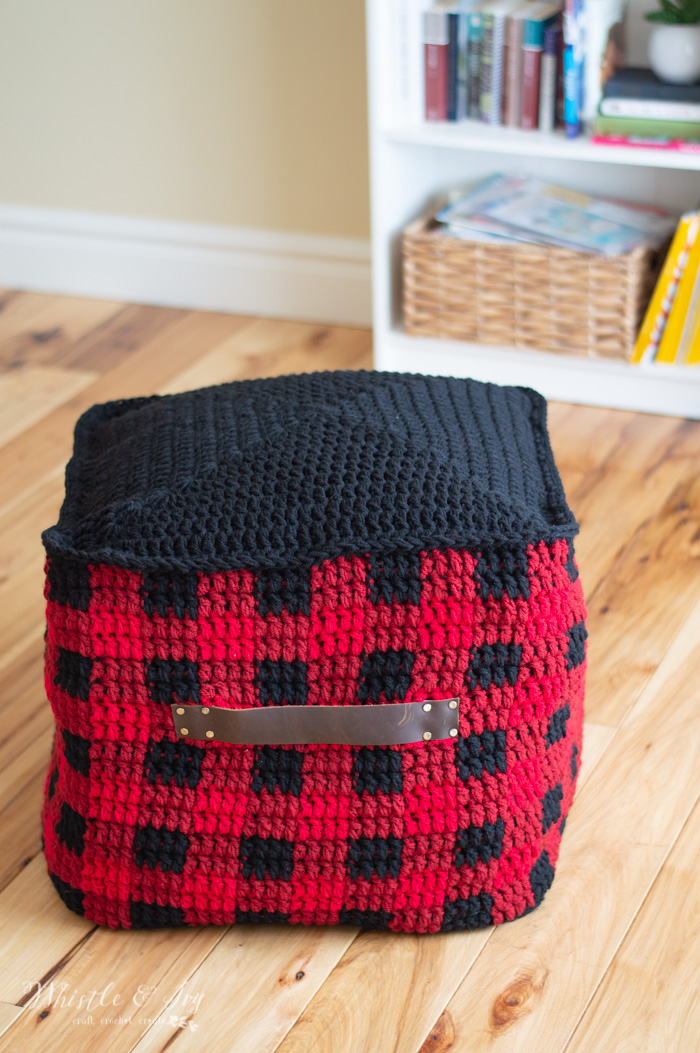
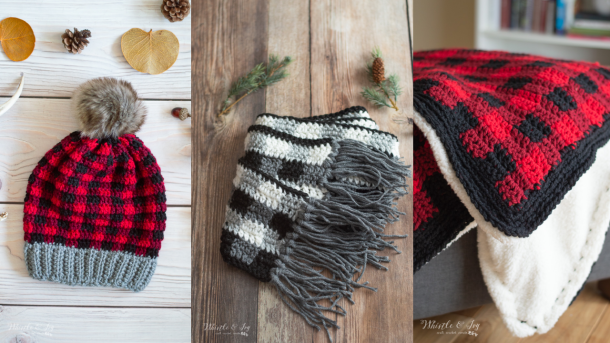
I just love your plaid collection of patterns, but these hats are just so sweet and your littles are precious in these pics!!! Slow and steady wins the race for you as these patterns are incredible and your design skills are wonderful, but by far your generous spirit is so appreciated as you share each one!!!
These are so adorable!! Can’t wait to make matching Mommy and daughter deer ones.
Thank you.