
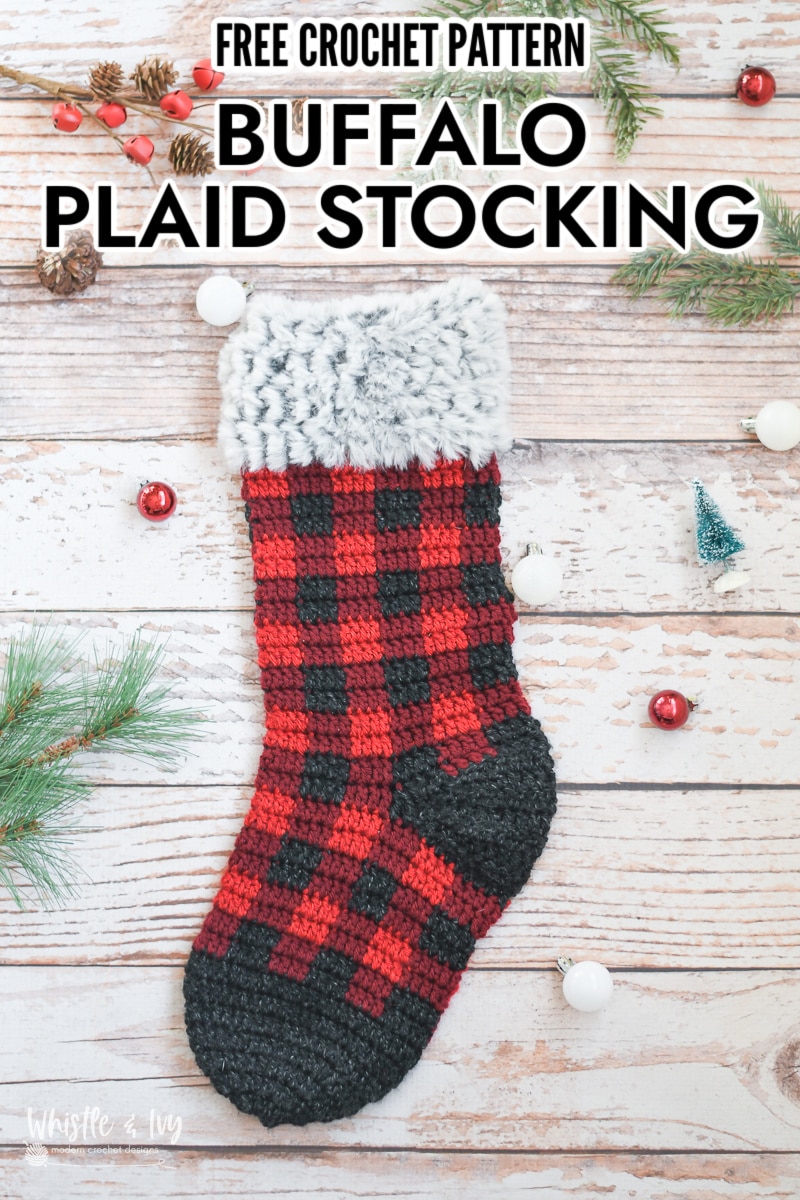
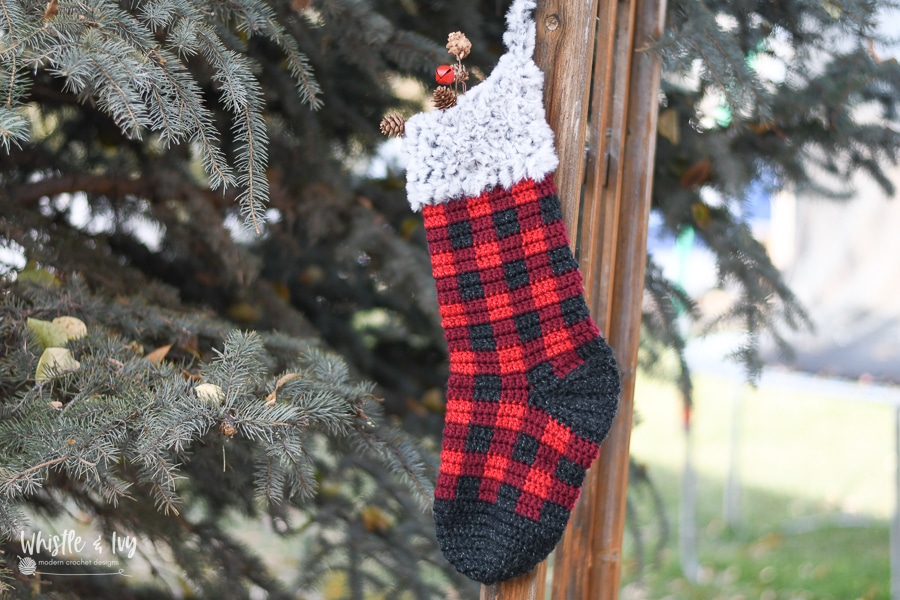
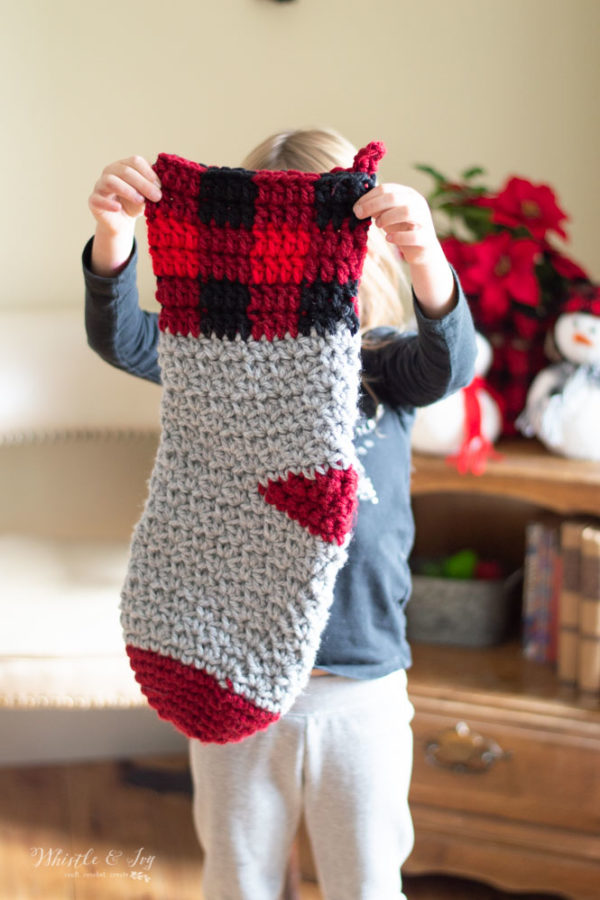
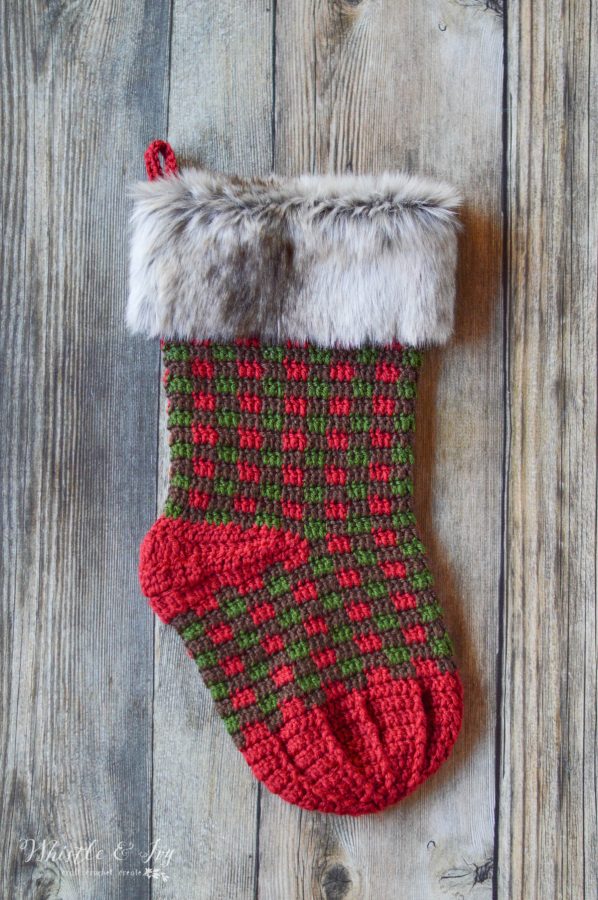
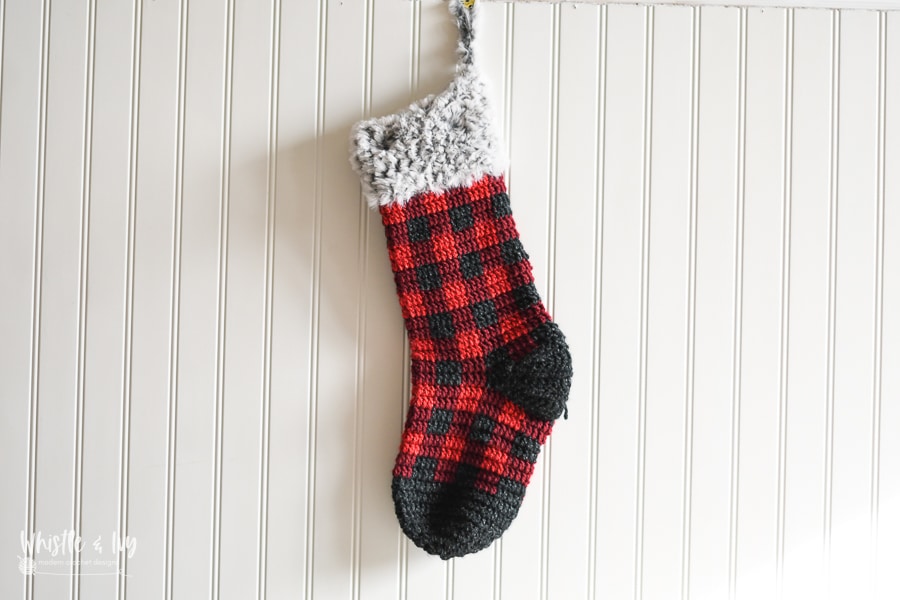
This classic crochet buffalo plaid stocking is perfect for adorning your mantel at Christmastime! Make a few in different color ways and enjoy the traditional flair they add to your Christmas decor.
This post may contain affiliate links, which means I get a small commission if you make a purchase, at no extra cost to you. Thanks for your support!
If you have been a follower of Whistle and Ivy for a few years, you may be thinking “didn’t you already design a plaid stocking?”.
I would answer, yes, yes I did. But I ended up having a few qualms with the finished design fand decided to finally remake it in a style I liked better.

You’re tired of sifting through complicated tutorials and patterns that leave you feeling overwhelmed.
Let me help.
PICTURE THIS:
Instant access to a library of modern, easy-to-follow patterns
Gifting your handcrafted treasures to your loved ones.
Feeling accomplished by your beautiful makes
It’s time to make your crafting experience as joyful as it should be.

So I fixed all the issued I had with the first one and have a new pattern to share with you today!
Additionally, this design is more of a skinny style, and I replaced the faux fur fabric with faux fur yarn, (which didn’t exist at the time!) and it’s so much easier to work with.
Want to join my email list? Join here:
I also fully intended on creating a few variations with plaid graphs and release it as a bundle, but time was my enemy this month. So I’m hoping to add some variations at some point in the future.
This design is FREE! If you decide to buy the ad-free PDF, your purchase will include all the future variation designs, and you will get them at no extra cost.
CROCHET BUFFALO PLAID CHRISTMAS STOCKING
WHAT YOU NEED:
– 4mm Hook
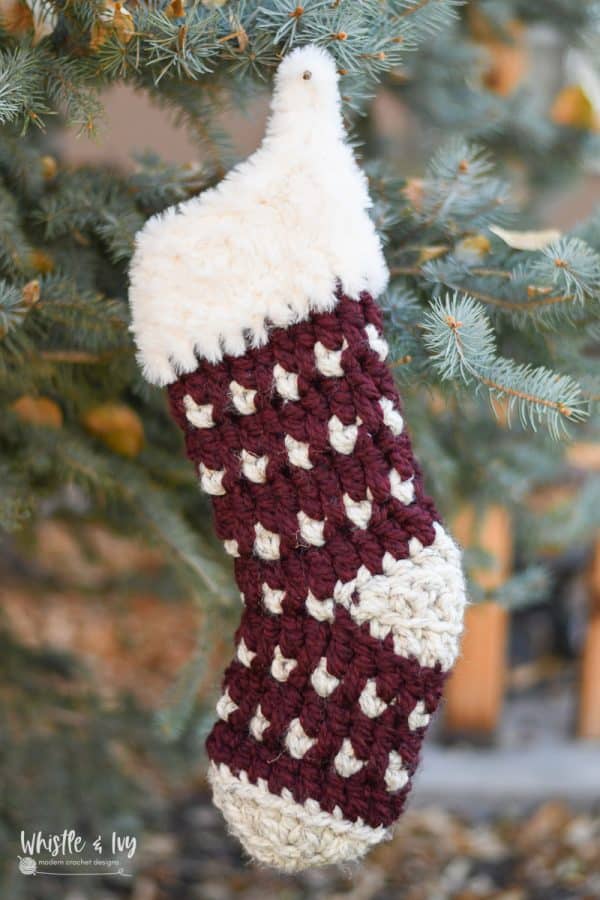
– Medium Weight Yarn in Red, Black and Wine or White, Black and Gray (Premier Anti Pill Everyday Worsted)
– Faux Fur yarn
– Darning Needle
GAUGE: Not important for this pattern
PATTERN NOTES:
Ch does not count. Always work first st in the same st as the chain.
Carry your yarn to give the stocking extra integrity.

READY TO MAKE YOUR CROCHET PLAID STOCKING?
This design is FREE! If you decide to buy the ad-free PDF, your purchase will include all the future variation designs, and you will get them at no extra cost. Where would you like to shop today?

CROCHET STOCKING: (approx. 19″)
Begin with a magic ring using black .
1. Ch 2. Work 12 dc into ring. Join with a sl st. (12 sts)
2. Ch 2. Work 2 dc in each st around. Join with a sl st. (24 sts)
3. Ch 2. *Dc in next 2 sts. Work 2 dc in next st* work 8 times. Join with a sl st. (32 sts)
4. Ch 2. *Work 2 dc in next st. Dc in next 3 sts* work 8 times. Join with a sl st. (40 sts)
5. Ch 2. *Dc in next 4 sts. Work 2 dc in next st* work 8 times. Join with a sl st. (48 sts)
6. – 7. Ch 2. Dc in each st around. Join with a sl st. (48 sts)
8. – 9. With Black, Ch 2. Dc in next 4 sts. *Switch to Wine. Dc in next 4 sts. Switch to Black. Dc in next 4 sts* work 5 times. Switch to Wine. Dc in last 4 sts. Join with a sl st. (48 sts)
10. – 11. With Wine, Ch 2. Dc in next 4 sts. *Switch to Red. Dc in next 4 sts. Switch to Wine. Dc in next 4 sts* work 5 times. Switch to Red. Dc in last 4 sts. Join with a sl st. (48 sts)
12. – 13. With Black, Ch 2. Dc in next 4 sts. *Switch to Wine. Dc in next 4 sts. Switch to Black. Dc in next 4 sts* work 5 times. Switch to Wine. Dc in last 4 sts. Join with a sl st. (48 sts)
14. – 15. With Wine, Ch 2. Dc in next 4 sts. *Switch to Red. Dc in next 4 sts. Switch to Wine. Dc in next 4 sts* work 5 times. Switch to Red. Dc in last 4 sts. Join with a sl st. (48 sts)
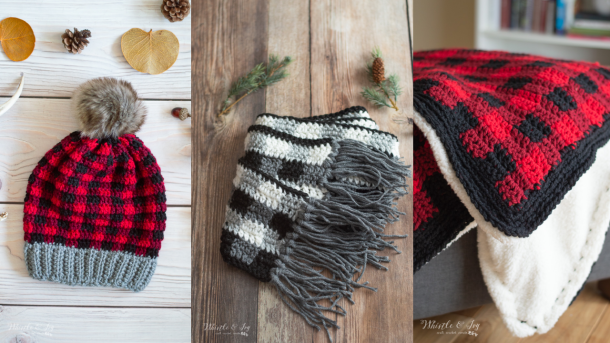
WANT MORE STOCKINGS?
CROHET BUFFALO PLAID STOCKING HEEL:
(The heel is worked in turning rows)
Join Black yarn in 38th st from row 15.
1. Ch 1. Sc in next 4 sts. Hdc in next 2 sts. Dc in next 10 sts (be sure to work into stitches, you will have a bit of space at the join). Hdc in next 2 sts. Sc in next 4 sts. Turn. (22 sts)
2. Ch 1. Sk same st. Sc in next 4 sts. Hdc in next 2 sts. Dc in next 8 sts. Hdc in next 2 sts. Sc in next 3 sts. Sk next st. Sl st in last st. Turn. (20 sts)
3. Ch 1. Sk same st. Sc in next 4 sts. Hdc in next st. Dc in next 8 sts. Hdc in next st. Sc in next 3 sts. Sk next st. Sl st in last st. Turn. (18 sts)
4. Ch 1. Sk same st. Sc in next 3 sts. Hdc in next st. Dc in next 8 sts. Hdc in next st. Sc in next 2 sts. Sk next st. Sl st in last st. Turn. (16 sts)
5. Ch 1. Sk same st. Sc in next 2 sts. Hdc in next st. Dc in next 2 sts. Work 2 dc in next st. Dc in next 3 sts. Work 2 dc in next st. Dc in next st. Hdc in next st. Sc in next st. Sk next st. Sl st in last st. Turn. (16 sts)
6. Ch 1. Sk same st. Sc in next 2 sts. Hdc in next st. Dc in next 8 sts. Hdc in next st. Sc in next st. Sk next st. Sl st in last st. Turn. (14 sts)
7. Ch 1. Sk same st. Sc in next 2 sts. Hdc in next st. Dc in next 2 sts. Work 2 dc in next 2 sts. Dc in next 2 sts. Hdc in next st. Sc in next st. Sk next st. Sl st in last st. Turn. (14 sts)
8. Ch 1. Sk same st. Sc in next 2 sts. Hdc in next st. Dc in next 6 sts. Hdc in next st. Sc in next st. Sk next st. Sl st in last st. Turn. (12 sts)
Cut Yarn .
16. Join Black yarn in 6th st (the row will be backwards, but count it from right to left).
Ch 2. Dc in next 4 sts. Switch to Wine. Dc in next 4 sts/spaces. Switch to Black. Dc in next 3 space. Work a dc2tog across next 3 spaces (this bring you to the end of the heel).
*Switch to Wine. Dc in next 4 sts. Switch to Black. Dc in next 4 sts* work 3 times. Switch to Wine. Dc2tog first 2 spaces on side of the heel. Dc in next 3 spaces. Switch to Black. Dc in next 4 sps. Switch to Wine. Dc in next 4 sts. Join with a sl st. (48 sts)
17. With Black, Ch 2. Dc in next 4 sts. *Switch to Wine. Dc in next 4 sts Switch to Black. Dc in next 4 sts* work 5 times. Switch to Wine. Dc in last 4 sts. Join with a sl st. (48 sts)
18. – 19. With Wine, Ch 2. Dc in next 4 sts. *Switch to Red. Dc in next 4 sts. Switch to Wine. Dc in next 4 sts* work 5 times. Switch to Red. Dc in last 4 sts. Join with a sl st. (48 sts)
20. – 21. With Black, Ch 2. Dc in next 4 sts. *Switch to Wine. Dc in next 4 sts. Switch to Black. Dc in next 4 sts* work 5 times. Switch to Wine. Dc in last 4 sts. Join with a sl st. (48 sts)
22. – 23. With Wine, Ch 2. Dc in next 4 sts. *Switch to Red. Dc in next 4 sts. Switch to Wine. Dc in next 4 sts* work 5 times. Switch to Red. Dc in last 4 sts. Join with a sl st. (48 sts)
24. – 25. With Black, Ch 2. Dc in next 4 sts. *Switch to Wine. Dc in next 4 sts. Switch to Black. Dc in next 4 sts* work 5 times. Switch to Wine. Dc in last 4 sts. Join with a sl st. (48 sts)
26. – 27. With Wine, Ch 2. Dc in next 4 sts. *Switch to Red. Dc in next 4 sts. Switch to Wine. Dc in next 4 sts* work 5 times. Switch to Red. Dc in last 4 sts. Join with a sl st. (48 sts)
28. – 29. With Black, Ch 2. Dc in next 4 sts. *Switch to Wine. Dc in next 4 sts. Switch to Black. Dc in next 4 sts* work 5 times. Switch to Wine. Dc in last 4 sts. Join with a sl st. (48 sts)
30. – 31. With Wine, Ch 2. Dc in next 4 sts. *Switch to Red. Dc in next 4 sts. Switch to Wine. Dc in next 4 sts* work 5 times. Switch to Red. Dc in last 4 sts. Join with a sl st. (48 sts)
FUR TOP:
Join Fur yarn.
1. Ch 2. Dc in same st. *Sk next st. Dc in next st* repeat all around the stocking. Join with a sl st. (24 sts)
2. – 5. Ch 2. Dc in each st around. Join with a sl st. (24 sts)
To finish, take a length of yarn and tie to the back top of the stocking to hang form.
Made it? Share it!
Tag me on INSTAGRAM, or share in our group. I would love to see!
Happy crocheting!
xoxo,


Hey so, I’m trying to make this but when I get to row 16 I seem to be having the issue that, when I get back around to the heel part of the round, I seem to be on the wrong color. I THINK I started the row in the right place (the middle of the heel) and everything up until the Dc2tog in wine matches up, but on mine it would be a Dc2tog in black and then there would be a double-up on black in the back.
The bottom of my heel spans 5 squares and the top should span 6? I am slightly confused 😅
Hi Sarah! Can you take a clear, focused photo of your work and send it to me and I can help ?
Send to: Bethany (at) whistle and ivy (dot) com
Hi Bethany!
I am working on this project and am incredibly confused by Row 16 and where the 6th st is that I should be joining to. I’ve read a previous comment, thought I figured it out, and realized I didn’t. Any help would be greatly appreciated!
Hello!
You are confused about where to join your yarn, is that correct?
It’s very near the middle of the heel.
Find the two top loops of the FIRST st on the right side of the last row of the heel. It is the first st from your point of view, but it will be the LAST st of the previous row because you turned. From that stitch, count 6 in, and that is where you join your new round.
Does that help?
Row 16 I don’t understand where the 6th stich is wish you had a video. I think I will have to give up on this project
Unless you can explain.
Hi Joy! The 6th st will be near the middle of the heel, they will be facing away from you, but try your best, this is where the new seam will be. You will count from L to R of the last row of the heel.
Thank you!!!
I will try again
Hi Beth. I believe your free online pattern is missing a few steps after round 8 of the heel. From round 8 it goes to round 16 and is missing the material between. I wondered if you could update the pattern with the missing rounds? Thank you in advance for your help. -Kathy
Hi Kathy, can you share a screenshot? The pattern appears to be complete from my end. Also, the heel doesn’t start until after round 15, are you thinking of a different pattern?
Hi Beth, Here is a copy of what I see. After round 8 of the heel, there is nothing until Rnd 16.
8. Ch 1. Sk same st. Sc in next 2 sts. Hdc in next st. Dc in next 6 sts. Hdc in next st. Sc in next st. Sk next st. Sl st in last st. Turn. (12 sts)
Cut Yarn .
16. Join Black yarn in 6th st (the row will be backwards, but count it from right to left).
Ch 2. Dc in next 4 sts. Switch to Wine. Dc in next 4 sts/spaces. Switch to Black. Dc in next 3 space. Work a dc2tog across next 3 spaces (this bring you to the end of the heel).
*Switch to Wine. Dc in next 4 sts. Switch to Black. Dc in next 4 sts* work 3 times. Switch to Wine. Dc2tog first 2 spaces on side of the heel. Dc in next 3 spaces. Switch to Black. Dc in next 4 sps. Switch to Wine. Dc in next 4 sts. Join with a sl
Maybe it is just a misprint but it didn’t seem like the entire pattern was there. Thanks for checking. It looks like a fun stocking which would be somewhat challenging to make.
Thanks again for your help, Kathy (I was able to get a screenshot but didn’t see a way to upload it.)
Can you take a screenshot and attach it to the comment reply email? I think we are having a miscommunication. This pattern (buffalo plaid stocking with fur at the top) does not have a heel after round 8, the heel starts on round 15, so something is getting lost along the way. Please send that and I will get to the bottom of this.
Bethany (at) whistleandivy (dot) com
hI Beth, I am so sorry I spent your time on this. I misread the pattern and was confused with the heel. So after really getting a good look at the pattern, after round 15, there are 8 rows for the heel before starting row 16. When I first looked at the pattern, because the heel listed rounds 1-8 then jumped to 16, I was confused and thought there was something missing. I really appreciate the time it took to look at this and again my apologies. Now I can’t wait to try the pattern! -Kathy
Please don’t apologize! Sometimes it takes a second look to get things figured out, please don’t feel sorry about this. So glad you figured it out!
After row 15 do you fasten off the yarn?
I’m wondering that also. I haven’t fastened off yet but don’t see a reply. Did you fasten off after round 15?
Thanj you for any assistance.
Hi Robin! You need to cut Black to start it in a new place, but you can keep your other colors and pull them up when you need them again after the heel.
This is beautiful, but what happened to 9 – 15?
Thank you.
Thank you! I see those rows are there in the pattern, what do you mean?