
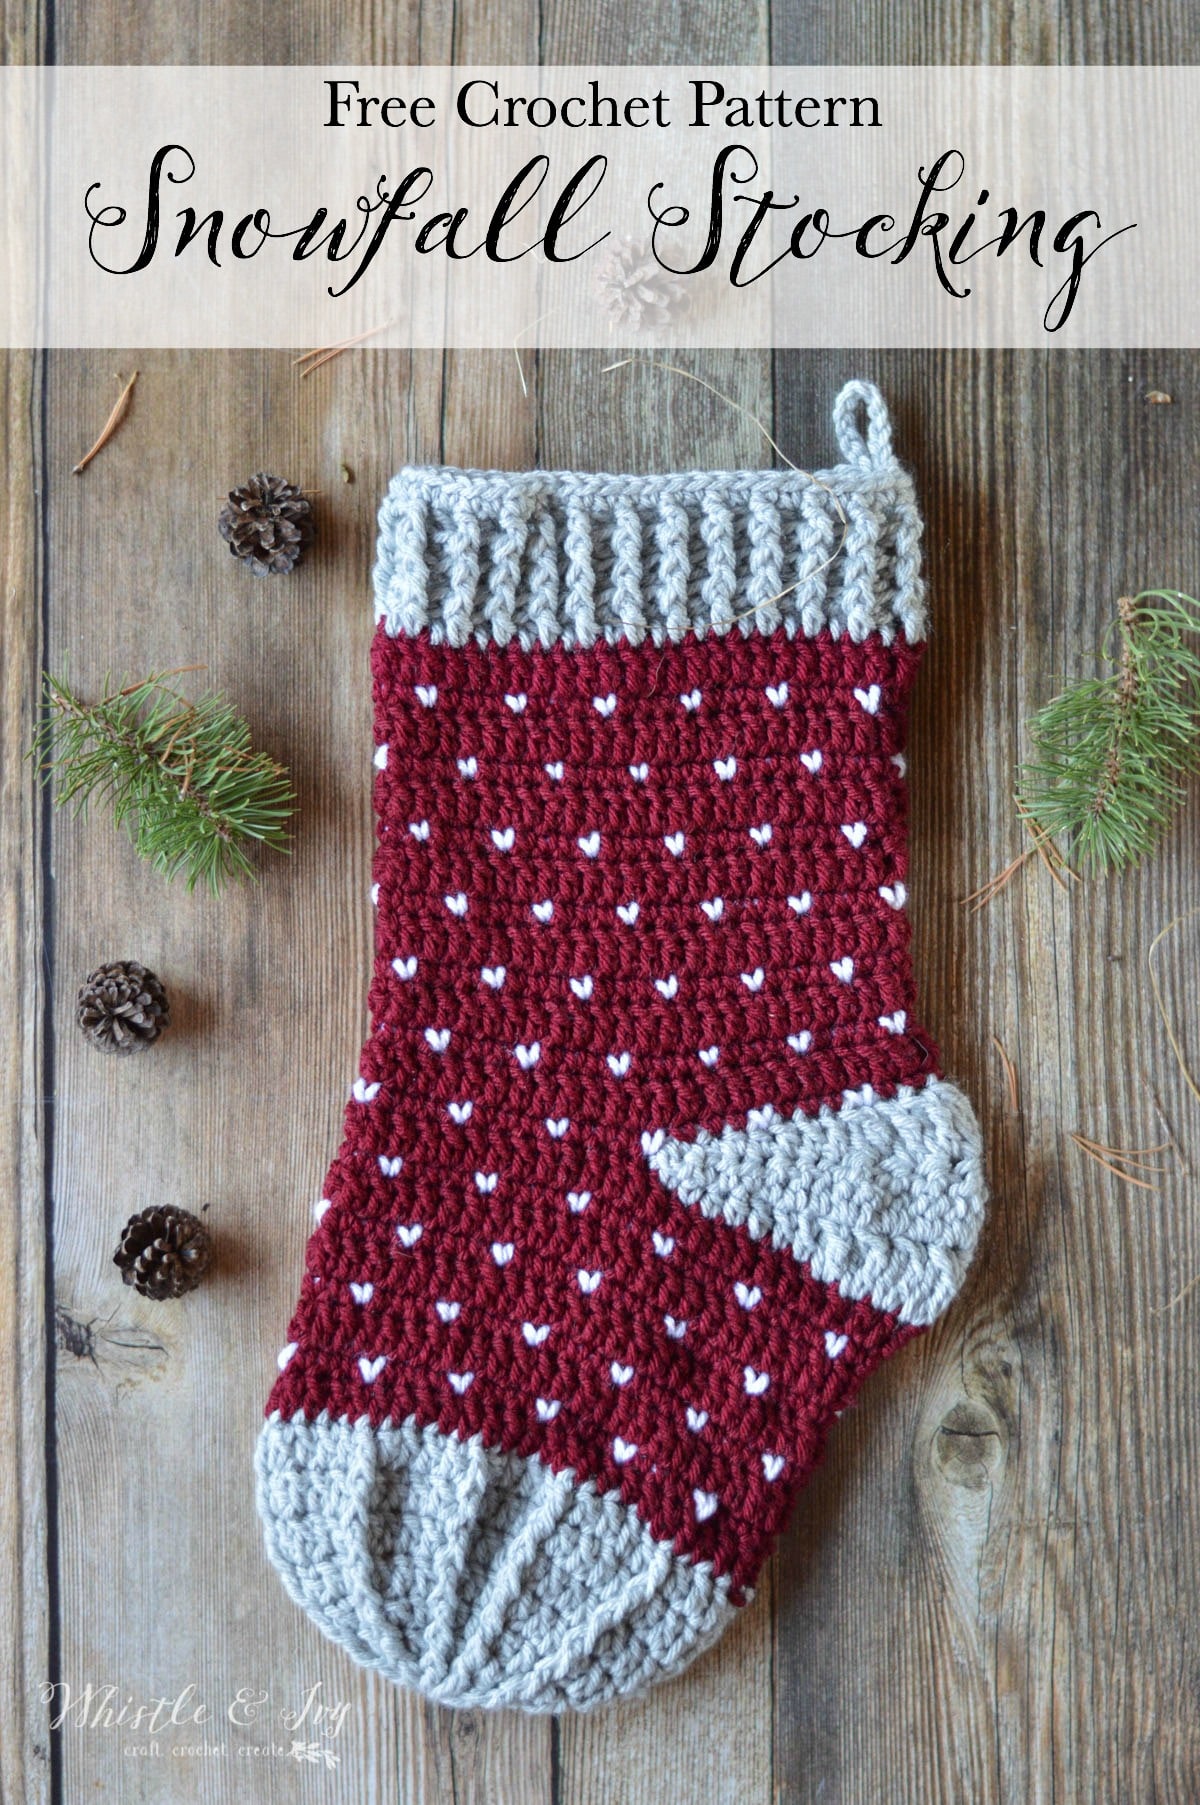
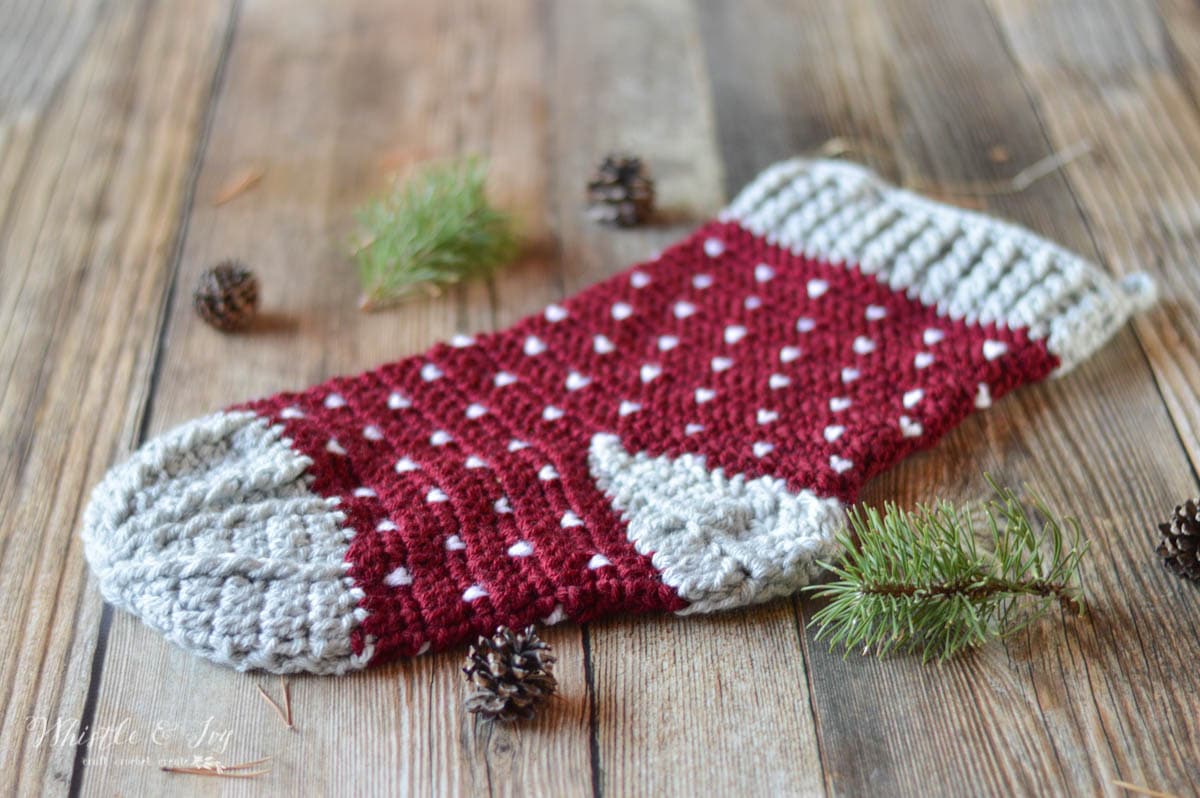
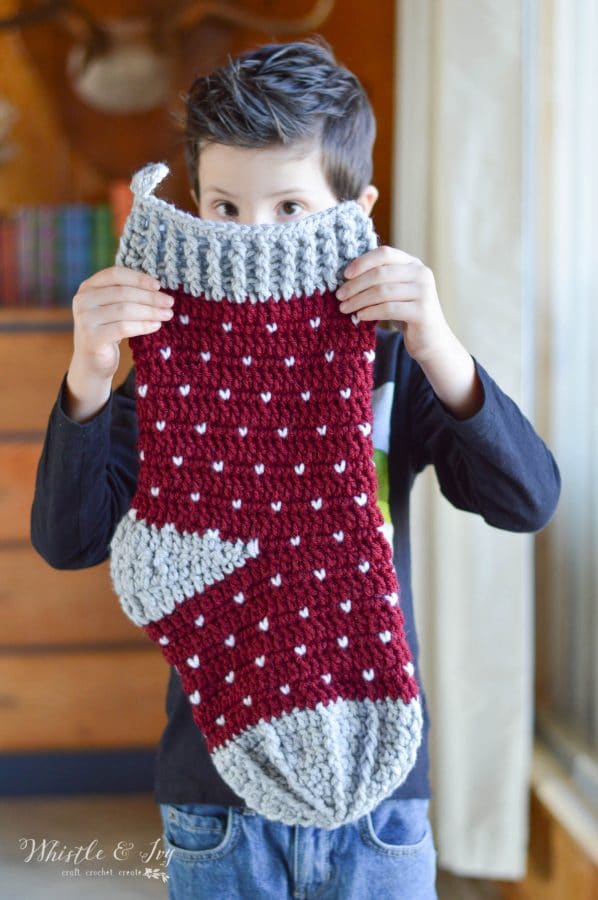
This crochet snowfall stocking is the perfect addition to your rustic mantle! It’s made with chunky yarn so it works up quickly and beautifully. Enjoy the crochet pattern for this pretty crochet stocking.
Oh, how I love food. Thanksgiving marks the beginning of the simply wonderful treats and food that are in store until the New Year. Growing up, my favorite parts about Thanksgiving were the single-sized pies for all the grandkids and my grandma’s famous cheeseball with Ritz crackers.
Even though things have changed, I am still very excited for Thanksgiving and what it represents in our family, a time of love and gratitude. It also means that I will be posting lots of fun Christmas patterns, yay! Isn’t it crazy how, as a child, the stretch between Thanksgiving and Christmas would drag on forever, but as an adult it’s barely time to trim the tree and get to everyone on your list. Well, today I am sharing this pretty Crochet Snowfall Stocking, in hopes you will have time to complete all the projects on your list, because it’s time to get going!
I am already cooking more Snowfall ideas…a Snowfall Week might be in order…

You’re tired of sifting through complicated tutorials and patterns that leave you feeling overwhelmed.
Let me help.
PICTURE THIS:
Instant access to a library of modern, easy-to-follow patterns
Gifting your handcrafted treasures to your loved ones.
Feeling accomplished by your beautiful makes
It’s time to make your crafting experience as joyful as it should be.
CROCHET SNOWFALL STOCKING
Please remember: You are free to use this pattern to make and sell, but do not republish or distribute this pattern in any way. DO NOT use my photos in your listings. Please do share my blog links! It’s a quick and FREE way of supporting Whistle and Ivy and more free crochet patterns in the future.
PLEASE read my Disclaimer before working my free patterns!
What you need: (affiliate links)
-#5 Chunky Yarn (Brava Chunky – 2 Balls Wine, 1 Ball White and 1 Ball Dove Heather)
– 7 mm hook
Abbreviations: US Terms
Ch – chain
Sc – single crochet
Dc – Double Crochet
Hdc – Half Double Crochet
Tc – Treble Crochet
Tc Cluster – Tc2tog worked in same stitch
Fpdc – Front post dc
Bpdc – Back Post dc
Sl st – Slip Stitch
St – stitch
Gauge: 11 sc sts = 4″ (Gauge pattern)
Approx. finished size: 14″ circumference, 21″ long.
Learn the Snowfall Technique:

LOVE THIS PATTERN BUT HATE THE ADS?
This pattern can be purchased in my shops! Where would you like to shop today?
Begin with Dove Heather, work a Magic Ring
(Ch 2 does not count as stitch)
1. 10 dc in ring. Join with a sl st with the first dc.
2. Ch 2. Dc in first dc. Fpdc around same st. *Dc in next st. Fpdc around same st.* work 9 times. Join with a sl st. (20 sts)
3. Ch 2. Dc 2. Fpdc around same st. (the fpdc from previous round) *Dc in next 2 sts. Fpdc around same st (fpdc from previous round)* work 9 times. Join with a sl st. (30 sts)
4. Ch 2. Dc 3. Fpdc around same st. *Dc in next 3 sts. Fpdc around same st.* work 9 times. Join. (40 sts)
5. Ch 2. Dc 3. Fpdc around next st. *Dc in next 4 sts. Fpdc around same st.* work 4 times. Dc 3. Fpdc around next st. *Dc in next 4 sts. Fpdc around same st.* work 4 times. Join.(48 sts)
Should have diameter of 6.5 “
6. – 7. Ch 2. Dc 3. Fpdc around next st. *Dc in next 4 sts. Fpdc around next st.* work 4 times. Dc 3. Fpdc around next st. *Dc in next 4 sts. Fpdc around next st.* work 4 times. (48 sts)
Change to Wine.
8. Ch 2. Dc in each st around. Join with a sl st. (48 sts)
9. Ch 1. *Sc 3. Work white sc in next st* repeat all around the stocking. Join with a sl st.
10. Ch 2. Dc in each st around. Join with sl st. (48 sts)
11. Ch 1. Sc. Work white sc in next st. *Sc 3. Work white sc in next st* repeat all around the stocking, leaving last 2 sts unworked. Sc in last 2 sts. Join. (48 sts)
12. – 15. Repeat rows 8 – 11.
16. Ch 2. Dc in each st around. Join with sl st. (48 sts)
Break yarn.
Heel:
Join Dove Heather 13 dc sts to the right of the join.
The next steps are making the heel. You will be turning instead of working rounds around the entire stocking.
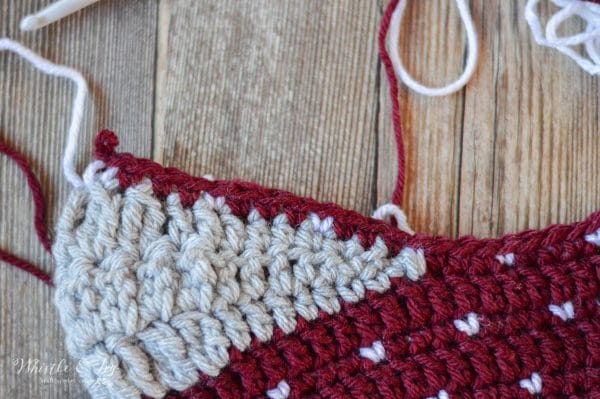
a. Sc 3. Hdc 2. Dc 3. 2-Tc Cluster 9 times(be sure to skip the join, don’t work a stitch in the ch 2). Dc 3. Hdc 2. Sc 3. Turn. (25 sts)
b. Ch 1. Sk same st. Sc 2. Hdc 2. Dc 3. 2-Tc Cluster 9 times. Dc 3. Hdc 2. Sc in next st. Sk next st, sl st in last st. ( 23 sts) Turn.
c. Ch 1. Sk same st. Sc 2. Hdc 2. Dc 3. 2-Tc Cluster 7 times. Dc 3. Hdc 2. Sc in next st. Sk next st, sl st in last st. (21 sts)
Break yarn.
17. Join Wine in 4th 2 -tc-cluster on the heel.
Ch 1. *Sc 3. Work white sc in next st.* work three times. The last white st will be worked in the dc st that meets the heel. It will be a bit of a stretch, but it pulls the stocking into shape.
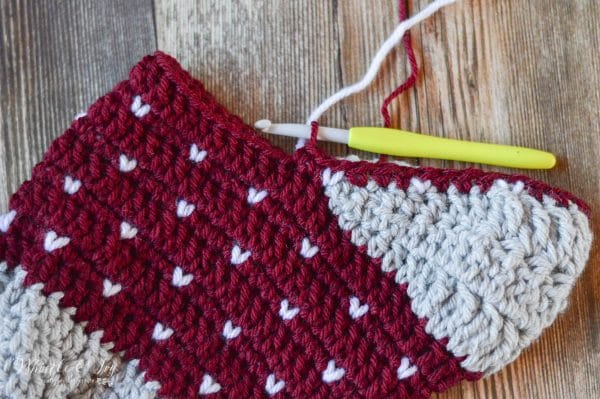
Continue repeating from * to* all around the stocking for 23 sts until you reach the other side of the heel. You will end on the last of the 3 sc of a set. Work a white sc in the dc that meets the gray heel. Work 2 sc up the side of the heel. The 3rd sc will be worked in the first sc of heel row c. Work a white sc in next st. *Sc 3. Work a white sc in next st* work twice. Join. (48 sts)
18. – 30. Repeat rows 8-11.
Break Wine and White.
Join Dove Heather.
31. Ch 2. Dc in each st around. Join (48 st)
32. – 34. Ch 2. Fpdc around same st. Bpdc are next st. Alternating working Fpdc and Bpdc all around the row. Join with a sl st. (48 sts)
35. Ch 1. Sc in each st around. Join with a sl st. (48 sts)
To make a loop to hand it, Ch 10. Sl st down into the same st. Tie off.
Join our Facebook Community! We need YOU!
xoxo,


Love this pattern. I think the heel needs to be deeper but I can’t seem to execute that. I will keep trying. Thanks for sharing it.
Hi there, are the steps between 16 and 17 a separate item? Are the 13dc’s on White Dove on the red sock? Or a chained 13 Dc separate from the red yarn?
It’s not a separate piece, you are making the heel. You will join your new color (I used “dove heather”) in the indicated place (13 sts to the Right of the join), then you are working in turning rows to make the heel. Are you able to see the photo after round 17? I might give you a visual of how the heel is worked in rows on the red sock.
What a beautiful pattern!
Thank you!
I am trying to work on the heel, what do you mean by sk same stitch?
SK means Skip, you will work in the following stitch
I’m late but glad I found this! What kind of yarn do you recommend for this?
I recommend Brava bulky, I have a link in the materials list.
I made this stocking for my daughter to try and match the snowfall knitted stockings that were made for my husband and I. Only problem is it’s WAY bigger than our standard sized ones. Any suggestions for how to reduce the size of this by a few inches?
Thank you for this pattern! Love it!
You can work it in worsted instead of chunky.
You are a genius! I have been crocheting stockings for many years, and this is the easiest one I’ve made. Taking it to a work party today for my secret friend. She’s going to love it. I think the snow looks like hearts! Reminds me of the verse, Wash me and I will be whiter than snow! Thank you! I used regular yarn and a G hook. Beautiful!
This is very lovely :) So glad you like it!
Thank you for the pattern. I’m actually making a stocking for one of my sons. This came at right time as I’m having trouble with the foot part. It is a beautiful stocking you made and your son is adorable. Have a wonderful Thanksgiving.
Thank you so much Misty! That is wonderful it was such perfect timing. Enjoy your Thanksgiving as well!
Just Adorable! Thank you so much for sharing your talents. Merry Christmas!
Thank you! Merry Christmas!
Thank you, Bethany! It’s a really cute pattern. Your son is so cute, too!
Thank you Ellen!
This is a very nice stocking. Thank you for sharing it with us…
hugs,
Gramzie
Thank you! You are welcome :)
Hi, this stocking is very cute and I’m making it for my “grand dog”. When I start on the row 9, it looks like it’s inside out. The small v stitches are not on the ribbed side. Any suggestions?
Are you working from the inside of the stocking? Sometimes when working a dome shape, the piece will automatically curl up, so you are working from the inside.
I see what you mean! I think I flipped it inside out when I changed the yarn to wine. Thank you!
You’re welcome!
Can this stocking be made without the snowflakes?
Sure, just work the entire row in sc without switching colors.
I LOVE this and can’t wait to make one. Do you carry the white through as you work, for the tiny single white stitches?
thanks and Merry Christmas!
oops need to add this for followups :)
yes! You can see how it’s done in the video.
Love, love, love it!!! I have just made two. One for each Granbaby. Quick and easy to work up. They may need matching hats too!! Thanks so much for sharing this beautiful pattern!
Yay! So glad you love it! You are very welcome!
Hi Bethany,
I’m a lefty, so I have inside out projects… When you say to do fpdc (or any specific post stitch like bpdc etc) should I invert those? That is, where you say to do fpdc, should I do bpdc instead and vice versa? Thanks!
It should be find either way, as long as you are working a fpdc into a fpdc and a bpdc into a bpdc, so it looks ribbed.
Thanks!
Very cute stocking.
Thank you!
Love this stocking pattern! Thank you for offering it for free!.
I have been seeing this term in patterns lately, “break”. Does this mean cut the yarn, or just switch to the other color, or something altogether different? Thank you!
It means cut the yarn :)
Thank you! :)
Hi Bethany,
Possibly a silly question, but when you break/cut the yarn, do you tie off the sl st? I’m still new to crochet and to understanding the way patterns/instructions are written. Seems there are implied steps that I keep missing LOL
Thanks as always!
Sorry you are confused! Which part are you referring to specifically?
I’m just getting used to terms. I did the first 7 rows several times before it started to look right. It’s okay. I’m figuring it out. I think the more I do, the more I’ll get used to the terminology.
Meghan,
You tie off your yarn first before cutting. I guess you could call it a slip stitch. on the last loop, you’re creating a chain and pulling the yarn all the way thru to create a knot.
Thank you!
Hi there! Your finished stocking is just beautiful and I am busy working on the pattern right now! I am having trouble with the heel section. I am on part a. And I am ending up with 34 stitches instead of 25… I think I’m missing a turn somewhere, but I don’t know where. Can you help point me in the direction I’m messing up on?
Hm, are you working 9 tc clusters or 18 sts there?
I have a video demonstrating this stitch right above the step on the page, or in the abbreviations list if you are looking at the PDF.
Me again! You’re gonna end up kicking be out! LOL so far, the stocking is beautiful. I am working the heel now. First: I joined the yarn the way you do in the video for the mini stocking. So, with new yarn, I pulled the loop through at the 13th st (between the 13th and 14th dc posts in the prev row), yo and pulled through to ch 1. I did a sc in the same st. Then I did two more sc to make the sc 3 as per instructions. Correct? Or was I supposed to start the sc 3 in the next st after the ch 1?
Next conundrum: in stitch legend, you say Tc cluster = Tc2tog (the tc decrease in the video) worked in one st instead of two, but in the pattern, you say 2-Tc cluster 9 times. Does that mean two clusters in one stitch (therefore 18 clusters in 9 stitches)? Or one cluster (Tc2tog in sm st) per each of the next 9 sts?
Hello!
Join in the actual stitch, the 13th st to the right of the join. Then 3 TOTAl sc stitches, starting in the same st.
A tc cluster is NOT a tc2tog. A tc2tog is a decrease stitch, worked over two stitches. A tc-cluster is a tc2tog worked in ONE stitch, so the number is not decreased. It’s the same as working one tc, but it’s a wider and fills out the space more (I explain this in the video). So you will work 9 sts = 9 clusters.
Okay, I am rereading your comment and I see you understand the Tc cluster, my apologies! The tc cluster is one stitch, so you will work one of them in each st, 9 total.
Thank you!! Seems I interpreted correctly! Yay! Though as a lefty, I actually started in the 13th st to the left (a tip for all your lefty fans: remember that most of the instructions on any pattern are reversed when done left-handed). In this instance, the FPDC for the toe DID NOT need to be changed to BPDC and since it’s alternating for the cuff, it shouldn’t matter then either.
What is the approximate size of this??
The measurements are in the pattern: 21″ long, 14″ circumference