
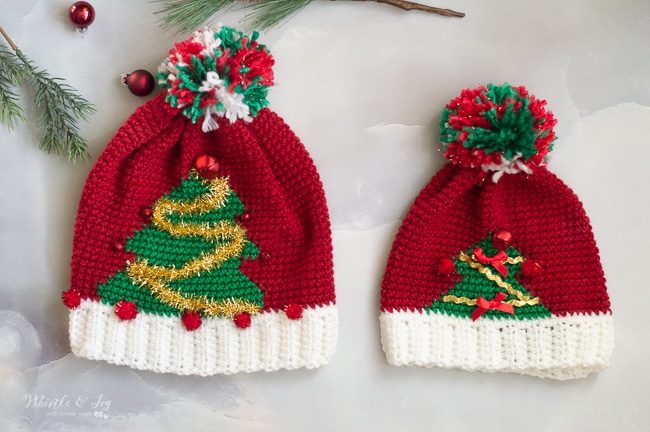
Work up this crochet ugly Christmas hat in the loudest green yarn and brightest red yarn. Next, add the sparkliest embellishments and pair with your best ugly Christmas sweater to delight all your holiday party guests! Pattern includes size adult and child. The post uses affiliate links, click here for more info.

Holiday Party Time.
You have your ugly Christmas sweater with its lights, colors, patterns and embellishments. You know you will be the most festive party goer. You think you have your holiday game cranked up to 11.
Enter, the crochet ugly Christmas hat.
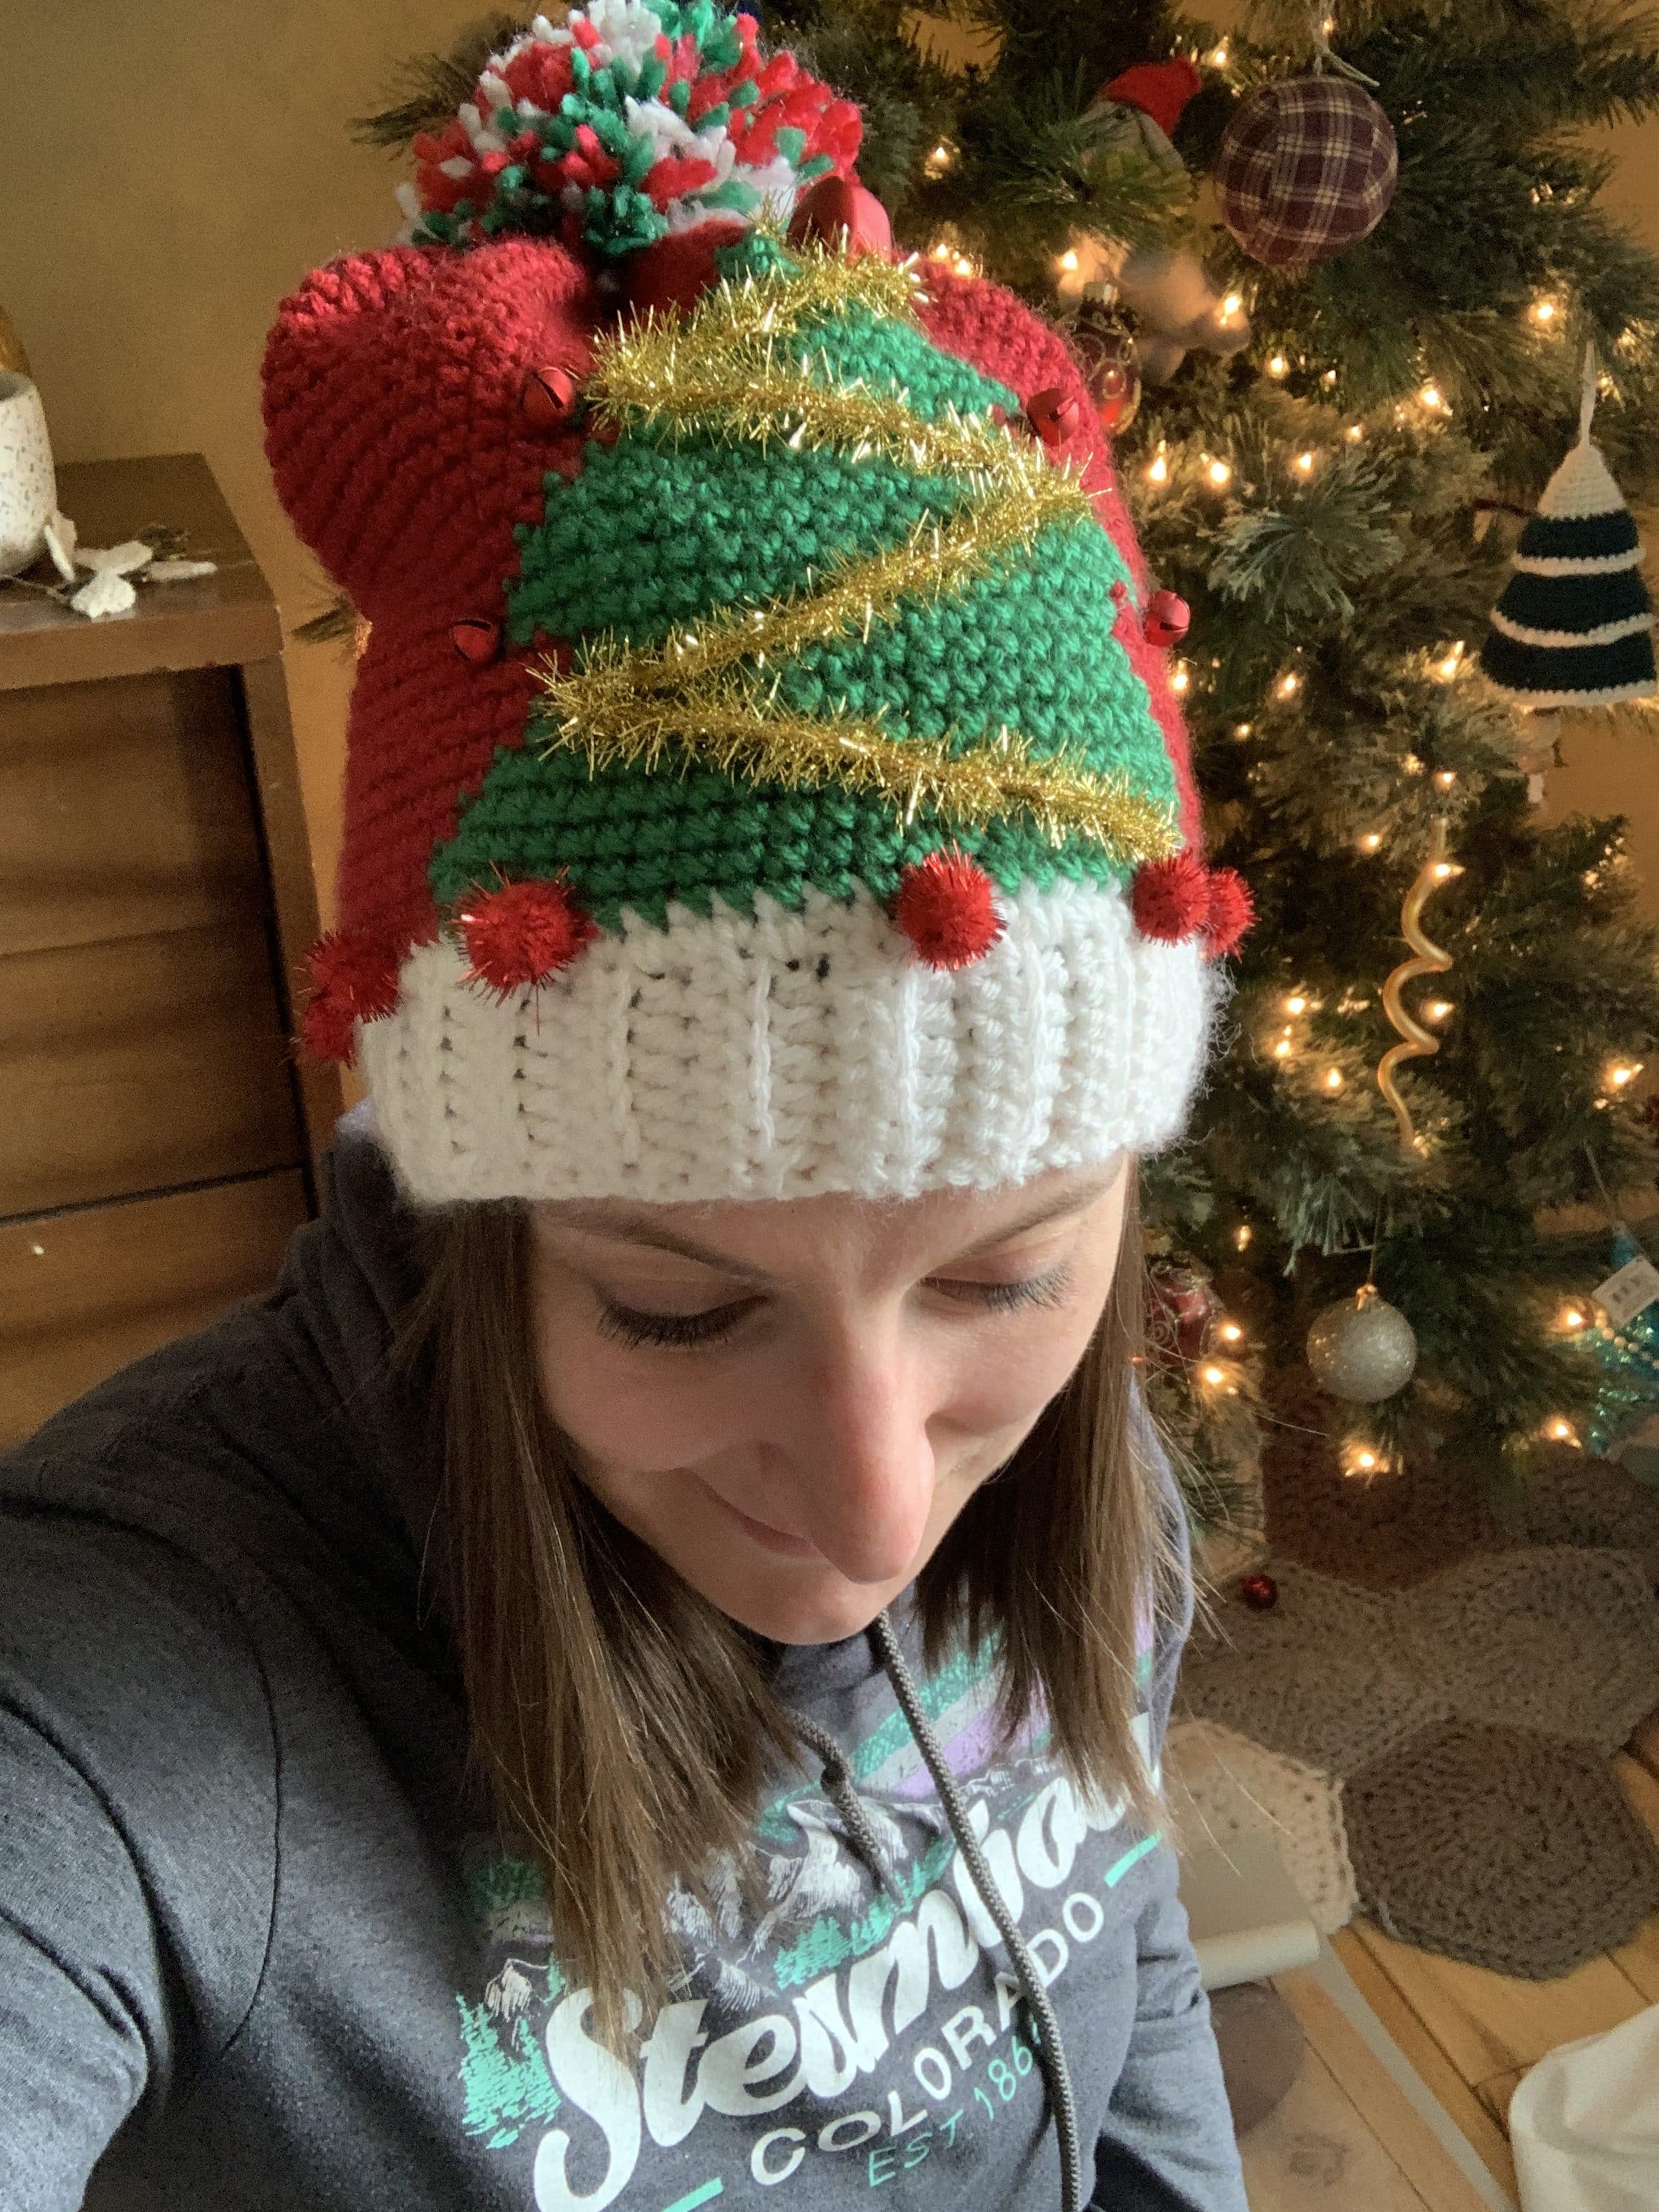
This hat starts with a basic tree design. Then, you take a trip to your craft supply closet, or down the holiday aisle at your craft store and grab all the bells, mini tinsel, and pom-poms you can possibly find.
(I found a teeny, tiny, wired tinsel garland that I think was made for this hat.)
This hat is a crafting experience as well as a fashion statement!

You’re tired of sifting through complicated tutorials and patterns that leave you feeling overwhelmed.
Let me help.
PICTURE THIS:
Instant access to a library of modern, easy-to-follow patterns
Gifting your handcrafted treasures to your loved ones.
Feeling accomplished by your beautiful makes
It’s time to make your crafting experience as joyful as it should be.
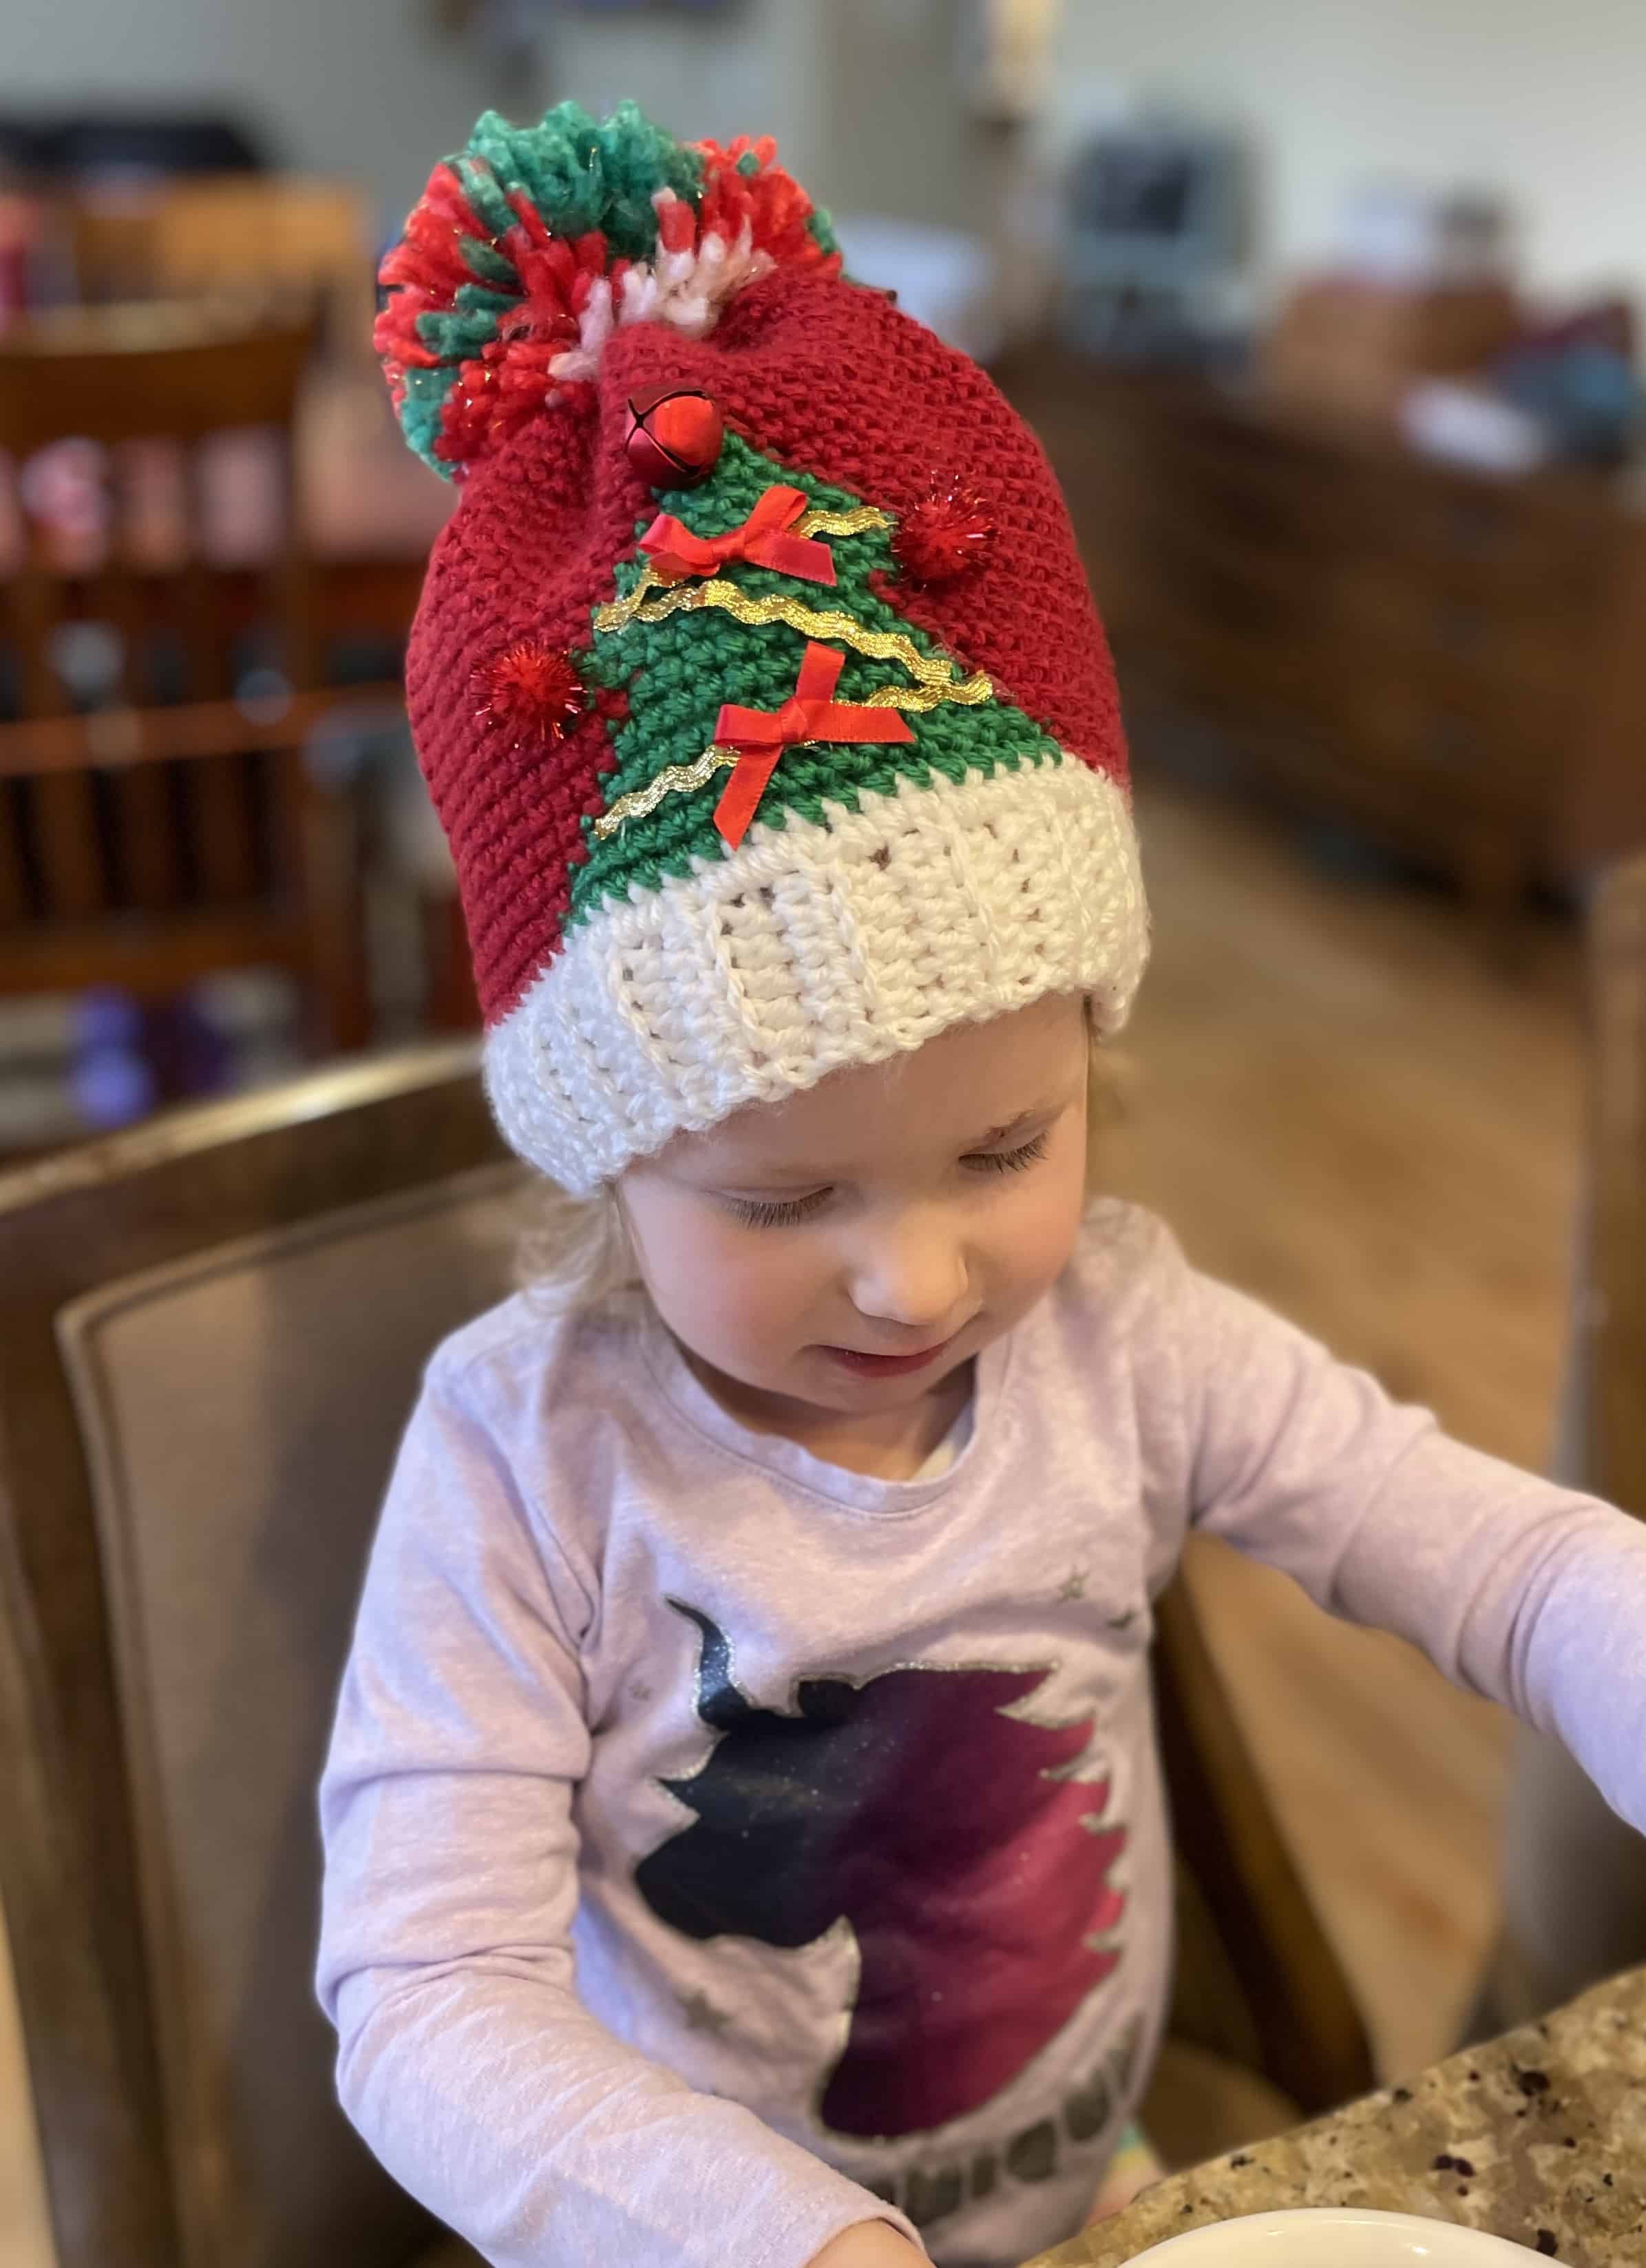
This pattern includes child sizing, but does not toddler or baby as this hat with all its loud embellishments is an extreme choking hazard 😆
CROCHE UGLY CHRISTMAS HAT – CROCHET PATTERN

WANT MORE SIZES?
This ugly Christmas hat ad-free PDF pattern can be purchased in my shops! It includes adult and child sizing, and doesn’t include ads or comments for easy printing and working on-the-go! Where would you like to shop today?
What you need:
Medium Weight Yarn (Lion Brand Anti-Pill in Red and Green)
Holiday yarn for pom-pom (optional)
Embellishments (tinsel, small bells, mini garlands, ric-rac, ribbon, etc.)
5.5 mm Hook (or hook to meet gauge)
ADULT SIZE: [Child size is available in the PDF download]
Please remember: You are free to use this pattern to make and sell, but do not republish or distribute this pattern (or parts of it) in any way. Please do not use my images in your listings.
What you need:
– 5.5mm Hook
– Medium Weight Yarn in green, red and white (Lion Brand Basic Stitch Anti-Pilling)
- Darning Needle
– Various bits of ribbon, tinsel or felt pom-poms for embellishments
Abbreviations: US Terms
Ch –chain
Sc –single crochet
Dc –Double Crochet
Hdc –Half Double Crochet
Sl st –Slip Stitch
St – Stitch
BLO- Back Loops Only
Gauge: 4″ = 14″ (Gauge Pattern)
Notes: Ch 1 does not count as a stitch. Always work the first st in the same st as the chain. Join each round with the first st, not the ch.
Also, I recommend working this hat in a “cross stitch” sc, which means you will grab the last YO with your hook front of the yarn instead of behind. This will help your stitches line up better.
Adult Size:
Ribbed Band:
Ch 8. (use white)
1. Hdc in 2nd ch from hook. Hdc in remaining 6 chs. Turn. (7 sts)
2. Ch 1. Hdc in same st. Hdc in next 5 sts in BLO. Hdc in last st, going through both loops. Turn. (7 sts)
Repeat step 2 until your band reached about 19″ -20″ It should stretch an additional 2″ for a snug fit, so adjust this measurement according to your yarn’s elasticity.
Fold the piece in half and sl st it into a band. Flip the band so the seam is on the inside on the loop is at the top. Continue from here to make the hat body.
BODY:
Still using white, Ch 1. As evenly as you can, work a row of sc achieving 72 total stitches. Join.
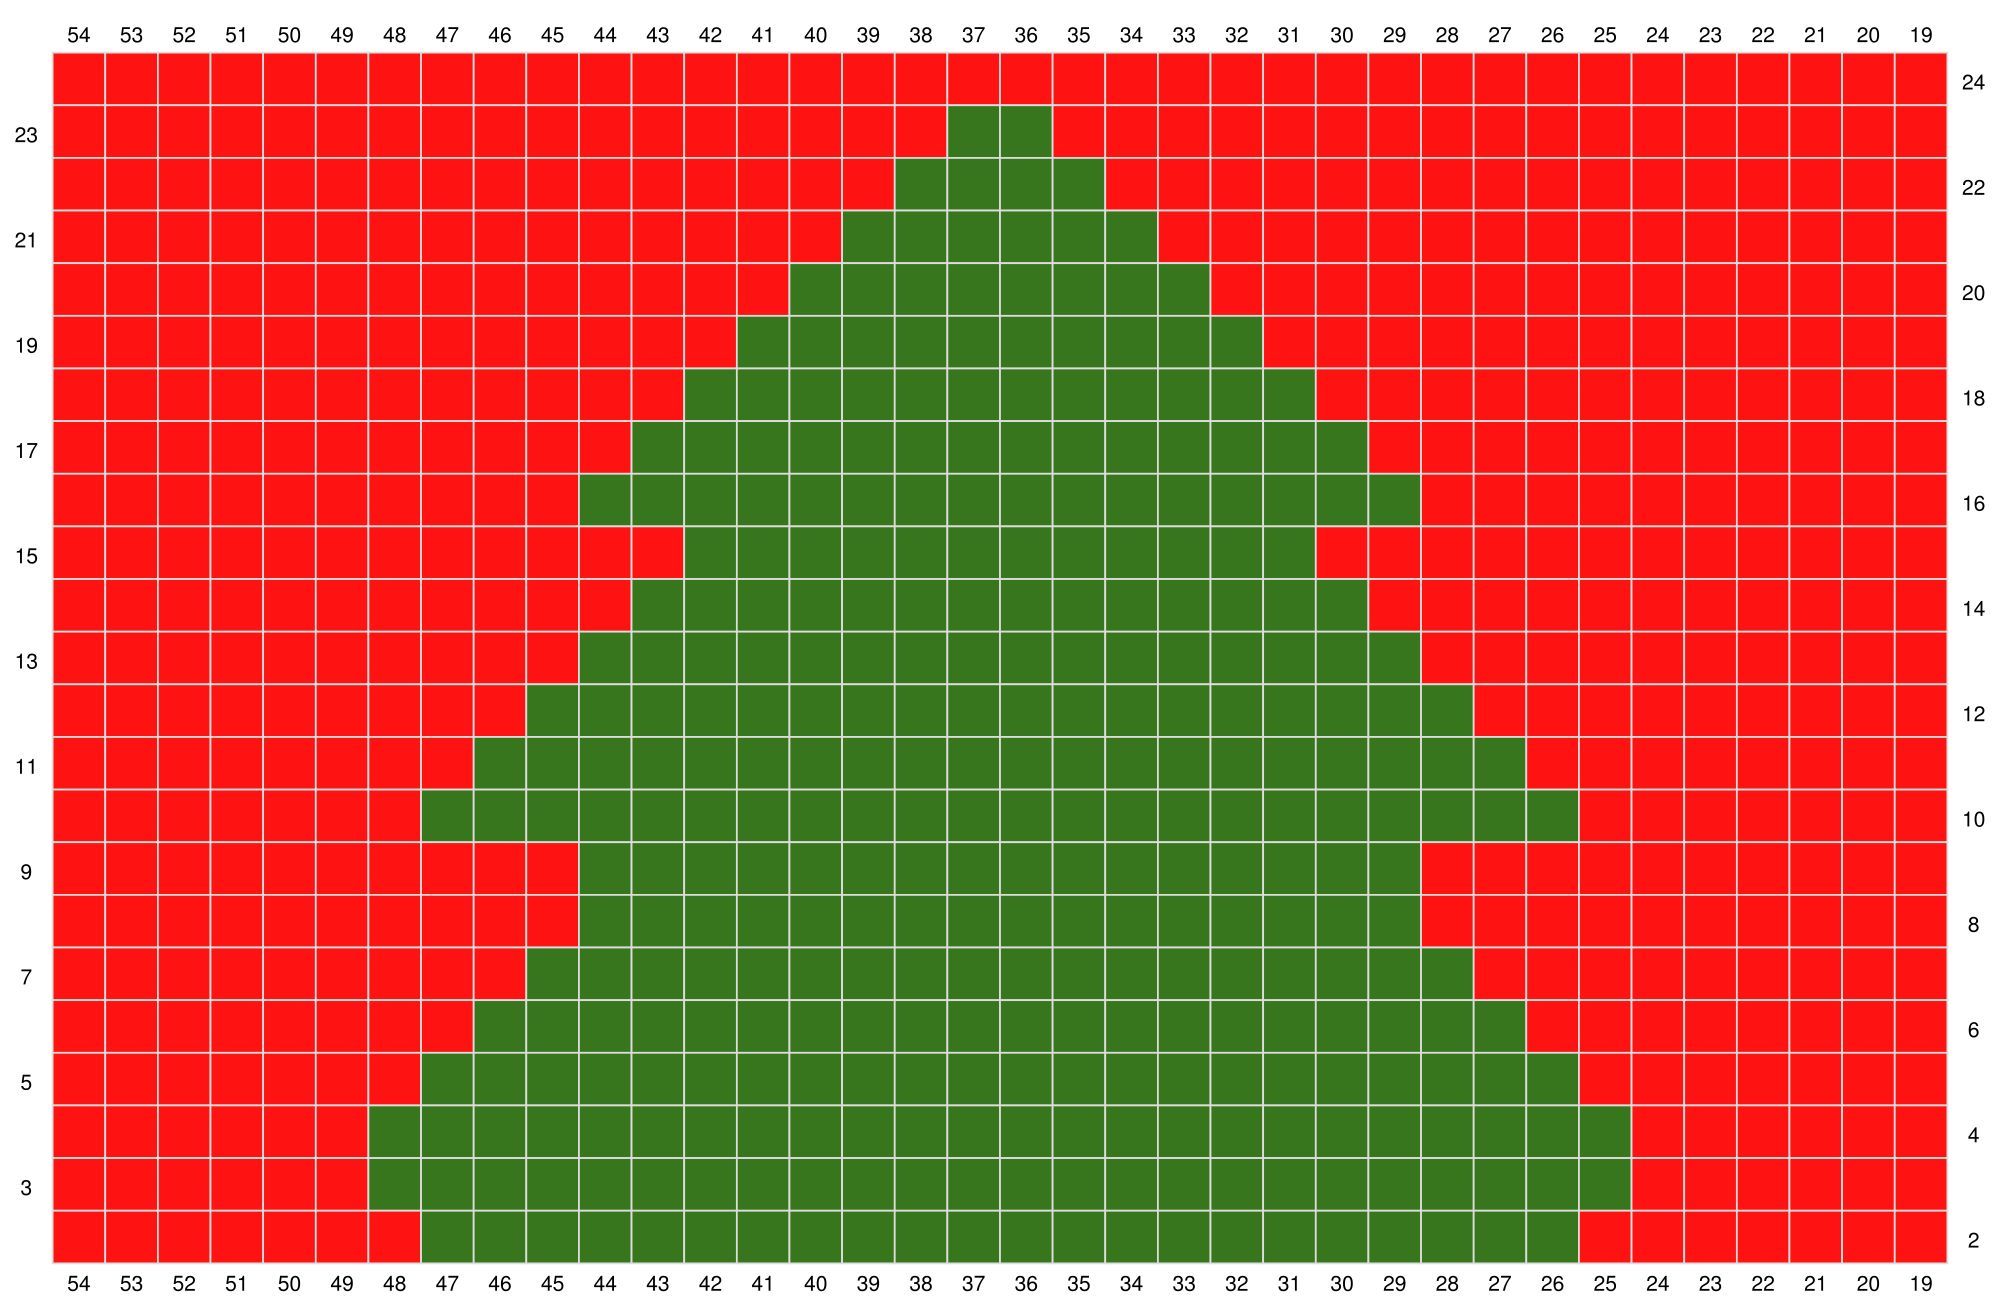
2. – 24. Reference the graph for these rows. Treat each square as a sc.
Stitches 1 – 18 will be worked in red only, and stitches 55 – 72 will be worked with red only. Work the graph on the front middle of the hat, comprising rows 19 – 54.
CONSTRUCTION:
From here you can go crazy embellishing your hats. I found a few fun things at my local craft store. Look for things that are small, but flashy; things that can be glued or sewn on. I suggest pom-poms, small bells, little bits of metallic ribbon or ricrac.

I recommend attaching the heaver things (like the small bells) by sewing them in place.
The other things like ribbons and pom-poms can be glued in place with small dabs of hot glue. Be sure to glue things on with the fewest connecting points as possible, as to not compromise the elasticity of the hat.
For instance, the golden tinsel would be glued on at the peaks and bends, and not the entire length of the piece.
Once you have finished with your embellishments, you can close the remaining hole.
CLOSING:
Turn the hat inside-out. Using the long tail, sew a loose running stitch around the remaining hole.
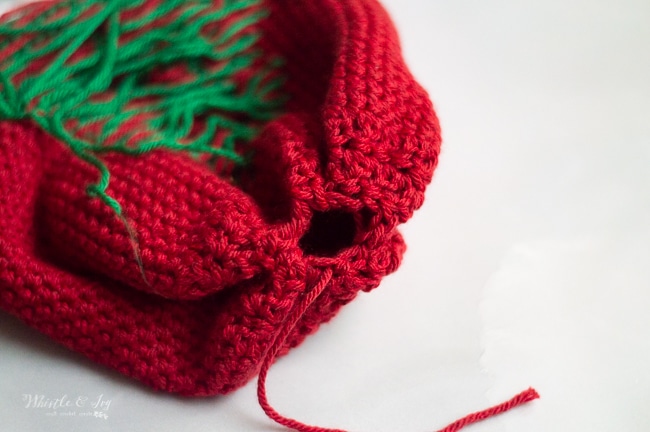
Pull the end and cinch the hole closed.
Weave in the ends to secure the top.
Tie off.
Finish by attaching a pom-pom. Try to find a bright color for your pom-poms! I used Big Twist Holiday yarn to make my pom-poms, its a cake that includes red, green and white, twisted with gold tinsel.
Enjoy winning all those holiday outfit contests!
Happy holidays and happy crocheting!


Hello I know how to crochet I just don’t know how to Read Patterns Thank you I love to crochet that my get Away ❤️