
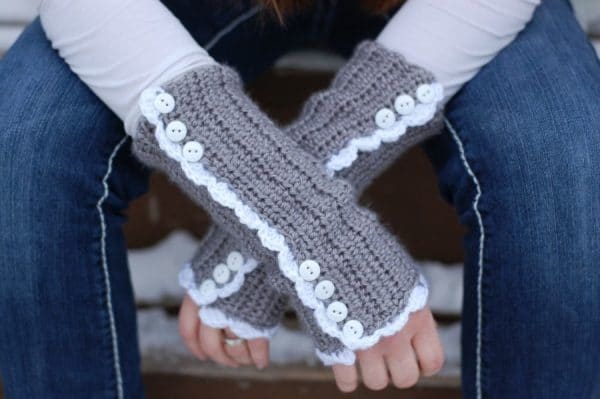
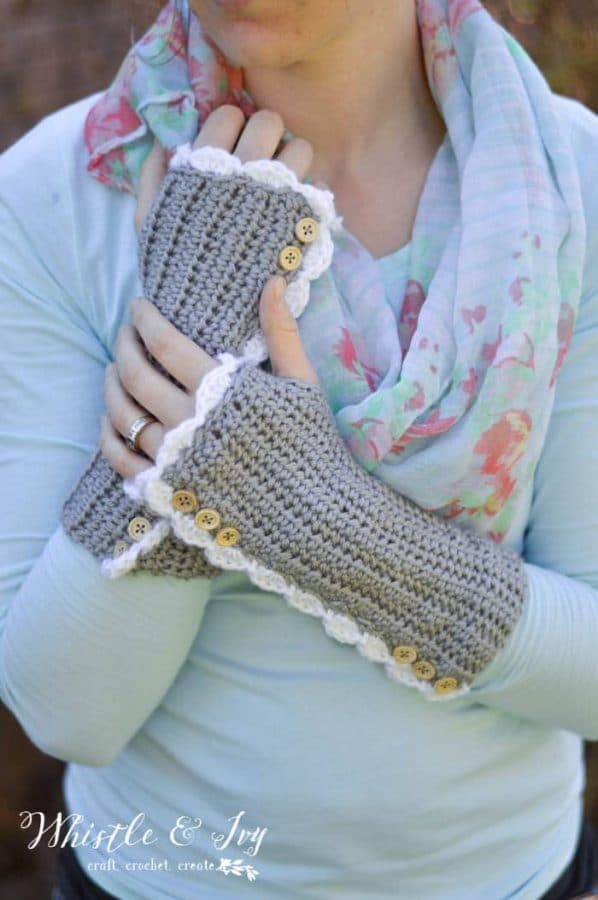
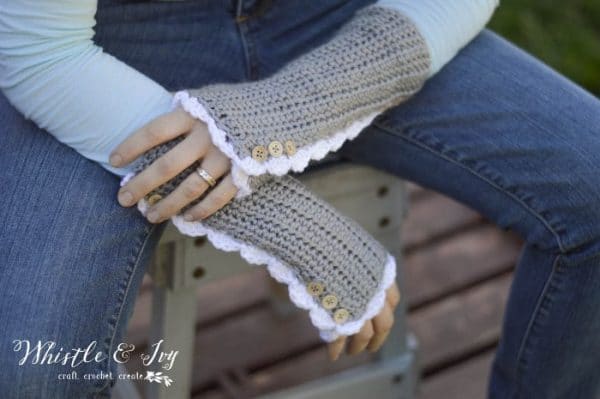
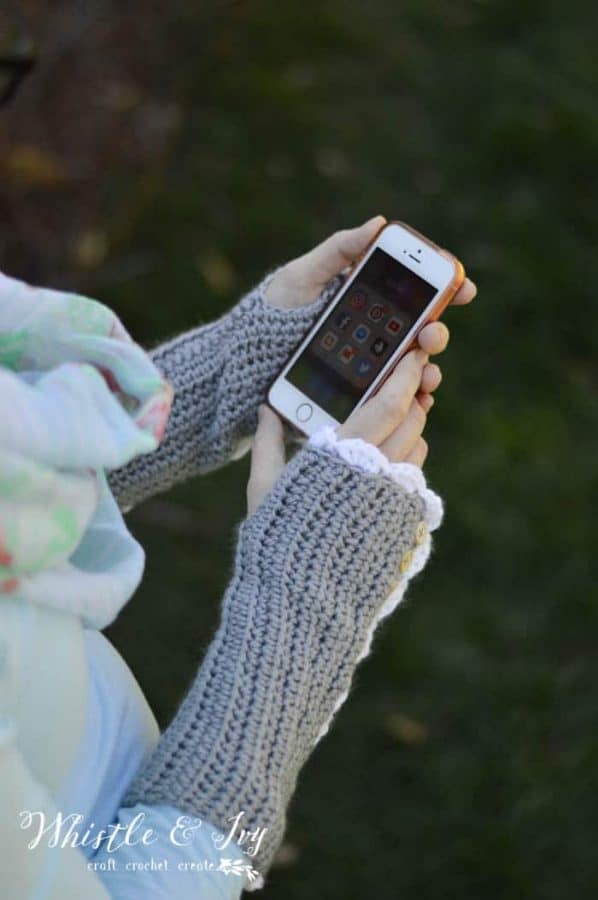
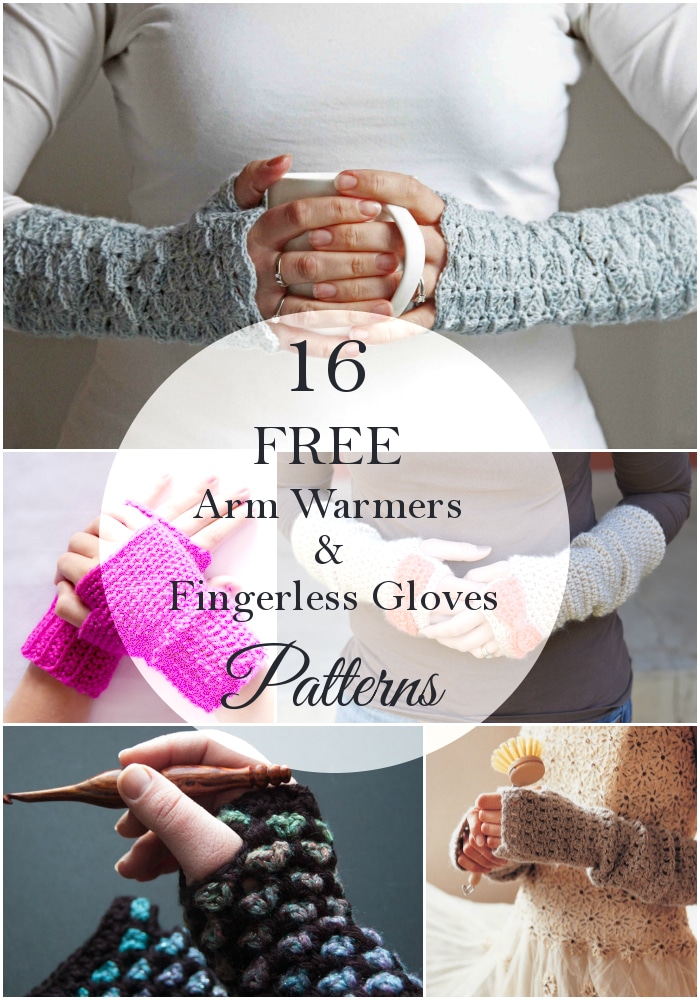
These darling crochet arm warmers look a bit like knit! They feature a feminine lacy edge, and a button detail that gives them a vintage vibe. Make with with or without thumbholes.
This post contains affiliate links which means I get a small commission at no extra cost to you. Thanks for your support!
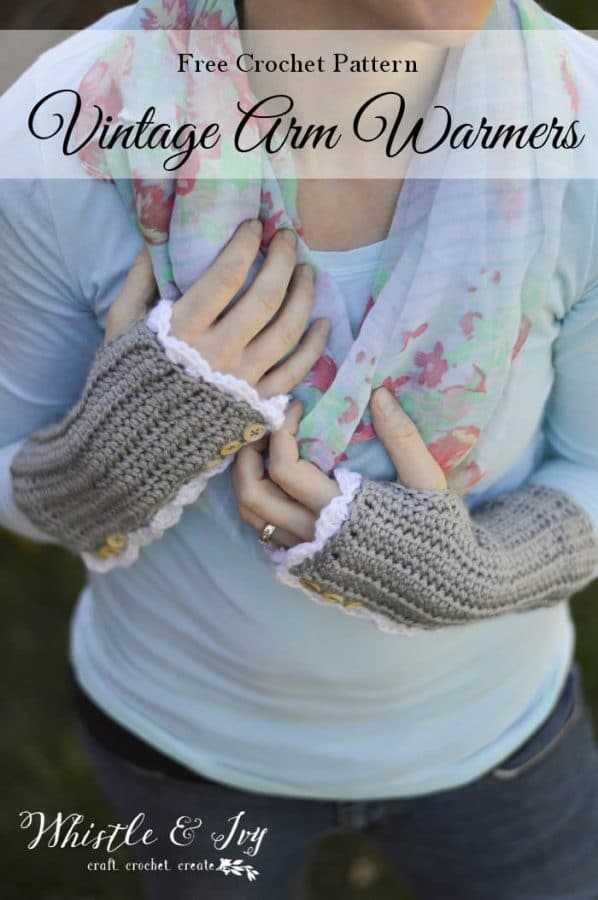
Happy Friday friends! I hope you have fabulous plans for the weekend. I am feeling fine because I FINALLY finished redesigning my Vintage Style Crochet Arm Warmers to have thumbholes! When The Boy was in the hospital, crocheting helped me stay sane and luckily this project was in my bag so I was able to finish them there. I just love them with wooden buttons.

You’re tired of sifting through complicated tutorials and patterns that leave you feeling overwhelmed.
Let me help.
PICTURE THIS:
Instant access to a library of modern, easy-to-follow patterns
Gifting your handcrafted treasures to your loved ones.
Feeling accomplished by your beautiful makes
It’s time to make your crafting experience as joyful as it should be.
It occurred to me as I was doing the pattern redesign that you don’t really need the button holes along the sides. Feel free to skip the button hole instructions by working a complete row of sc and sew the buttons on very last. My buttons are functional, but they can be decorative if you prefer.
VINTAGE-STYLE CROCHET ARM WARMERS – CROCHET PATTERN
Please remember: You are free to use this vintage style crochet arm warmers pattern to make and sell, but do not republish or distribute this pattern in any way. DO NOT use my photos in your listings. Please do share my blog links! It’s a quick and FREE way of supporting Whistle and Ivy and more free crochet patterns in the future.
What you need:
Medium Weight Yarn (Knit Picks Mighty Stitch in Silver and White)
H hook
Darning Needle
12 small buttons
Abbreviations: (American Terms)
Ch – Chain
Sc – Single Crochet
Hdc – Half Double Crochet
Sk – Skip
St – Stitch
FLO – Front Loops Only
Gauge: 12 sc = 3″

LOVE THIS PATTERN BUT HATE THE ADS?
The ad-free PDF download can be purchased in my shops! Where would you like to shop today?
Vintage Style Crochet Arm Warmers Pattern:
Right:
Ch 35.
1. Hdc in 2nd ch from hook. Hdc 33. Turn. (34 sts)
2. (FLO) Ch 1. Sc in same st. Sc in each st across. Turn. (34 sts)
3. Ch 1. Hdc in same st. Hdc in each st across. Turn. (34 sts)
4. – 11. Repeat rows 2 and 3 respectively until 11 total rows.
12. Ch 1. Sc in same st. Sc in next st. Ch 5. Sk 5 sts, sc in next st. FLO – work a sc in each remaining st. (34 sts)
13. Ch 1. Hdc in same st. Hdc in each st across. Turn. (34 sts)
14. – 23. Repeat rows 2 and 3 respectively until 23 total rows.
24. Ch 1. Sc in same st. *Ch 1. Sk next st. Sc in next st. Sc in next st* work 3 times. Sc 16. *Ch 1. Sk next st. Sc in next st. Sc in next st* work twice. Ch 1. Sk next st. Sc in last st. (34 sts)
Break yarn, tie off.
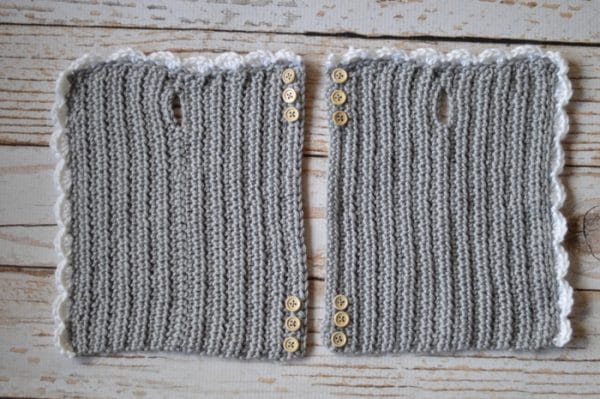
Join yarn at the top (with thumbhole at the top). Sc across the top, working stitches as evenly as possible, achieving 28 sts. Break yarn. Tie off. Your piece should measure approx. 9″ x 7.5 “
Shell Edging:
Start on long side with thumbhole to your left.
Join white yarn. Starting in next st, *dc 4. Sk next st. Sl st in next st. Sk next st* repeat down the side and across the top. Tie off.
Left Hand:
Ch 35.
1. Sc in 2nd ch from hook. *Ch 1. Sk next ch. Sc in next ch. Sc in next ch * work 3 times. Sc 16. Ch 1. Sk next ch. Sc in next ch. Sc in next ch* work twice. Ch 1. Sk next st. Sc in last st. (34 sts)
2. Ch 1. Hdc in same st. Hdc in each st across. Turn. (34 sts)
3. (FLO) Ch 1. Sc in same st. Sc in each st across. Turn. (34 sts)
4. – 11. Repeat rows 2 and 3 respectively until 11 total rows.
12. Ch 1. Sc in same st. Sc in next st. Ch 5. Sk 5 sts, sc in next st. FLO – work a sc in each remaining st. (34 sts)
13. Ch 1. Hdc in same st. Hdc in each st across. Turn. (34 sts)
14. – 24. Repeat rows 2 and 3 respectively until 24 total rows.
Break yarn, tie off.
Join yarn at the top (with thumbhole at the top). Sc across the top, working stitches as evenly as possible, achieving 28 sts. Break yarn. Tie off. Your piece should measure approx. 9″ x 7.5 “
Shell Edging:
Start on the top right of piece. Join white yarn. Starting in next st, *dc 4. Sk next st. Sl st in next st. Sk next st* repeat across the top and down the side. Tie off.
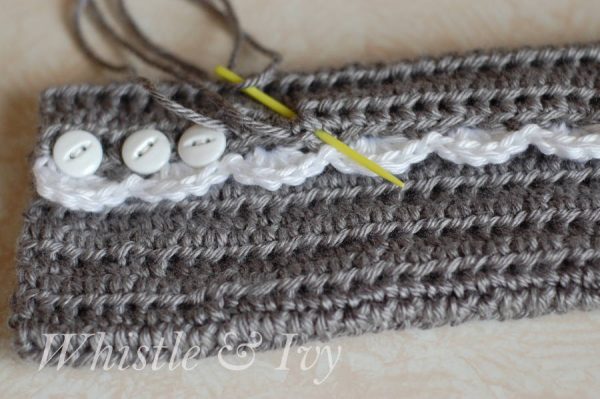
To sew them together, fold the the shells edge over the other edge. Using a darning needle, sew the arm warmers closed in between the buttons. Work down from the top, putting your needle down through both layers and up, all in one stitch.
xoxo,


If I wanted to add width, because I have somewhat larger arms, as well as length, because I also have long arms, how would I adapt it? Any thoughts? I made a pair of these a while back for my daughter, and she loved them, and now that I’m getting back into crocheting again, I want to make a pair for myself, but I have “man size” hands/ arms, and I’m not entirely sure how I would adapt it to work.
Hi Margaret! For the width, you can simply work more rows. For the length, you can work the foundation chain to the length that works for you, and add the extra stitches to the *middle* of the pattern, leaving the button hole ends the same. Does that make sense?
You can also simply skip the button holes, and sew the air warmers into tubes and add the buttons as non-functional detail.
I hope this helps!
How would you change this for a toddler and child size?
Thank you!
BTW, I’ve made a set of these for myself and I absolutely love them!! 😊
I am working on this pattern, but I’m so confused as to where the thumb hole is. You say at the end of row 24 to join at the top where the thumb hole is, but I don’t we what row you did a thumb hole?
It’s Row 12 when you skipped stitches.
Row 12 is where the thumbhole begins
Really like all your patterns very easy to follow. Have a question on this pattern. Almost finished first glove. Making for a friend. Had her try it on to see if it will fit (pinned sides together) Forearm to small but around hand way to big. Any suggestions on making them to fit?
Hi Gwen! They really aren’t fitted, that is for sure, they are just a tube shape. Because they are worked lengthwise, it would be a bit tricky to make them more fitted at the hand/wrist.
I am thinking you can maybe switch to DC instead of hdc halfway across, this will make half of it wider at one end, does that make sense?
Could you send a photo so I am sure we are on the same page?
Bethany (at) whistleandivy (dot) com
Yes, When I figure it out will send a picture. I was also thinking on the end where thumb hole is using a smaller hook see if that works.
Another idea is to simply pleat it at the wrist, like a dress shirt. So make it fit the forearm, make the tube, then sew it sort of cone shaped. This will make the buttons on the bottom/wrist non-functional, so you would just sew them in place, but still keep the look.
Sorry just got back to this. Great idea about pleating. Now just learn how to do that. Going to help watching videos. Thank you, Bethany,
I would like to add length to these. If I double the foundation chain from 35 to 70 and follow the pattern accordingly, will that work or will the count be off?
That counts will obviously be different but it will work! Be sure to work the button holes the same, just work your extra stitches in the middle of the rows.
Thank you for this pattern, I have made myself a pair and an just about to start another for a friend.
Very easy to understand instructions and they look so beautiful – I chose to make the warmers a deep purple and and red scallops on one hand and green on the other, they look seriously brilliant and I am getting many compliments :)
Thank you you again Bethany
This is wonderful! I am so glad! They sound beautiful!
I’m making these at the moment. On the left hand one you have row 11 as an sc row, and also row 12, when it should logically be a htr row. It looks better doing it as a htr row as the pattern stays consistent.
Sorry that should say hdc – I’m in the UK so have to convert the stitch names! Your sc is what I’d call a double and your hdc is what I’d call a htr.
You can do that, but that is the thumb hole row, so if you switch to Hdc, the left hand will have a larger thumb hole than the right hand.
these arm warmers are beautiful, thanks for the pattern. I’m looking forward to making them for my daughter.
thank you! You’re welcome!
Do you have a YouTube video on this pattern or others?
I don’t have a video for this specific project but I do have a YT channel. However, I have mostly moved my videos to my Endless Bundle membership! You can find my YouTube here:
https://www.youtube.com/channel/UCojB0sjCdvnEpH0yaFLLWWQ
Learn about my membership here:
https://www.whistleandivy.com/the-endless-bundle/
How much yarn do I need / what’s the yardage?
I don’t have exact yardage, you will use less than one 100g skein.
Is there a kids version of this? Would love to do for my granddaughter- she’s 3
I don’t have a child’s version, very sorry!
I’m a bit confused. Which row is the button hole row? I’d like to skip it, but not sure which one it is. It’s such a lovely pattern and would I love to make these as gifts.
Thank you! :-)
Sandra
Row 24 on the right, and row 1 on the left.
Thank you so much!!
hello, i am a little confused about the joining row of 28 sc stitches and then the join by overlapping and sewing together. are those two different options of how to join them?? other than that i love the pattern! thank you. could you help me understand the way to join them more clearly? i would appreciate it. thank you again.
You are simply joining yarn aon the top to work a row of 28 sts. This completes the rectangles, and you can move on to making the shell edging. Afterward, you move on to constructing them by overlapping and sewing.
I chose not to make button holes and then did the right pattern twice. Also, because I don’t like to keep cutting yarn and doing a lot of weaving, I found that once I finished off the right side, I could just fold it over right side facing me and work the scallops through both long ends together in order to join them together. When I got to the end of the long side (top where we keep the thumb hole) I ended there with a scallop, then started working single crochet around the cuff, slip stitching into the shell when done and crossing over to work the shells around the cuff in the SC. Great pattern – love it
Wish I could do this but I only know how to hdc lol.
Thats half way to a dc. You can sooo do this. It is very very easy. Think of it as making an arm brace and look up videos for the other stitches because if you can hdc they other ones are just as easy 😊
I am working on the left warmer. When following the pattern at row 11 is a sc line then, row 12 is also a sc line then row 13 is a hdc line and then row 14 is another hdc line. If I follow this am I going to get the proper ribbing???
Just curious as the right hand never has 2 lines the same in a row but the directions for the left does. Thanks
Because they are mirrored, not the same, I had to do slightly differences. The pattern is correct if you work it as written!
Is the entire pattern in FLO or just the sc rows?
Just the SC rows
Bethany, Can this pattern be printed? I don’t think I want to sit at my computer and do this from it.
You can buy my PDF in my shop :)
https://www.etsy.com/listing/500111744/vintage-inspired-arm-warmers-crochet
Or highlight the words and click “Print”
Bethany, I love this pattern. My crochet skills are remedial, but your pattern is easy to follow. I made the right glove twice because I was not making button holes. I made them in black, worsted weight wool, and I substituted the scallops with a row of sparkly, eyelash yarn. They are so cute! The perfect gift.
I am so glad you loved them! Thank you for letting me know :)
I made one of the fingerless gloves and for women with bigger hands and fore arm need to add more rows to fit them so the next pair I made it am going to add 2 or 4 more rows