
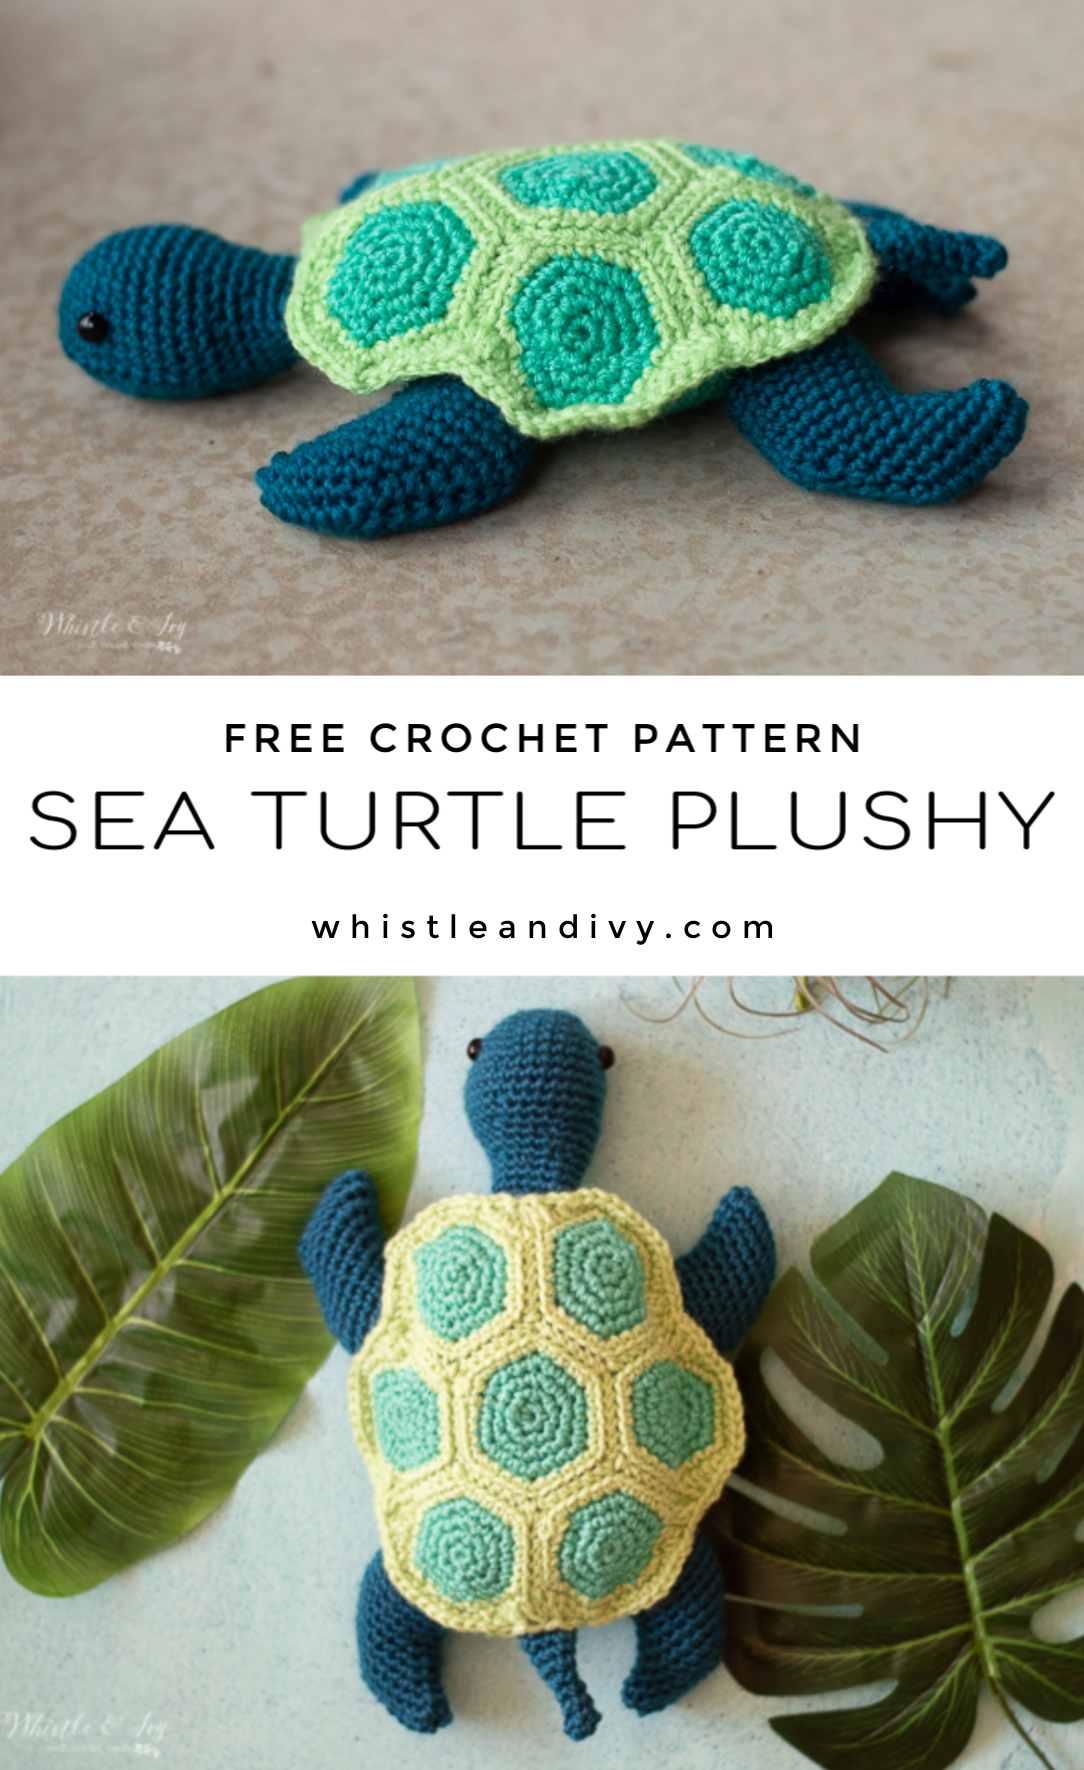
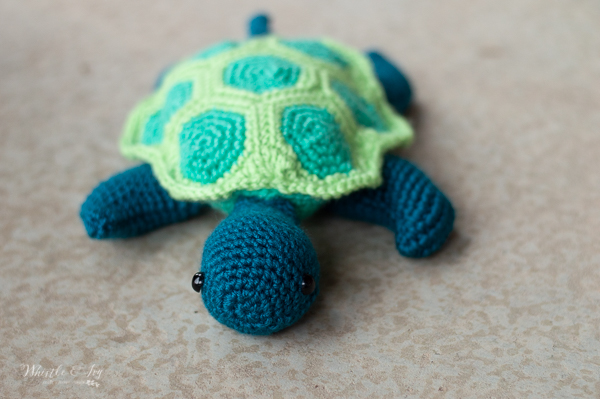
This darling little crochet sea turtle will delight all children with his adorable hexagon shape and tiny little flippers. Make him in 2 or 3 colors and he will be your child’s new favorite toy. This crochet baby sea turtle crochet pattern is adapted from a pattern originally found at joann.com and is posted with permission here. This post also includes affiliate links, which means I get a small commission at at now extra cost to you. Thanks for your cooperation!
This crochet sea turtle patterns has quite the tale to tell. Several years ago I was contacted by Joann to participate in summer craft challenge. Joann was releasing an online catalog that included fun summery crafts of all kinds. They wanted me to choose one project and make it. I chose the cute crochet sea turtle. The original pattern had some unusual design choices so I wrote up some of my adaptions and linked to the original turtle at Joann.com.
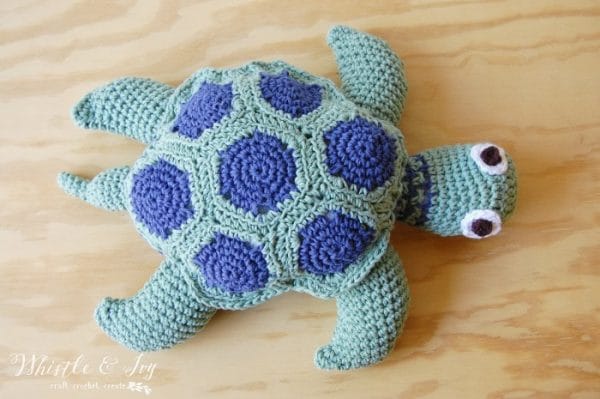
This was my original sample, worked with Bernat Handicrafter Cotton.
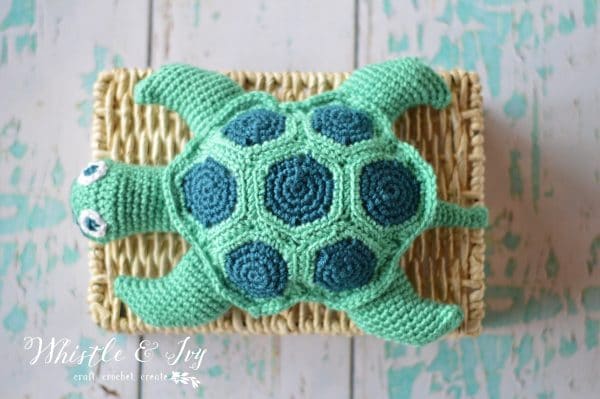
My second sample using Brava Worsted acrylic yarn and with further simplified instructions:
Over the years, the original pattern at Joann.com moved URLs a few times, until finally I had a user message me to tell me the current URL was again not leading to the pattern. I searched and searched the site to no avail. I reached out to the Joann creative team and they informed me the pattern was taken down and was not saved anywhere in the archives. They said if I ever got a my hands on a copy, I had permission to share it with you.
The crochet sea turtle was lost forever!
Last summer, I had a reader reach out to me, telling me she had downloaded the pattern and was willing to share. The turtle is saved!
Due to the birth of Cubbie, I didn’t have the time to do anything with it at that moment, so I thought it would sit safely in my inbox. Finally, last month when I decided to sit down and take care of this pattern once and for all, I couldn’t find the pattern, the email or any of it.
Blurg.
I thankfully kept my samples, so I did a bit of reverse engineering to finally complete this crochet sea turtle pattern in it’s totality.
The fins and shell are all original. The head is completely my design and the belly (and tail) was a combination, as I couldn’t quite figure out what I original did based on my sample and had to design as I went, using the original as my starting point.
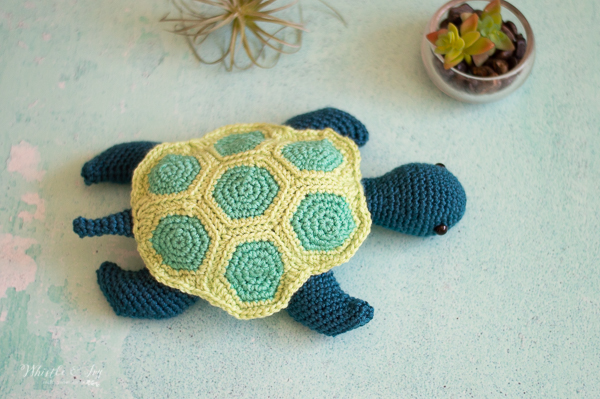
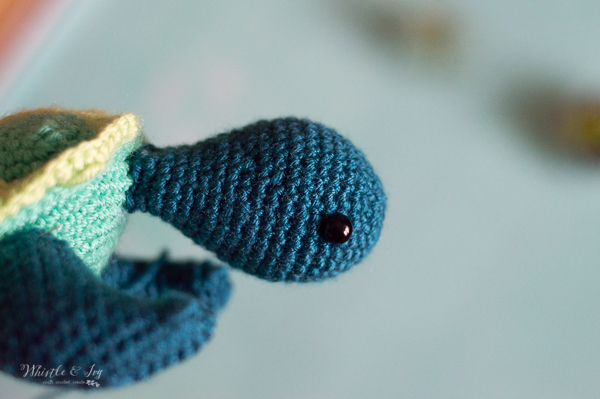
I personally prefer the look of safety eyes, but you can totally make the crochet eyes for yours of course. Either way this little guy is totally adorable!
I am so, so happy to finally have this pattern published and completed. Thank you all for your patience!

I SEE YOU, BUSY MAKER
You’re tired of sifting through complicated tutorials and daunting patterns that leave you feeling overwhelmed.
Let me help.
Picture this:
🧶 Joining a thriving community of fellow crocheters who share your passion.
📚 Access to our ENTIRE library of patterns that will buildsyour confidence.
🎁 Gifting handcrafted treasures to be cherished by your loved ones.
🌟 Modern, easy-to-follow patterns that will leave you feeling accomplished.
It’s time to make your crafting experience as joyful as it should be. We can’t wait to meet you!
CROCHET SEA TURTLE – FREE CROCHET PATTERN
Please remember: You are free to use this pattern to make and sell, but do not republish or distribute this pattern in any way. DO NOT use my photos in your listings. Please do share my blog links! It’s a quick and FREE way of supporting Whistle and Ivy and more free crochet patterns in the future.
PLEASE read my Disclaimer before working my free patterns!
What you need: (affiliate links)
– 4mm Hook
– Different yarns will give you different sizes! I originally made this turtle with Bernat Handicrafter Cotton, and it was about 18 long, my subsequent samples were made with Brava Worsted, about 11″ long.
– Extras
– Darning Needle
– -Polyfil
– 8mm Safety Eyes
Abbreviations: US Terms
Ch – chain
Sc – single crochet
Sc2tog – Sc decrease
Tc – Treble Crochet
Dc – Double Crochet
Hdc – Half Double Crochet
Sl st – Slip Stitch
St – stitch
Gauge: not important, just make sure your stitches are tight. If you can see spaces between your stitches or can see stuffing, go down a hook size or two.
Notes: Be sure to always work the first st in the same st as the chain.Alternately, you can also make your crochet sea turtle’s eyes from crochet circles instead of safety eyes. You would simply crochet one circle using white and crochet a second, smaller circle using black. I would suggest glueing it in place, I personally do not like sewing on things that small!
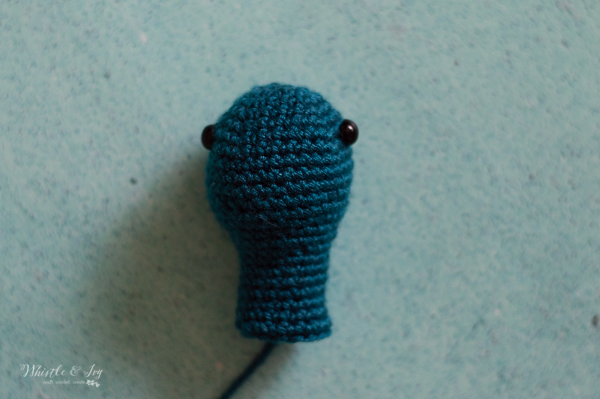
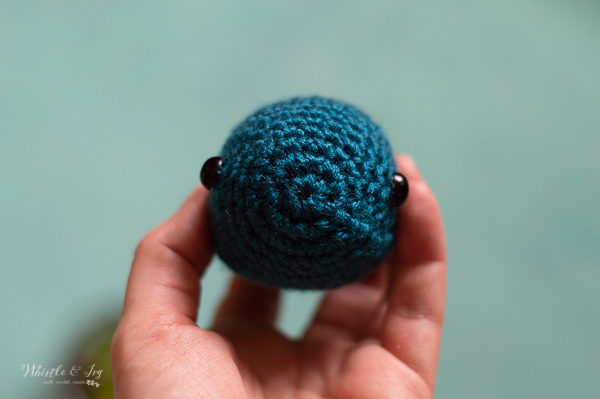
HEAD:
Magic ring
1. Work 8 sc into ring. (8 sts) Join.
2. Ch 1. Work 2 sc in each st around. Join. (16 sts)
3. Ch 1. *Sc in next 7 sts. Work 2 sc in next st* work twice. Join. (18 sts)
4. Ch 1. Sc in next 3 sts. Work 2 sc in next st. Sc in next 8 sts. Work 2 sc in next st. Sc in next 5 sts. Join. (20 sts)
5. Ch 1. *Sc in next 4 sts. Work 2 sc in next st* work 4 times. Join. (24 sts)
6. Ch 1. *Sc in next 5 sts. Work 2 sc in next st* work 4 times. Join. (28 sts)
7. Ch 1. Sc in next 3 sts. Work 2 sc in next st. *Sc in next 6 sts. Work 2 sc in next st* work 3 times. Sc in last 3 sts. Join. (32 sts)
8. – 10. Ch 1. Sc in each st around. Join. (32 sts)
11. Ch 1. *Sc in next 6 sts. Sc2tog.* work 4 times. Join. (28 sts)
12. Ch 1. Sc in each st. Join. (28 sts)
13. Ch 1. *Sc in next 5 sts. Sc2tog.* work 4 times. Join. (24 sts)
14. Ch 1. Sc in next 2 sts. Sc2tog. *Sc in next 4 sts. Sc2tog* work 3 times. Sc in last 2 sts. Join. (20 sts)
15. Ch 1. *Sc in next 3 sts. Sc2tog.* work 4 times. Join. (16 sts)
16. – 20. Sc in each st around. Join. (16 sts)
Leave a long tail.
Stuff firmly.
Place safety eyes on either side of the head between rows 6 and 7.

LOVE THIS PATTERN BUT HATE THE ADS?
Grab an ad-free PDF download!
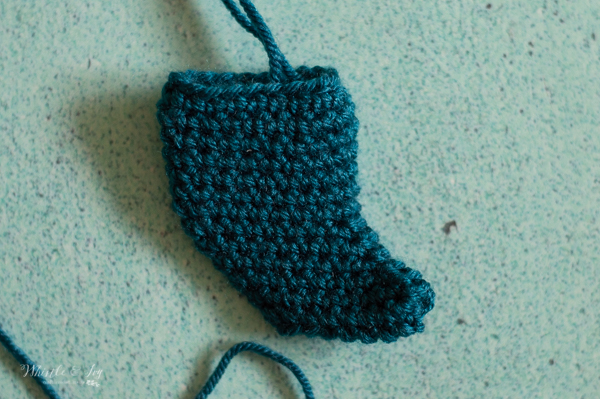
FLIPPERS:(make 4)
Ch 18. Join with sl st to first ch to form a ring, taking care not to twist the the ch.
1. Ch 1. Sc in each ch. Join. (18 sts)
2. – 7. Ch 1. Sc in each st. Join. (18 sts)
8. – 13. Ch 1. Work 2 sc in same st. Sc in next 6 sts. Sc2tog twice. Sc in next 6 sts. Work 2 sc in last st. Join with sl st. (18 sts)
Tie off and leave a long tail. Turn Leg inside-out. Fold leg flat and sl st along 13 row, sewing the end shut. Turn leg right-side out and stuff with Polyfil.
BELLY: (always work first st in the same st as the ch)
Ch 6.
1. Work 3 sc in 2nd ch from hook. Sc in next 3 chs. Work 3 sc in last ch. Working across opposite side of chain: sc in next 3 chs. Join with first sc. (12 sts)
2. Ch 1. Sc in next st. Work 3 sc in next st. Sc in next 2 sts. Work 2 sc in next st. Sc in next 2 sts. Work 3 sc in next st. Sc in next 2 sts. Work 2 sc in next st. Sc in last st. Join. (18 sts)
3. Ch 1. Sc in next st. Work 2 sc in next st. Work 3 sc in next st. Work 2 sc in next st. Sc in next 6 sts. Work 2 sc in next st. Work 3 sc in next st. Work 2 sc in next st. Sc in next 5 sts. Join. (26 sts)
4. Ch 1. Sc in next 3 sts. Work 2 sc in next st. Work 3 sc in next st. Work 2 sc in next st. Sc in next 4 sts. Work 2 in next 2 sts. Sc in next 4 sts. Work 2 sc in next st. Work 3 sc in next st. Work 2 sc in next st. Sc in next 4 sts. Work 2 sc in next 2 sts. Sc in last st. Join. (38 sts)
5. Ch 1. Sc in next 3 sts. Work 2 sc in next st. Sc in next 2 sts. Work 3 sc in next st. Sc in next 2 sts. Work 2 sc in next st. Sc in next 12 sts. Work 2 sc in next st. Sc in next 2 sts. Work 3 sc in next st. Sc in next 2 sts. Work 2 sc in next st. Sc in next 9 sts. Join. (46 sts)
6. Ch 1. Sc in next 4 sts. Work 2 sc in next st. Sc in next 3 sts. Work 2 sc in next st. Sc in next 3 sts. Work 2 sc in next st. Sc in next 14 sts. Work 2 sc in next st. Sc in next 3 sts. Work 2 sc in next st. Sc in next 3 sts. Work 2 sc in next st. Sc in next 10 sts. Join. (52 sts)
7. Ch 1. Sc in next 6 sts. Work 2 sc in next st. *Sc in next 4 sts. Work 2 sc in next st.* work twice. Sc in next 15 sts. Work 2 sc in next st. *Sc in next 4 sts. Work 2 sc in next st.* work twice. Sc in next 9 sts. Join. (58 sts)
8. Ch 1. Sc in next 7 sts. Work 2 sc in next st. *Sc in next 3 sts. Work 2 sc in next st.* work twice. Sc in next 20 sts. Work 2 sc in next st. *Sc in next 3 sts. Work 2 sc in next st.* work twice. Sc in next 13 sts. Join. (64 sts)
9. Ch 1. Sc in next 8 sts. Work 2 sc in next st. Sc in next 3 sts. Work 2 sc in next 2 sts. Sc in next 3 sts. Work 2 sc in next st. Sc in next 22 sts. Work 2 sc in next st. Sc in next 3 sts. Work 2 sc in next 2 sts. Sc in next 3 sts. Work 2 sc in next st. Sc in next 14 sts. Join. (72 sts)
10. Ch 1. Sc in each st around. Join. (72 sts)
11. Ch 1. Sc in next 9 sts. Work 2 sc in next st. Sc in next 5 sts. Work 2 sc in next st. Sc in next 5 sts. Work 2 sc in next st. Sc in next 23 sts. Work 2 sc in next st. Sc in next 5 sts. Work 2 sc in next st. Sc in next 5 sts. Work 2 sc in next st. Sc in next 14 sts. Join. (78 sts)
12. Ch 1. Sc in next 10 sts. Work 2 sc in next st. Sc in next 6 sts. Work 2 sc in next st. Sc in next 6 sts. Work 2 sc in next st. Sc in next 24 sts. Work 2 sc in next st. Sc in next 6 sts. Work 2 sc in next st. Sc in next 6 sts. Work 2 sc in next st. Sc in next 14 sts. Join. (84 sts)
13. – 14. Ch 1. Sc in each st around. Join. (84 sts)
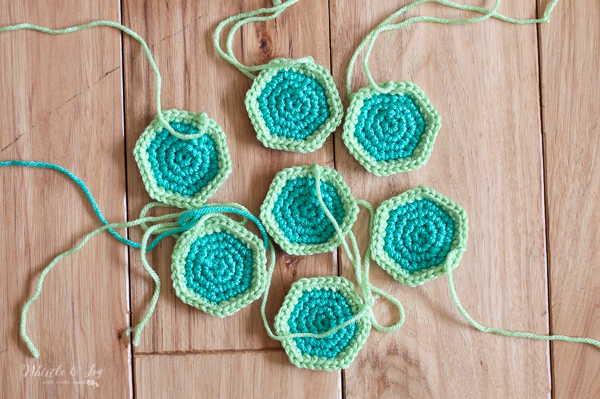
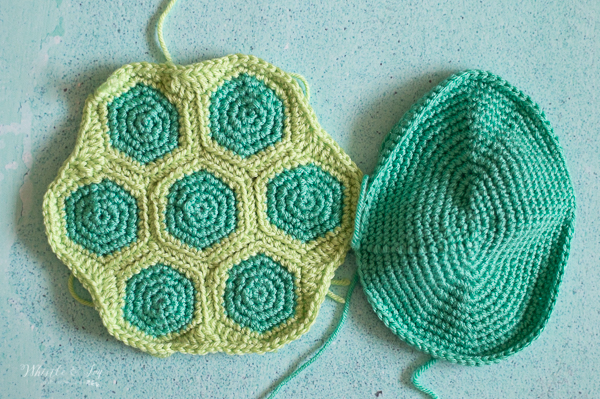
SHELL:
HEXAGONS: Work 7 (always work first st in same st as chain, and join with the top two loops of first st).
Magic ring
1. Ch 1. Sc 6 into ring. Join. (6 sts)
2. Ch 1. Work 2 sc in each st. Join. (12 sts)
3. Ch 1. *Sc in next st. Work 2 sc in next st* work 6 times. Join. (18 sts)
4. Ch 1. *Sc in next 2 sts. Work 2 sc in next st* work 6 times. Join. (24 sts)
Join 2nd color
5. Ch 1. *Sc in next 3 sts. Work 3 sc in next st. * work 6 times. Join. (36 sts)
Tie off.
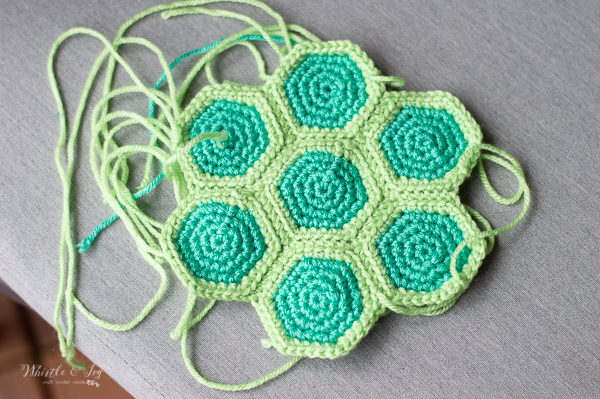
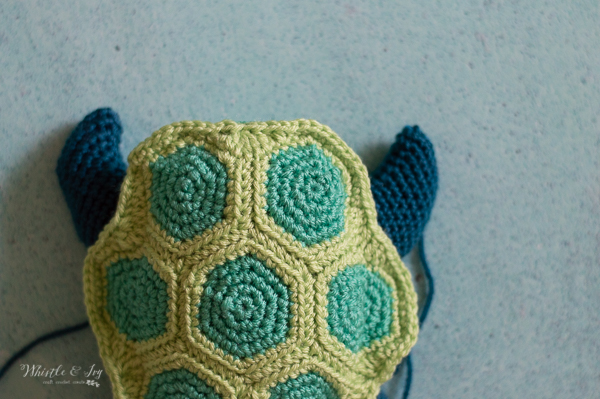
Sew the shell together with one hexagon in the middle, and the remaining 6 around the middle hexagon. Using the same color yarn as the last round on your hexagons, sew them together 2 at a time by lining them up, right sides together. Using a separate yarn, sc the hexagons together going through the back loops only on each hexagon (the 2 outside loops when the hexagon are oriented with rights sides together. Work until all are sewn together. Weave in the outside tails in, but you do not need to bother weaving in the ends in the middle, they will be hidden when the turtle is fully constructed.
SHELL OUTER EDGE:
With shell oriented with two hexies on top, join yarn in the right hexagon, in the top peak.
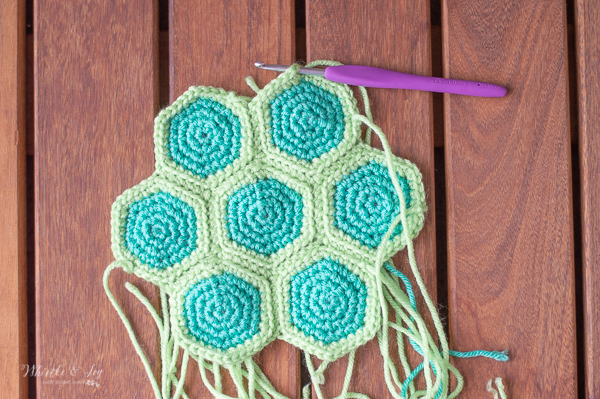
Ch 1. (work first st in the same st as the ch) Sc in next 3 sts. *Hdc in next st. Dc in next 2 sts. Work a 3 dc cluster st over the next st, the space in between the hexies and the next st on the following hexie. Dc in next 2 sts. Hdc in next st.Sc in next 11 sts * work 5 times. Hdc in next st. Dc in next 2 sts. Work a 3 dc cluster st over the next st, the space in between the hexies and the next st on the following hexie. Dc in next 2 sts. Hdc in next st. Sc in next 8 sts.
Join with first st.(103 sts)
Tie off.
TAIL:
Magic Ring
1. Ch 1. Work Sc 5 into ring. Join. (5 sts)
2. – 4. Sc in each st around. Join. (5 sts)
5. Ch 1. Sc in next 2 sts. Work 2 sc in next st. Sc in next 2 sts. Join. (6 sts)
6. Ch 1. Sc in each st. Join. (6 sts)
7.Ch 1. Work 2 sc in same st. Sc in next 5 sts. Join. (7 sts)
8. Ch 1. Sc in each st. Join. (7 sts)
9. Ch 1. Work 2 sc in next st. Sc in next 3 sts. Work 2 sc in next st. Sc in next 2 sts. (9 sts)
10. – 12. Ch 1. Sc in each st around. Join. (9 sts)
Leave a long tail.
CONSTRUCTION:
BODY:
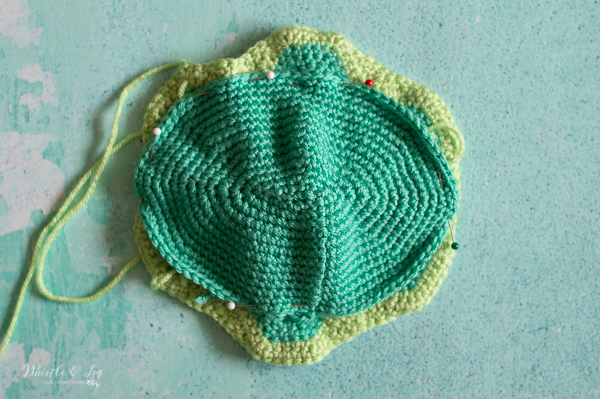
Sew the belly to the finished shell: line the belly lengthwise on the bottom of the shell, wrong sides together.
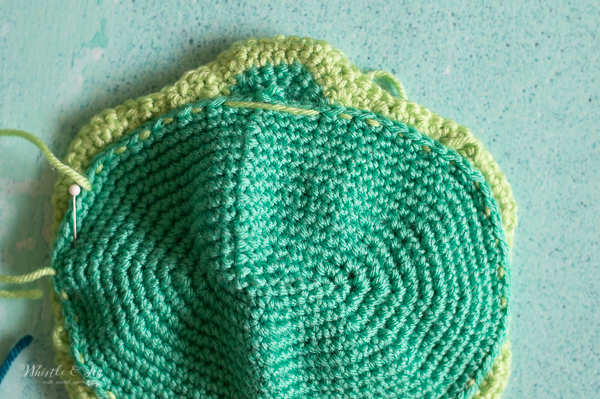
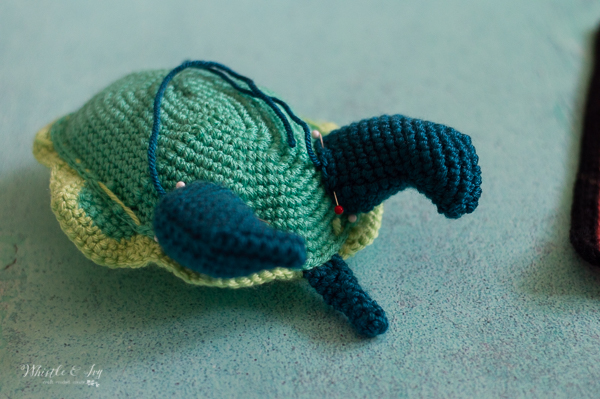
The tips will be flush, but the outer side edges of the shell will extend past the belly. Pin in place. You will sew it together using a sewing running stitch. Use the same color yarn that you used to sew your hexagons together. Pin in place.
When you get to one end (doesn’t matter which) sandwich the tail in between the belly and the shell, sewing it place as you go.

When you get to the sides of the shell, you can continue along with your sewing it if you don’ t mind seeing the stitches on top. You can also skip it for now, and come back with the same color you used for your hexagon centers and sew up that space, so you can’t see your stitches from the top.
You can clip the yarn and put a small dab of glue to keep the yarn from pulling out.
Leave a small hole to stuff it in. Once firmly stuff, sew up remaining hole.
FLIPPERS: Next, sew the flippers in place. Your back flippers should be near the tail, lined up the the outer edge of the bottom two hexagons. Pinch the open end slightly and pin in place on the edge of the belly, just inside of where it meets the shell. Using the tail, sew in place. Repeat for other back flippers.
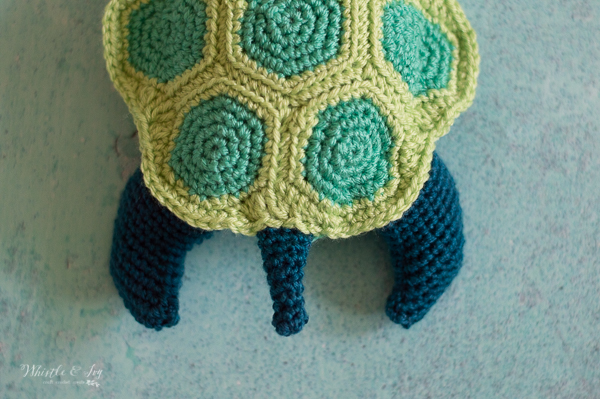
Front flippers will be slightly farther apart than the the back flippers. Sew them approx. centered where the two hexagons meets in the top corners of the shell. Sew in place using the tails, just as you did with the back flippers.
HEAD: The head will go at the top, centered between your two front flippers. Take care that the head is straight so the eyes are on either side of the head. Sew it under the shell on the belly, similar to how you sewed the legs. Make sure all ends are weaved in.
It’s amazing the size difference between the cotton and acrylic!
The Boy named the larger, original crochet sea turtle “Finny,” which is pretty darn cute. And even though his neck is stretched out already from being swung around, I am so happy The Boy loves his new friend. This little guy (made with acrylic) fits on the original Finny’s shell. Of course the kids love them all.

xoxo,


This is So Stinkin’ Cute!!! I was just blessed with my first Granddaughter last Thursday and have been looking for a lovey or try my hand at a stuff animal following my daughters seaside theme for months now. I love the info on sizing differences between types of worsted yarn, so helpful. I like the smaller size you got from the Brava and am gonna use that yarn. However, having never attempted such a project I am not sure how much yarn I need to purchase. Will 1 ball of each of 3 colors be enough or will the shell top (minus dots) and bottom eat more yarn? I know it all depends on gauge I get, etc. but is can you provide a ball park? Like should I get 2 balls of each color or will one do? I can’t wait to start this so once she’s old enough it will be done. Thank you for a wonderful pattern and any assistance you can provide.
Hi Barbara! One skein of each color will be enough :) Congrats on your new granddaughter! So exciting!
I am having really hard time understanding where and how I joing the shell to the body.
Do you have it pinned together yet like the photo?
Thank You for the pattern such a cute turtle
Thank you!
Hi, I’m making this turtle for my mom for Christmas but on the the Belly I’m having trouble getting passed round 2, I chain 6 and do as it says but by the time I finish round 2 I’m passed where round 3 should start. What am I doing wrong?!
What is your stitch count?
Sorry to have disturbed you with this but I don’t need help anymore I figured it out (still not completely sure what I did but 🤷🏻♀️), have a nice day!
Merry Christmas!!!
No apologies necessary, Merry Christmas!
Do I stuff the head? It seems that I would, but I can’t find it in the pattern.
Yes you stuff the head.
Having trouble with the belly. Are you supposed to end up at where you started each time? I’m using a stitch marker and ending up either short or over it. Thanks!
Hi Heather! Yes you are supposed to end at the same spot. Which row is throwing you off and what is your count?
Hey, I couldn’t understand the part where you join the hexagons together. Do we have to sew them together and then do single crochet on top it?
No, the sc sews them together.
Oh, thankyou. I finally get it now, I think I misread it. Thankyou for replying & also for the pattern. Take care 💗
You are very welcome, have a great weekend!
Are you able to tell me what the finished size the turtle is.
The sizing will vary quite a bit depending on your yarn and gauge, but mine made with acrylic was about 14″ long, and the one made with cotton was about 24″ long.
What does the star mean in step 7 of the belly part please as I can’t seem to work it out correctly.
It contains the repeat, so repeat the entire contents of the asterisks the indicated number of times, just as you did in step 6.
Thank you so much I now understand your pattern is amazing so far easy to follow 😀
You’re welcome!
Hi! I have been trying to make the shell and am having troubles because I keep having an extra stitch so instead of 18 stitches on part 4, I have 19. What am I doing wrong??
For the individual hexagons you are getting 19 sts on round 4?
I’m having trouble understanding how to download and/or print this pattern. Please help.
Hi Joan! I don’t have download or print options for this pattern, the only way to get a download would be to join my Endless Bundle. You just have to work it right from my website.
Hi, I’m having a hard time understanding how to sew the hexagons together.
How can I help?
Do I sew them all together and then go back and sc or just sc them together? Also, where did you start the sc to make it easier and faster?
You will sc the together. Be sure to read the part about working through the Back loops only for best results. You cannot do it in one pass, sorry! It’s a circle, so just start anywhere on the outside.
I am having trouble with the construction part of the sea turtle. Am I seeing the find inthe shell like the tail or on the outside?
The fins go on the bottom/side of the belly under the shell. I have a photo of the fins pinned to the belly, did you see it?
How big is the finished turtle?
It depends on your yarn and gauge! My new little guy is about 9″ long. However, the large cotton one was about 14″ long! The cotton was a bit bulkier than the acrylic, so that can make a huge difference.
I am having trouble with the start of the belly. Working on opposite side if chain, then it’s only 3 stitches and joins with first stitch. So confused!
You are working in an oblong shape, so you will work across one side of the chain and back down the other side, joining with the first st.
Me too…..can’t figure it out. Do you have any close up ictures please?
Hm. I don’t. Here is a similar shape with a photo. Does that help?
https://forthefrills.com/crochet-oval-elbow-patch-tutorial/
Hi! I’m having a really difficult time understanding how to make the fins. If we are working in rounds, why is there still a chain 1 (rows 2-7) would this not mean that each row is increasing by 1 stitch?
Thanks!
You are working deceases in each round as well, this keeps the stitch count the same.
Oh, sorry, I think I misunderstood. The ch 1 does not count as a stitch, you are working in joined rows, not spiral-shaped, continuous rows.
Is there a mistake on the flippers rounds 8-13? …not making sense to me if those rows have 18 stitches how will it go to a point as shown in the pic? thanks for helping… I posted the same but I couldn’t find it so it re-posted. Thanks for helping me.
No, its correct. It shifts over because you are working decreases on one side, and increases on the other.
Hi. I paid for the sea turtle pattern, but can’t find a way to download. Its adorable and I really want to make it. Can you help. Thanks.
Hm. It’s not for sale, where did you download it?
Can’t wait to make several of these