
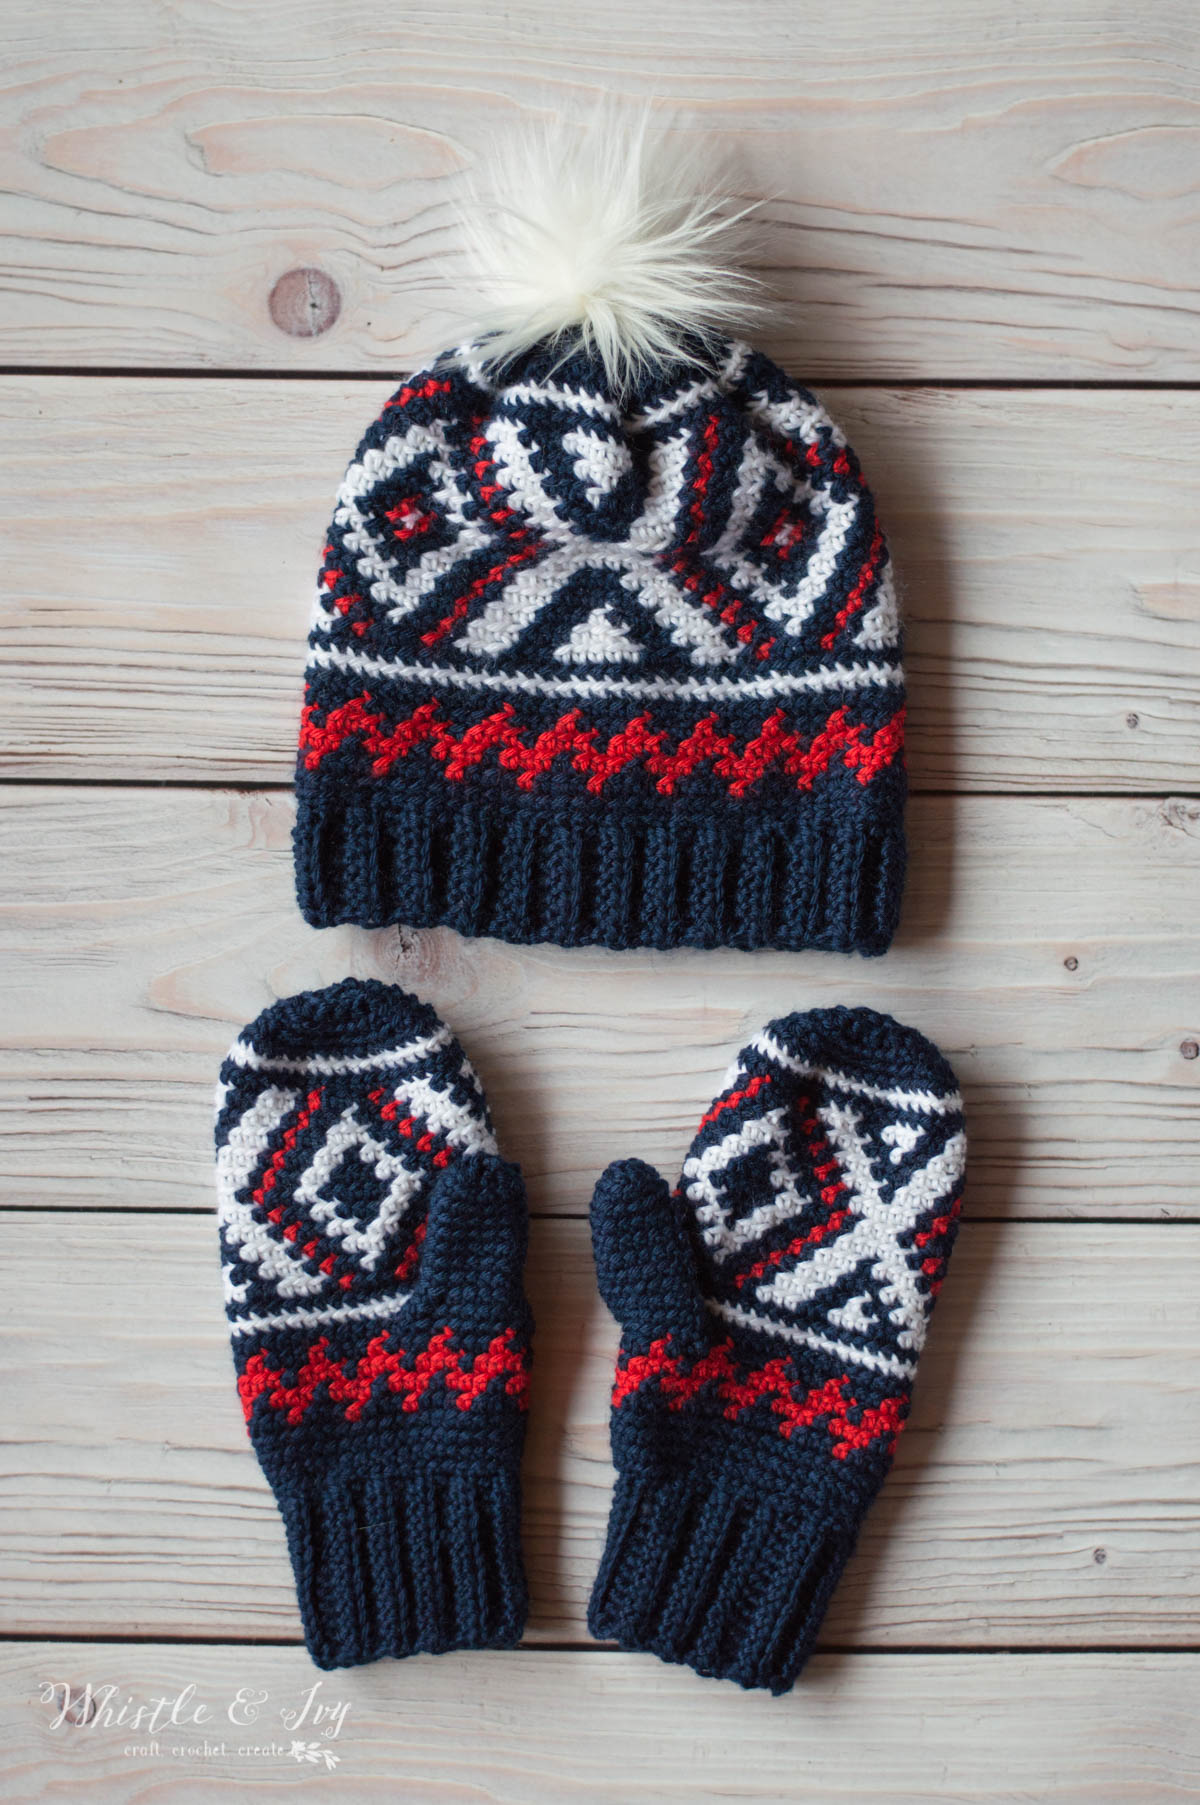
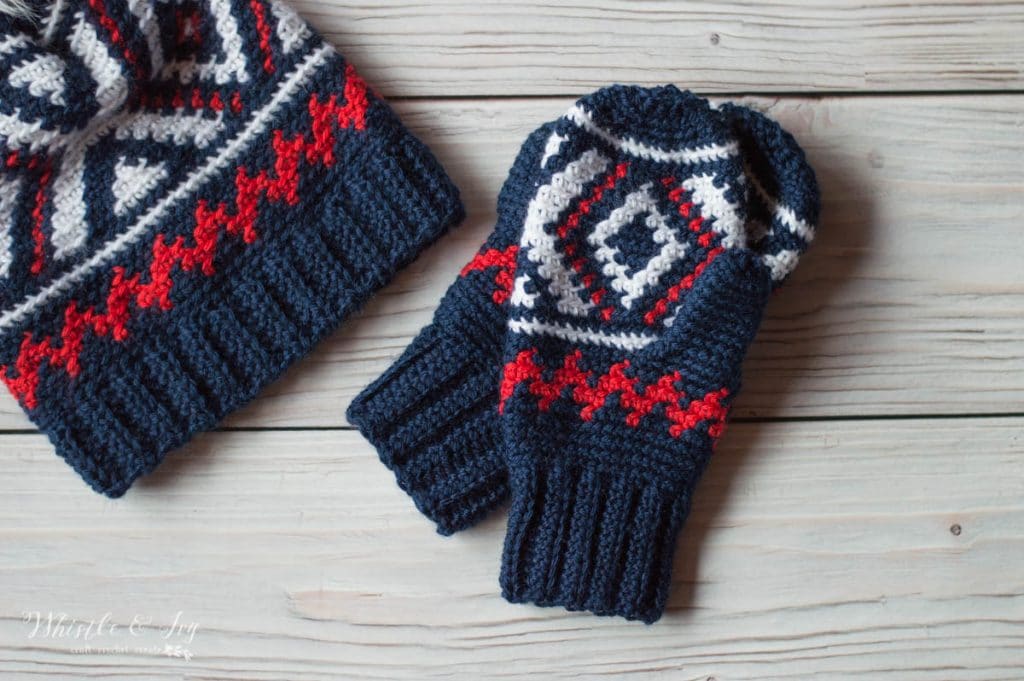
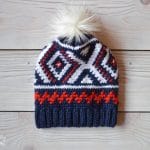
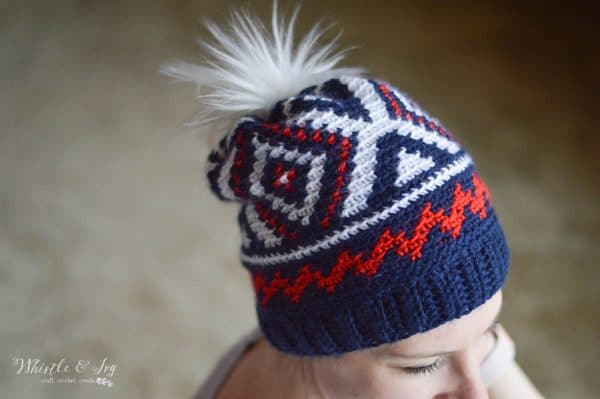
This gorgeous fair isle hat and mitten set is inspired by the 2018 winter Olympics Team USA uniforms! Switch up the colors and make it perfect for your style! The post contains affiliate links which means I get a small commission at no extra cost to you. Thanks for your support!
Do you like watching the Olympics? I always look forward to it and I love summer and winter equally. Summer has gymnastics, hand ball, beach volleyball; winter has snowboarding, hockey, figure skating. It’s so amazing to see so many athletes excel. I was also pretty cool to see Ralph Lauren’s designs for the Team USA closing ceremonies uniforms. The crochet olympics team hat is awesome. But holy. Guacamole. I won’t be spending $200 on one, so I decided to make one.
Join me?

Don’t let the color work intimidate you, seriously. If you work slowly and steadily, this fair isle hat will work out for you. It’s definitely not a quick project, but it’s a very rewarding project. It turned out even prettier than I imagined, and I think you will be seeing more graphs here soon.

The trick to getting the design to line up is simply working through the back loops! I learned this neat trick from the book Modern Tapestry Crochet. It’s a perfect book for tapestry crochet beginners. She makes it SO easy.
Bear in mind that the right-leaning diagonals for right-handed crocheters (and visa versa) will look closer spaced, while the diagonal stitch going the other way will look slightly spaced out. This is normal!
Unfortunately, with crochet color work there is a give-and-take with each method. BLO method will line up much better but will have the differing look with the diagonal stitches.

You’re tired of sifting through complicated tutorials and patterns that leave you feeling overwhelmed.
Let me help.
PICTURE THIS:
Instant access to a library of modern, easy-to-follow patterns
Gifting your handcrafted treasures to your loved ones.
Feeling accomplished by your beautiful makes
It’s time to make your crafting experience as joyful as it should be.
NEVA FAIR ISLE CROCHET HAT and MITTENS (USA Olympics Team THEMED) – CROCHET PATTERN
Please remember: You are free to use this pattern to make and sell, but do not republish or distribute this pattern in any way. Please DO NOT use my photos in your listings.
What you need: (affiliate links)
– I Hook
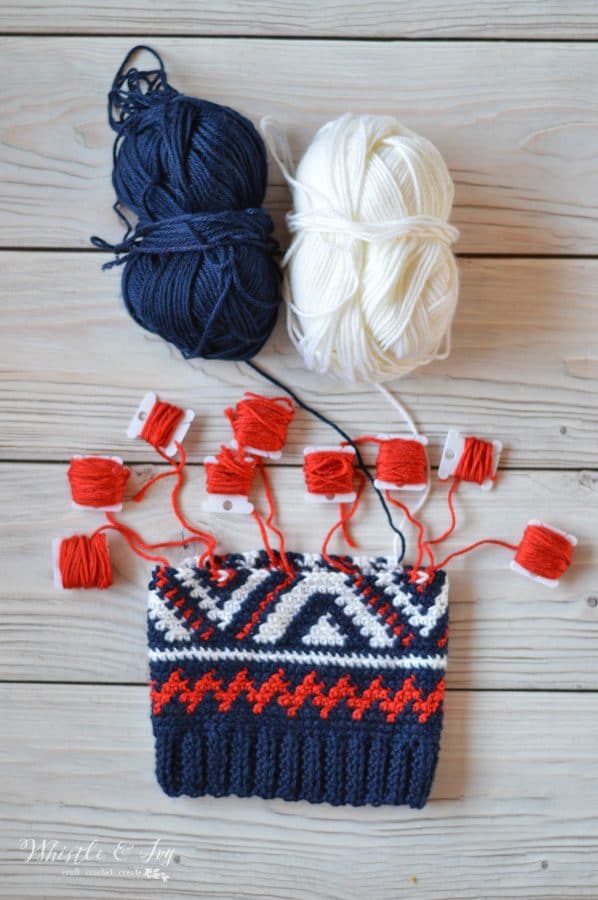
– Mighty Stitch (Medium Weight Yarn) in Serrano, White and Navy
– Pom-Pom
– Bobbins
– Darning Needle
Gauge: 14 sts = 4″ (Gauge Pattern)
New to colorwork? I have a small video that can help! My main tip is to take is SLOW. You can do it!
READY TO MAKE YOUR FAIR ISLE HAT AND MITTENS?
This hat and mitten set can be purchased in my shops! Where would you like to shop today?
Bobbins look intimidating, but it’s much easier than you think! The Endless Bundle includes the pattern download and a helpful video to assist in making this hat.
You can do colorwork!
So pull on your new hat and tune in to the Olympics. They start this weekend, yay!
Stay tuned for more projects featuring color work, because it is so much fun.


I was part of the endless bundle until a few weeks ago and I had downloaded and made this Fair Isle hat last year. I now can’t find where I saved the pattern. Is there any way to get it again without having to pay for the endless bundle again?
Hi Meg! I am very sorry, all downloads that you have downloaded while you are a member are, of course, yours to keep, but you lose access to the library when you cancel.
Hi Bethany
I bought the pattern and I started to make it, but I have a question about the Brim, you said we had to repeat row 2 until reached approx 19”. I wonder how many rows you made it to have a reference.
In the finished hat photo, I count around 52 rows. You could say me that’s right or an approx number thanks
That sounds about right! The row count doesn’t really matter as long as you made a gauge swatch before beginning and the brim fits around your head snugly.
Okay, I have to ask – it says free pattern, but I see absolutely no written instructions anywhere on this page. Was it a free pattern, and now for purchase only? If that’s the case, that’s fine (but maybe label it somewhere?), but I really want to know what I am missing, because the below is all I see.
Where does it say free? Yes, it used to be free, but I have retired several of my designs to my shop only. I thought I pulled out any mention of it being free.
On Pinterest the pattern says it is free.
Can you share the pin that says it’s free?
Hi Bethany,
I love this beanie – go USA! I’m going to make this as Christmas beanies for my family. Do you have a toddler/child’s pattern? I’ve only been crocheting since quarantine, made 12+ afghans but haven’t tried this style yet. Also, can I just add more stitches to make the brim wider so it can be folded up?
Thanks and stay well!
Thank you so much!
I am sorry, I only have this hat for adults, the graph repeat is so wide that I would have to completely change it to make it smaller. It’s something I hope to do in the future. You can definitely make the brim wider, just work double the amount of chains it calls for and work stitches in each.
Would it work to carry the yarn through instead of reattaching it each time? I’m a newbie at switching colors like this and have always had an aversion at changing colors. Do you have a video I could watch of the technique? With each bobbin, does that color just go up to the next row right above it every time (looking at all those red ones, does the color get carried up to the next row then)? I can’t even think of how to ask the question because I just don’t know.
Hello! Yes it’s intimidating, but it’s not as scary as it seems! I have a video tutorial for this hat in this post, right above the instructions for the brim.
Thank you so much for sharing your beautiful crochet patterns! I look forward to trying them ALL! Lol! Love your work!
Thank you Angela!!
I think this is an intermediate pattern but well written, beautiful graph and great tut. This is my new WIP and having no trouble at all; just getting in the rhythm. I’m using a heavy wt 4; I.e., red heart super saver. And I used an H hook for the brim then switched to an I for the pattern. For my head, I use an I or J with Red Heart SS and 64 rows for the brim, 72 for my husband. For those having sizing trouble, I would suggest crocheting a hat including brim in plain color, SCBLO to check fit. Once they have obtain the correct fit WITHOUT CHANGING STITCH COUNT, they can then start your gorgeous hat. I have done this when I am starting a complex pattern with a graph then I have a hat to donate to St Vincent de Paul for the homeless and I KNOW FOR SURE that when I start the complex pattern, I will be happy with result. Thank you for your free pattern and taking time to answer all the questions.
Thank you Mary! Very helpful info, I appreciate it!
Wonderful idea about the stitching one in plain scblo first and donating it. :-)
Okay, one more thing I love about this pattern is that when I skip a stitch on the graph, it’s easy to catch the mistake. I don’t have to frog many stitches to fix it. Thanks for sharing this great pattern, Bethany!
I’m having so much fun with this pattern! I’m about half way through the chart and I must say I won’t dive right into the mittens but look forward to giving the set at Christmas!
And IMHO,Caron simply soft is what I call a “thin four.” I have some British yarn I love but the feel is more like a baby sport.
Would this be easy to convert to a scarf pattern? I’ve finished the hat and mittens thinking a scarf to go with the set would be awesome. Thinking taking the graph and possibly just doing a repeat of it until the scarf is long enough – does that sound like it would work? Since it’s your graph wasn’t sure if you had a scarf pattern that wasn’t up or wanted to see if you could provide input possibly on a way to do a scarf with the graph to match the hat and mittens.
Yes that would work! I don’t have a scarf at the moment, I am sorry!
Hi, when you chain one to start row, do you SC into bottom of that chain one or next stitch? Thanks
I personally sc in the bottom of the chain. You can do it either way, just make sure if you are working a sc in the same as the chain, then you are joining with the sc, not the chain. (and you would join with the chain if doing it the other way)
Thank you so much for your speedy response. I’ve made a start! My son has requested this hat for his trip to Poland. Thanks again x
You are welcome! How fun!