
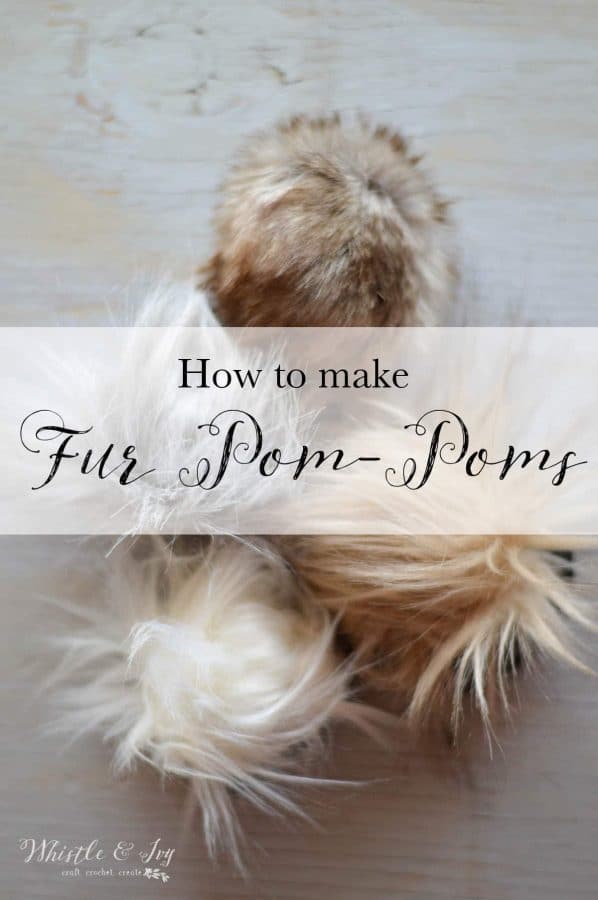
Ever wanted to make your own fur pom-poms? They are so much easier than you think! Read on the learn how to make your own!
This post may includes affiliate links which means I get a small commission at no extra cost to you.
Last year, when I put out my Buffalo Plaid Slouchy Hat, I wanted to add a fur pom-pom for the perfect finishing touch. I went to every local store I could think of and no one carried them. I decided to publish the pattern with a yarn pom-pom instead and order a fur one online for later. After searching, I finally found a shop on Etsy that sold beautiful ones, only for the shop owner to take a fall/holiday break. Nooo!
I scoured the internet, wondering if there was possibly a way to make DIY Fur Pom-Poms. I couldn’t conceive that it was possible to make them! I found a tutorial and the main technique was much easier than I though! I made a fur pom-pom the way she described, cutting the circle out with scissors. But… it looked like it had a bad haircut on the bottom, and it wasn’t hidden when sewn in place. Plus, it made an incredibly hairy mess.
What to do?
Then my husband suggested using my Precision Knife to cute the fabric back.
Of course!
Not only does the edge look very nice, it eliminates a very hairy mess (I have Labrador, so I know a thing or two about hairy messes!). These fury pom-poms are a breeze to made; once you get going you will make dozens of them.
However, it can be a bit tricky to get the circle the right size. I was tired of searching my kitchen for the right sized bowl or cup to trace! So I created a template that you can print for free. I suggest the middle one for adult/kids hats, the small one for babies and the large one for chunky projects.
DIY FUR POM-POMS
What you need:
–Faux Fur Fabric
–Precision Knife
– Printable Template
– Sharpie
–Darning Needle +Small bit of yarn
– Poyfil
If you are visual learner, you can watch this video:
The technique for making these fur pom-poms is quite simple:
STEP ONE:
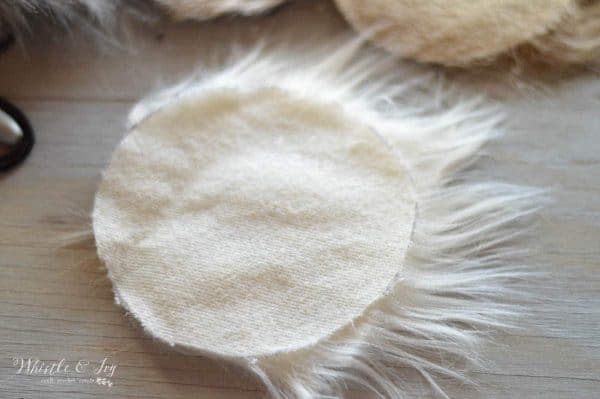
Outline the template on the back of the fur fabric and cut with precision knife. DO NOT USE SCISSORS! This will make a terrible, furry mess and your completed fur pom-pom will have a “bad haircut” look at the bottom. Make sure you are using precision knife to cute your fur.
STEP TWO:
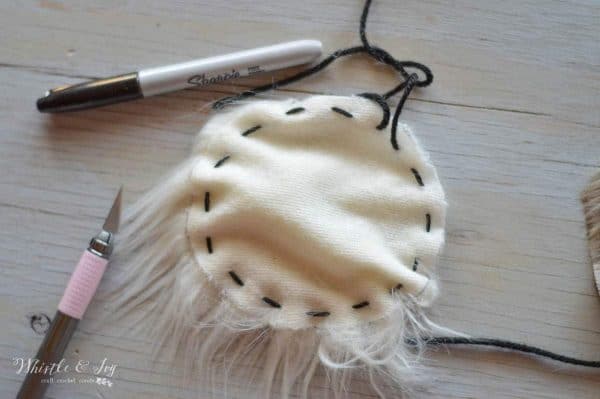
Sew a loose running stitch around the outside.
STEP THREE:
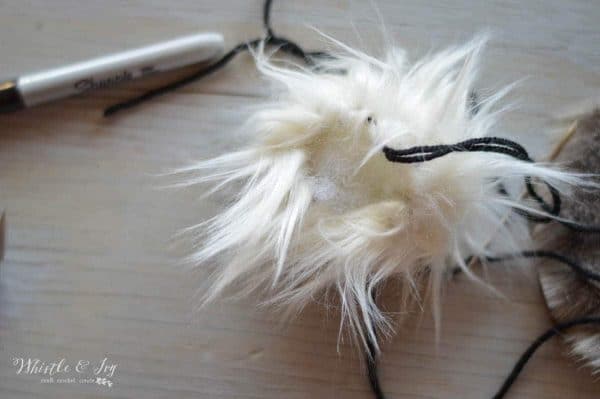
Cinch tight and stuff with some Polyfil.
There is it!
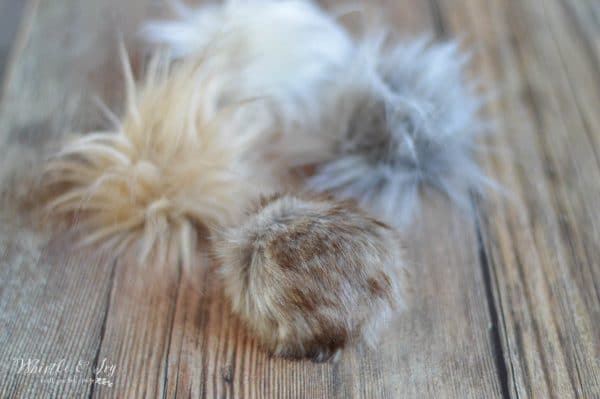
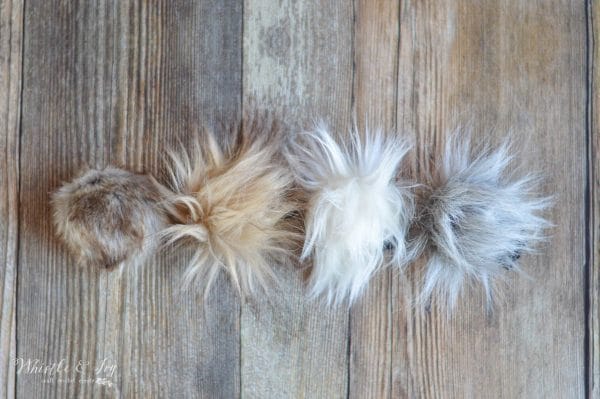
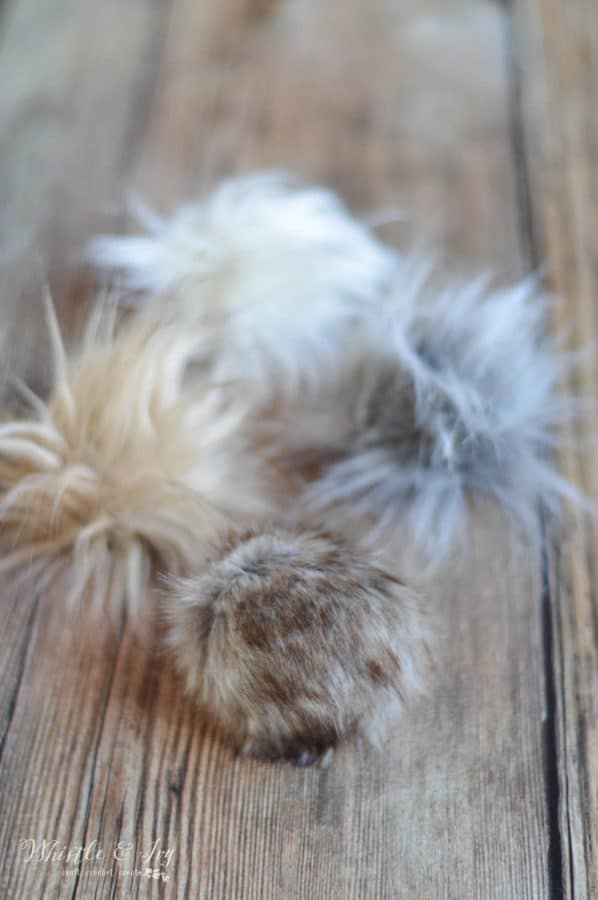
Seriously, it’s that easy. I made 4 in about 10 minutes. And it’s so fun to experiment with different types of faux fur. I thought I really only loved long pile fur, but the way that cute brown one turned out is changing my mind.
Share your work in our Facebook Community!


Thank you for sharing the pompom method! Just what I wanted for my gnomes!! You’re the best!!
You are very welcome!!
Hi – I am wondering where you buy faux fur? Any suggestions are welcomed. Also what to look for when you buy it.
Thanks
Hello! I buy it at Joann. I prefer the thick, low pile. The finished pom-poms look very nice with a lower pile (in my opinion).
I just used whats around the house or the circle template. made 6 ” large ones with a coffee can. Smaller ones using a large soap can. Traced onto the back of the fabric with a white pencil crayon. Sewed them with extra strong upholstery thread as I find the yarn breaks when pulling the pompoms closed.
I used to make bears..you can also cut the circle with a very sharp pair of scissors..just be sure to ONLY cut the backing not the fur..scissors pointed up while cutting will leave the fur beautiful..
I thank you for this pattern..have a huge amount of faux fur I can now use up.
I must not be very skilled with my scissors, because I tried and it was a terrible mess! Haha! Thanks for the tip!
I just found your site today. LOVE the pattern graphs. I was getting a little bored with just making hats. Now I’ve got the patterns and graphs for a challenge. Going to finish them off with homemade fur pompoms too! Thank you
yay! Thank you so much for visiting, I am thrilled that you love what you see!
You could make the pom pom removable with a button, so u could wash the item without the pom pom.
What would you think the washing instructions for a hat with this pom Pom would be?
Thank you!
I would say hand-wash only. The faux fur does not do well in the washer.
THANK YOU for this great tutorial!! Can’t wait to start making some poms!
You are welcome!
Bought the fur but the yarn will not see through the fabric. I tried thread but it didn’t pull tight – any suggestions?
Pull through
What do you mean the yarn won’t pull through?
My printer is not working so i can’t print out the templates. I bought all the materials yesterday. What is the size of the 3 different circles so i can try to find something that size to trace? Thanks! I can’t wait to make my own pom poms!
The adult/child has an approx. 4 3/4″ diameter, the infant has an approx. 3 5/8″ diameter and the chunky has an approx. 6″ diameter.
Thanks for the tutorial! Can you tell me the diameter of the circles so I don’t need to use a piece of paper? It’s easier if I can just draw the circles right in the fabric. Thanks!
The adult/child has an approx. 4 3/4″ diameter, the infant has an approx. 3 5/8″ diameter and the chunky has an approx. 6″ diameter.
Remember those geometry sets used in math class? Take your compass and insert a thin marker or gel pen. To determine the size of the circle you want to draw, position the sharp point of the compass at “0” on the ruler. Now you need to find the number on the ruler that is HALF of the width of the circle size you want to make. Place the pen part of the compass on this number on the ruler.
Without disturbing the settings you measured against the ruler, bring your compass to the non-fur side of your fabric or fur. Press the compass point into the fabric and trace your circle around the point.
Keep the compass point perfectly vertical while you trace the circle and you should end up with a perfect circle.
Thank you for this site and the tutorials. Ive made several hats, but preferred he look oft he fur poms. Bought some todayon sale, and the clerk cut the fabric just as you described with a utility knife. Cant wait to try this, and plan to make the snowfall hat for one of my little friends!
This looks easy to do. Thank you! What is the best way to attach to your project? Snaps, strings or just sew on to project.
I sew them directly on, but many people use a button so you can remove it to wash it! They do NOT hold up in the wash, they get matted and ruined.
How do you attach a snap or a button to it?
:O Tribbles! I totally have to try this <3 Thank you.
Haha!
Which types of faux furs did you use in the pictures? I can’t quick figure it out at the link. Thank you!
I used “Faux Chinchilla” (the brown, short-pile one), “Long Hair Grizzly Cream” (the white one), and unfortunately I don’t see the two other furs I used online. The gray fur I have had since last season, so that could be why. But the tan one a bought last week, so I am not sure why that one isn’t online.
Thx so much for this pattern to make the faux fur pompoms! I too looked locally just a few days ago!!! But FYI, Lionbrand sells them!!!
Glad I was helpful! Yes, I know they do, I had a hard time finding them last year, though!
I love this so much! Thank you for sharing – you’re so talented:)
Thank you very much!