
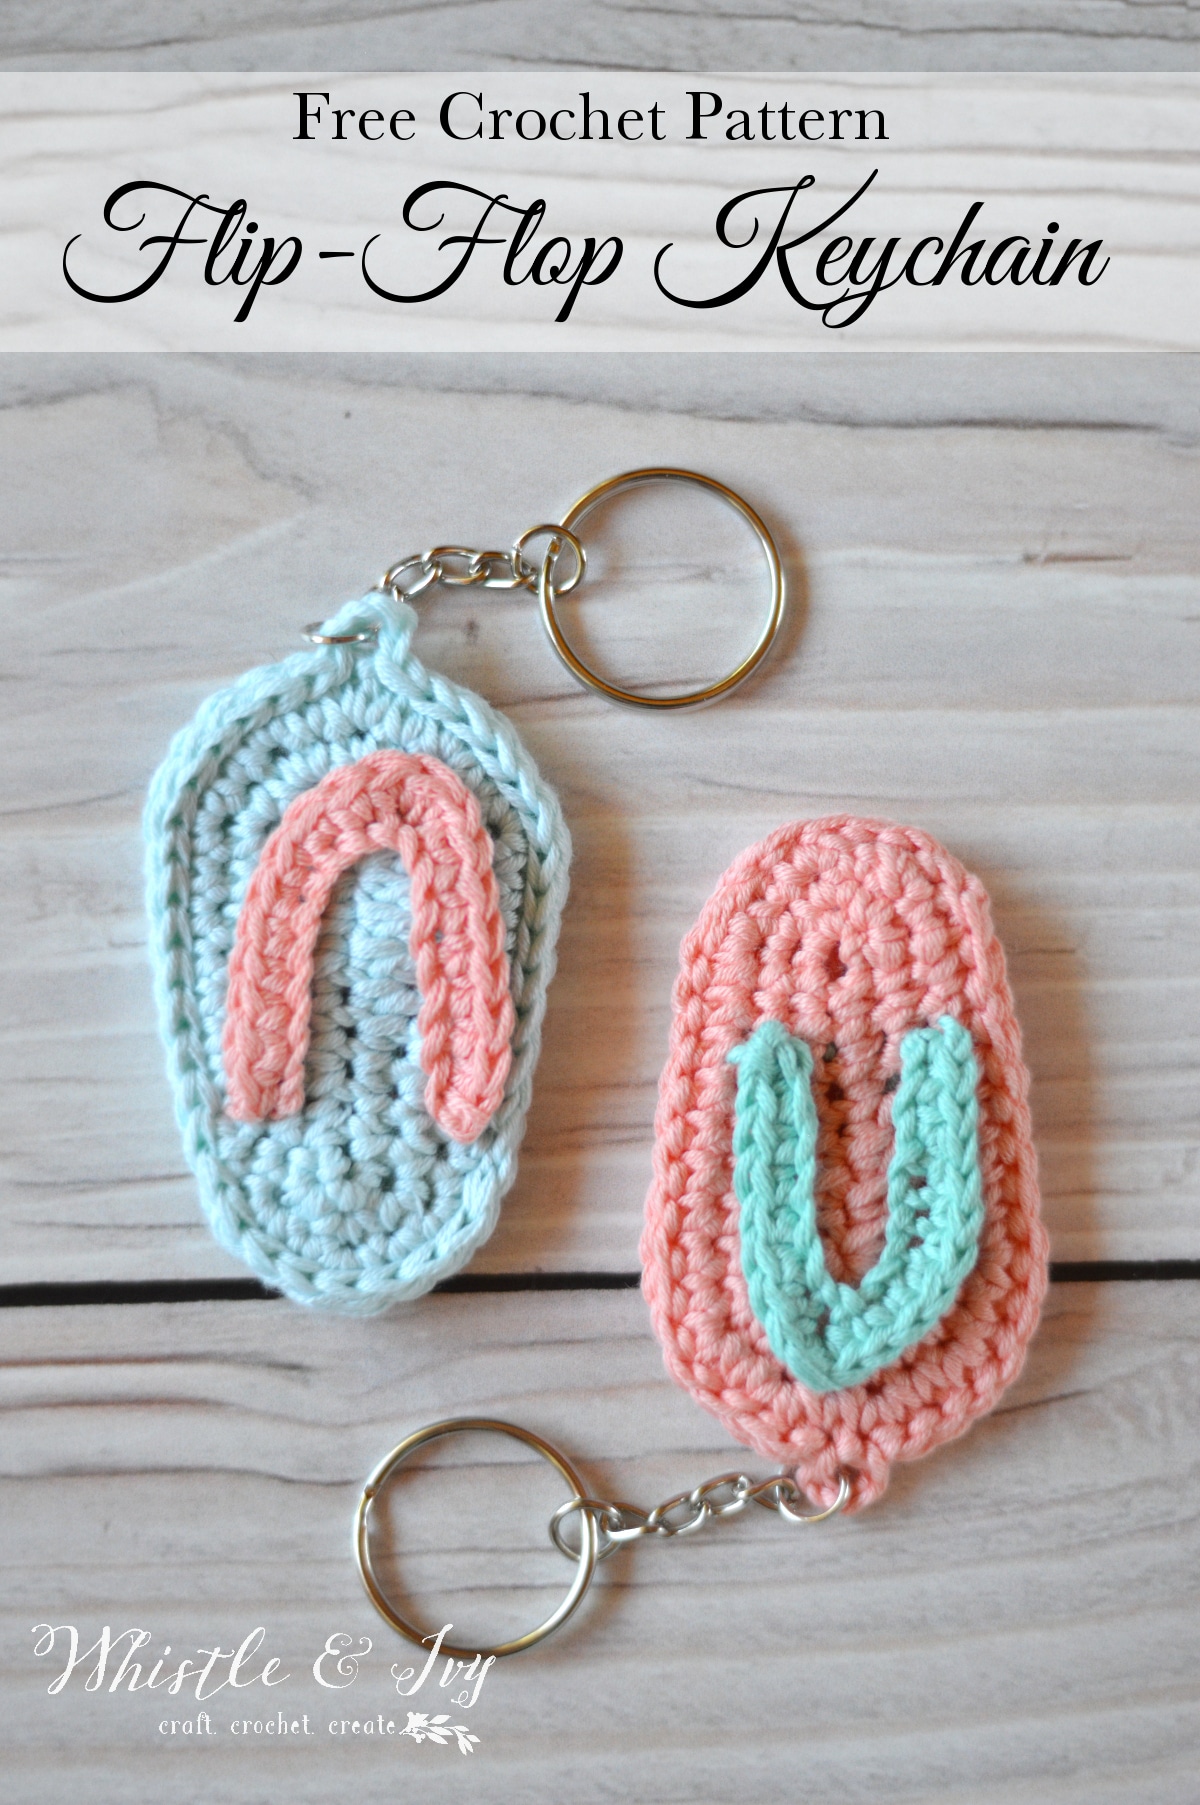
[This crochet flip flop keychain pattern has been updated! The new version has a nicer shape and is quick and easier to make!] This cute flip flop keychain would make a fun easy gift or a nice addition to your summer craft booth. Mix and match colors and enjoy this quick project! This post includes affiliate links, click here for more info. Thank you for supporting Whistle and Ivy!

Need a quick and easy afternoon project? Try these crochet flip flop keychains! They are a perfect scrap buster and would even make a fun and easy addition to your craft booth!

ABOUT THIS PATTERN:
This pattern was originally published back in 2017. Sometimes time and space can lend some perspective and upon looking at this pattern with a bit of distance, a decided it was time to give this pattern a major overhaul.
I think you will like this newer version! It has a better shape, uses less yarn, and is much quicker to work up.
This is a great project if you have scraps laying around that need to be busted.

You’re tired of sifting through complicated tutorials and patterns that leave you feeling overwhelmed.
Let me help.
PICTURE THIS:
Instant access to a library of modern, easy-to-follow patterns
Gifting your handcrafted treasures to your loved ones.
Feeling accomplished by your beautiful makes
It’s time to make your crafting experience as joyful as it should be.
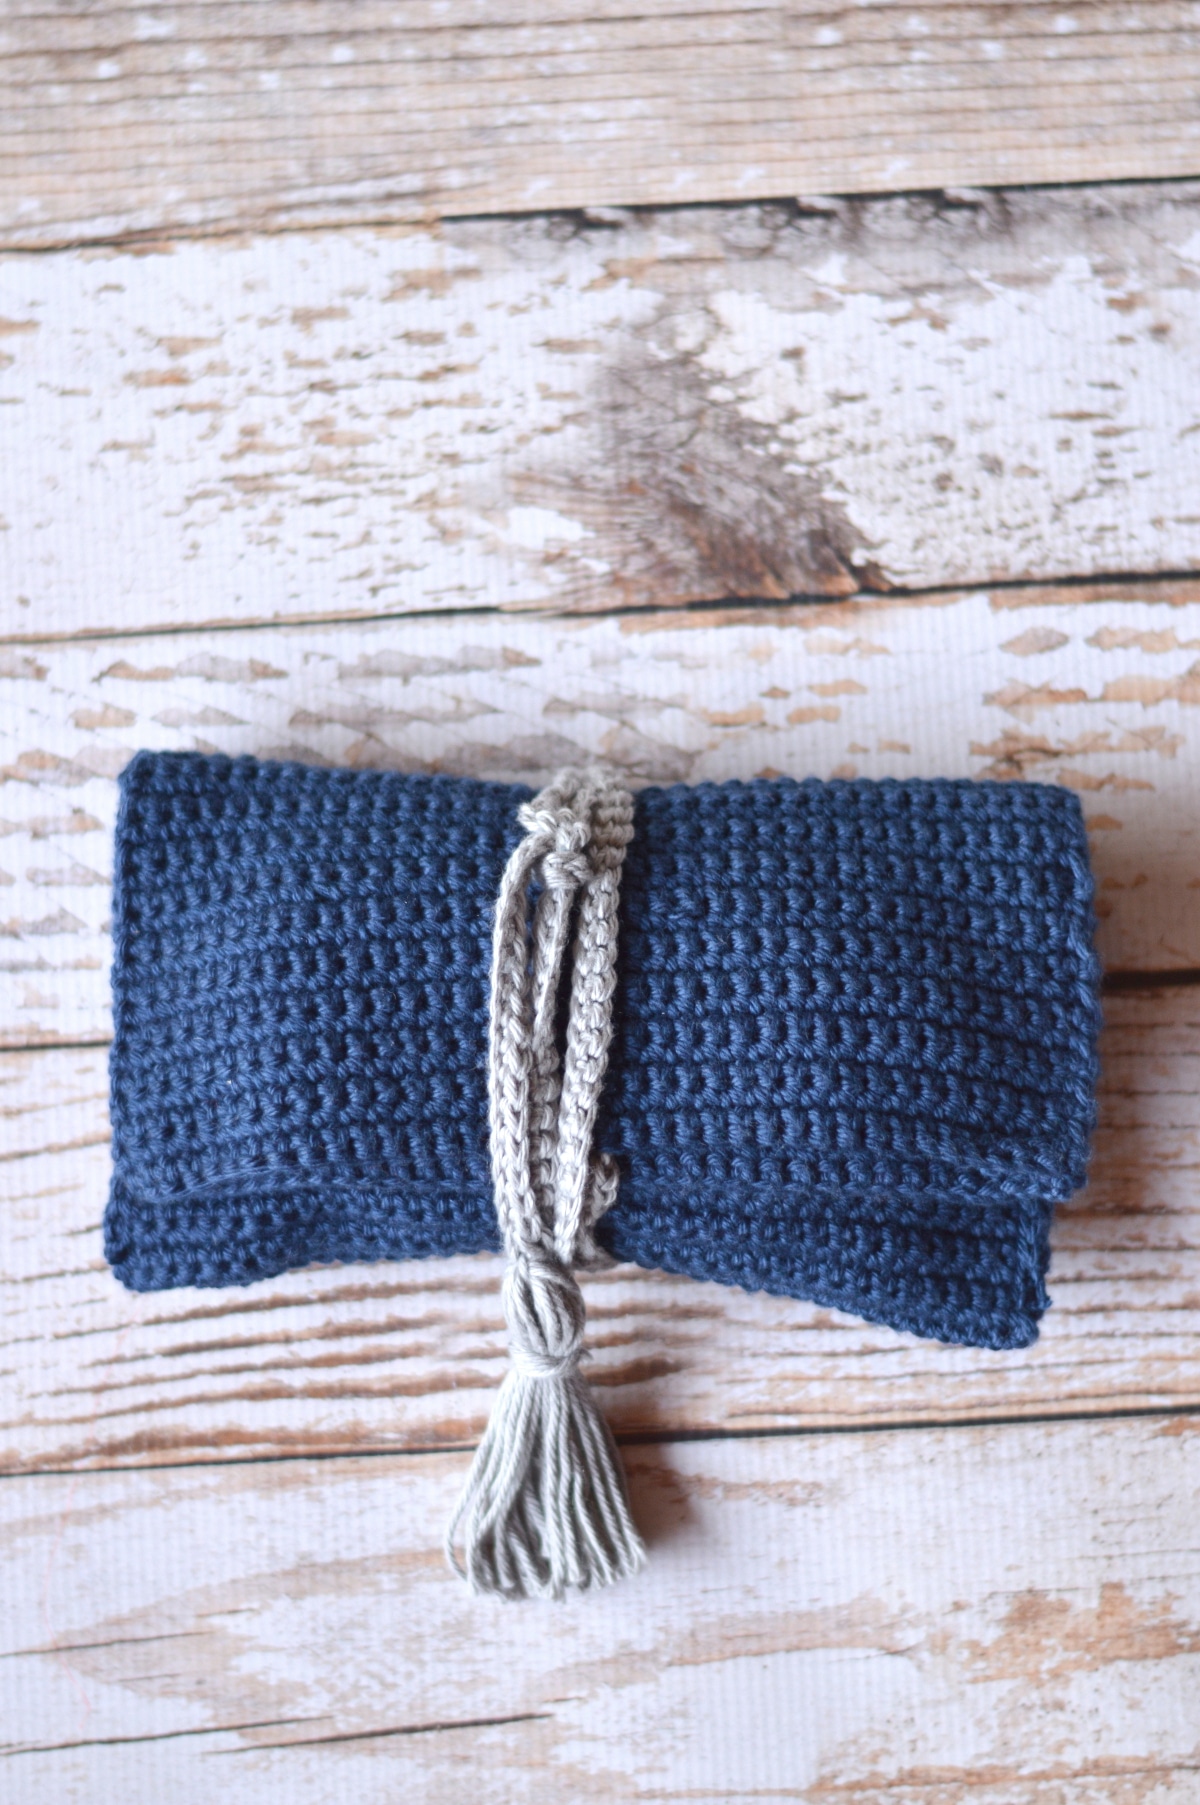
CROCHET FLIP FLOP KEYCHAIN – FREE CROCHET PATTERN
Please remember: You are free to use this pattern to make and sell, but do not republish or distribute this pattern in any way. DO NOT use my photos in your listings. Please do share my blog links! It’s a quick and FREE way of supporting Whistle and Ivy and more free crochet patterns in the future.
What you need:
– 3mm Hook
– Sport Weight Yarn (WeCrochet Shine Sport)
– Key Ring and Chain
OR
– Ball chain and Key Ring
– Darning Needle
– Sticky Back Felt
Abbreviations: US Terms
St – Stich
Ch – Chain
Sl st – Slip Stitch
Sc – Single crochet
Hdc – Half Double Crochet
Dc – Double Crochet
Gauge: Not Important

Love the pattern but hate the ads? Get the PDF download! Portable for offline use and ad-free!
$2.99
FLIP FLOP SOLE
Begin with a ch 11.
1.
Work 2 sc in 2nd ch from hook. Sc in next 5 sts, hdc in next 3 sts, work 7 hdc in last ch. Working across the opposite side of the chain: hdc in next 3 chs, sc in next 5 chs, work 2 sc in last ch (same as the first ch). Join with a sl st. (27 sts)
2.
Ch 1, work 2 sc in next 2 sts, sc in next 11 sts. Work 2 sc in next st, work 2 hdc in next 2 sts, sc in next 9 sts. Work 2 sc in last 2 sts. Join with a sl st. (34 sts)
3.
Ch 1, sc in next st, work 2 sc in next st, sc in next 11 sts. Work 2 sc in next st, sc in next 3 sts, work 2 sc in next st. Work 2 hdc in next 3 sts. Sc in next 11 sts, work 2 sc in next st, sc in last st. Join.
(41 sts)
Cut yarn, set piece aside. Use second color for strap.
TOE PIECE
1.
Using second color, Ch 22. Starting in the 2nd ch from hook, sl st in each ch across.
Cut yarn, tie off ends.
FLIP FLOP CONSTRUCTION
Join 2nd color on sole at the join. Starting in next st, sl st in next 6 sts. Sl st in the next st, but catch one end of your strap, working your sl st through the strap and the sole, tacking it in place.

Sl st in next 26 sts. Sl st in next st, tacking down the other side of the strap with your sl st. Sl st in remaining sts on the sole and finish with a sl st into the join to meet your first sl st. Pull the tail up and out, and with a needle, stitch it into the first st so you can tie it off at the bottom.
Weave in any remaining tails.


Next, tack the toe strap down by threading a length of matching yarn onto a darning needle and simply sewing up one through the sole above the strap, and then back down the sole just below the strap. You can do it a few times if you want to tack it more firmly. Tie a trim knot on the back of the flip flop to secure the ends.

FINISHING:
For extra integrity, you can choose to add sticky felt to the bottom of your flip flop key chain. Using your flip flop as a template, draw around it with a pencil onto the paper backing of your felt. Cut it out and hold it up to the bottom to make sure it is sized properly (trim if needed). Pull back the paper backing and place the sticky side on the bottom of the flip flop, pressing firmly.

Next, pull apart your jump ring with your needle nosed pliers and stick one end through the top of your flip flop, place the last link of your chain onto the jumping and close it again with your pliers.

Clip end and weave them in.


Am I the only one missing the part where you anchor the middle of the strap to the base? Sorry I am new to crotchet.
Thank you in advance to anyone that can answer my question.
Tracy
Sorry Tracy! I have been reworking and editing this post (the original version was quite different and was published 8 years ago!) and apparently should not have published yet. The toe can be tacked down at any point, but ideally before the felt sole is placed [so sorry if this causes you issues with your project :( ]
Place the strap to the side a bit (like a real flip flop would be). Take a length of yarn and sew down through the sole on one side of the toe piece, and back up on the other side. Going up and own a few times until it feel sturdy, they tie a firm knot on the back. You can even secure it in place with a couple dabs of hot glue.
Thank you, it was fun. I added a sole to the bottom off mine which turned out so cute.
you’re a star love it
Oh how cute! So glad you love it!
Love this pattern! The keychain turned out so cute and I can’t wait to give it as a gift. Thank you for sharing!
YAY! So glad it worked well for you!
This is a great keychain! I love the colors and the pattern is easy to follow.
Thank you!!
I love it. It was so easy to make. I see more in my future 😄
Thank you <3
How cute they are! I find them great. Each year, I make a small gift for my young students (6 & 7 years) for the end of classes in June.
This year you’ll be My Designer … LoL Thank you Bethany
Amitiés du Québec, Lucie-France ;-)
How fun! They will love :)
These keychains are adorable. I have a neighbor that I do a LOT of commissioned crochet for (she calls me her personal hooker – haha). This would be a perfect little gift for her.
Aw I love that! Glad you like them, she will love them!
I have two nieces that are flipflop girls. I will be making these for them. Thank you so much for your free patterns. I appreicate them so much. Have a great day.
Perfect!! You are very welcome :)
ok, thanks so much!
which stitches am I supposed to go through to slip stitch these flip flops together? The slip stitches or the single crochets or both?
Slip stitches. Make sure you follow the instructions and make the loop.
Oh I just reread your question, I am sorry! I am seeing a typo in the pattern, you do NOT need to slip stitch all around each isle, I am not sure what I was doing putting that in there. I am very sorry for the confusion! When the two soles are done, you will use a sl st to sew them together.
Hi Bethany, these flip flop key chains are so cute. I will be making some for my craft shows.
what would you sell them for, I was thinking $2 or $3 a piece or $3 each or 2 for $5?
How long does it take you to make them? I personally would do $5 each at least.
Yes I think your right, with all the work & sewing them together, $5 each sounds about right. Thank you
Love all your work and your videos are easy to follow! Do you have a baby espadrilles pattern to share?
Thank you so much! I don’t, I’m sorry!
The key chains are adorable. You asked about summer and crojo. I have been working on fingerless mitts for all my nieces, nephews, great nieces and nephews, brothers and sisters and all the above for my inlaws, too. I decided a few weeks ago that these will be Christmas gifts. Since I have 7 siblings and my husband has 3 and all have kid and grandkids I will end up with about 50 pair. I have about 12 done so far. LOL
Great idea to start on Christmas gifts! I am trying to finished up a CAL (crojo problem again) and then I am going to start on Christmas too!
Key chains are very cute.
Thank you!