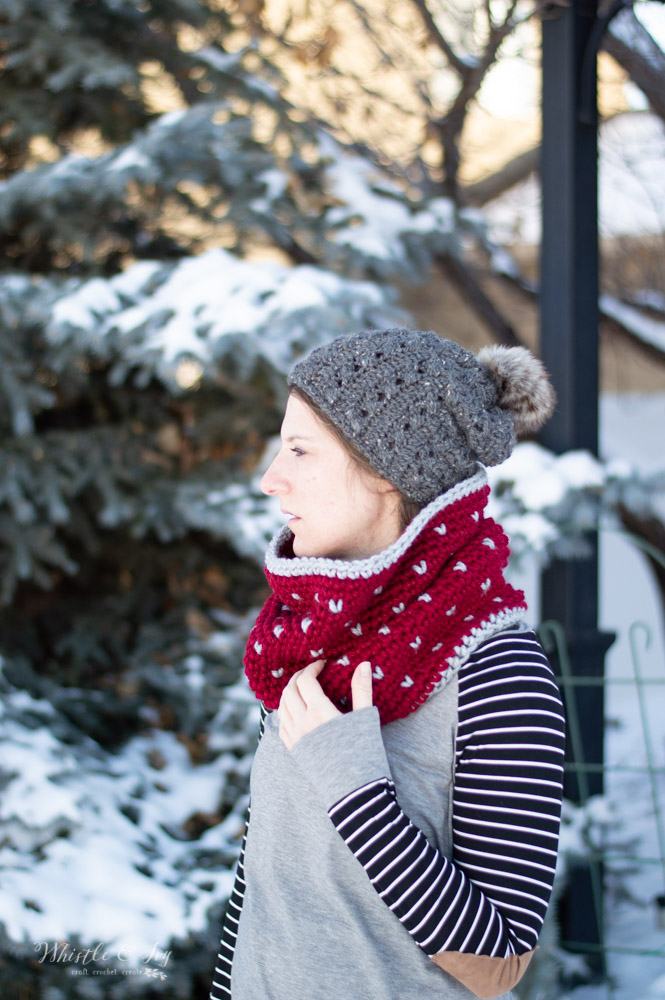
This beautiful chunky snowfall fair isle cowl uses a simple but beautiful fair isle technique that you will love to working. Watch the video to see how to work this easy technique. Pair with the snowfall hat and mittens for a complete set. You will love it! The post includes affiliate links, which means I earn a small commission if you make a purchase using one of my links, at no extra cost to you. Thank you for your support!
Crochet Buffalo Plaid Scarf – Free Crochet Pattern
This crochet buffalo plaid scarf is a classic look for fall, winter or the holidays! Perfect for both men and women, this simple scarf uses The Plaid Technique for changing colors and achieves the look of buffalo plaid. Enjoy making this fun and timeless scarf with this free crochet pattern.
This post includes affiliate links, which means I get a small commission at no extra cost to you. Thank you for your support!
EASY Crochet Plaid Sheepskin Cowl – Free Crochet Pattern
This lux crochet plaid sheepskin wool features a large 4-color buffalo plaid check pattern, but it’s also lined with buttery-soft faux sheepskin, making it so warm and cozy! It’s even a crochet projects that would be a great crochet item for men. So warm and easy to make!
Crochet Granny Square Cowl Pattern
This week I have been sluggish. I am trying to get the year planned out and organized, and it resulted in less articles appearing on Whistle and Ivy. I am so excited about what I have planned out for the year and I hope I can create content that you absolutely LOVE. This granny square cowl is a pattern that I designed about 18 months ago, but I am republishing it here so you can find it easier. It is very cozy, and quite easy to whip up, especially if you love making granny squares.
Finger Knit Cowl and Tutorial
The Finger Knit Cowl is a guest post written by Abbey from The Firefly Hook. You can find her on Facebook, Instagram and Pinterest.
I teach crochet classes, and I love thinking of projects that younger children can make all by themselves. I am especially on the hunt for those projects that look amazing and not at all “kiddish” or only cute because your kid make it for you. You know what I’m talking about, right?
Enter the finger knit cowl. I came up with the idea when my oldest went to Kindergarten and he REALLY wanted to crochet a scarf for his teacher. Since I already taught him to finger knit (and he was a little too young to pick up crochet skills to make a scarf before Christmas) I put his forever-long finger-knit strands to good use.
I also like teaching kids to finger-knit because it’s a great way to get kids excited about yarn and interacting with it in a positive way. There’s no better feeling than making something with your hands! And finger knitting perfectly demonstrates the fundamental skill in knit AND crochet: wrapping yarn over an instrument (needle, hook, and in this case – finger) and pulled through a loop. I’ve found that kids who learn to finger knit are ready to crochet or knit with hook or needle, respectively.
There are a couple of ways to accomplish getting the yarn around each finger- wrapping or weaving. I am going to share my preferred method – wrapping.
1. Begin with the tail of your yarn between your thumb and first finger.
2. Wrap yarn clockwise around your first finger.
3. Wrap yarn clockwise around your second finger.
4. Wrap yarn clockwise around your third finger.
5. Wrap yarn clockwise around your fourth finger.
6. Wrap yarn clockwise around your fourth finger once more.
7. Wrap yarn counter-clockwise around your third finger.
8. Wrap yarn counter-clockwise around your second finger.
9. Wrap yarn counter-clockwise around your first finger and leave yarn dangling behind your hand between your first and second finger.
10. Observe that there are two loops on each finger. We will pull up the bottom loop on each finger and pull it up and over the finger (without pulling the top loop off.)
11. Pull loop off first finger.
12. Pull loop off second finger.
13. Pull loop off third finger.
14. Pull loop off fourth finger.
15. Push loops down on your fingers.
16. Wrap yarn counter-clockwise around your first finger.
17. Then counter-clockwise around second, third and fourth fingers. Note that the yarn ended between the first and second fingers the first time we pulled the bottom loops off our fingers, and this time the yarn ended between the third and fourth fingers. The yarn will alternate between these two ending spots at each pass.
18. Pull the bottom loops off each finger.
Repeat wrapping fingers and pulling loops off until finger knit section is to desired length. The finished cowl pictured used one skein of jumbo #7 yarn and measured approximately 6 feet. Thinner yarn will need more length to properly fill out the cowl.
Don’t forget to leave about five feet of yarn to wrap around the cowl.
I coiled up his strand so they were all even and tied the two ends together. Make sure to leave yourself a long (like five feet) tail when you cut the yarn. Then take your loooooong tail and wrap it around your coil to keep it in place. You could also tie the loose tails tight around your coil and sew on a button or flower. The wrapped yarn covers up the seam from the ends being tied together and keeps the coiled sections in place.
I used super-super bulky yarn (Jumbo or #7) because it filled in really nicely. Super bulky yarn will work well, too. And using high quality yarn will make your kiddos project shine without much effort.
Tip: If your kid (or you!) would like to take a break, carefully pull each loop off and slip them onto a pencil or clip together with a clothes pin. When you are ready to pick it up again, carefully slip the loops of and place each one on a finger.
Favorite or queue on Ravelry here.
Happy finger knitting!
Abbey