
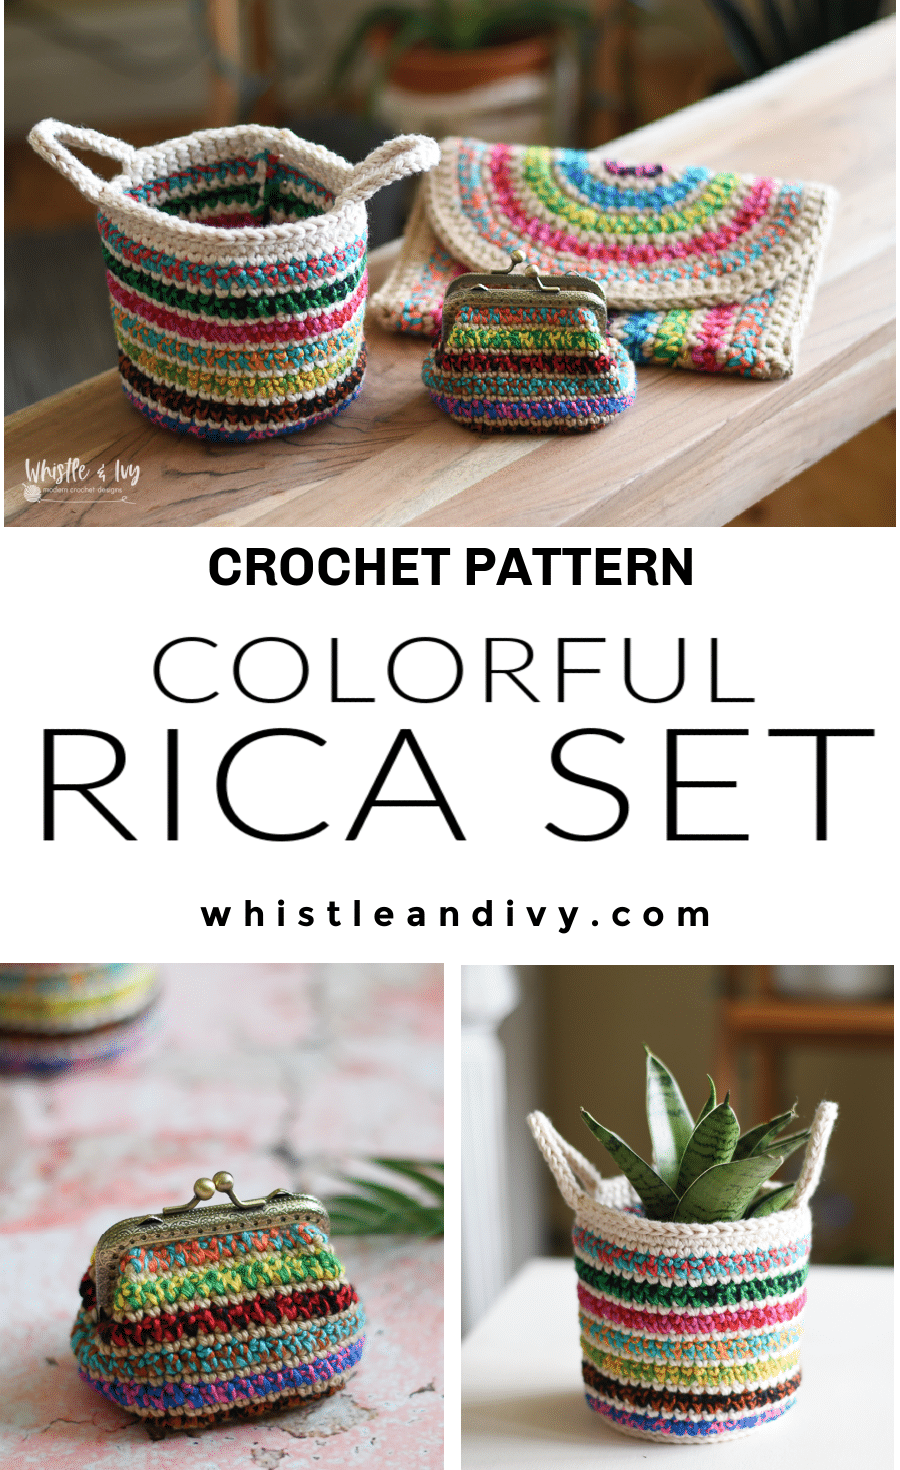
Needing to scrap-bust your stash? Mix and match those odds and ends into a stunning summer-ready colorful crochet clutch with this easy pattern that even beginners can try.
This post contains affiliate links, which means if you make a purchase I get a small commission. Thanks for your support!
This is one age-old issue we crocheters face: what do I do with that little bit of leftover yarn.
…Toss it?
Heavens no.
And so that little baby ball of yarn we didn’t have the heart to send out with the trash spends its days sitting on a shelf (or more likely, an overflowing basket) gathering dust.
Let’s do something about it, shall we?
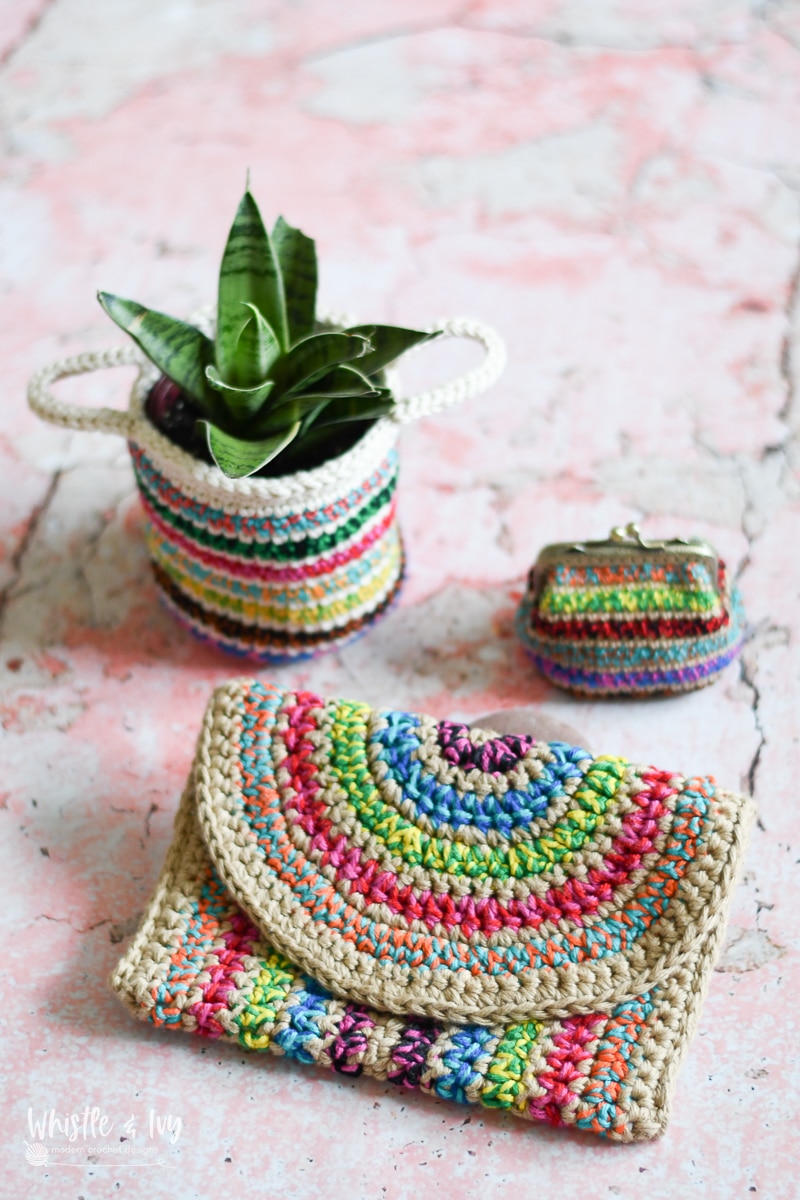
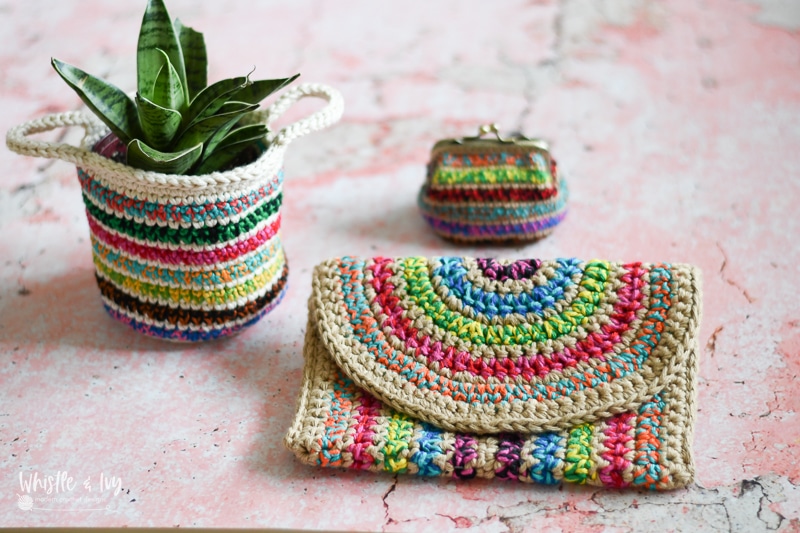
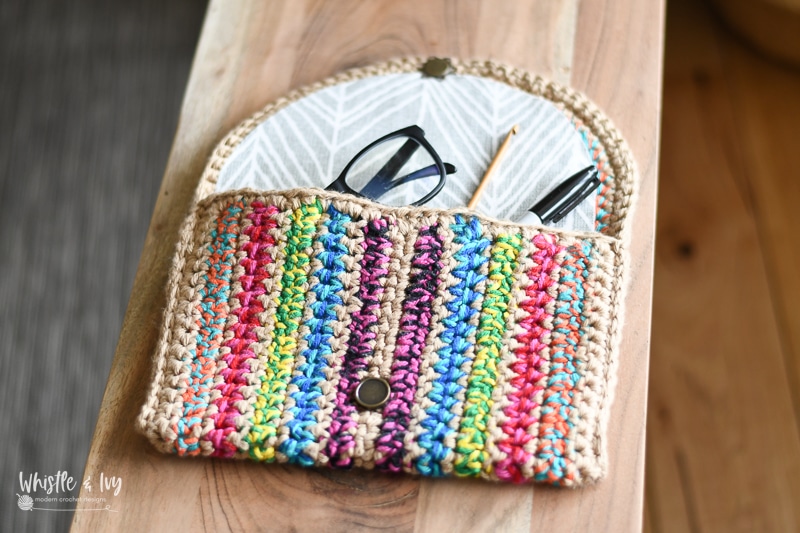
This modern colorful clutch not only radiates color and joy, it solved the issue of those darn baby balls of scrap yarn we all can’t let go of.
So pull out your stash of scraps and let’s dive in!
I really enjoyed digging through my stash and pairing yarns together for the colorful rows. Because it’s worked with two strands, the color combinations are endless, and each time you make it (you know will want to make a few!), it will be unique. I designed one with cream as the main color, then I tried a second one with a tan color and it really makes the colors pop. It also looks a bit more boho/southwestern, which is the look I was going for.
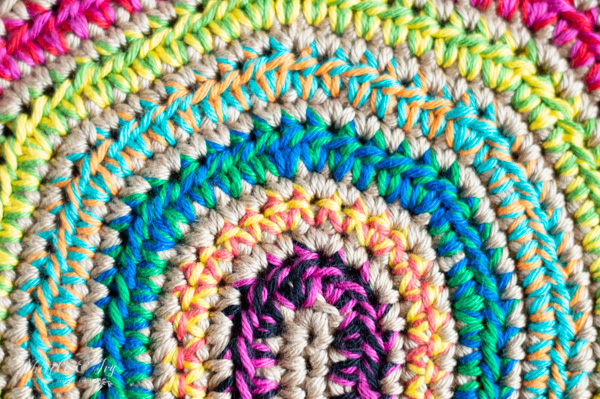
The aqua and orange row turned out stunning. I am going to use that color combination for another project down the line for sure.
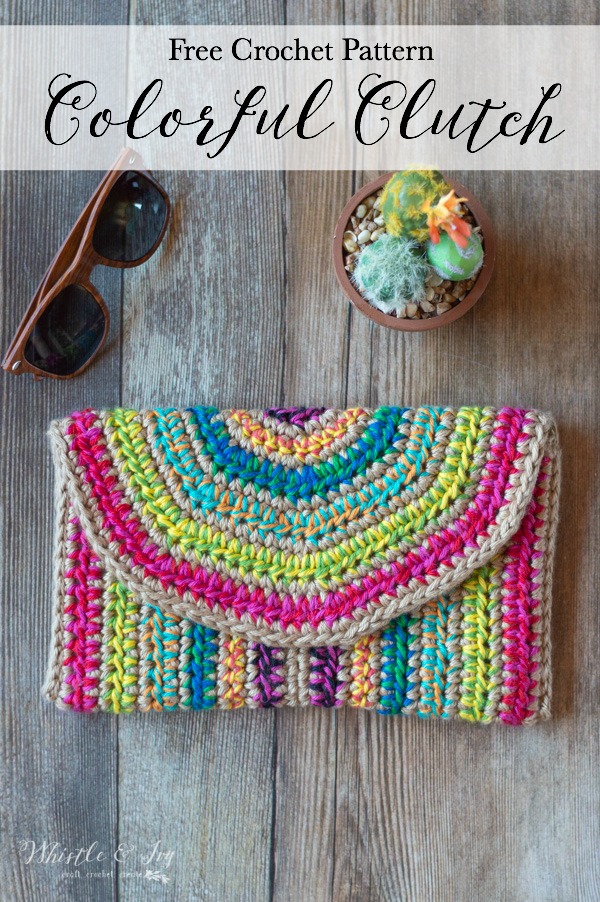
An Instagram commenter remarked that this crochet clutch looks like a piñata, and I absolutely love the comparison. That south-of-the-border color work was exactly what I was going for.

You’re tired of sifting through complicated tutorials and patterns that leave you feeling overwhelmed.
Let me help.
PICTURE THIS:
Instant access to a library of modern, easy-to-follow patterns
Gifting your handcrafted treasures to your loved ones.
Feeling accomplished by your beautiful makes
It’s time to make your crafting experience as joyful as it should be.
Get your colors paired and keep scrolling for the pattern. ⤵
COLORFUL CROCHET CLUTCH – FREE CROCHET PATTERN
Please remember: You are free to use this colorful crochet clutch pattern to make and sell, but do not republish or distribute this pattern in any way. DO NOT use my photos in your listings. Please do share my blog links! It’s a quick and FREE way of supporting Whistle and Ivy and more free crochet patterns in the future.
PLEASE read my Disclaimer before working my free patterns!
What you need: (affiliate links)
– 7 mm Hook
– Medium Cotton Yarn – mixture of Shine and Comfy (Main color is Shine Worsted in “Willow”
– Double Sided Fusible Interfacing
– Fabric for lining
– Darning Needle
– Sew-on Magnetic Clasp
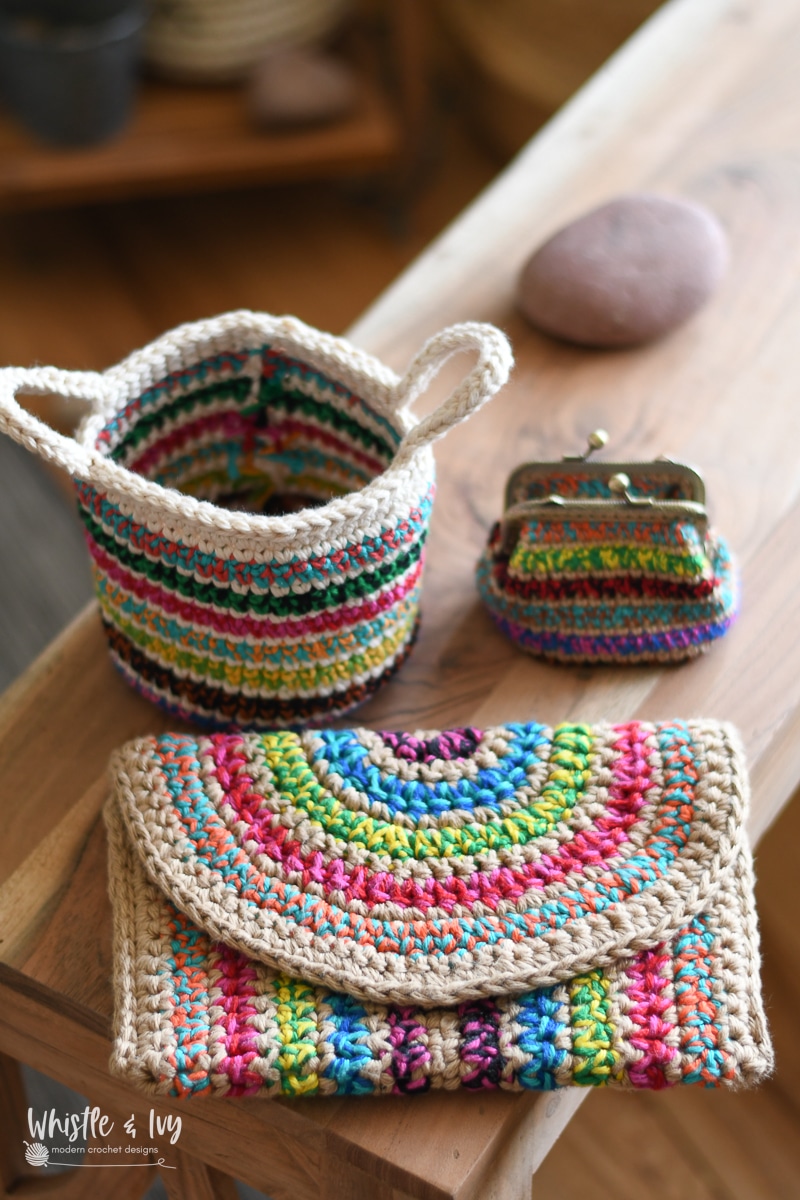
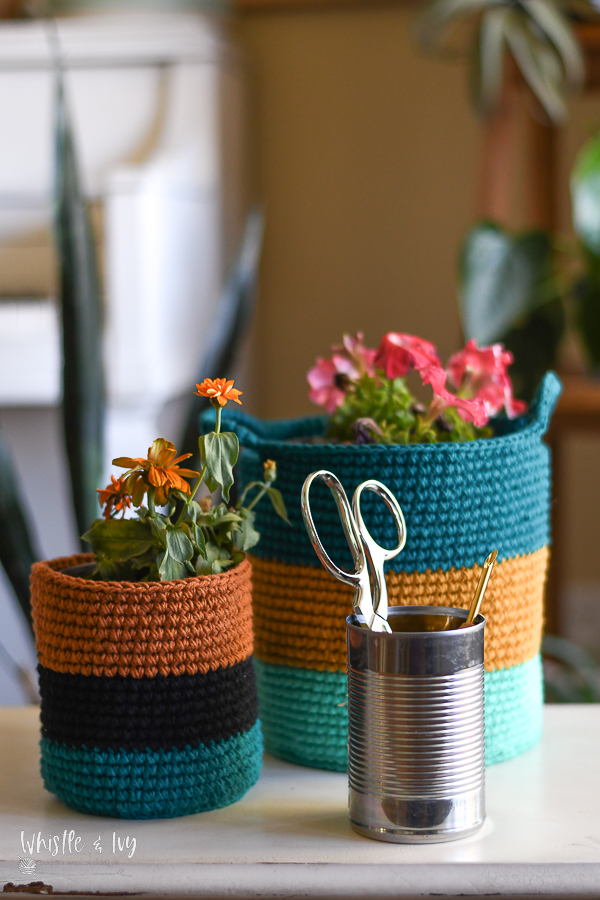
I also gave this girl a pretty facelift and added a couple patterns to keep her company! The ad-free PDF includes a darling kiss-clasp coin purse and a planter basket.
Abbreviations: US Terms
Ch – chain
Sc – single crochet
Dc – Double Crochet
Esc – Extended Sc
Sl st – Slip Stitch
St – stitch
BLO – Back Loops Only
Gauge: (not important. Make sure your hook is small enough that your stitches are tight so your finished bag is as sturdy as possible.)

THE RICA CLUTCH IS FREE IN-TEXT!
You can also get the full set, which includes a planter/basket and a coin purse pattern!
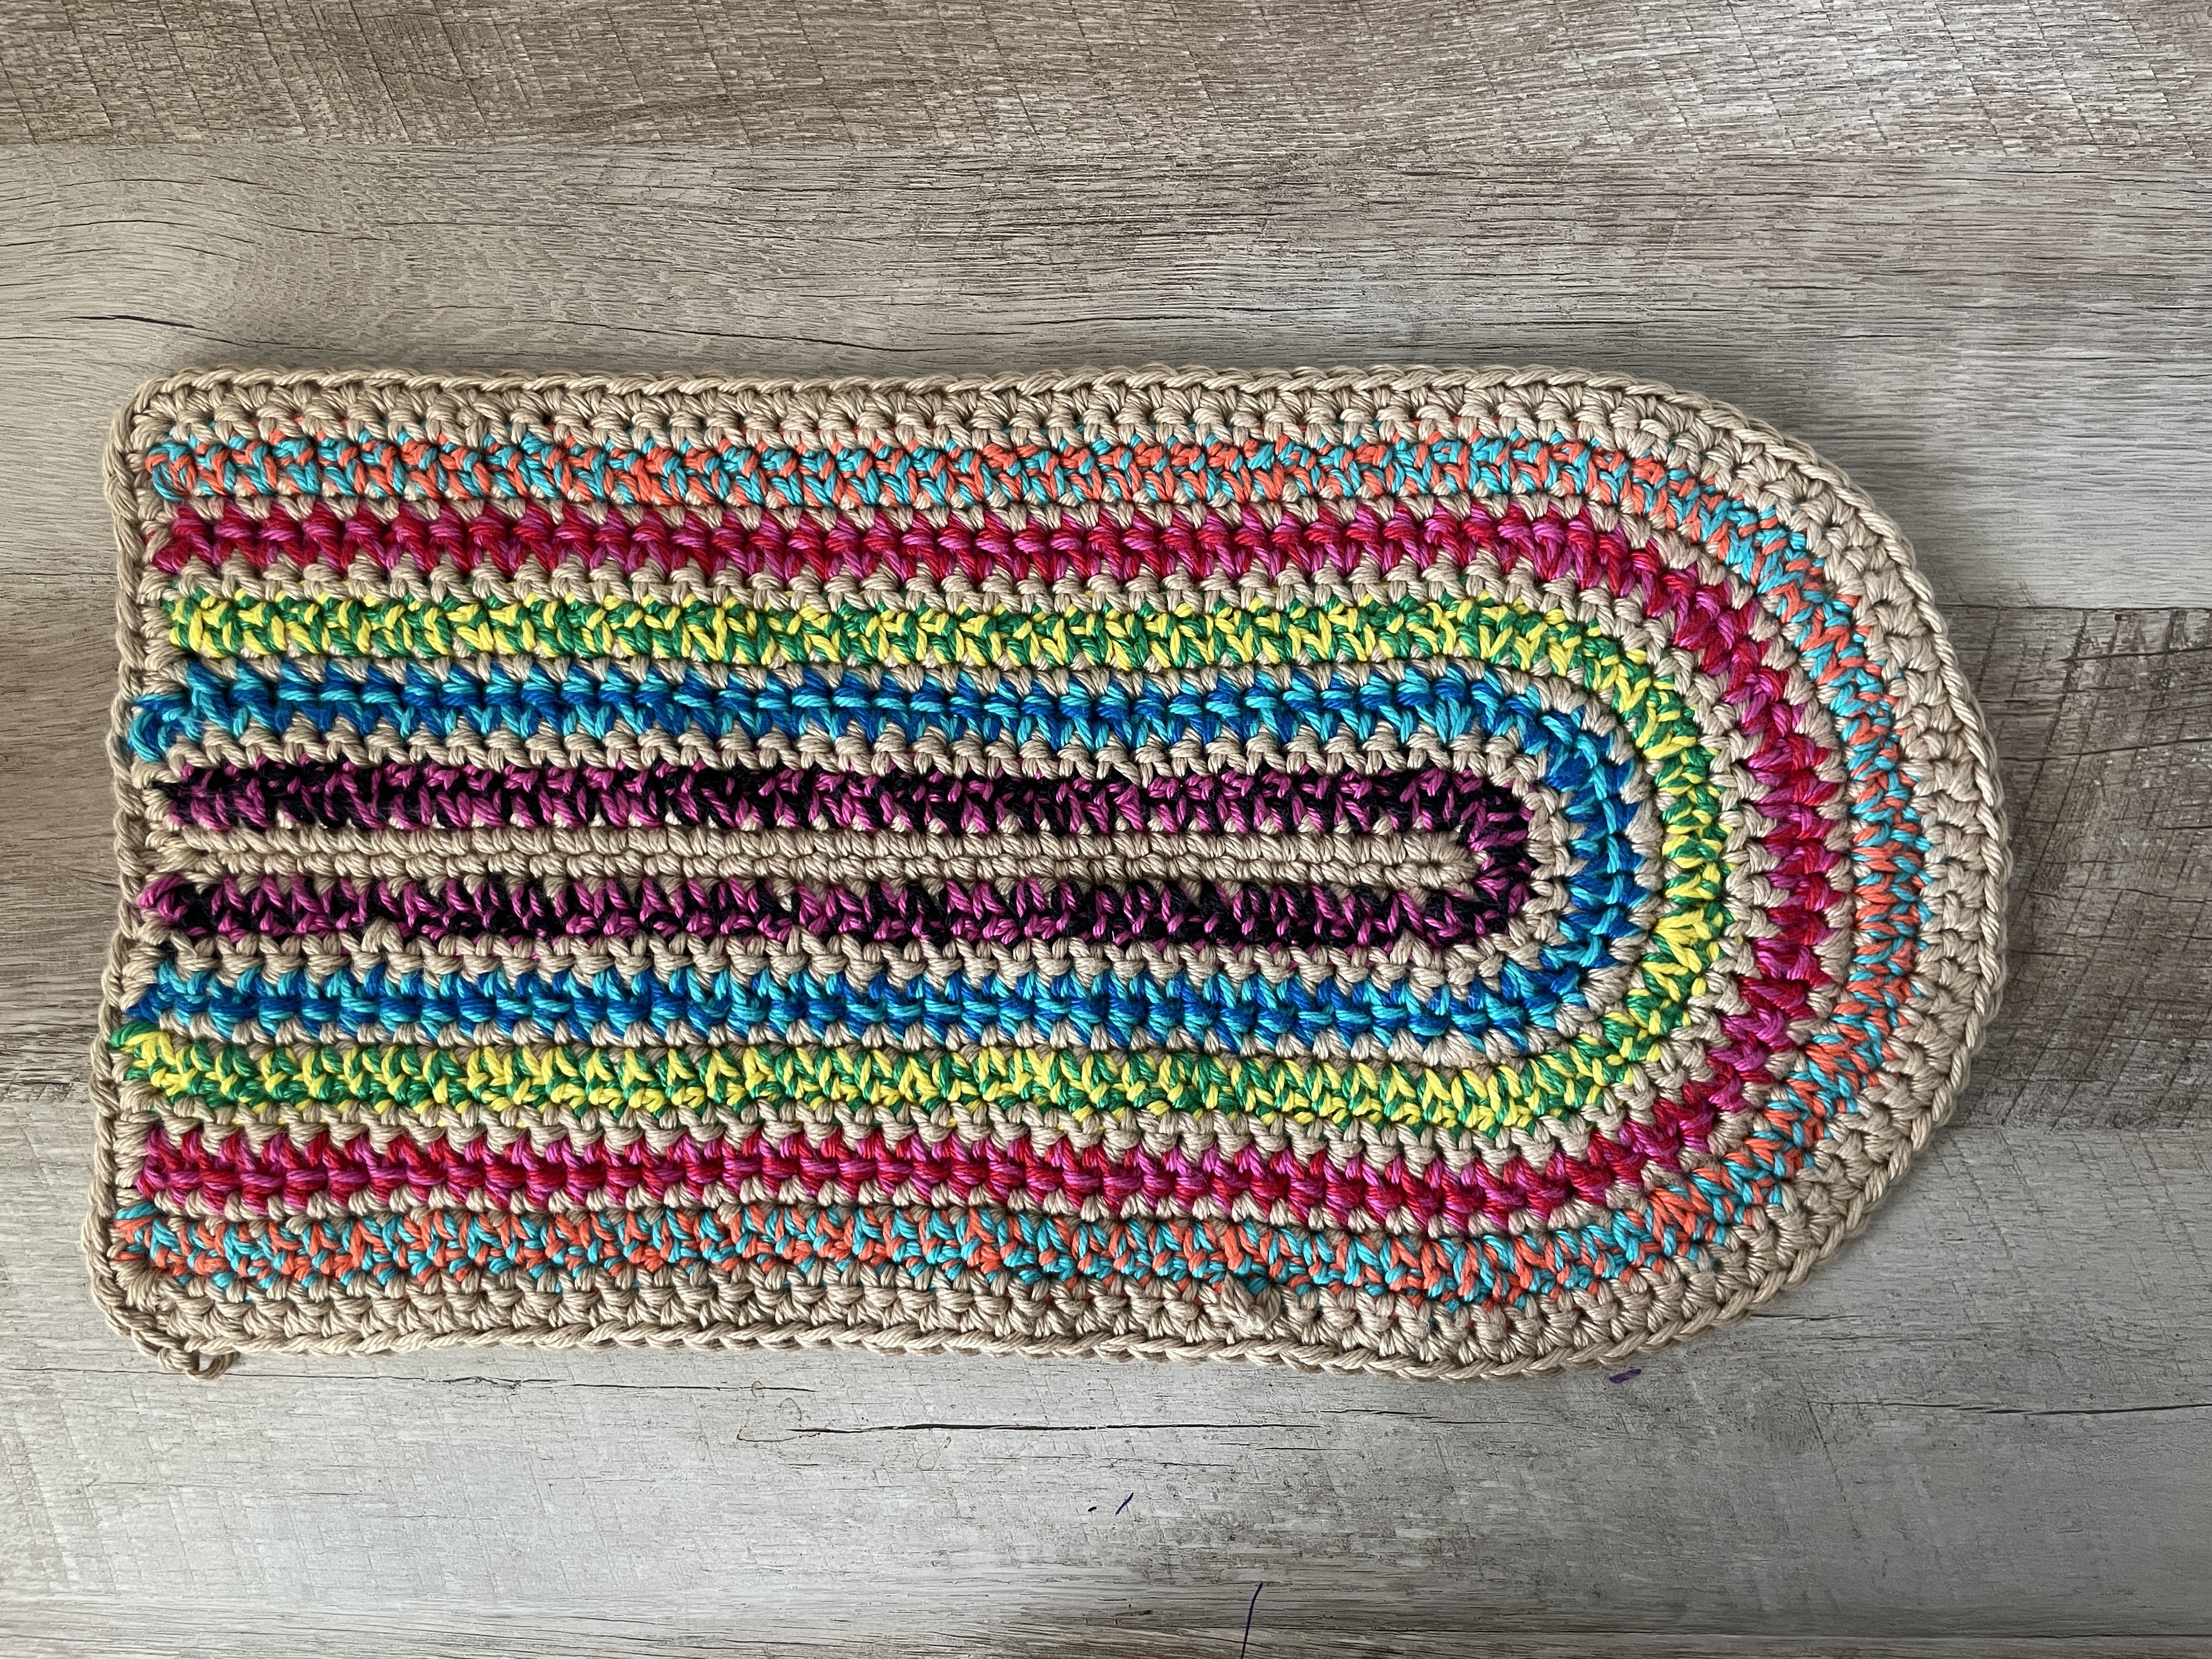
Colorful clutch pattern instructions:
Using two strands of Willow:
Begin with a ch 35.
1. Sc in 2nd ch from hook. Sc in each ch, leaving last ch unworked. Work 4 sc in last ch. Working across other side of chain: sc in each remaining ch. Turn. (70 sts)
Join any two colors, one strand of each:
2. (Carry both strands of 1st color) Esc in next 33 sts. Work 2 esc in next 4 sts. Esc in next 33 sts. Turn. (74 sts)
Cut bright colors, use 1st color:
3. Sc in next 33 sts. *Sc in next st. Work 2 sc in next st* work 4 times. Sc in next 33 sts. Turn. (78 sts)
Join any two colors, one strand of each:
4. (Carry both strands of 1st color) Esc in next 33 sts. *Esc in next 2 sts. Work 2 esc in next st* work 4 times. Esc in next 33 sts. Turn. (82 sts)
Cut bright colors, use 1st color:
5. Sc in next 33 sts. *Sc in next 3 sts. Work 2 sc in next st* work 4 times. Sc in next 33 sts. Turn. (86 sts)
Join any two colors, one strand of each:
6. (Carry both strands of 1st color)
Esc in next 33 sts. *Esc in next 4 sts. Work 2 esc in next st* work 4 times. Esc in next 33 sts. Turn. (80 sts)
Cut bright colors, use 1st color:
7. Sc in next 33 sts. *Sc in next 5 sts. Work 2 sc in next st* work 4 times. Sc in next 33 sts. Turn. (94 sts)
Join any two colors, one strand of each:
8. (Carry both strands of 1st color) Esc in next 33 sts. *Esc in next 6 sts. Work 2 esc in next st* work 4 times. Esc in next 33 sts. Turn.
(98 sts)
Cut bright colors, use 1st color:
9. Sc in next 33 sts. *Sc in next 7 sts. Work 2 sc in next st* work 4 times. Sc in next 33 sts. Turn. (102 sts)
Join any two colors, one strand of each:
10. (Carry both strands of 1st color) Esc in next 33 sts. *Esc in next 8 sts. Work 2 esc in next st* work 4 times. Esc in next 33 sts. Turn.
(106 sts)
Cut bright colors, use 1st color:
11. Sc in next 33 sts. *Sc in next 9 sts. Work 2 sc in next st* work 4 times. Sc in next 33 sts. Turn. (110 sts)
12. Sc in next 33 sts. *Sc in next 11 sts. Work 2 sc in next st* work 4 times. Sc in next 32 sts.
Bottom: Work 3 sc in last st. Working across the bottom, evenly sc across the raw edge. Work 3 sc in last space. Join with the first st of the round.
Tie off.
NOTE: Take the time to block your piece!
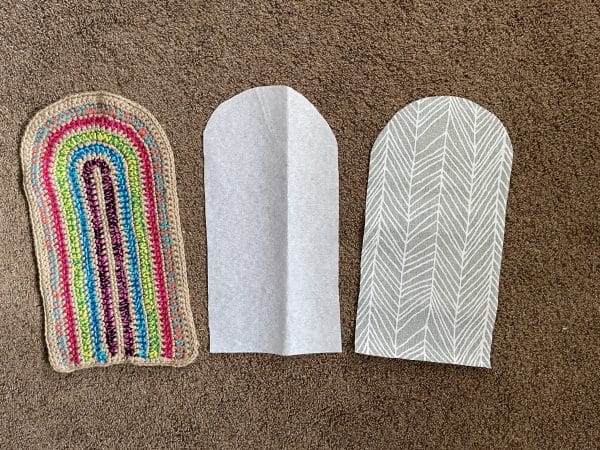
CONSTRUCTION:
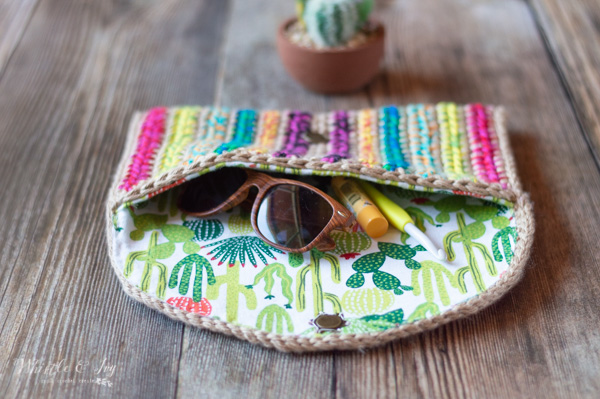
Using your finished piece as a guide, cut a piece of interfacing and a piece of canvas fabric. Cut around the interfacing and fabric so they are each approx 1/2″ smaller around the edge.
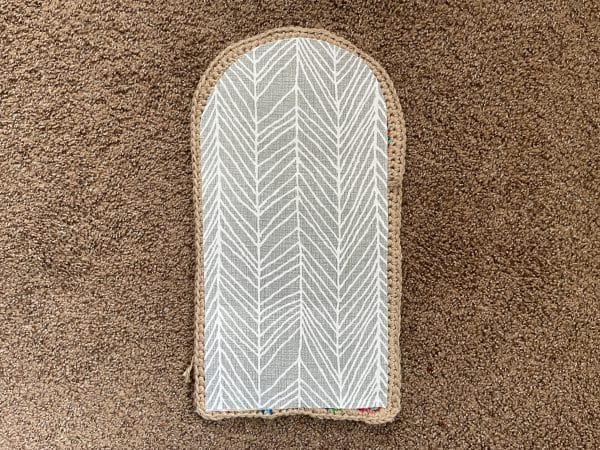
Heat Iron to hottest setting without steam.
Place interfacing on wrong side of your crochet clutch piece, then lay the fabric on top,
right side facing up.
Iron in place. Let it cool completely (it will not adhere properly until it’s fully cooled).
Fold the bottom flat part up until it almost reaches where the sides curve up.
Starting on the bottom on either side, sl st going through both layers, sewing the side shut. Continue slip stitching around the rounded top and down the other side, stitching the other side shut.
Finish with a simple sew-on magnetic snap.
I can’t WAIT to see your version! What colors will you choose? Share it!


U have tutorial for this clutch . Beautiful.If not please make Vedic for this I can’t understand written pattern.Thank a lot
I don’t have a video, I am sorry!
Please try to make. Then good for those who can’t understand pattern.
I am a little confused about the increases…..my one side seems to be curling up a little instead of being straight…there are increases on one side but not the other…that is causing curling…what am I doing wrong
I am having a hard time pictured what you are saying. The shape of the pouch has a round-shaped top where the increases are, but this shouldn’t cause curling on the bottom. Can you explain with more detail so I can help?
Hello
I’m writing from Paris (France) . Thank you for your pattern and video
have a nice day
Thank you Marie!
Hi,
Can I ask roughly how much yarn is needed to create this?
Thanks!
Catherine
You will need 2 balls of the main color but for the other colors I just used scraps from my stash.
Thank you so so much for all your work!! You are awesome!!! I sent this link to my sis….not sure if she is still croceting and quilting with her arthritic hands….knowing her, she probably it!!…..toooomany miles away!!……Happy New Year sweet girl and May you have the rich love of God in your life and in your families lives……Karen
Happy New Year Karen! You are very welcome, thank you for sharing my work with others, that means so much! Have a wonderful week!
What a fun clutch and simple in design…thank you! And though sewing may not be your forte, you managed a way to get around it that works – bravo!
I love to see what you come up with so thank you (again) for your wonderful emails.
Thanks so much Judi! I appreciate your kinds words :)
What is Willow?
It’s the tan color.
Is the pattern printable or do you have to write it out?
You can write it out or you can buy a PDF from my shop:
https://www.ravelry.com/patterns/library/rica-colorful-clutch
https://www.etsy.com/listing/619628384/crochet-pattern-rica-crochet-clutch
Not sure what I’m missing but how do you transition from the end of one side to the beginning of the next? I see in the pic that the end is flat/straight but done see anything in the instructions about acheiging thus?! Thx in advance nance
Hello! You will turn each row :)
Hi me again!! Thanks for getting back to me so quickly…..It was helpful, I got it!!! Not sure why I’m having so many problems with this project!!! My stitch count is off; don’t know what is wrong. ie row 3..starting with 74 stitches (from the end of row 2)…..sc 33 and 1 more then 2 stitches each in the next 4 stitches then 33 more. That totals up to only 71, the way I am working it?? It should be 78 according to your pattern…..Help!! Thanks again. Nance
Hi Nance! You are working the total sequence 4 times (sc in next st, work 2 sc in next st). It’s a three stitch sequence repeated 4 times. This gives you a total of 12 stitches around the round part and 33 on each side which makes 78 stitches.
Is a 7.00 considered a G hook?
No it’s not, a G hook is a 4mm (or sometimes 4.25mm). This hook is a 7mm hook.
Ok I’m sorry what letter is the 7 or doesn’t it have one
It doesn’t have a letter but is between an H and an I hook.
Ok I have a 7 hook that says it is a 4.5 is this the same? Thanks for your help
No, it’s not. I’m sorry! It can be quite confusing. A 7 hook is a weird hook between the size G and H. A 7mm doesn’t have a letter, it will simply say 7.0mm on it.
Look for an “L” or “N” as they are larger hooks.
Is it for sale? I’m just beginning again after a long time away from crocheting. Yours is so beautiful I’d love to buy it!!
It’s not for sale, I am sorry!
Hi, I noticed that the gauge isn’t listed. I want to see if yarn that I have in my stash would work. Is this the type of pattern where it doesn’t matter?
I LOVE this clutch! So colorful!!
Thank you so much!
I love this design! This it totally my kind of pattern.
yay! Thank you! I am glad you like it!
Hi, I was just checking to see what the gauge should be, or if it matters. When I click on the link, it just goes to your lazy gauge page, but doesn’t actually tell what the gauge is, or what the gauge pattern is. Thanks…looking forward to start this!
The gauge doesn’t matter! You want to use a small enough hook that your stitches are relatively tight so your finished bag will be a sturdy as possible.
Sorry, after I submitted my comment a second time, all of these new comments popped up! Thanks for letting me know.
Do you have a video for this pattern?
I don’t, I’m sorry! Do you need assistance?
When you say carry do you mean drop off the hook but follow with
Do you have a video
Carry means you lay the unused yarn behind the stitches and work it inside the stitch. This is so the yarn is where you need it on the next row, instead of cutting and reattaching each time.
Are all the colored rows suppose to be hdc? I did mine in sc like the pattern states, but after looking at your picture, I noticed your colored rows look like hdc.
Also, why 9 sc in the last row?
Yes they are, thank you for catching those mistakes. I should not have published these while out to town, what a mess. My apologies!
Are the directions corrected? Thank you! I love this so much!
Yes they are! Thanks for your patience!
I really need to ask you if you could please make notes in black the pinks and light blue just don’t do it for my eye sight. I’m 75 and things of light color just don’t cut it for me. Even this note I’m having a bad time seeing. I’d appreciate your help on this. Thank You
I love this! I’m a new crocheter (I knit) and am wondering about how to “carry the Willow” as in the instructions. I know how to do this in knitting colorwork but am not sure how to accomplish here! Any tips or videos that might help? Thanks for this pretty pattern!
Yes! I have a video that shows how to change color and read a graph, but it also touches on carrying the yarn as well. I hope this is helpful!
https://www.youtube.com/watch?v=bKfaWMJo8V8
I’m so excited to start working this pattern!! The colors you used are just gorgeous! What did you use for your closure? It almost looks magnetic. Thank you for sharing such a beautiful pattern with us!
Thank you! yes, it’s a simple sew-on magnetic closer from Joann. It’s perfect!