
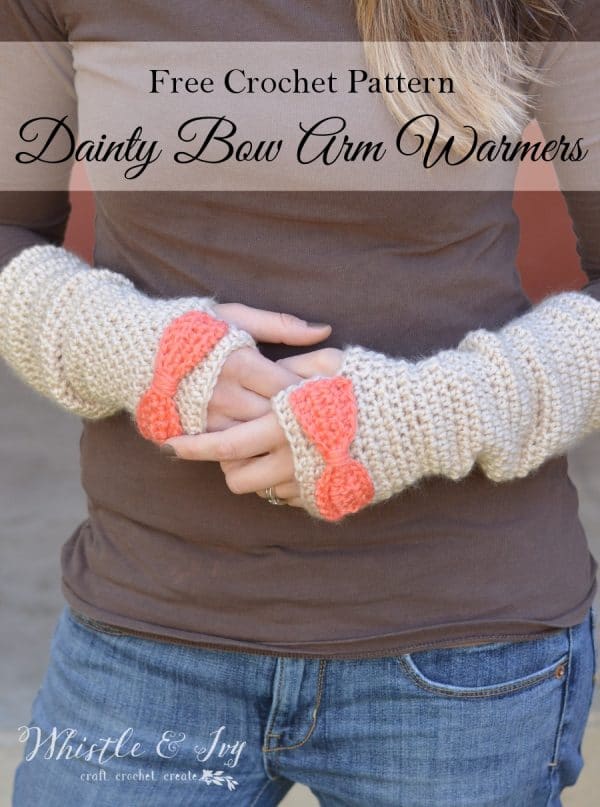
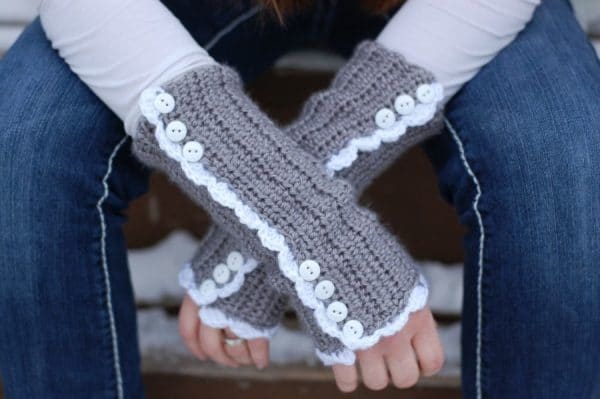
These darling crochet arm warmers have slight shaping for a more feminine look. They are working in hdc that gives them a bit more texture and drape than working in a sc. Add the bow for a final pretty touch on the hands! This post contains affiliate (commission) links, for more info click here.
I love Mondays. Perhaps I am the only one, but it seems like a lovely fresh start. I can reset my goals, and hopefully hit more of them this time around. What I really want for Christmas is an extra 4 hours each day, I wonder if Santa could fit that on his sleigh? Thankfully, I have still been able to find time to design, between the diapers, mac n’ cheese and Christmas bustle. These Dainty Bow Crochet Arm Warmers were a big hit when I first published them at Pink When. It’s strange, this pattern was one I wasn’t quite sure about. I didn’t know if people would love them or not, so thank you! Thanks for all the kind comments and all the shares. It really meant (and means) so much.

You’re tired of sifting through complicated tutorials and patterns that leave you feeling overwhelmed.
Let me help.
PICTURE THIS:
Instant access to a library of modern, easy-to-follow patterns
Gifting your handcrafted treasures to your loved ones.
Feeling accomplished by your beautiful makes
It’s time to make your crafting experience as joyful as it should be.
Dainty Bow Crochet Arm Warmers – Crochet Pattern
What you need:
- Size G hook (4.25 mm)
- Medium Weight Yarn (Mighty Stitch in Oyster and Conch)
- Yarn Needle
Abbreviations:
Ch – chain
Hdc – half double crochet
Sl st – slip stitch

LOVE THIS PATTERN BUT HATE THE ADS?
Get the ad-free PDF download! Where would you like to shop today?
Arm Warmers:
(make 2)
Begin by chaining a length that fits around the widest part of your forearm.
(I did a ch 32) Make sure it’s snug. It will loosen up a bit later.
Sl st into the first ch, forming a loop.
1. – 11.
Ch 1. Hdc in same st. Hdc in each st around your loop. Join with a sl st. (32 sts)
Important: Hdc stitches tend to make a diagonal seam when joined. To counteract this, ch 1, hdc in next st, skipping the same st(ch 1 does NOT count at first st). Hdc in each st around, work 2 hdc in last st, and join with the first hdc (not the chain.). Work two rounds this way, and the third round normally by ch 1, hdc in same st and working a hdc in each st around, joining in the first hdc. Repeat this 3-round sequence in rounds 1- 11.
12. – 23.
You will begin working one decrease at the beginning of each round. Ch 1. Sk same st, hdc in next st. Hdc in each st around. Join with the first hdc.
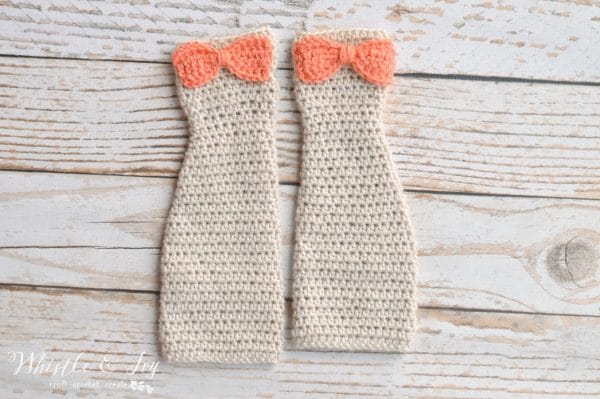
Your arm warmers will gradually taper down, as they reach your wrist.
24. – 26.
Ch 1. Hdc in same st. Hdc in each st around (use the same method as above, to avoid the slanted seam.) Join with first hdc.
27.
Ch 1. Hdc in same st. Hdc in next st. Hdc 2 in the next st. *hdc 2, 2 hdc in next st* – work all around your arm warmers. Join with first hdc.
28. – 29.
Ch 1. Hdc in same st. Hdc in each st around. Join with first hdc.
30.
For Right Arm Warmer:
Ch 1. Hdc in same st. Hdc in each st, almost halfway around your arm warmers (where your right thumb would come through, with the seam on the underside of the arm warmers). Ch 5. Sk 5 sts, hdc in next st. Finished the row by hdc in each remaining st. Join with first hdc.
For Left Arm Warmer:
Hdc a few more stitches around that with the right. It doesn’t need to be exact, use your arm to estimate a good place to put the thumb hole so the seam is on the underside.
31. – 34.
Ch 1. Hdc in same st. Hdc in each st around. Join with beginning hdc (use the method above to avoid slanted seam). Tie off and weave in ends.
Click here for the bow pattern.
Sew the bow in place on the sides only, so your arm warmers can stretch properly. Using a yarn needle, go in and out down each side. Tie off.
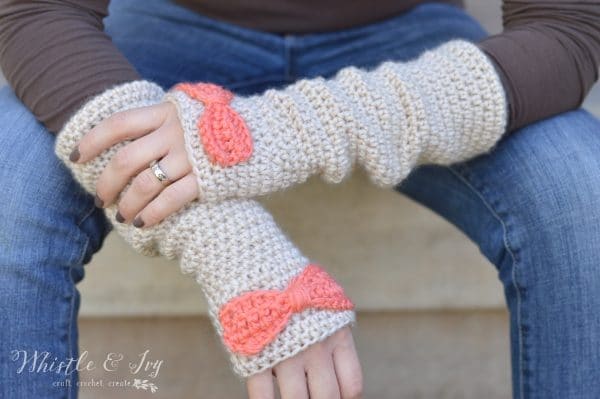
I love these cute little things! I keep mine on my desk by my computer, and slip them on when my hands get a bit cold.
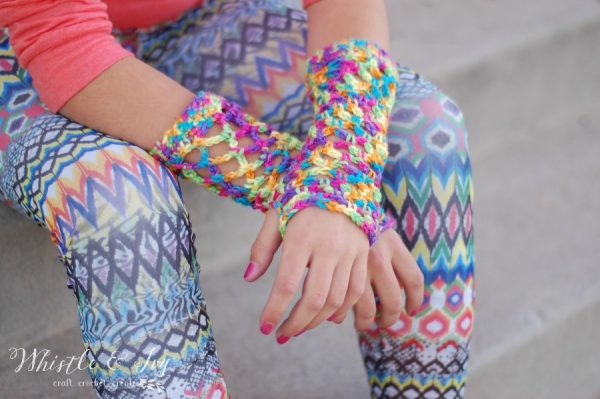
I have a couple other arm warmer patterns as well:
Be sure to subscribe so you don’t miss any patterns or projects, and follow me in Instagram and Pinterest.
Happy crocheting,


Made these over the weekend! They worked out very well. I will say that I might have done the row ends incorrectly, as the second one i did after practicing the first was diagonal, although the seams were almost invisible. the first glove i made the seams were straight-ish but visible. i also experimiented with where to attach the bows. i might prefer a single anchor point in the middle so they have more volume. i attached mine maybe a centimeter from the ends and i like how they flip up a bit and add dimension. i did cream gloves and bright pink bows!
How would I go about making the thumb a little…longer? Meaning, how do I make it so the thumb is covered more, instead of just a hole in the pattern?
You would need to work rows around the hole. Similar to the thumb directions on these mittens:
https://www.whistleandivy.com/crochet-plaid-mittens/
Another darling pattern. Thanks. I am printing it as I write this.
So glad you like it!
I’ve made two pairs of these for two grandaughters. I just need to put the bows on them. Thanks for the pattern, Beth.
What is the gauge on these? i would like to make these with a different yarn and the gauge would be great. thanks again.
Hello! I didn’t include gauge because you use your own forearm to custom make them for yourself. Does that make sense? You can use the pattern with any yarn and any hook, using your forearm to have them fit you. I included the stitch counts for the arm warmers that are fit to my arms for reference.
There is no specific gauge, you simply use your own arm as a guide to make them fit your arms perfectly (see the note by the beginning chain). Any yarn will work great!
I am attempting to make these for a 5 year old. Wouldn’t 11 rounds make the arm warmers too long for her little arms? Should I only do 6 rounds and then continue as normal with the rest of the pattern? Love them, by the way! Thanks
Yes, I think they would be too long! I haven’t made arm warmers for a child, so I would not be much help, I am sorry!
I love your page. Makes me want to weave everything I see here. All very nice! Thank you very much for sharing patterns for all of us. A hug!
Thanks so much!!! Hugs back :)
So lovely! I love these warmarms.Thank you for the pattern.
I made these for my daughter for Christmas, now she wants a pair in black and another pair for a friend. I did my decreases a little different, did “2 hc together” instead of skipping the first stitch, I just like the look better love the pattern, will be trying some of the others. Thanks for sharing.
Great idea! Thank you, so glad you like them :)
I love these bow wristers! I want to crochet a pair for my 9 year old grand daughter but I’m not sure how to go about altering the number of chains or if that’s even possible. If you have any suggestions, I’m all ears.
Thank you! Yes! You should be able to begin with a chain that fits around her forearm, and do the rest of the directions accordingly.
I have a question about which is the “right side” of the fabric. When I’m stitching in the round I sometimes feel like maybe I turned the whole “tube” inside out from the instructions. (For instance, when I made the right warmer, I found myself going all the way around to the other side to correctly place my thumb hole stitches, which is the way you describe making the hole for the left warmer… and is consistent with having the fabric inside out.) With hdc, on one side of the fabric you get a distinctive, 3D line visible in each row, and on the other side you don’t. I’ve zoomed in on the photo but I just can’t figure out which side of the stitching is on the outside, and I’m not sure which look I prefer, so I wanted to know what you intended. Thanks! Btw, this is my fav pattern of all the wristers I have tried so far (and I’ve tried many) bc I have muscular forearms but small wrists, and I love the way the warmers taper down at the wrist so they actually feel snug!
I always have the right side of the stitches facing outward.
Hi! I absolutely love this pattern and adore arm warmers in general. But I have attempted to make these twice now and am not getting a good result :( The HDC decrease rows leave an ugly seam on mine, my hand portion ends up too fat and where i start to decrease has somewhat of a “point”. I am following your pattern exactly (or so i think lol) but maybe there are just things im not doing right I would love some advice so I can make a pair im finally happy with! You can email me back if thats easier for you.
Thanks for your time! :)
Thank you! There will always be a seam when you are joining your rows, that is why I designed it on the inside. Are you working the straight seam method I recommended? Also, have you checked the gauge? What do you mean by “point?”
I did try using your method for a straight seam, and all was going well until i got to the decreases. I have a feeling my yarn is too stiff which is causing it to look like a “point”. Gonna try a different yarn and see how that turns out. Thanks again.
Hm. I haven’t had that happen. Maybe work the last 2 hdc less frequently, instead of 2 in a row. It’s so strange how different yarn works up so differently!
How many skeins of yarn does it take to make these?
Less than one for the body, and only a few yards for the bow.
Love these! But, I’m coming up with 10 rows after 3 rounds of doing the diagonal seam instead of 11. What row could I be missing?
There is no missing row, you work the sequence until you can to make 11 rows. Does that make sense? You won’t end up making an exact amount of each row.
I do not crochet but love these arm warmers!!! The gray ones with white buttons and trim. How could I order some?
Thank you! I am sorry, I don’t make and sell finished items.
Hi I am confused on Row 12. What does sk same stitch mean? I am mostly a self taught crocheted but I love this pattern!!
Hi Melanie! It means “skip”, so you will skip a stitch and work in the next one. It basically is a decrease, so the hand warmer tapers and gets smaller. Let me know if you have more questions! I am sorry I didn’t include that in the abbreviation list, I will add it now.
Hi. I love these armwarmers but im confused about row 27. Is that 2hdc and then another 2hdc or was it a typo??
It’s an increase–> hdc, hdc, 2 hdc in next st.
I am making these and was wondering what store bought yarn is comparable to this yarn as I need it now.These are so cute!
Hello!
It is a medium weight yarn, which is a common weight that I think you can find most places. Are you in the US? I believe Aran is the equivalent, but you might need to look it up to be sure. I was avoid using Red Heart Super Saver, but I think Caron Simply Soft or Lion Brand Wool-Ease would do fine. I don’t branch out from my favorite yarn too much :)
I also am having problems. So this is hdc, hdc two single hdcs and then 2 hdc meaning two more all in same stitch?
I am not sure I understand your question. You will work hdc 2 in the same st (this is the increase). Then 2 hdc each in their own stitch.