
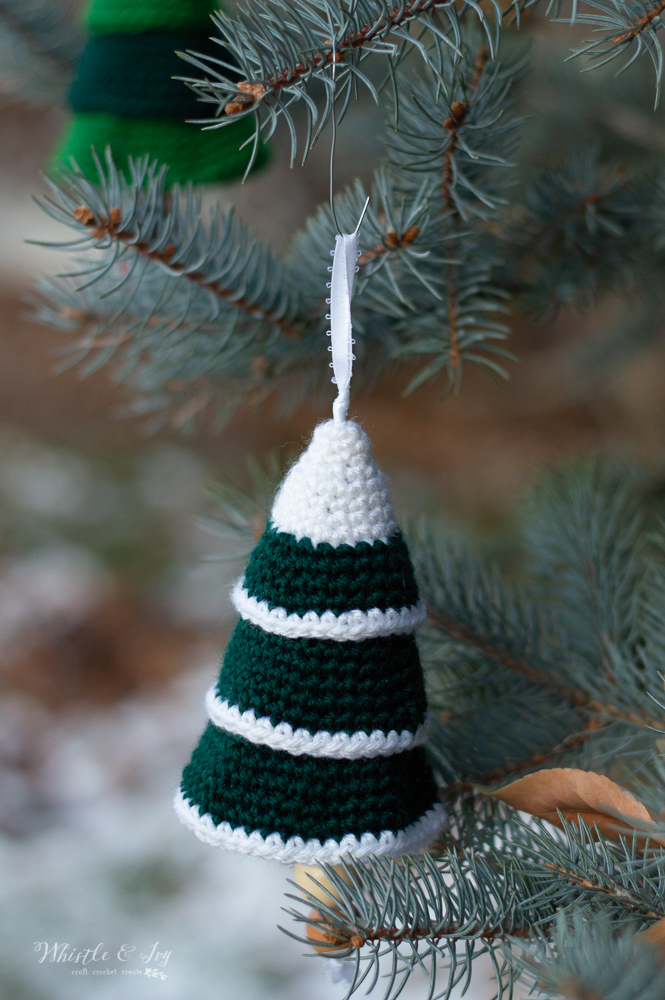
These darling crochet tree shaped ornaments have a simple, rustic construction, and will make a darling addition to your handmade ornament collection. Add your own embellishments or edge it in white to look like a snow-covered tree. This post contains affiliate links, which means I get a small commission at no extra cost to you. Thanks for your support!
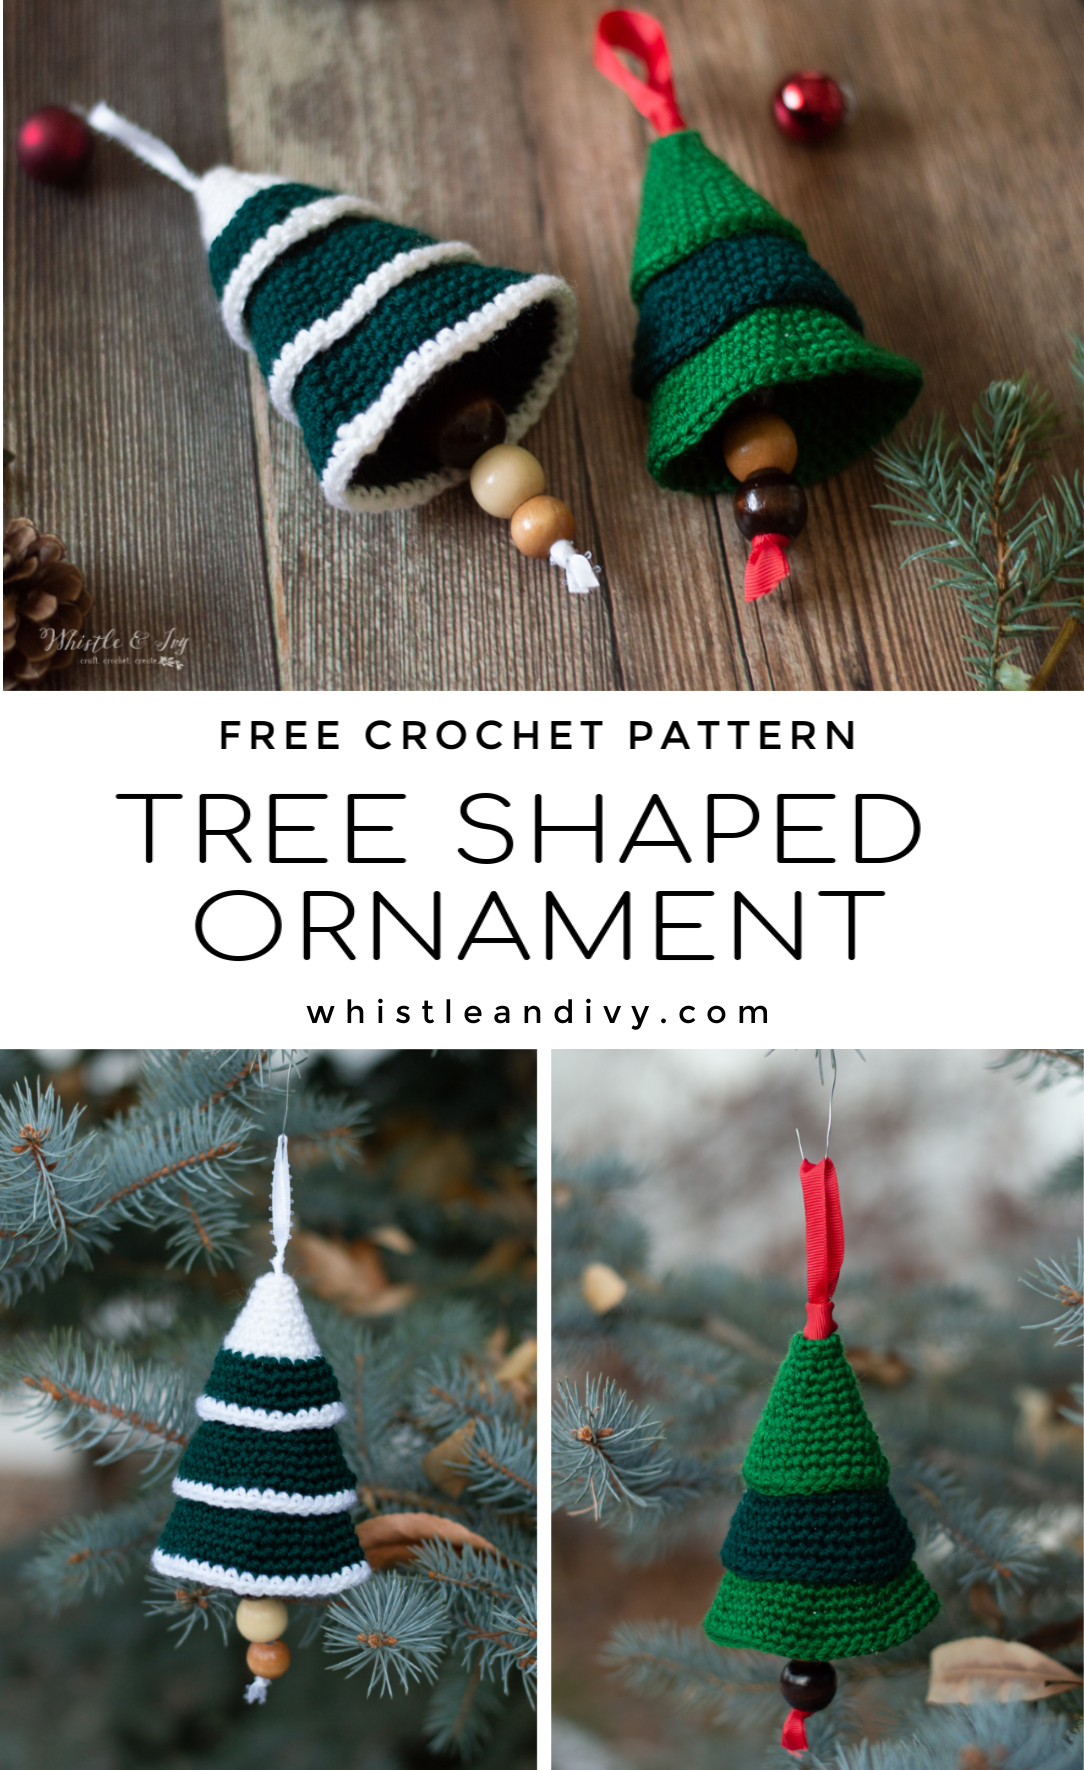
When I was brainstorming some ideas for the holidays a few months ago, I realized that I simply do not have enough cute crochet ornament patterns in my library! I came up with a few simple ideas and this cute crochet tree shaped ornaments was one the first ideas to hit me. It’s so simple to make! I used green yarn, but afterward thought it was be so cute to use hemp or a neutral colored yarn to give them a bit more rustic look.
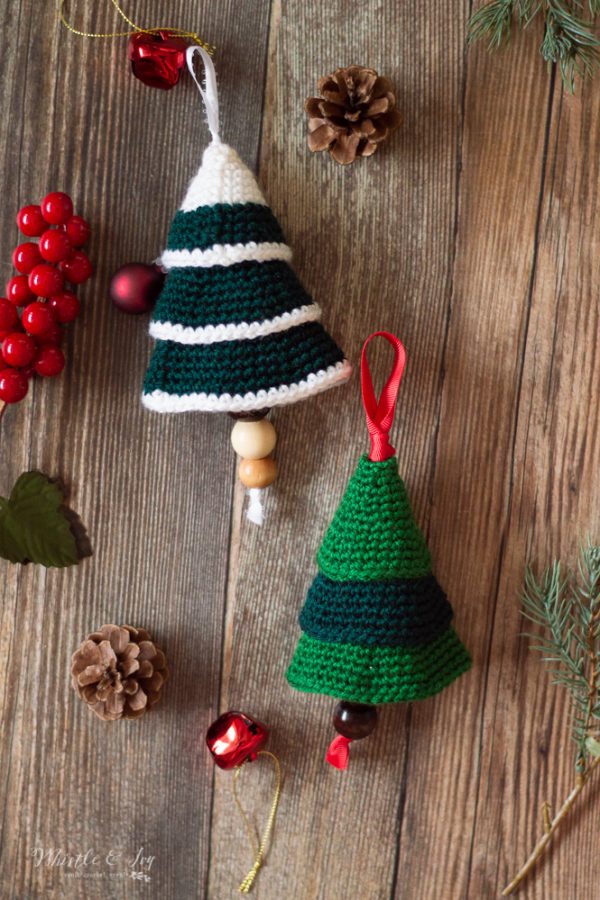
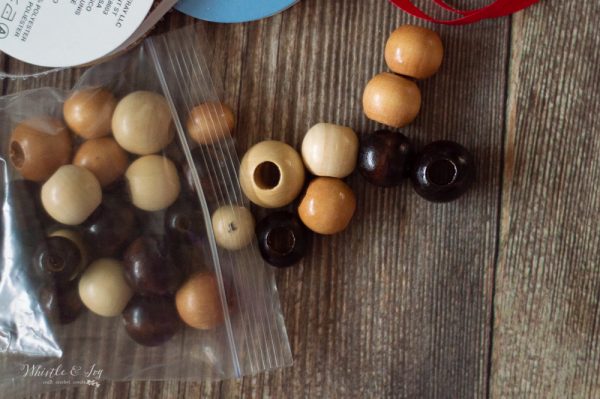
I got my wooden beads at Joann, but I shared a link to amazon to beads that are similar. The beads will construct the ornament together and double as a cute little “trunk” at the bottom. I also liked the look of the thicker red ribbon myself, but I just grabbed a few different sizes and colors from my stash, so I encourage you to do the same!
[convertkit form=1044470]

I SEE YOU, BUSY MAKER
You’re tired of sifting through complicated tutorials and daunting patterns that leave you feeling overwhelmed.
Let me help.
Picture this:
🧶 Joining a thriving community of fellow crocheters who share your passion.
📚 Access to our ENTIRE library of patterns that will buildsyour confidence.
🎁 Gifting handcrafted treasures to be cherished by your loved ones.
🌟 Modern, easy-to-follow patterns that will leave you feeling accomplished.
It’s time to make your crafting experience as joyful as it should be. We can’t wait to meet you!
CROCHET TREE SHAPED ORNAMENT – FREE CROCHET PATTERN
Please remember: You are free to use this crochet tree shaped ornament pattern to make and sell, but do not republish or distribute this pattern in any way. DO NOT use my photos in your listings. Please do share my blog links! It’s a quick and FREE way of supporting Whistle and Ivy and more free crochet patterns in the future.
PLEASE read my Disclaimer before working my free patterns!
What you need: (affiliate links)
– G Hook
– Brava Worsted in Hunter, Grass, White
– Ribbon
– Plastic Darning Needle
– Wooden Beads
Abbreviations: US Terms
Ch – chain
Sc – single crochet
Sl st – Slip Stitch
St – stitch
Gauge: Not important, but you want the stitches to be rather tight.
The written pattern below is FREE in-text. However, if you would like a pretty downloadable PDF (and would like to offer support for Whistle and Ivy!) you can get one in my Ravelry or Etsy shops. The PDF is formatted for easy crocheting on-the-go or for easy printing, it doesn’t include ads or comments. Where would you like to shop today?
Whistle and Ivy Shop
Ravelry
Etsy

READY TO MAKE YOUR CROCHET ORNAMENTS?
The written pattern below is FREE in-text. However, if you would like a pretty downloadable PDF (and would like to offer support for Whistle and Ivy!) you can get one in my shops. The PDF is formatted for easy crocheting on-the-go or for easy printing, it doesn’t include ads or comments. Where would you like to shop today?
Notes: The instructions are for the white-tipped tree shaped ornament. To make yours solid, omit the white color changes.
TOP CONE:
(with white)
Ch 2.
1. Sc 5 into first ch. Join. (5 sts)
2. Ch 1. Work 2 sc in same st. Sc in next st. Work 2 sc in next st. Sc in next 2 sts. Join (7 sts)
3. Ch 1. Sc in each st around. Join (7 sts)
4. Ch 1. *Work 2 sc in next st. Sc in next st* work 3 times. Work 2 sc in last st. Join. (11 sts)
5. Ch 1. *Sc in next 2 sts. Work 2 sc in next st* work 3 times. Sc in next st. Work 2 sc in last st. Join. (15 sts)
6. Ch 1. Sc in each st around. Join. (15 sts)
7. Ch 1. Sc in next 6 sts. Work 2 sc in next st* work twice. Sc in last st. Join. (17 sts)
8. Ch 1. Sc in next 7 sts. Work 2 in next st. * work twice. Sc in last st. Join. (19 sts)
Join green.
9. Ch 1. Sc in next 5 sts. Work 2 sc in next st* work 3 times. Sc in last st. Join. (22 sts)
10. Ch 1. Sc in next 6 sts. Work 2 sc in next st* work 3 times. Sc in last st. Join. (25 sts)
11. Ch 1. Sc in each st around. Join. (25 sts)
12. Ch 1. Sc in next 7 sts. Work 2 sc in next st* work 3 times. Sc in last st. Join. (28 sts)
Join White.
13. Ch 1. Sc in next 3 sts. Work 2 sc in next st. *Sc in next 8 sts. Work 2 sc in next st* work 2 times. Sc in last 6 sts. Join. (31 sts)
MIDDLE CONE:
Work the pattern for the small cone and continue onto round 14:
14. Ch 1. Sc in each st around. Join. (31 sts)
15. Ch 1. Sc in next 5 sts. Work 2 sc in next st. *Sc in next 9 sts. Work 2 sc in next st* work twice. Sc in next 5 sts. Join. (34 sts)
16. Ch 1. Sc in next 10 sts. Work 2 sc in next st* work 3 times. Sc in last st. Join. (37 sts)
17. Ch 1. Sc in each st around. Join. (37 sts)
BOTTOM CONE:
Work the pattern for the small cone, continue to work the addition rounds of the middle cone and continue to round 18:
18. Ch 1. Sc in next 6 sts. Work 2 sc in next st. *Sc in next 11 sts. Work 2 sc in next st* work twice. Sc in next 6 sts. (40 sts)
19. Ch 1. Sc in next 12 sts. Work 2 sc in next st* work 3 times. Join. (43 sts)
21. Ch 1. Sc in each st around. Join. (43 sts)
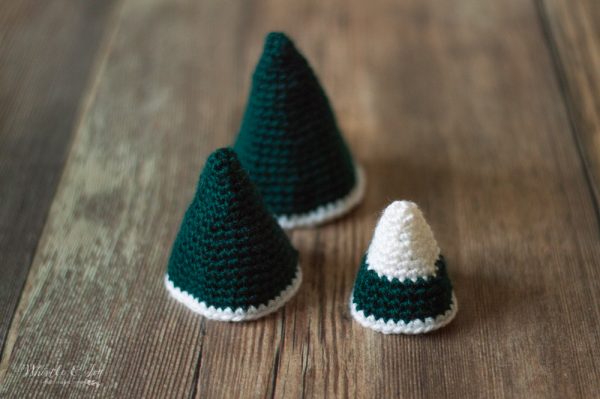
CONSTRUCTION:
The tree shaped ornaments are constructed by nesting the cones together, with the smallest at the top, the largest at the bottom. No sewing is required!
First, measure out a length of ribbon about 2′ long. Thread the end through your plastic darning needle (I recommend plastic because sharp needle will go through areas that your ribbon won’t be able to follow).
Nest the cones together and with your needle go up through the bottom and out the top.
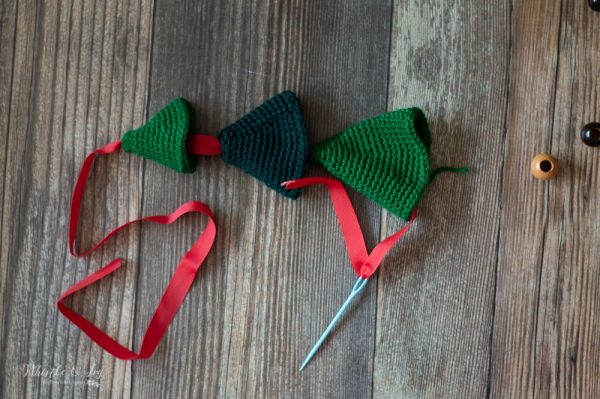
Next, go back down, leaving an extra large loop on top.
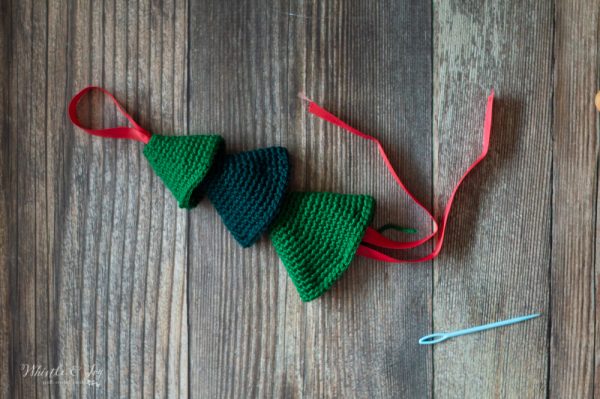
The two ends of the ribbon will be coming out the bottom. With the large loop on top, tie a large knot.

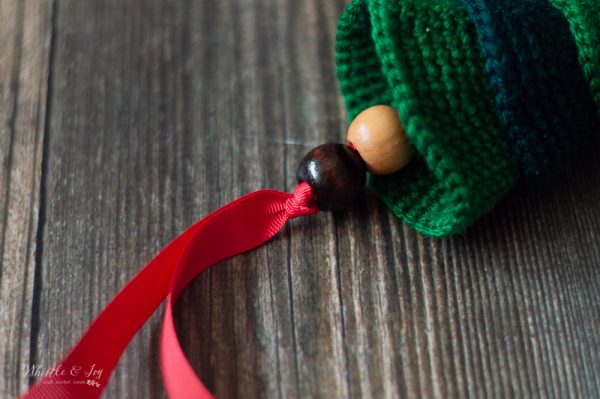
Thread the ribbon ends through the needle and string the wooded beads onto the ribbon at the bottom of the cones. Gently push the beads up so the cones are pressed firmly together, and pressed against the top knot.
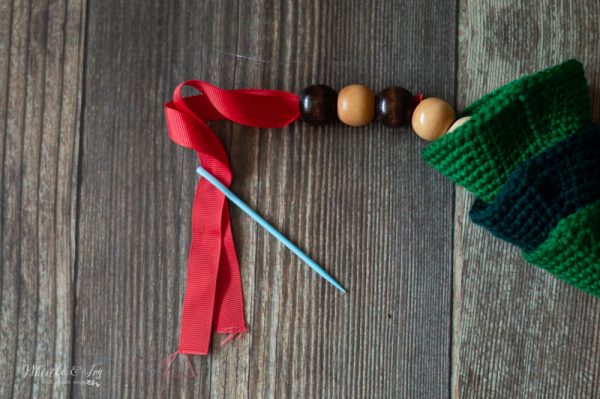
Once your beads are strung, tie a knot at the bottom. Depending on your bead size, you might want to put a smaller bead at the bottom so your beads don’t slip over your knot.
Trim the ends of your ribbon (and singe them to prevent fraying).
Aren’t they adorable? This projects is beginner friendly, so it might make a fun craft night with friends.
Enjoy and happy making!
xoxo,


Ohhh Bethany that is the cutest ornament I’ve seen yet very original ❤️I hope you &!your Family had a wonderful Christ- Mas 🎄🙏😊❤️
Thank you so much! Merry Christmas and Happy New Year!
Wonderful, thank you for that ❣️
You’re welcome!
These are so fun! I just love them!
Thank you!