
Thank you so much for following along with our crochet plaid patchwork blanket CAL! It was so fun to see your progress and participation. Today we will use a simple method to sew the squares together into a finished blanket. This CAL is brought to you by Red Heart, all creatives, patterns and opinions are 100% my own. This post contains affiliate links, which means I get a small commission at no extra cost to you, thanks for your support!
I hope you enjoyed making all the squares for this week.
I’m curious, did you like the graph squares?
Today we need to sew everything together to complete the blanket. Take this part slow and pay attention to what you are doing. I had to pull out my first row no less than THREE TIMES because I was trying to crochet and watch HGTV at the same time.
Follow my instructions and hopefully you can learn from my mistakes!
CROCHET PLAID PATCHWORK BLANKET – CONSTRUCTION
What you need to make your Crochet Plaid Patchwork Blanket: (affiliate links)
– 6mm Hook
– Red Heart Soft
3 Light Heather Gray
1 Really Red or Berry Red
1 Wine
2 Black
2 White
1 Charcoal
– Darning Needle
Abbreviations: US Terms
Ch – chain
Sc – single crochet
Dc – Double Crochet
Hdc – Half Double Crochet
Sl st – Slip Stitch
St – stitch
BLO – Back Loops Only
Gauge: Not important, but if you want the exact same finished size as mine, make sure your foundation is approx. 9″ wide.
The written pattern below is FREE in-text. However, if you would like a pretty downloadable PDF with the entire plaid blanket (and would like to offer support for Whistle and Ivy!) you can get one in my Ravelry or Etsy shops. The PDF is formatted for easy crocheting on-the-go or for easy printing, it doesn’t include ads or comments. Thanks for your support!
Purchase PDF on Ravelry
Purchase PDF on on Etsy
Want even MORE modern crochet patterns?
Join the ENDLESS BUNDLE!
What is the ENDLESS BUNDLE? It’s the ever-growing pattern bundle membership where you will find modern crochet patterns, video tutorials, stitch tutorials, courses and crochet graphics for your DIY crochet swag! I add new content every month! Get access to my entire CROCHET library
⭐️ LEARN MORE ⭐️
Be sure you weave in all ends before sewing the squares together. Using a darning needle is the easiest way.
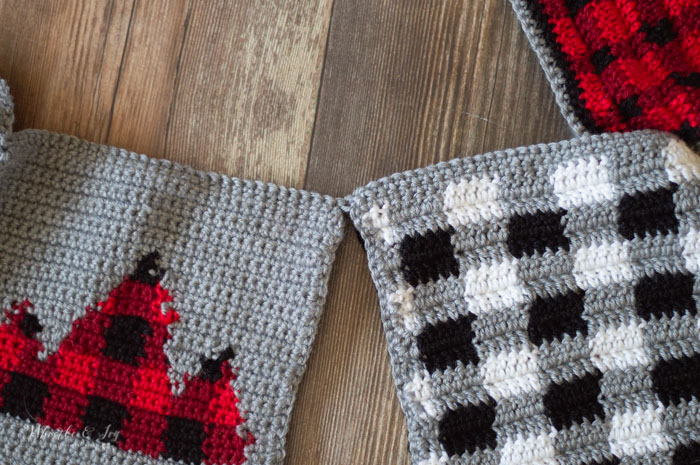
1. Lay out your pieces the way you want them sewn together (it helps to take a photo with your phone or tablet so you can reference it later). The blanket will be sewn together in rows. My preferred method is sewing them together with a row of sc, but you can use your preferred method.
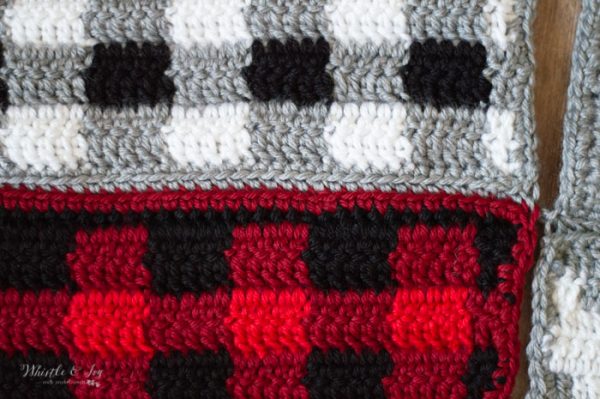
To do my preferred method, you will place the squares right sides together and sc in the back loops only of each square. Because they are right sides together, the back loops with be the loops on the outsides ( the loop closest to you and farthest from you).
The top of the seam will will look like this: (the back will have a ridge at the seam)
2. Start with the bottom two rows. Make sure you have the two rows laid out the way you want. Once they are positioned correctly, take all the row 2 blocks and flip them each down on top of row 1. The blocks will be placed right sides together, and the row 2 blocks will appear to be upside down. (When you sew it together and flip it back up, it will be the right way!) Work one row of sc sewing across the 4 blocks (going through both squares) They will look like a banner/garland, connected by only one stitch in between.
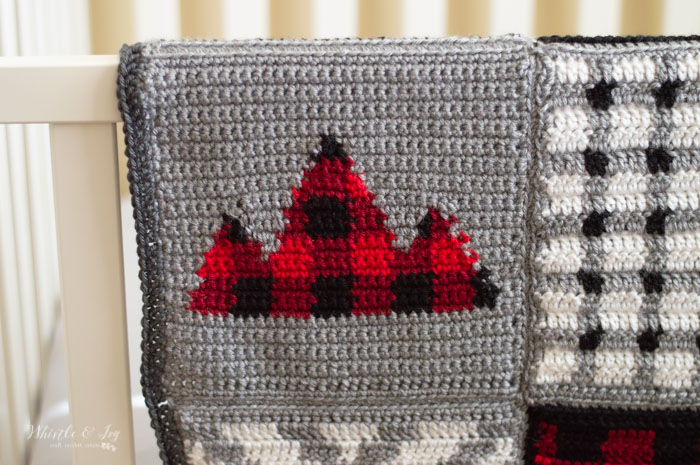
(use this photo as a guide but notice my mountain was sewn on upside down, I had to pull it out!)
3. Flip row 2 up and repeat the process when you sew row 3 to row 2, and when you sew row 4 to row 3. To avoid mistakes (I sewed it together wrong no less than 3 times!), make sure you lay it out correctly on the floor, flipping them down when you are ready to sew the next rows together.
4. Your squares should be sewn into one piece, but all the vertical seams will be open. Sew the remaining seams row by row by folding the entire row over, working a long row of sc down the length of the blanket. Repeat this until all seams have been sewn together.
Weave in all ends before making the border.
5. This blanket would look great with any border, but I opted to do a simple row of DC around the outside. Join Charcoal anywhere and work DC around the outside. Make sure to work 4 dc in each corner. Join with first st and tie off.
Well that’ a wrap on this FIRST week of Plaid Week.
I hope you decide to share your creation on social media! Stare it in our Facebook group or tag me in Instagram (@whistleandivy). I can’t wait to see your creativity and unique spin on this project!
Keep your hook handy, Plaid Week #2 starts in 2 days!
GET ALL THE SQUARE PATTERNS:
DAY ONE- BUFFALO PLAID
DAY TWO – GEOMETRIC
DAY THREE – ANTLERS
DAY FOUR – TARTAN
DAY FIVE – MOUNTAIN PEAKS
DAY SIX – CONSTRUCTION
xoxo,

Love this and looking forward to making it . Thank you so much for all of your free patterns. Merry Christmas
What should the length and width dimensions be following your pattern? I want to block my squares to prepare to assemble, my SO is going to make me my own wooden square to use to block them, but I need to know how big it has to be. Thank you in advance! I’ve had so much fun crocheting this blanket it will be the perfection addition to our baby boy’s nursery!
Glad you like it!
The finished size will depends your gauge, I suggest your foundation be 9″ long (so the finished will be about 9″ x 9″), so maybe block them to 10″. The gauge for blankets is not super important as it’s not a sized object, but I suggest making one square first to ensure the size of your exact squares. Does that make sense?
Thanks for plaid CAL , Making Hubby’s XMAS PRESENT, Looking forward to 2nd Plaid week Sue
My crochet matches your gauge, but you can see the yarn that I’m carrying between some of the stitches. How do I keep this from happening?
You will very gently tug the carried yarn. I explained this in the tutorial:
https://www.whistleandivy.com/how-to-crochet-buffalo-plaid-the-plaid-stitch/
What a beautiful blanket (and great instructions too!)
thank you
Thank you!