
Septembers here are pretty darn unpredictable. They could be chilly. They could be like a second August. They could start out like August and end like November. So we need to be prepared!
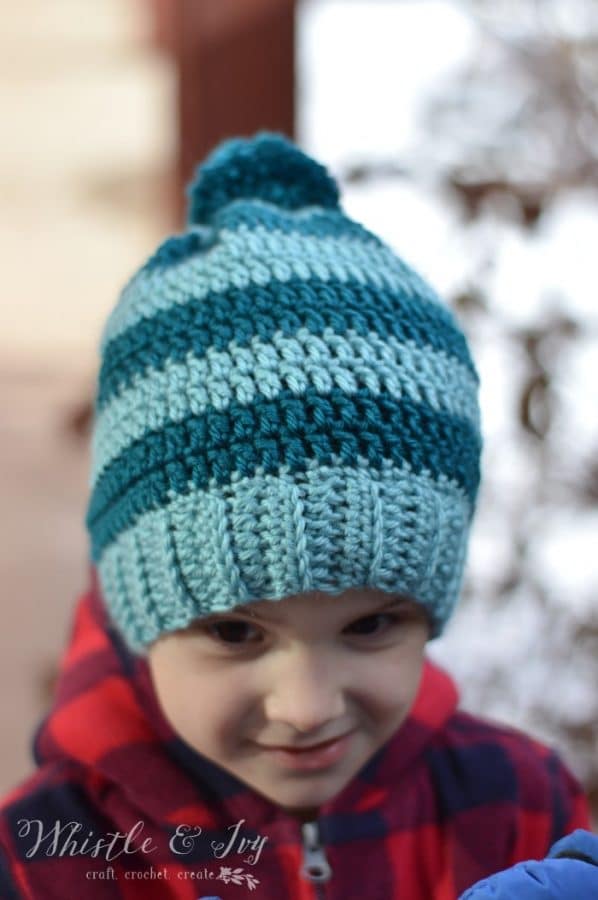
A couple of years ago, I had a friend reach out to me about some crochet hats. She was making some for an elementary school class and wanted to make sure each child in the class had one. I decided to whip up a pattern that was perfect for chilly school morning and fast to make. This simple Schoolyard hat is perfect for both girls and boys and is an easy pattern for when you need a hat fast.
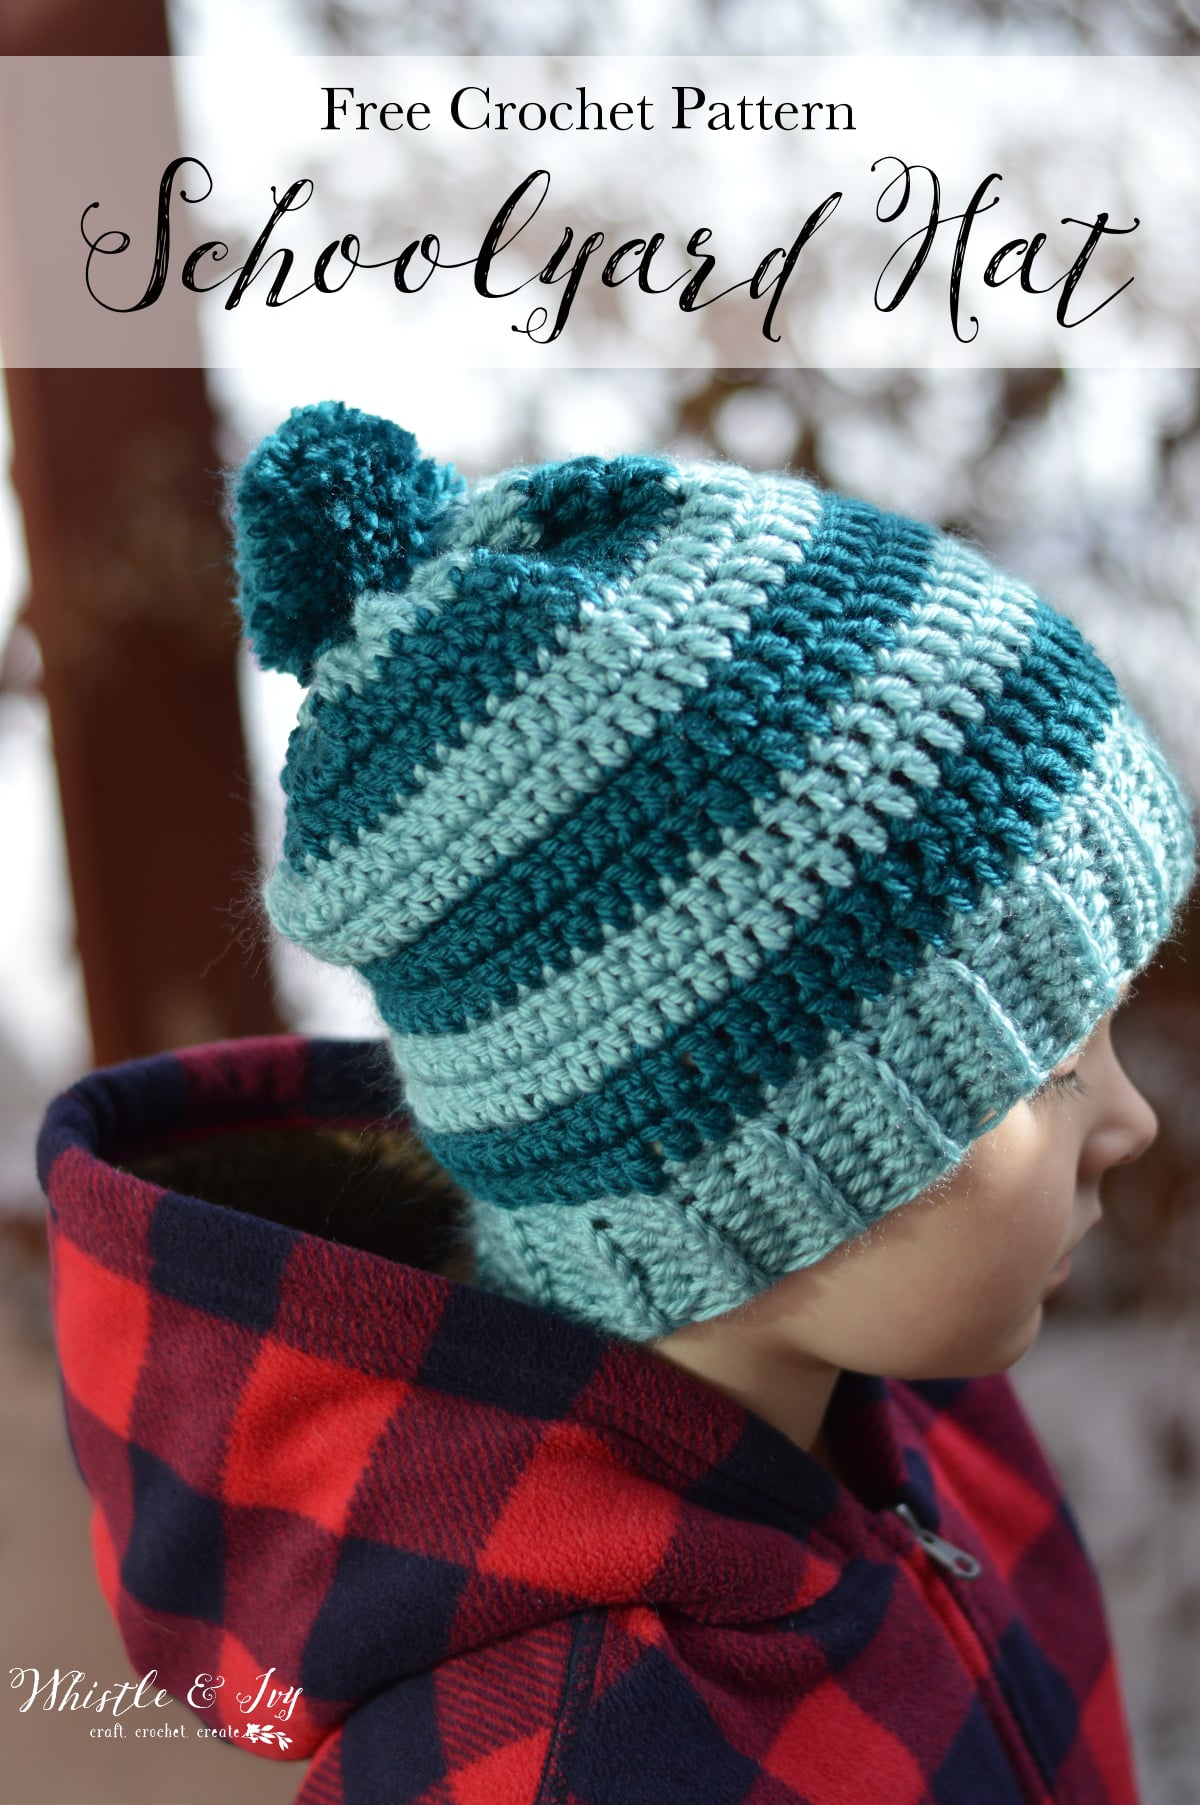
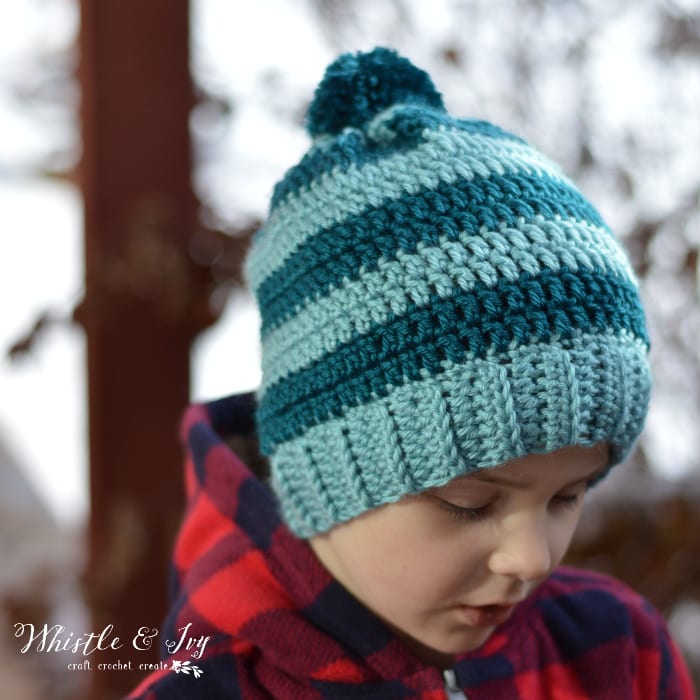
SCHOOLYARD POM-POM HAT
Please remember: You are free to use this pattern to make and sell, but do not republish or distribute this pattern in any way. DO NOT use my photos in your listings. Please do share my blog links! It’s a quick and FREE way of supporting Whistle and Ivy and more free crochet patterns in the future.
What you need: (affiliate links)
-Medium Weight Yarn (in 2 colors)
(Red Heart Soft in Seafoam and Teal)
–Size J Hook
–Darning Needle
Abbreviations: US Terms
St – Stich
Ch – Chain
Sl st – Slip Stitch
Sc – Single crochet
Hdc – Half Double Crochet
Dc – Double Crochet
Sp – Space
BLO – Back Loops Only
Gauge: 7 sts= 2″

I SEE YOU, BUSY MAKER
You’re tired of sifting through complicated tutorials and daunting patterns that leave you feeling overwhelmed.
Let me help.
Picture this:
🧶 Joining a thriving community of fellow crocheters who share your passion.
📚 Access to our ENTIRE library of patterns that will buildsyour confidence.
🎁 Gifting handcrafted treasures to be cherished by your loved ones.
🌟 Modern, easy-to-follow patterns that will leave you feeling accomplished.
It’s time to make your crafting experience as joyful as it should be. We can’t wait to meet you!
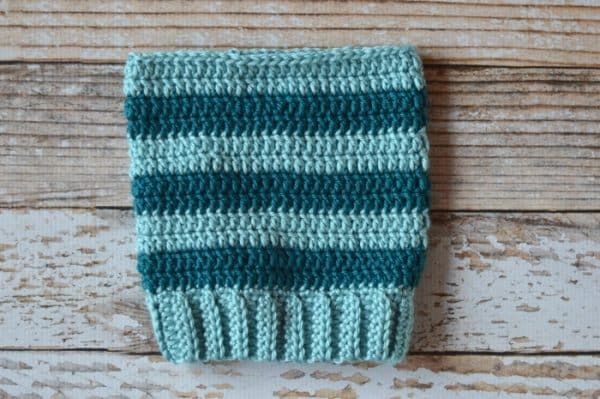
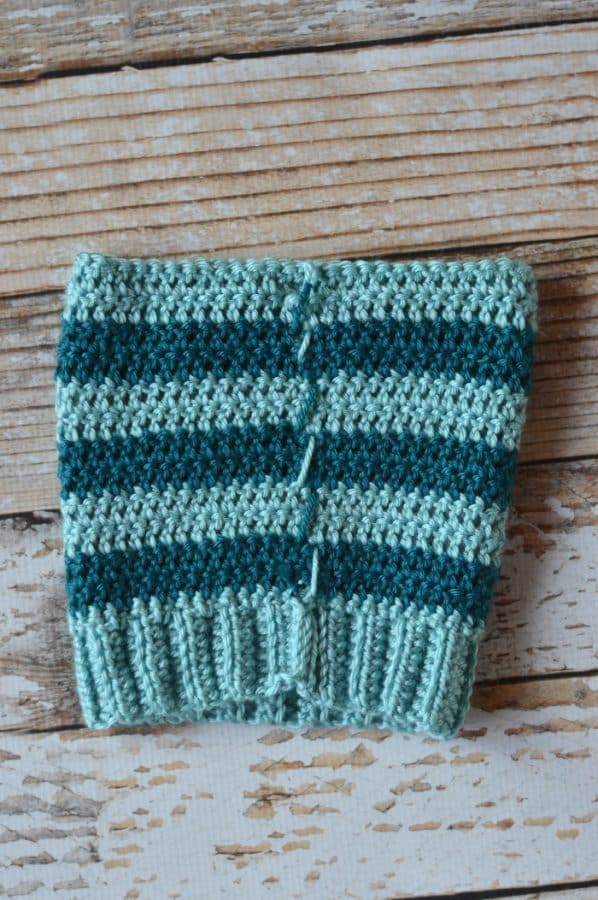
Ribbed Band:
Using 1st color, Ch 8.
1. Hdc in 2nd ch from hook. Hdc 6. Turn. (7 sts)
2.- 40. Ch 1. Hdc in same st. In BLO, Hdc 5. Hdc in last st (through both loops). Turn.
Piece should measure approx. 15.5″ long (unstretched). Note: the brim should be VERY stretchy. If your yarn choice is stiff and your brim is not stretchy, then continue working more rows until you get a band that would fit a child’s head, approx. 19″.
Fold the band in half and sl st the two ends together, forming a band. Don’t break yarn.
Hat:
1. Orient the band so the seam is on the inside and your yarn is at the top. Ch 1. Sc in same sp. You will be working into the horizontal stitches, but try to make them an even as possible. Your exact total stitch count is not super important, but try to work between 55-60 sts (for the child size). You can adjust this to fit your needs. Bear in mind, if you work too few stitches, it will reduce the stretchiness in the brim.
2.- 3. Ch 2. Dc in same st. Dc in each st around. Join with sl st.
Join 2nd color. You don’t need to break your yarn, you can bring it up with each color change, eliminating extra tails when you are finished.
4. – 5. Repeat row 2.
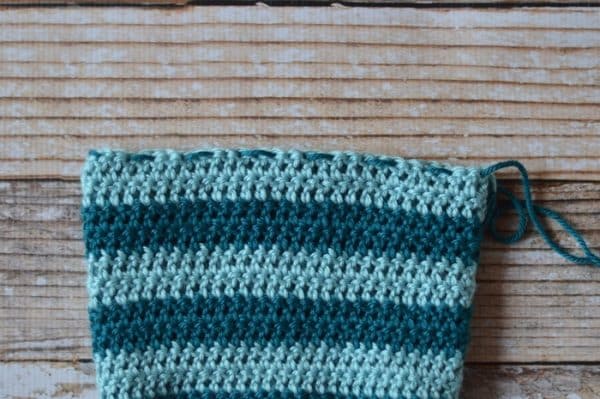
Alternate colors, working 2 rows of each color until you reach a total of 13 rows on the body of the hat.
To switch between colors, simply drip the color and pick it back up again when you are ready for it. The inside of your hat will look like this:
To close the hat, turn it inside out. Thread a length of yarn through a darning needle and sew a loose running stitch around the top. Pull the stitch tight, closing the hand with a cinch. Tie a sturdy knot.

Turn your hat right-side out. Finish your hat by adding a pom-pom. You can use this tutorial to make a pom-pom without a pom pom maker.
Share your work in our Facebook Community! Can’t wait to see your version!
See you soon!


thanks for sharing!
You’re welcome!
Thanks for this practical hat! I can see this in school colors for the “sports-nut” men in my life. I like the ribbed band because it seems to hug the head the best.
Great idea to do it in team colors! My husband could use one as well :) The hat is very versatile for sure!