
Hello all!
If you had a chance to finish all your stockings, then you are ready to make the board to hang them on. I have seen some really great ideas in the Facebook Group of how to hang the stockings, but if you are interested in how I hung mine, I wanted to show you.
What you need:
- 16″ x 48″ precut board (check lumber or home improvement stores
- medium grit sand paper
- wood stain
- mug hooks
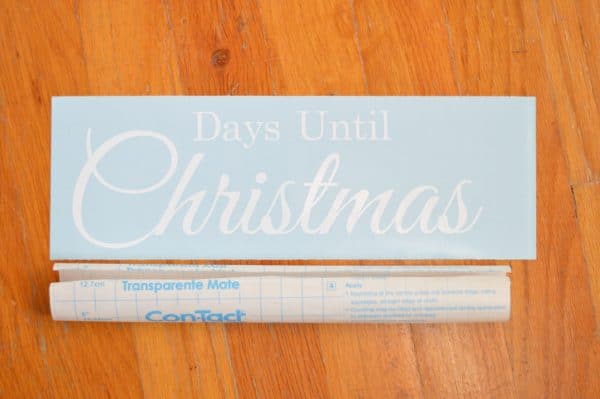
- Vinyl words (you can also hand-paint them)
- Square tool
- Pencil
- Straight edge
- Measuring tape or ruler
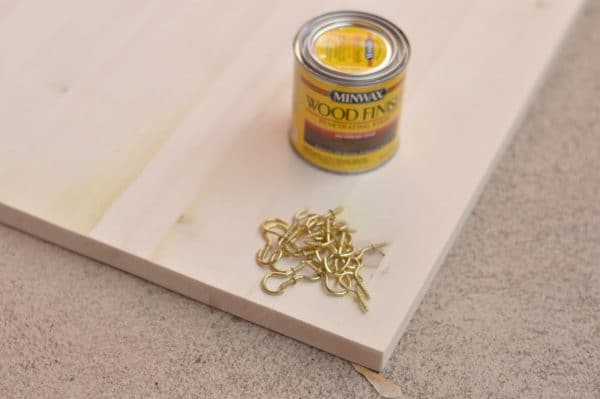
Start by sanding the board. Nothing too crazy, you just want to smooth any rough edges so there is no danger of splinters. Wipe the board down to remove all the dust.
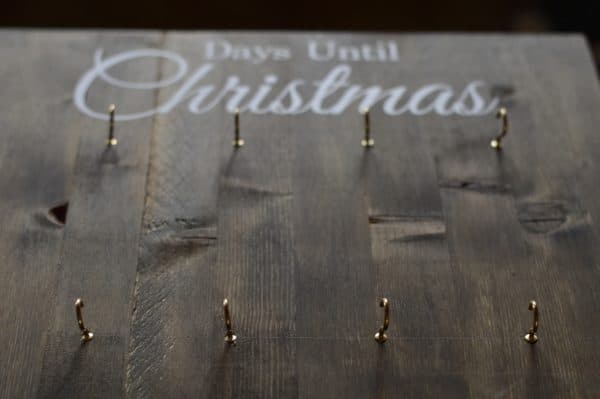
Next, stain the board your preferred color. I loved the rustic look of Jacobean by Minwax. Some people use a paintbrush, but I feel like I have more control with a rag and my hands. Place the rag around your fingers and dip the very tips in the stain. Then gently rub in on the wood until you have the coverage you want. Stain can be very light or very dark, depending on how much you use and how many coats. I did one thorough coat and loved the color. Let it dry outside, the stain has smelly fumes.
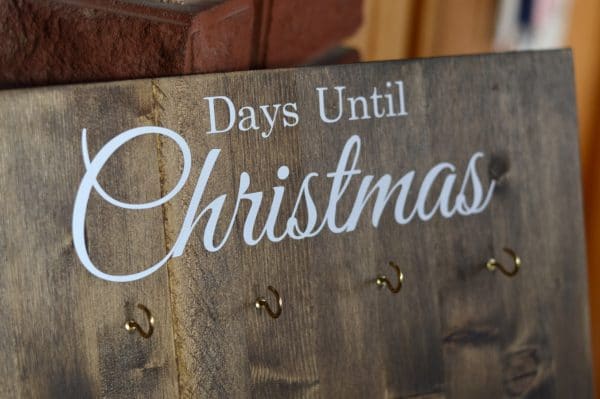
I put the wording on top before putting the holes to make sure there was room for everything. If you order vinyl, here is how to apply it:
Peel the backing from the contact paper.
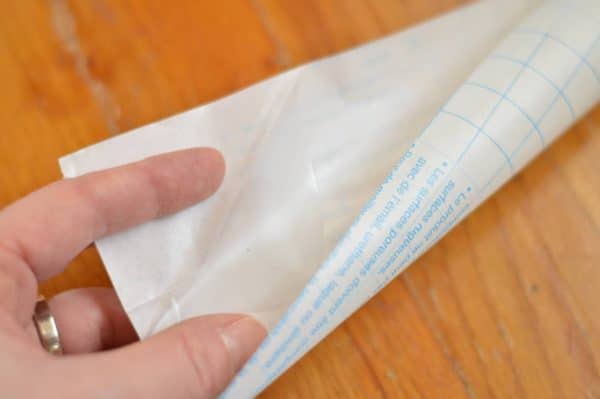
Gently lay it on top of the vinyl, making sure there aren’t any bubbles.
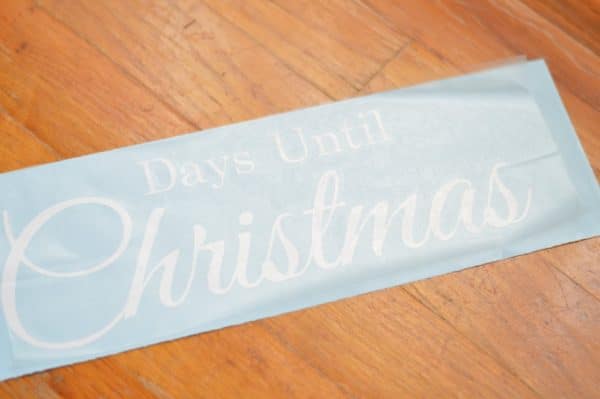
This is the most tedious part. The contact paper will pick up the vinyl, however, you will have to work with it. I have tried squeegee-type tools and haven’t had any luck with them. I just use my fingernail. You almost need to scrape it across the vinyl, making sure it’s sticking firmly. You will need to work with each letter as you pull back the contact paper. It can get frustrating, just keep scraping and working until it picks it up. Also, try not to let the letters touch the blue backing once they have been picked up by the contact paper.
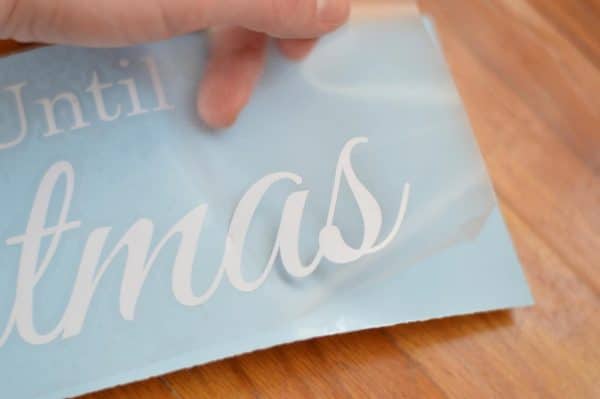
Once you have lifted the entire phrase, you can stick it to the wood. Be very sure it’s where you want it. This is permanent vinyl, and it will be difficult to move once you get it on.
Next, you can add the hooks. They are easy to screw in and you don’t need any tools. However, if you want them to be in straight rows, you will need a straight edge, a pencil, a measuring tap and a square.
Lay out your stockings and get an idea of how you want them to lay. I placed my hooks 3″ apart, and I placed the rows with a 6.5″ space between them.
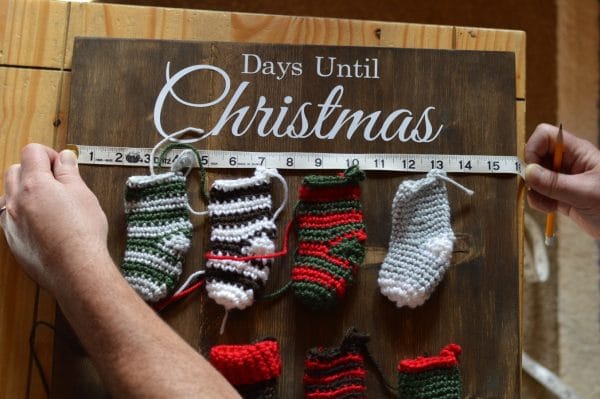
The first row is the trickiest, it gets easier afterward. Use your square and pencil to get a straight line. Then, use your straight edge to draw a line all the way across.
You will want this first row to be as close to your lettering as possible so you can fit all your stockings.
From here, you can screw in your hooks according to your measurements. Again, mine were 3″ apart. I made marks with my pencil across and then screwed in the hooks.
Continue using your square, pencil and straight edge to make lines as you go down. My rows were 16.5″ apart.
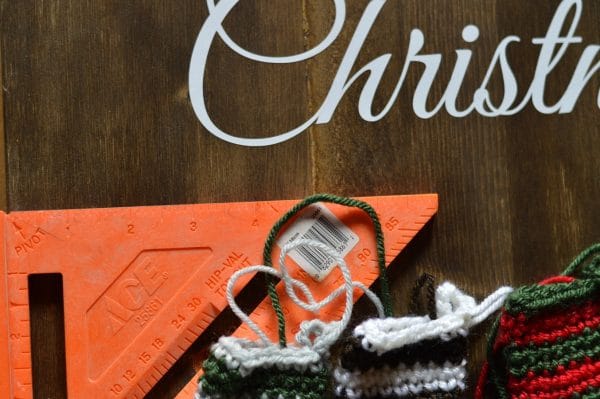
Now, the 6th row will be a bit different. In order to accommodate the last, larger socking, you will need to space them out a tad, and then fit the 25th hook in between them. You can see I didn’t realize this until after I placed my 6th row, so learn from my mistake!
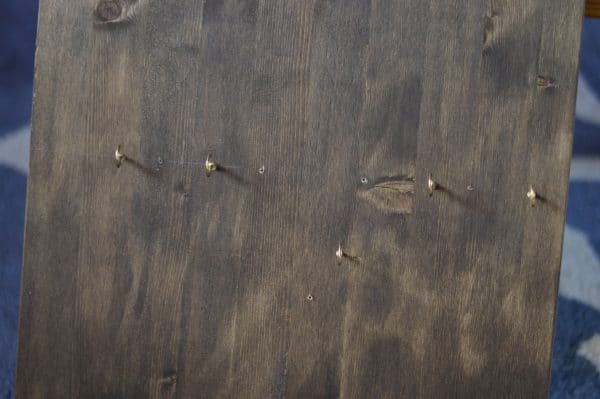
You also want the 25th hook to be off-center, opposite the way your stockings will be hanging. Mine hang to the left, so the hook is to the right. This way, the actual stocking will hang in the middle. Use your stocking as a guide for your hook placement.
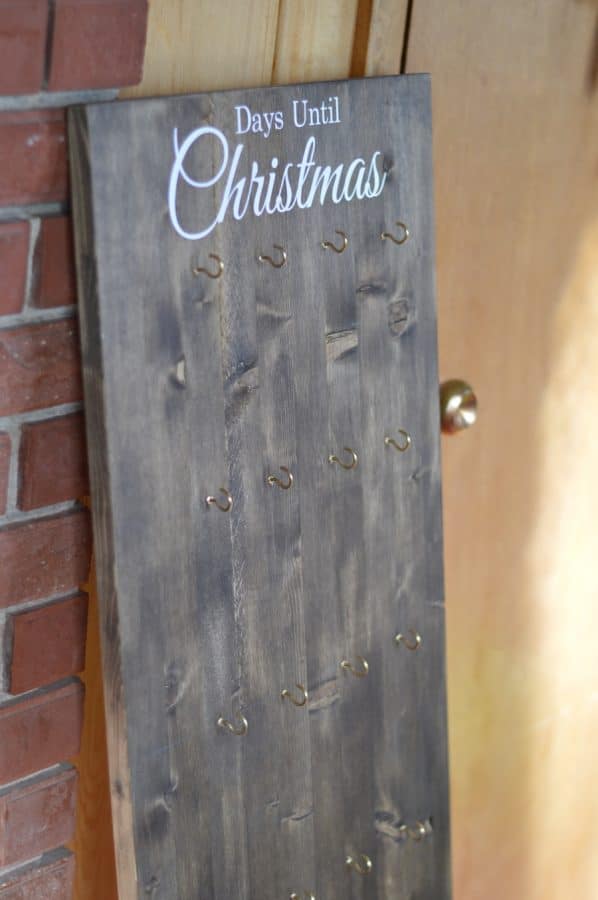
Finish by lightly erasing your pencil lines and hanging your stockings!
I hope you have a fun time counting down the days.
Thanks for crocheting along. I would love to do more, do you have any requests??


Can you tell me the Font that was used for the word Christmas?
Yes it’s called “Great Vibes”.
Bethany,
My sis has the socks made and ready for the board. You said to get a 16X48 board. Then you said to make the rows 16.5 inches apart. For six rows of socks, that would be over 8 feet. Is that a typo, or am I not understanding something?
Whoa, typo. It should be 6.5″ apart. My apologies!
Thanks, Bethany. Great plan.
I love this! May I ask where did you get your vinyl “Days Till Christmas” sticker from?
Thank you! When I released the pattern a couple years ago I sold a few in my Etsy shop, but that was for a limited time. I am sorry!
Did you put numbers on yours at all for the countdown?
I didn’t, but after using it 2 years, I might go back and add some. It’s a bit annoying without them!
Once we stick rhe letters to the board do we peel the contact paper off?
Yes, carefully peel it off and throw it away.
Would it be possible in future CALs to have a “Printer Friendly” and/or PDF ? That would make printing or saving patterns so much easier.
This project is so cute and so much fun! I am enjoying it – not quite finished yet, but having fun.
Thank you for sharing it with us!
Cathy